1. Avant de commencer
Flutter permet aux développeurs de créer rapidement de nouvelles interfaces utilisateur de manière itérative en combinant le rechargement à chaud et l'UI déclarative. Cependant, il arrive un moment où vous devez ajouter de l'interactivité à une interface. Ces touches peuvent être aussi rapides que l'animation d'un bouton au clic ou aussi spectaculaires qu'un nuanceur qui déforme l'interface utilisateur à l'aide de la puissance du GPU.
Dans cet atelier de programmation, vous allez créer une application Flutter qui utilise la puissance des animations, des nuanceurs et des champs de particules pour concevoir une interface utilisateur qui évoque les films et séries télévisées de science-fiction que nous aimons tous regarder quand nous ne programmons pas.
Ce que vous allez faire
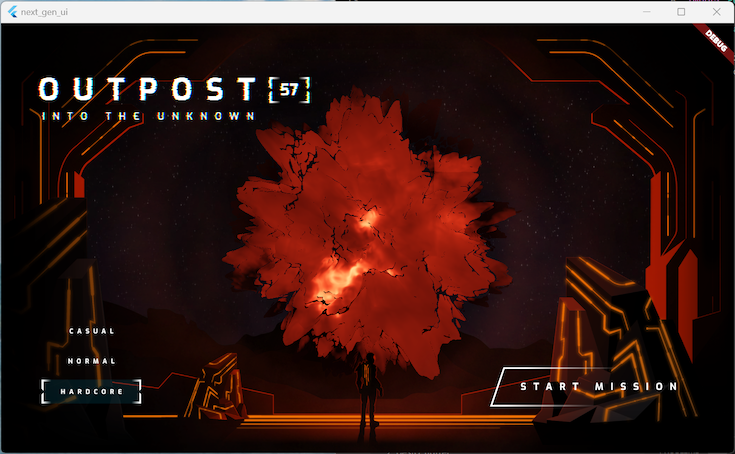
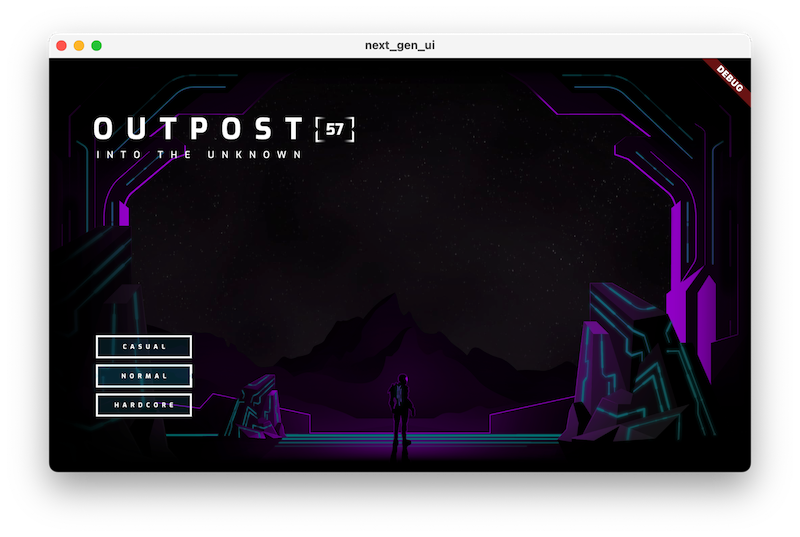
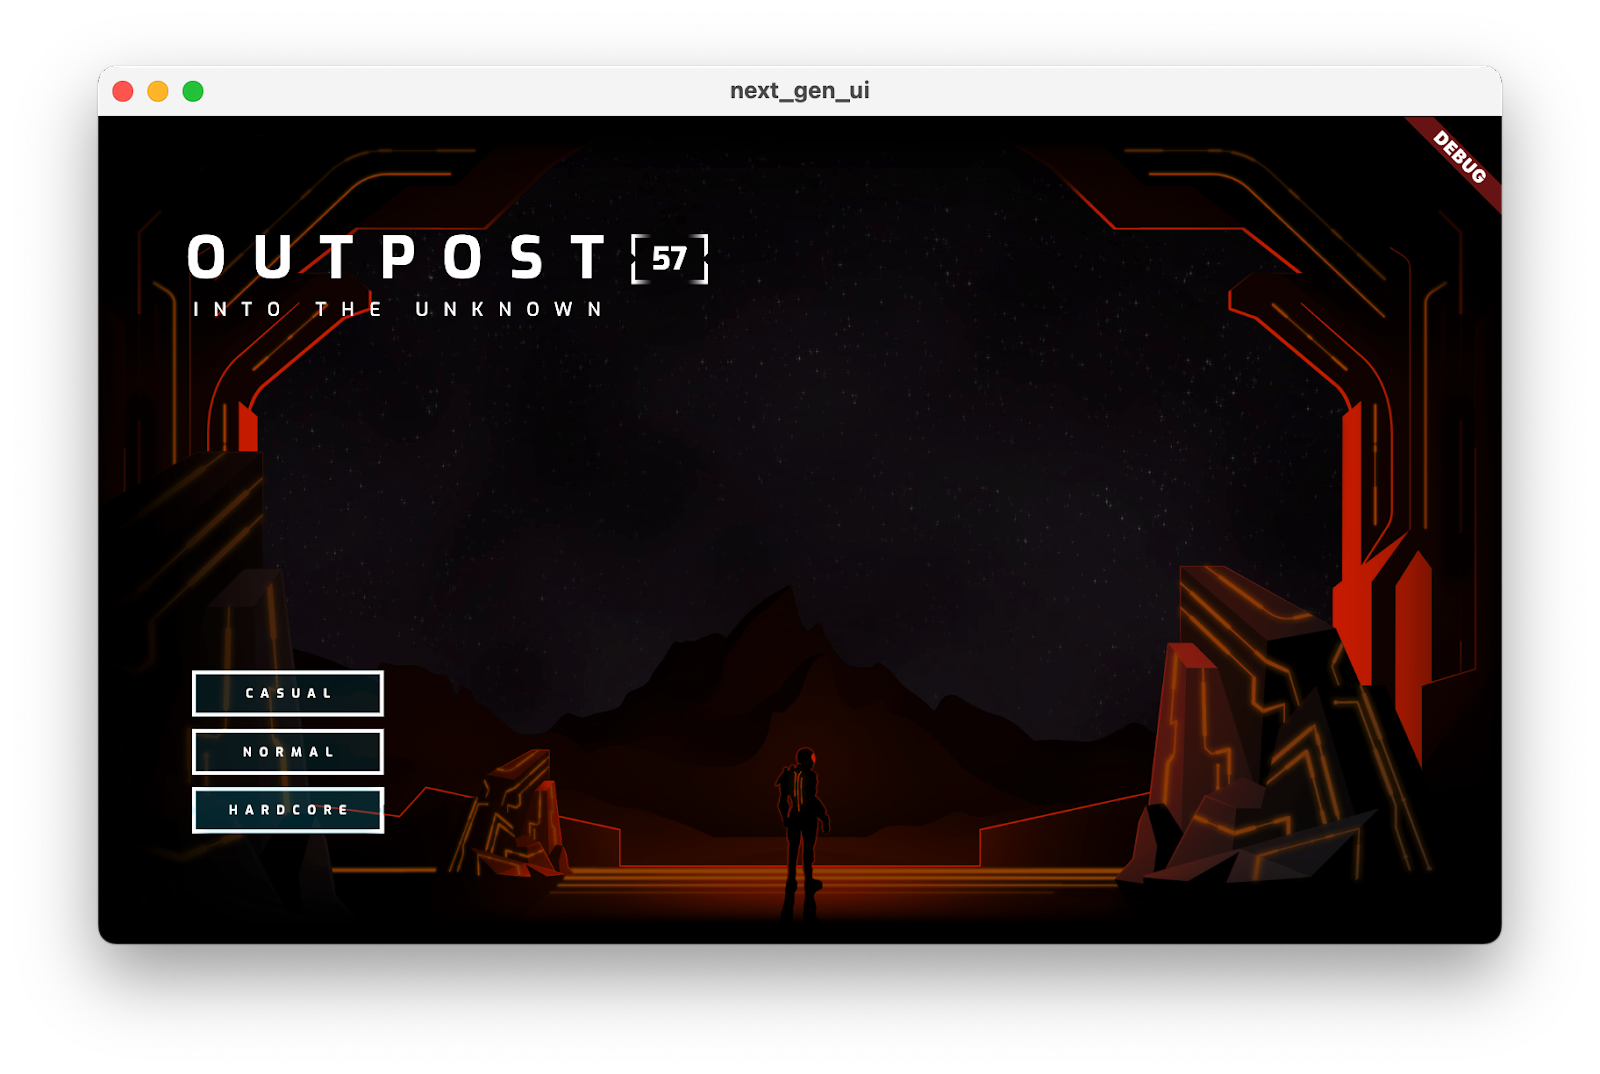
Vous allez créer la page de menu initiale d'un jeu de science-fiction post-apocalyptique. Il y a un titre avec un nuanceur de fragment qui échantillonne le texte pour l'animer visuellement, un menu de difficulté qui change le thème de couleur de la page avec de nombreuses animations, et un orbe animé peint avec un deuxième nuanceur de fragment. Si cela ne suffit pas, à la fin de l'atelier de programmation, vous ajouterez un subtil effet de particules pour apporter du mouvement et de l'intérêt à la page.
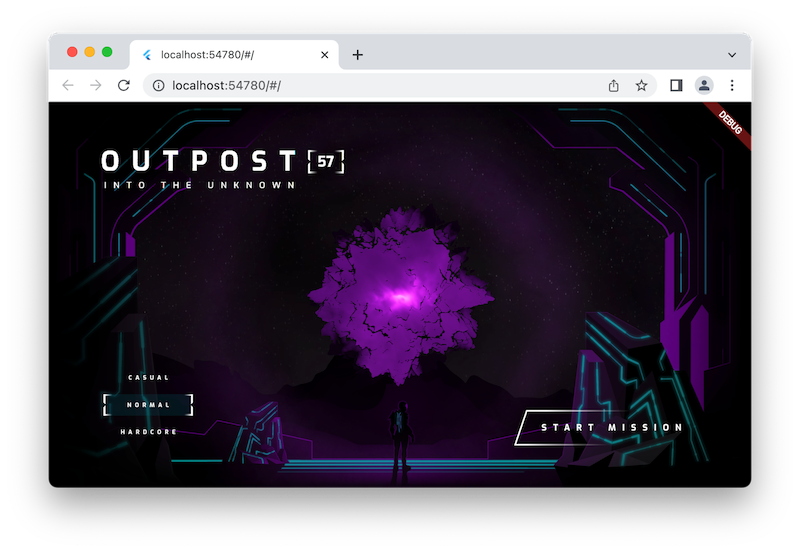
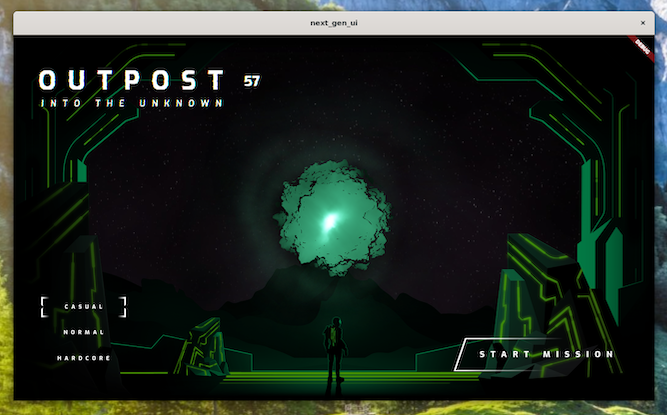
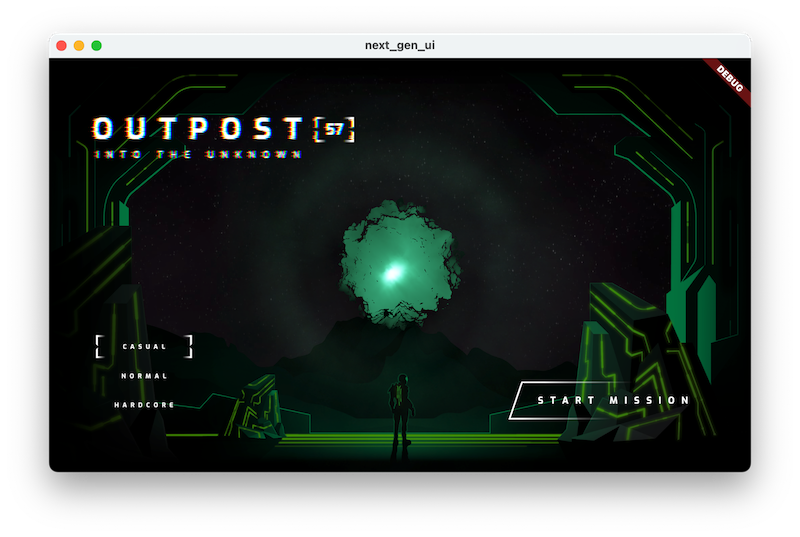
Les captures d'écran suivantes montrent l'application que vous allez créer sur les trois systèmes d'exploitation d'ordinateur compatibles : Windows, Linux et macOS. Pour plus de détails, une version de navigateur Web (également compatible) est fournie. Des animations et des nuanceurs de fragment partout !
|
|
|
|
Prérequis
- Connaissances de base du développement Flutter avec Dart, comme indiqué dans l'atelier de programmation Créer votre première application Flutter
Points abordés
- Utiliser
flutter_animatepour créer des animations expressives - Utiliser la compatibilité de Flutter avec les nuanceurs de fragments sur ordinateur et sur le Web
- Ajouter des animations de particules à votre application avec
particle_field
Prérequis
- Le SDK Flutter
- VS Code configuré pour Flutter et Dart
- Assistance pour les ordinateurs configurée pour Flutter sous Windows, Linux ou macOS
- Configuration de l'assistance Web pour Flutter
2. Premiers pas
Télécharger le code de démarrage
- Accédez à ce dépôt GitHub.
- Cliquez sur Code > Download ZIP (Code > Télécharger le fichier ZIP) afin de télécharger l'ensemble du code pour cet atelier de programmation.
- Décompressez le fichier ZIP téléchargé pour accéder au dossier racine
codelabs-main. Vous n'avez besoin que du sous-répertoirenext-gen-ui/, qui contient les dossiersstep_01àstep_06, qui contiennent le code source sur lequel s'appuie chaque étape de cet atelier de programmation.
Télécharger les dépendances du projet
- Dans VS Code, cliquez sur File > Open folder > codelabs-main > next-gen-uis > step_01 (Fichier > Ouvrir le dossier > codelabs-main > next-gen-uis > step_01) pour ouvrir le projet de démarrage.
- Si une boîte de dialogue VS Code vous invite à télécharger les packages requis pour l'application de démarrage, cliquez sur Get packages (Télécharger les packages).

- Si aucune boîte de dialogue VS Code ne vous invite à télécharger les packages requis pour l'application de démarrage, ouvrez votre terminal, puis accédez au dossier
step_01et exécutez la commandeflutter pub get.
Exécuter l'application de démarrage
- Dans VS Code, sélectionnez le système d'exploitation de votre ordinateur ou Chrome si vous souhaitez tester votre application dans un navigateur Web.
Par exemple, voici ce que vous voyez lorsque vous utilisez macOS comme cible de déploiement :

Voici ce qui s'affiche lorsque vous utilisez Chrome comme cible de déploiement :

- Ouvrez le fichier
lib/main.dart, puis cliquez sur Démarrer le débogage. L'application se lance sur votre système d'exploitation de bureau ou dans un navigateur Chrome.
Explorer l'application de démarrage
Dans l'application de démarrage, vous pouvez remarquer ce qui suit :
- L'UI est prête à être créée.
- Le répertoire
assetscontient les ressources artistiques et les deux nuanceurs de fragment que vous utiliserez. - Le fichier
pubspec.yamlliste déjà les éléments et une collection de packages pub que vous utiliserez. - Le répertoire
libcontient le fichiermain.dartobligatoire, un fichierassets.dartqui liste le chemin d'accès aux éléments artistiques et aux nuanceurs de fragments, ainsi qu'un fichierstyles.dartqui liste les styles de texte et les couleurs que vous utiliserez. - Le répertoire
libcontient également un répertoirecommon, qui contient quelques utilitaires utiles que vous utiliserez dans cet atelier de programmation, et le répertoireorb_shader, qui contient unWidgetqui sera utilisé pour afficher l'orbite avec un nuanceur de vertex.
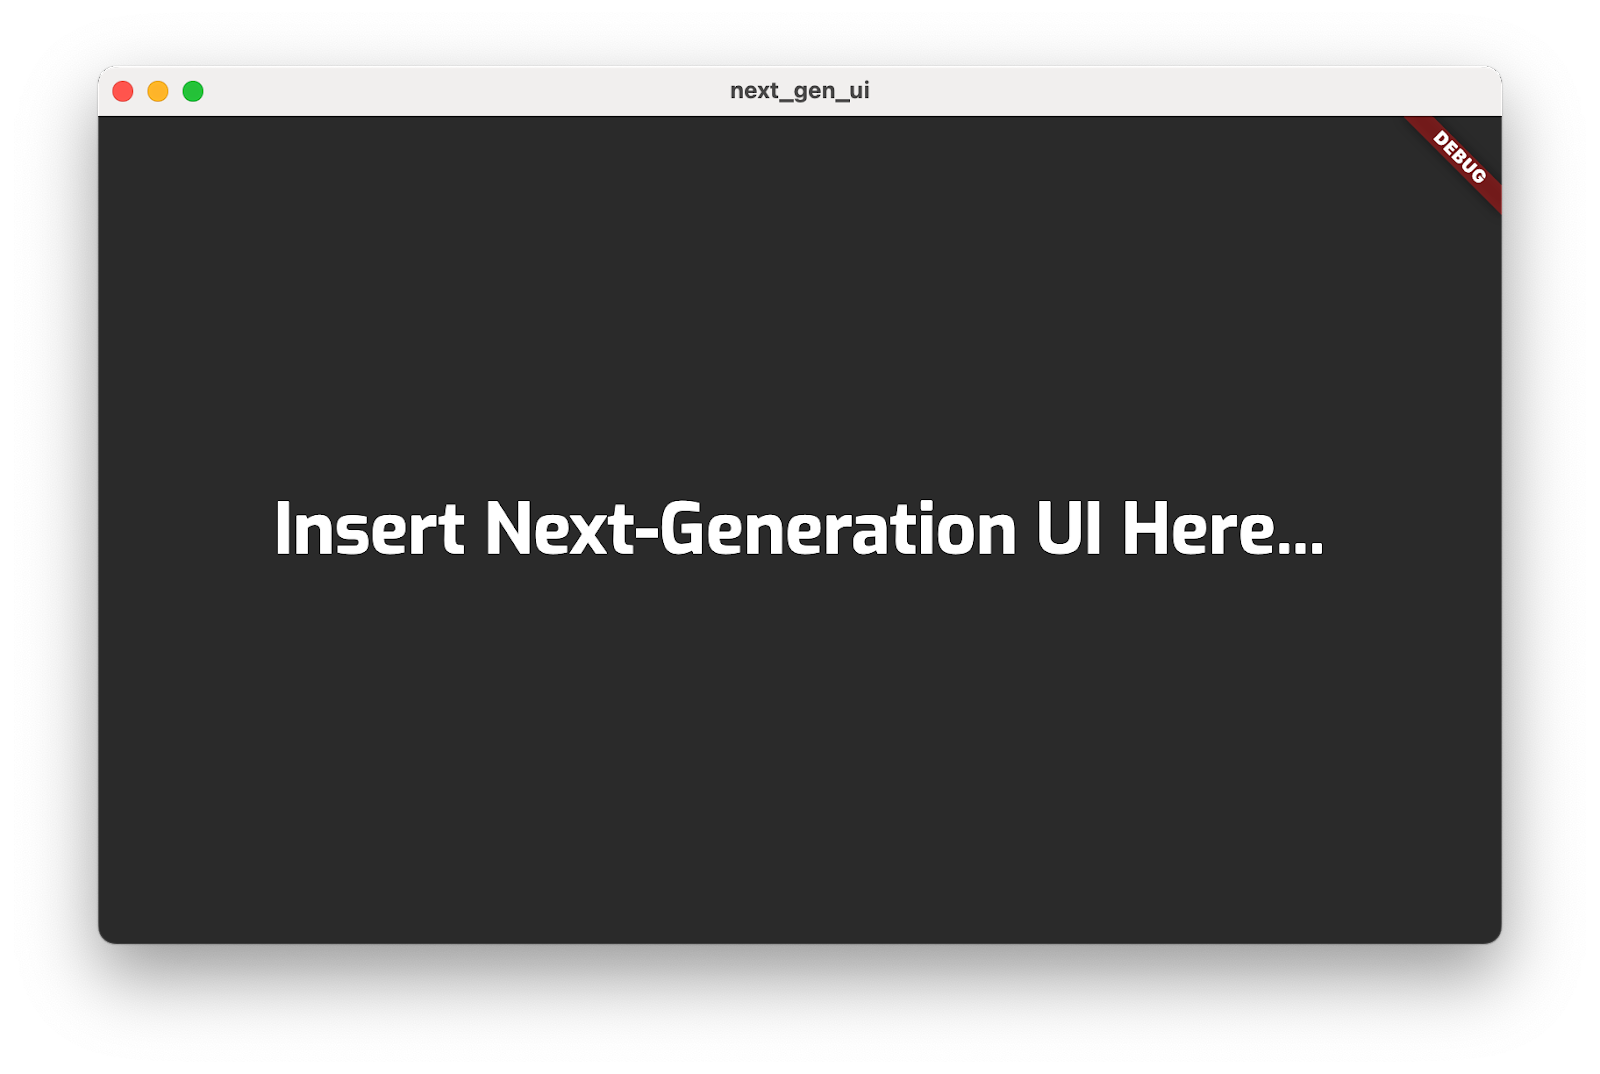
Voici ce que vous verrez une fois l'application lancée.
3. Peindre la scène
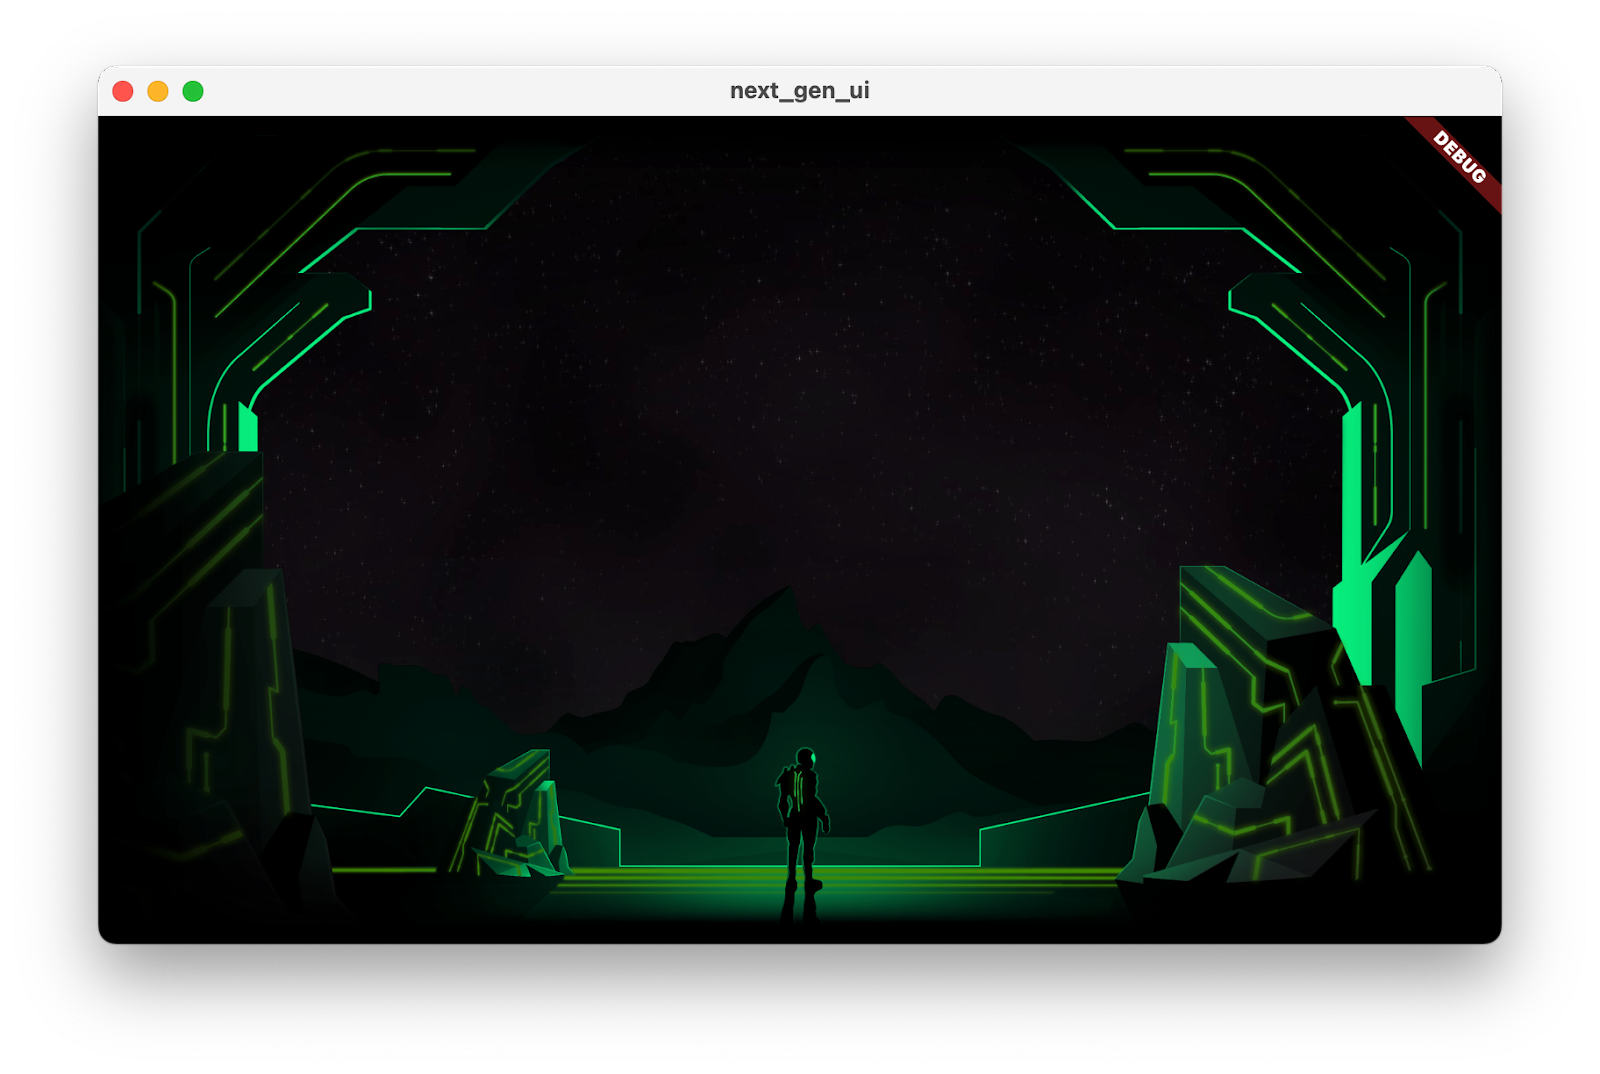
Au cours de cette étape, vous allez placer tous les éléments graphiques d'arrière-plan sur l'écran, en les organisant en calques. Au début, l'image sera probablement monochrome, mais vous ajouterez des couleurs à la scène à la fin de cette étape.
Ajouter des composants à la scène
- Créez un répertoire
title_screendans votre répertoirelib, puis ajoutez un fichiertitle_screen.dart. Ajoutez le contenu suivant au fichier :
lib/title_screen/title_screen.dart
import 'package:flutter/material.dart';

import '../assets.dart';

class TitleScreen extends StatelessWidget {
  const TitleScreen({super.key});

  @override
  Widget build(BuildContext context) {
    return Scaffold(
      backgroundColor: Colors.black,
      body: Center(
        child: Stack(
          children: [
            /// Bg-Base
            Image.asset(AssetPaths.titleBgBase),

            /// Bg-Receive
            Image.asset(AssetPaths.titleBgReceive),

            /// Mg-Base
            Image.asset(AssetPaths.titleMgBase),

            /// Mg-Receive
            Image.asset(AssetPaths.titleMgReceive),

            /// Mg-Emit
            Image.asset(AssetPaths.titleMgEmit),

            /// Fg-Rocks
            Image.asset(AssetPaths.titleFgBase),

            /// Fg-Receive
            Image.asset(AssetPaths.titleFgReceive),

            /// Fg-Emit
            Image.asset(AssetPaths.titleFgEmit),
          ],
        ),
      ),
    );
  }
}
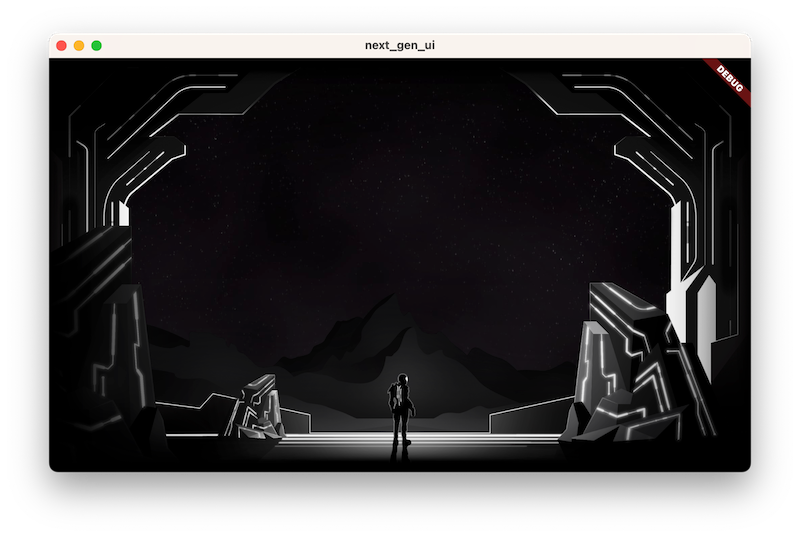
Ce widget contient la scène avec les composants empilés en couches. Les calques d'arrière-plan, de plan intermédiaire et de premier plan sont chacun représentés par un groupe de deux ou trois images. Ces images seront éclairées avec différentes couleurs pour capturer la façon dont la lumière se déplace dans la scène.
- Dans le fichier
main.dart, ajoutez le contenu suivant :
lib/main.dart
import 'dart:io' show Platform;

import 'package:flutter/foundation.dart' show kIsWeb;
import 'package:flutter/material.dart';
import 'package:window_size/window_size.dart';
                                                          // Remove 'styles.dart' import
import 'title_screen/title_screen.dart';                  // Add this import


void main() {
  if (!kIsWeb && (Platform.isWindows || Platform.isLinux || Platform.isMacOS)) {
    WidgetsFlutterBinding.ensureInitialized();
    setWindowMinSize(const Size(800, 500));
  }
  runApp(const NextGenApp());
}

class NextGenApp extends StatelessWidget {
  const NextGenApp({super.key});

  @override
  Widget build(BuildContext context) {
    return MaterialApp(
      themeMode: ThemeMode.dark,
      darkTheme: ThemeData(brightness: Brightness.dark),
      home: const TitleScreen(),                          // Replace with this widget
    );
  }
}
Cela remplace l'UI de l'application par la scène monochrome créée par les éléments artistiques. Ensuite, vous coloriez chaque calque.
Ajouter un utilitaire de colorisation d'image
Ajoutez un utilitaire de coloration d'image en ajoutant le contenu suivant au fichier title_screen.dart :
lib/title_screen/title_screen.dart
import 'package:flutter/material.dart';

import '../assets.dart';

class TitleScreen extends StatelessWidget {
  const TitleScreen({super.key});

  @override
  Widget build(BuildContext context) {
    return Scaffold(
      backgroundColor: Colors.black,
      body: Center(
        child: Stack(
          children: [
            /// Bg-Base
            Image.asset(AssetPaths.titleBgBase),

            /// Bg-Receive
            Image.asset(AssetPaths.titleBgReceive),

            /// Mg-Base
            Image.asset(AssetPaths.titleMgBase),

            /// Mg-Receive
            Image.asset(AssetPaths.titleMgReceive),

            /// Mg-Emit
            Image.asset(AssetPaths.titleMgEmit),

            /// Fg-Rocks
            Image.asset(AssetPaths.titleFgBase),

            /// Fg-Receive
            Image.asset(AssetPaths.titleFgReceive),

            /// Fg-Emit
            Image.asset(AssetPaths.titleFgEmit),
          ],
        ),
      ),
    );
  }
}

class _LitImage extends StatelessWidget {                 // Add from here...
  const _LitImage({
    required this.color,
    required this.imgSrc,
    required this.lightAmt,
  });
  final Color color;
  final String imgSrc;
  final double lightAmt;

  @override
  Widget build(BuildContext context) {
    final hsl = HSLColor.fromColor(color);
    return Image.asset(
      imgSrc,
      color: hsl.withLightness(hsl.lightness * lightAmt).toColor(),
      colorBlendMode: BlendMode.modulate,
    );
  }
}                                                         // to here.
Ce widget utilitaire _LitImage recolore chacun des éléments artistiques, selon qu'ils émettent ou reçoivent de la lumière. Un avertissement du linter peut s'afficher, car vous n'utilisez pas encore ce nouveau widget.
Peindre en couleur
Peignez en couleur en modifiant le fichier title_screen.dart comme suit :
lib/title_screen/title_screen.dart
import 'package:flutter/material.dart';

import '../assets.dart';
import '../styles.dart';                                  // Add this import

class TitleScreen extends StatelessWidget {
  const TitleScreen({super.key});

  final _finalReceiveLightAmt = 0.7;                      // Add this attribute
  final _finalEmitLightAmt = 0.5;                         // And this attribute

  @override
  Widget build(BuildContext context) {
    final orbColor = AppColors.orbColors[0];              // Add this final variable
    final emitColor = AppColors.emitColors[0];            // And this one

    return Scaffold(
      backgroundColor: Colors.black,
      body: Center(
        child: Stack(
          children: [
            /// Bg-Base
            Image.asset(AssetPaths.titleBgBase),

            /// Bg-Receive
            _LitImage(                                    // Modify from here...
              color: orbColor,
              imgSrc: AssetPaths.titleBgReceive,
              lightAmt: _finalReceiveLightAmt,
            ),                                            // to here.

            /// Mg-Base
            _LitImage(                                    // Modify from here...
              imgSrc: AssetPaths.titleMgBase,
              color: orbColor,
              lightAmt: _finalReceiveLightAmt,
            ),                                            // to here.

            /// Mg-Receive
            _LitImage(                                    // Modify from here...
              imgSrc: AssetPaths.titleMgReceive,
              color: orbColor,
              lightAmt: _finalReceiveLightAmt,
            ),                                            // to here.

            /// Mg-Emit
            _LitImage(                                    // Modify from here...
              imgSrc: AssetPaths.titleMgEmit,
              color: emitColor,
              lightAmt: _finalEmitLightAmt,
            ),                                            // to here.

            /// Fg-Rocks
            Image.asset(AssetPaths.titleFgBase),

            /// Fg-Receive
            _LitImage(                                    // Modify from here...
              imgSrc: AssetPaths.titleFgReceive,
              color: orbColor,
              lightAmt: _finalReceiveLightAmt,
            ),                                            // to here.

            /// Fg-Emit
            _LitImage(                                    // Modify from here...
              imgSrc: AssetPaths.titleFgEmit,
              color: emitColor,
              lightAmt: _finalEmitLightAmt,
            ),                                            // to here.
          ],
        ),
      ),
    );
  }
}

class _LitImage extends StatelessWidget {
  const _LitImage({
    required this.color,
    required this.imgSrc,
    required this.lightAmt,
  });
  final Color color;
  final String imgSrc;
  final double lightAmt;

  @override
  Widget build(BuildContext context) {
    final hsl = HSLColor.fromColor(color);
    return Image.asset(
      imgSrc,
      color: hsl.withLightness(hsl.lightness * lightAmt).toColor(),
      colorBlendMode: BlendMode.modulate,
    );
  }
}
Voici à nouveau l'application, cette fois avec les éléments artistiques teintés en vert.
4. Ajouter une interface utilisateur
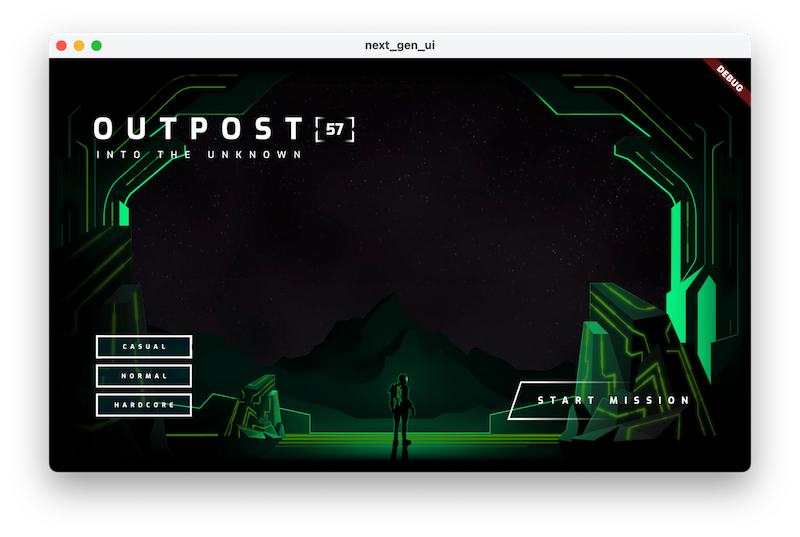
Dans cette étape, vous allez placer une interface utilisateur sur la scène créée à l'étape précédente. Cela inclut le titre, les boutons de sélection de la difficulté et le bouton Démarrer, qui est essentiel.
Ajouter un titre
- Créez un fichier
title_screen_ui.dartdans le répertoirelib/title_screenet ajoutez-y le contenu suivant :
lib/title_screen/title_screen_ui.dart
import 'package:extra_alignments/extra_alignments.dart';
import 'package:flutter/material.dart';
import 'package:gap/gap.dart';

import '../assets.dart';
import '../common/ui_scaler.dart';
import '../styles.dart';

class TitleScreenUi extends StatelessWidget {
  const TitleScreenUi({
    super.key,
  });
  @override
  Widget build(BuildContext context) {
    return const Padding(
      padding: EdgeInsets.symmetric(vertical: 40, horizontal: 50),
      child: Stack(
        children: [
          /// Title Text
          TopLeft(
            child: UiScaler(
              alignment: Alignment.topLeft,
              child: _TitleText(),
            ),
          ),
        ],
      ),
    );
  }
}

class _TitleText extends StatelessWidget {
  const _TitleText();

  @override
  Widget build(BuildContext context) {
    return Column(
      mainAxisSize: MainAxisSize.min,
      crossAxisAlignment: CrossAxisAlignment.start,
      children: [
        const Gap(20),
        Row(
          mainAxisSize: MainAxisSize.min,
          children: [
            Transform.translate(
              offset: Offset(-(TextStyles.h1.letterSpacing! * .5), 0),
              child: Text('OUTPOST', style: TextStyles.h1),
            ),
            Image.asset(AssetPaths.titleSelectedLeft, height: 65),
            Text('57', style: TextStyles.h2),
            Image.asset(AssetPaths.titleSelectedRight, height: 65),
          ],
        ),
        Text('INTO THE UNKNOWN', style: TextStyles.h3),
      ],
    );
  }
}
Ce widget contient le titre et tous les boutons qui composent l'interface utilisateur de cette application.
- Mettez à jour le fichier
lib/title_screen/title_screen.dartcomme suit :
lib/title_screen/title_screen.dart
import 'package:flutter/material.dart';

import '../assets.dart';
import '../styles.dart';
import 'title_screen_ui.dart';                            // Add this import

class TitleScreen extends StatelessWidget {
  const TitleScreen({super.key});

  final _finalReceiveLightAmt = 0.7;
  final _finalEmitLightAmt = 0.5;

  @override
  Widget build(BuildContext context) {
    final orbColor = AppColors.orbColors[0];
    final emitColor = AppColors.emitColors[0];

    return Scaffold(
      backgroundColor: Colors.black,
      body: Center(
        child: Stack(
          children: [
            /// Bg-Base
            Image.asset(AssetPaths.titleBgBase),

            /// Bg-Receive
            _LitImage(
              color: orbColor,
              imgSrc: AssetPaths.titleBgReceive,
              lightAmt: _finalReceiveLightAmt,
            ),

            /// Mg-Base
            _LitImage(
              imgSrc: AssetPaths.titleMgBase,
              color: orbColor,
              lightAmt: _finalReceiveLightAmt,
            ),

            /// Mg-Receive
            _LitImage(
              imgSrc: AssetPaths.titleMgReceive,
              color: orbColor,
              lightAmt: _finalReceiveLightAmt,
            ),

            /// Mg-Emit
            _LitImage(
              imgSrc: AssetPaths.titleMgEmit,
              color: emitColor,
              lightAmt: _finalEmitLightAmt,
            ),

            /// Fg-Rocks
            Image.asset(AssetPaths.titleFgBase),

            /// Fg-Receive
            _LitImage(
              imgSrc: AssetPaths.titleFgReceive,
              color: orbColor,
              lightAmt: _finalReceiveLightAmt,
            ),

            /// Fg-Emit
            _LitImage(
              imgSrc: AssetPaths.titleFgEmit,
              color: emitColor,
              lightAmt: _finalEmitLightAmt,
            ),

            /// UI
            const Positioned.fill(                        // Add from here...
              child: TitleScreenUi(),
            ),                                            // to here.
          ],
        ),
      ),
    );
  }
}

class _LitImage extends StatelessWidget {
  const _LitImage({
    required this.color,
    required this.imgSrc,
    required this.lightAmt,
  });
  final Color color;
  final String imgSrc;
  final double lightAmt;

  @override
  Widget build(BuildContext context) {
    final hsl = HSLColor.fromColor(color);
    return Image.asset(
      imgSrc,
      color: hsl.withLightness(hsl.lightness * lightAmt).toColor(),
      colorBlendMode: BlendMode.modulate,
    );
  }
}
L'exécution de ce code révèle le titre, qui est le début de l'interface utilisateur.
![L'application de l'atelier de programmation s'exécute avec le titre "Outpost [57] Into the unknown"](https://codelabs.developers.google.cn/static/codelabs/flutter-next-gen-uis/img/ed313b0bbcc38b66.png?hl=fr)
Ajouter les boutons de difficulté
- Mettez à jour
title_screen_ui.darten ajoutant une nouvelle importation pour le packagefocusable_control_builder:
lib/title_screen/title_screen_ui.dart
import 'package:extra_alignments/extra_alignments.dart';
import 'package:flutter/material.dart';
import 'package:focusable_control_builder/focusable_control_builder.dart'; // Add import
import 'package:gap/gap.dart';

import '../assets.dart';
import '../common/ui_scaler.dart';
import '../styles.dart';
- Ajoutez les éléments suivants au widget
TitleScreenUi:
lib/title_screen/title_screen_ui.dart
class TitleScreenUi extends StatelessWidget {
  const TitleScreenUi({
    super.key,
    required this.difficulty,                            // Edit from here...
    required this.onDifficultyPressed,
    required this.onDifficultyFocused,
  });

  final int difficulty;
  final void Function(int difficulty) onDifficultyPressed;
  final void Function(int? difficulty) onDifficultyFocused; // to here.

  @override
  Widget build(BuildContext context) {
    return Padding(                                      // Move this const...
      padding: const EdgeInsets.symmetric(vertical: 40, horizontal: 50), // to here.
      child: Stack(
        children: [
          /// Title Text
          const TopLeft(                                 // Add a const here, as well
            child: UiScaler(
              alignment: Alignment.topLeft,
              child: _TitleText(),
            ),
          ),

          /// Difficulty Btns
          BottomLeft(                                    // Add from here...
            child: UiScaler(
              alignment: Alignment.bottomLeft,
              child: _DifficultyBtns(
                difficulty: difficulty,
                onDifficultyPressed: onDifficultyPressed,
                onDifficultyFocused: onDifficultyFocused,
              ),
            ),
          ),                                             // to here.
        ],
      ),
    );
  }
}
- Ajoutez les deux widgets suivants pour implémenter les boutons de difficulté :
lib/title_screen/title_screen_ui.dart
class _DifficultyBtns extends StatelessWidget {
  const _DifficultyBtns({
    required this.difficulty,
    required this.onDifficultyPressed,
    required this.onDifficultyFocused,
  });

  final int difficulty;
  final void Function(int difficulty) onDifficultyPressed;
  final void Function(int? difficulty) onDifficultyFocused;

  @override
  Widget build(BuildContext context) {
    return Column(
      mainAxisSize: MainAxisSize.min,
      children: [
        _DifficultyBtn(
          label: 'Casual',
          selected: difficulty == 0,
          onPressed: () => onDifficultyPressed(0),
          onHover: (over) => onDifficultyFocused(over ? 0 : null),
        ),
        _DifficultyBtn(
          label: 'Normal',
          selected: difficulty == 1,
          onPressed: () => onDifficultyPressed(1),
          onHover: (over) => onDifficultyFocused(over ? 1 : null),
        ),
        _DifficultyBtn(
          label: 'Hardcore',
          selected: difficulty == 2,
          onPressed: () => onDifficultyPressed(2),
          onHover: (over) => onDifficultyFocused(over ? 2 : null),
        ),
        const Gap(20),
      ],
    );
  }
}

class _DifficultyBtn extends StatelessWidget {
  const _DifficultyBtn({
    required this.selected,
    required this.onPressed,
    required this.onHover,
    required this.label,
  });
  final String label;
  final bool selected;
  final VoidCallback onPressed;
  final void Function(bool hasFocus) onHover;

  @override
  Widget build(BuildContext context) {
    return FocusableControlBuilder(
      onPressed: onPressed,
      onHoverChanged: (_, state) => onHover.call(state.isHovered),
      builder: (_, state) {
        return Padding(
          padding: const EdgeInsets.all(8.0),
          child: SizedBox(
            width: 250,
            height: 60,
            child: Stack(
              children: [
                /// Bg with fill and outline
                Container(
                  decoration: BoxDecoration(
                    color: const Color(0xFF00D1FF).withOpacity(.1),
                    border: Border.all(color: Colors.white, width: 5),
                  ),
                ),

                if (state.isHovered || state.isFocused) ...[
                  Container(
                    decoration: BoxDecoration(
                      color: const Color(0xFF00D1FF).withOpacity(.1),
                    ),
                  ),
                ],

                /// cross-hairs (selected state)
                if (selected) ...[
                  CenterLeft(
                    child: Image.asset(AssetPaths.titleSelectedLeft),
                  ),
                  CenterRight(
                    child: Image.asset(AssetPaths.titleSelectedRight),
                  ),
                ],

                /// Label
                Center(
                  child: Text(label.toUpperCase(), style: TextStyles.btn),
                ),
              ],
            ),
          ),
        );
      },
    );
  }
}
- Convertissez le widget
TitleScreende widget sans état à widget avec état, puis ajoutez un état pour permettre de modifier le jeu de couleurs en fonction de la difficulté :
lib/title_screen/title_screen.dart
import 'package:flutter/material.dart';

import '../assets.dart';
import '../styles.dart';
import 'title_screen_ui.dart';

class TitleScreen extends StatefulWidget {
  const TitleScreen({super.key});

  @override
  State<TitleScreen> createState() => _TitleScreenState();
}

class _TitleScreenState extends State<TitleScreen> {
  Color get _emitColor =>
      AppColors.emitColors[_difficultyOverride ?? _difficulty];
  Color get _orbColor =>
      AppColors.orbColors[_difficultyOverride ?? _difficulty];

  /// Currently selected difficulty
  int _difficulty = 0;

  /// Currently focused difficulty (if any)
  int? _difficultyOverride;

  void _handleDifficultyPressed(int value) {
    setState(() => _difficulty = value);
  }

  void _handleDifficultyFocused(int? value) {
    setState(() => _difficultyOverride = value);
  }

  final _finalReceiveLightAmt = 0.7;
  final _finalEmitLightAmt = 0.5;

  @override
  Widget build(BuildContext context) {
    return Scaffold(
      backgroundColor: Colors.black,
      body: Center(
        child: Stack(
          children: [
            /// Bg-Base
            Image.asset(AssetPaths.titleBgBase),

            /// Bg-Receive
            _LitImage(
              color: _orbColor,
              imgSrc: AssetPaths.titleBgReceive,
              lightAmt: _finalReceiveLightAmt,
            ),

            /// Mg-Base
            _LitImage(
              imgSrc: AssetPaths.titleMgBase,
              color: _orbColor,
              lightAmt: _finalReceiveLightAmt,
            ),

            /// Mg-Receive
            _LitImage(
              imgSrc: AssetPaths.titleMgReceive,
              color: _orbColor,
              lightAmt: _finalReceiveLightAmt,
            ),

            /// Mg-Emit
            _LitImage(
              imgSrc: AssetPaths.titleMgEmit,
              color: _emitColor,
              lightAmt: _finalEmitLightAmt,
            ),

            /// Fg-Rocks
            Image.asset(AssetPaths.titleFgBase),

            /// Fg-Receive
            _LitImage(
              imgSrc: AssetPaths.titleFgReceive,
              color: _orbColor,
              lightAmt: _finalReceiveLightAmt,
            ),

            /// Fg-Emit
            _LitImage(
              imgSrc: AssetPaths.titleFgEmit,
              color: _emitColor,
              lightAmt: _finalEmitLightAmt,
            ),

            /// UI
            Positioned.fill(
              child: TitleScreenUi(
                difficulty: _difficulty,
                onDifficultyFocused: _handleDifficultyFocused,
                onDifficultyPressed: _handleDifficultyPressed,
              ),
            ),
          ],
        ),
      ),
    );
  }
}

class _LitImage extends StatelessWidget {
  const _LitImage({
    required this.color,
    required this.imgSrc,
    required this.lightAmt,
  });
  final Color color;
  final String imgSrc;
  final double lightAmt;

  @override
  Widget build(BuildContext context) {
    final hsl = HSLColor.fromColor(color);
    return Image.asset(
      imgSrc,
      color: hsl.withLightness(hsl.lightness * lightAmt).toColor(),
      colorBlendMode: BlendMode.modulate,
    );
  }
}
Voici l'UI avec deux niveaux de difficulté différents. Vous remarquerez que les couleurs de difficulté appliquées en tant que masques aux images en niveaux de gris créent un effet réfléchissant réaliste.
|
|
Ajouter le bouton de démarrage
- Mettez à jour le fichier
title_screen_ui.dart. Ajoutez les éléments suivants au widgetTitleScreenUi:
lib/title_screen/title_screen_ui.dart
class TitleScreenUi extends StatelessWidget {
  const TitleScreenUi({
    super.key,
    required this.difficulty,
    required this.onDifficultyPressed,
    required this.onDifficultyFocused,
  });

  final int difficulty;
  final void Function(int difficulty) onDifficultyPressed;
  final void Function(int? difficulty) onDifficultyFocused;

  @override
  Widget build(BuildContext context) {
    return Padding(
      padding: const EdgeInsets.symmetric(vertical: 40, horizontal: 50),
      child: Stack(
        children: [
          /// Title Text
          const TopLeft(
            child: UiScaler(
              alignment: Alignment.topLeft,
              child: _TitleText(),
            ),
          ),

          /// Difficulty Btns
          BottomLeft(
            child: UiScaler(
              alignment: Alignment.bottomLeft,
              child: _DifficultyBtns(
                difficulty: difficulty,
                onDifficultyPressed: onDifficultyPressed,
                onDifficultyFocused: onDifficultyFocused,
              ),
            ),
          ),

          /// StartBtn
          BottomRight(                                    // Add from here...
            child: UiScaler(
              alignment: Alignment.bottomRight,
              child: Padding(
                padding: const EdgeInsets.only(bottom: 20, right: 40),
                child: _StartBtn(onPressed: () {}),
              ),
            ),
          ),                                              // to here.
        ],
      ),
    );
  }
}
- Ajoutez le widget suivant pour implémenter le bouton de démarrage :
lib/title_screen/title_screen_ui.dart
class _StartBtn extends StatefulWidget {
  const _StartBtn({required this.onPressed});
  final VoidCallback onPressed;

  @override
  State<_StartBtn> createState() => _StartBtnState();
}

class _StartBtnState extends State<_StartBtn> {
  AnimationController? _btnAnim;
  bool _wasHovered = false;

  @override
  Widget build(BuildContext context) {
    return FocusableControlBuilder(
      cursor: SystemMouseCursors.click,
      onPressed: widget.onPressed,
      builder: (_, state) {
        if ((state.isHovered || state.isFocused) &&
            !_wasHovered &&
            _btnAnim?.status != AnimationStatus.forward) {
          _btnAnim?.forward(from: 0);
        }
        _wasHovered = (state.isHovered || state.isFocused);
        return SizedBox(
          width: 520,
          height: 100,
          child: Stack(
            children: [
              Positioned.fill(child: Image.asset(AssetPaths.titleStartBtn)),
              if (state.isHovered || state.isFocused) ...[
                Positioned.fill(
                    child: Image.asset(AssetPaths.titleStartBtnHover)),
              ],
              Center(
                child: Row(
                  mainAxisAlignment: MainAxisAlignment.end,
                  children: [
                    Text('START MISSION',
                        style: TextStyles.btn
                            .copyWith(fontSize: 24, letterSpacing: 18)),
                  ],
                ),
              ),
            ],
          ),
        );
      },
    );
  }
}
Voici l'application en cours d'exécution avec une collection complète de boutons.
5. Ajouter une animation
Dans cette étape, vous allez animer l'interface utilisateur et les transitions de couleur pour les éléments artistiques.
Faire apparaître le titre en fondu
Dans cette étape, vous allez utiliser plusieurs approches pour animer une application Flutter. L'une d'elles consiste à utiliser flutter_animate. Les animations fournies par ce package peuvent se relancer automatiquement chaque fois que vous effectuez un rechargement à chaud de votre application, afin d'accélérer les itérations de développement.
- Modifiez le code dans
lib/main.dartcomme suit :
lib/main.dart
import 'dart:io' show Platform;

import 'package:flutter/foundation.dart' show kIsWeb;
import 'package:flutter/material.dart';
import 'package:flutter_animate/flutter_animate.dart';   // Add this import
import 'package:window_size/window_size.dart';

import 'title_screen/title_screen.dart';

void main() {
  if (!kIsWeb && (Platform.isWindows || Platform.isLinux || Platform.isMacOS)) {
    WidgetsFlutterBinding.ensureInitialized();
    setWindowMinSize(const Size(800, 500));
  }
  Animate.restartOnHotReload = true;                     // Add this line
  runApp(const NextGenApp());
}

class NextGenApp extends StatelessWidget {
  const NextGenApp({super.key});

  @override
  Widget build(BuildContext context) {
    return MaterialApp(
      themeMode: ThemeMode.dark,
      darkTheme: ThemeData(brightness: Brightness.dark),
      home: const TitleScreen(),
    );
  }
}
- Pour profiter du package
flutter_animate, vous devez l'importer. Ajoutez l'importation danslib/title_screen/title_screen_ui.dart, comme suit :
lib/title_screen/title_screen_ui.dart
import 'package:extra_alignments/extra_alignments.dart';
import 'package:flutter/material.dart';
import 'package:flutter_animate/flutter_animate.dart';   // Add this import
import 'package:focusable_control_builder/focusable_control_builder.dart';
import 'package:gap/gap.dart';

import '../assets.dart';
import '../common/ui_scaler.dart';
import '../styles.dart';

class TitleScreenUi extends StatelessWidget {
- Ajoutez une animation au titre en modifiant le widget
_TitleText, comme suit :
lib/title_screen/title_screen_ui.dart
class _TitleText extends StatelessWidget {
  const _TitleText();

  @override
  Widget build(BuildContext context) {
    return Column(
      mainAxisSize: MainAxisSize.min,
      crossAxisAlignment: CrossAxisAlignment.start,
      children: [
        const Gap(20),
        Row(
          mainAxisSize: MainAxisSize.min,
          children: [
            Transform.translate(
              offset: Offset(-(TextStyles.h1.letterSpacing! * .5), 0),
              child: Text('OUTPOST', style: TextStyles.h1),
            ),
            Image.asset(AssetPaths.titleSelectedLeft, height: 65),
            Text('57', style: TextStyles.h2),
            Image.asset(AssetPaths.titleSelectedRight, height: 65),
          ],                                             // Edit from here...
        ).animate().fadeIn(delay: .8.seconds, duration: .7.seconds),
        Text('INTO THE UNKNOWN', style: TextStyles.h3)
            .animate()
            .fadeIn(delay: 1.seconds, duration: .7.seconds),
      ],                                                 // to here.
    );
  }
}
- Appuyez sur Recharger pour voir le titre apparaître progressivement.
Faire apparaître progressivement les boutons de difficulté
- Ajoutez une animation à l'apparence initiale des boutons de difficulté en modifiant le widget
_DifficultyBtns, comme suit :
lib/title_screen/title_screen_ui.dart
class _DifficultyBtns extends StatelessWidget {
  const _DifficultyBtns({
    required this.difficulty,
    required this.onDifficultyPressed,
    required this.onDifficultyFocused,
  });

  final int difficulty;
  final void Function(int difficulty) onDifficultyPressed;
  final void Function(int? difficulty) onDifficultyFocused;

  @override
  Widget build(BuildContext context) {
    return Column(
      mainAxisSize: MainAxisSize.min,
      children: [
        _DifficultyBtn(
          label: 'Casual',
          selected: difficulty == 0,
          onPressed: () => onDifficultyPressed(0),
          onHover: (over) => onDifficultyFocused(over ? 0 : null),
        )                                                // Add from here...
            .animate()
            .fadeIn(delay: 1.3.seconds, duration: .35.seconds)
            .slide(begin: const Offset(0, .2)),          // to here
        _DifficultyBtn(
          label: 'Normal',
          selected: difficulty == 1,
          onPressed: () => onDifficultyPressed(1),
          onHover: (over) => onDifficultyFocused(over ? 1 : null),
        )                                                // Add from here...
            .animate()
            .fadeIn(delay: 1.5.seconds, duration: .35.seconds)
            .slide(begin: const Offset(0, .2)),          // to here
        _DifficultyBtn(
          label: 'Hardcore',
          selected: difficulty == 2,
          onPressed: () => onDifficultyPressed(2),
          onHover: (over) => onDifficultyFocused(over ? 2 : null),
        )                                                // Add from here...
            .animate()
            .fadeIn(delay: 1.7.seconds, duration: .35.seconds)
            .slide(begin: const Offset(0, .2)),          // to here
        const Gap(20),
      ],
    );
  }
}
- Appuyez sur Recharger pour que les boutons de difficulté apparaissent dans l'ordre, avec un léger mouvement vers le haut en prime.
Faire apparaître le bouton de démarrage
- Ajoutez une animation au bouton de démarrage en modifiant la classe d'état
_StartBtnState, comme suit :
lib/title_screen/title_screen_ui.dart
class _StartBtnState extends State<_StartBtn> {
  AnimationController? _btnAnim;
  bool _wasHovered = false;

  @override
  Widget build(BuildContext context) {
    return FocusableControlBuilder(
      cursor: SystemMouseCursors.click,
      onPressed: widget.onPressed,
      builder: (_, state) {
        if ((state.isHovered || state.isFocused) &&
            !_wasHovered &&
            _btnAnim?.status != AnimationStatus.forward) {
          _btnAnim?.forward(from: 0);
        }
        _wasHovered = (state.isHovered || state.isFocused);
        return SizedBox(
          width: 520,
          height: 100,
          child: Stack(
            children: [
              Positioned.fill(child: Image.asset(AssetPaths.titleStartBtn)),
              if (state.isHovered || state.isFocused) ...[
                Positioned.fill(
                    child: Image.asset(AssetPaths.titleStartBtnHover)),
              ],
              Center(
                child: Row(
                  mainAxisAlignment: MainAxisAlignment.end,
                  children: [
                    Text('START MISSION',
                        style: TextStyles.btn
                            .copyWith(fontSize: 24, letterSpacing: 18)),
                  ],
                ),
              ),
            ],
          )                                              // Edit from here...
              .animate(autoPlay: false, onInit: (c) => _btnAnim = c)
              .shimmer(duration: .7.seconds, color: Colors.black),
        )
            .animate()
            .fadeIn(delay: 2.3.seconds)
            .slide(begin: const Offset(0, .2));
      },                                                 // to here.
    );
  }
}
- Appuyez sur Recharger pour que les boutons de difficulté apparaissent dans l'ordre, avec un léger mouvement vers le haut en prime.
Animer l'effet de survol de la difficulté
Ajoutez une animation à l'état de pointage des boutons de difficulté en modifiant la classe d'état _DifficultyBtn, comme suit :
lib/title_screen/title_screen_ui.dart
class _DifficultyBtn extends StatelessWidget {
  const _DifficultyBtn({
    required this.selected,
    required this.onPressed,
    required this.onHover,
    required this.label,
  });
  final String label;
  final bool selected;
  final VoidCallback onPressed;
  final void Function(bool hasFocus) onHover;

  @override
  Widget build(BuildContext context) {
    return FocusableControlBuilder(
      onPressed: onPressed,
      onHoverChanged: (_, state) => onHover.call(state.isHovered),
      builder: (_, state) {
        return Padding(
          padding: const EdgeInsets.all(8.0),
          child: SizedBox(
            width: 250,
            height: 60,
            child: Stack(
              children: [
                /// Bg with fill and outline
                AnimatedOpacity(                         // Edit from here
                  opacity: (!selected && (state.isHovered || state.isFocused))
                      ? 1
                      : 0,
                  duration: .3.seconds,
                  child: Container(
                    decoration: BoxDecoration(
                      color: const Color(0xFF00D1FF).withOpacity(.1),
                      border: Border.all(color: Colors.white, width: 5),
                    ),
                  ),
                ),                                       // to here.

                if (state.isHovered || state.isFocused) ...[
                  Container(
                    decoration: BoxDecoration(
                      color: const Color(0xFF00D1FF).withOpacity(.1),
                    ),
                  ),
                ],

                /// cross-hairs (selected state)
                if (selected) ...[
                  CenterLeft(
                    child: Image.asset(AssetPaths.titleSelectedLeft),
                  ),
                  CenterRight(
                    child: Image.asset(AssetPaths.titleSelectedRight),
                  ),
                ],

                /// Label
                Center(
                  child: Text(label.toUpperCase(), style: TextStyles.btn),
                ),
              ],
            ),
          ),
        );
      },
    );
  }
}
Les boutons de difficulté affichent désormais BoxDecoration lorsque la souris pointe sur un bouton qui n'a pas été sélectionné.
Animer le changement de couleur
- Le changement de couleur d'arrière-plan est instantané et brutal. Il est préférable d'animer les images éclairées entre les schémas de couleurs. Ajoutez
flutter_animateàlib/title_screen/title_screen.dart:
lib/title_screen/title_screen.dart
import 'package:flutter/material.dart';
import 'package:flutter_animate/flutter_animate.dart';    // Add this import

import '../assets.dart';
import '../styles.dart';
import 'title_screen_ui.dart';

class TitleScreen extends StatefulWidget {
- Ajoutez un widget
_AnimatedColorsdanslib/title_screen/title_screen.dart:
lib/title_screen/title_screen.dart
class _AnimatedColors extends StatelessWidget {
  const _AnimatedColors({
    required this.emitColor,
    required this.orbColor,
    required this.builder,
  });

  final Color emitColor;
  final Color orbColor;

  final Widget Function(BuildContext context, Color orbColor, Color emitColor)
      builder;

  @override
  Widget build(BuildContext context) {
    final duration = .5.seconds;
    return TweenAnimationBuilder(
      tween: ColorTween(begin: emitColor, end: emitColor),
      duration: duration,
      builder: (_, emitColor, __) {
        return TweenAnimationBuilder(
          tween: ColorTween(begin: orbColor, end: orbColor),
          duration: duration,
          builder: (context, orbColor, __) {
            return builder(context, orbColor!, emitColor!);
          },
        );
      },
    );
  }
}
- Utilisez le widget que vous venez de créer pour animer les couleurs des images éclairées en mettant à jour la méthode
builddans_TitleScreenState, comme suit :
lib/title_screen/title_screen.dart
class _TitleScreenState extends State<TitleScreen> {
  Color get _emitColor =>
      AppColors.emitColors[_difficultyOverride ?? _difficulty];
  Color get _orbColor =>
      AppColors.orbColors[_difficultyOverride ?? _difficulty];

  /// Selected difficulty
  int _difficulty = 0;

  /// Focused difficulty (if any)
  int? _difficultyOverride;

  void _handleDifficultyPressed(int value) {
    setState(() => _difficulty = value);
  }

  void _handleDifficultyFocused(int? value) {
    setState(() => _difficultyOverride = value);
  }

  final _finalReceiveLightAmt = 0.7;
  final _finalEmitLightAmt = 0.5;

  @override
  Widget build(BuildContext context) {
    return Scaffold(
      backgroundColor: Colors.black,
      body: Center(
        child: _AnimatedColors(                           // Edit from here...
          orbColor: _orbColor,
          emitColor: _emitColor,
          builder: (_, orbColor, emitColor) {
            return Stack(
              children: [
                /// Bg-Base
                Image.asset(AssetPaths.titleBgBase),

                /// Bg-Receive
                _LitImage(
                  color: orbColor,
                  imgSrc: AssetPaths.titleBgReceive,
                  lightAmt: _finalReceiveLightAmt,
                ),

                /// Mg-Base
                _LitImage(
                  imgSrc: AssetPaths.titleMgBase,
                  color: orbColor,
                  lightAmt: _finalReceiveLightAmt,
                ),

                /// Mg-Receive
                _LitImage(
                  imgSrc: AssetPaths.titleMgReceive,
                  color: orbColor,
                  lightAmt: _finalReceiveLightAmt,
                ),

                /// Mg-Emit
                _LitImage(
                  imgSrc: AssetPaths.titleMgEmit,
                  color: emitColor,
                  lightAmt: _finalEmitLightAmt,
                ),

                /// Fg-Rocks
                Image.asset(AssetPaths.titleFgBase),

                /// Fg-Receive
                _LitImage(
                  imgSrc: AssetPaths.titleFgReceive,
                  color: orbColor,
                  lightAmt: _finalReceiveLightAmt,
                ),

                /// Fg-Emit
                _LitImage(
                  imgSrc: AssetPaths.titleFgEmit,
                  color: emitColor,
                  lightAmt: _finalEmitLightAmt,
                ),

                /// UI
                Positioned.fill(
                  child: TitleScreenUi(
                    difficulty: _difficulty,
                    onDifficultyFocused: _handleDifficultyFocused,
                    onDifficultyPressed: _handleDifficultyPressed,
                  ),
                ),
              ],
            ).animate().fadeIn(duration: 1.seconds, delay: .3.seconds);
          },
        ),                                                // to here.
      ),
    );
  }
}
Avec cette dernière modification, vous avez ajouté des animations à chaque élément de l'écran, ce qui améliore considérablement l'apparence de votre vidéo.
6. Ajouter des nuanceurs de fragment
Dans cette étape, vous allez ajouter des nuanceurs de fragment à l'application. Vous allez d'abord utiliser un nuanceur pour modifier le titre et lui donner une ambiance plus dystopique. Ensuite, vous ajoutez un deuxième nuanceur pour créer un orbe qui sert de point focal central de la page.
Déformer le titre avec un nuanceur de fragment
Avec cette modification, vous introduisez le package provider, qui permet de transmettre les nuanceurs compilés dans l'arborescence des widgets. Si vous souhaitez savoir comment les nuanceurs sont chargés, consultez l'implémentation dans lib/assets.dart.
- Modifiez le code dans
lib/main.dartcomme suit :
lib/main.dart
import 'dart:io' show Platform;

import 'package:flutter/foundation.dart' show kIsWeb;
import 'package:flutter/material.dart';
import 'package:flutter_animate/flutter_animate.dart';
import 'package:provider/provider.dart';                 // Add this import
import 'package:window_size/window_size.dart';

import 'assets.dart';                                    // Add this import
import 'title_screen/title_screen.dart';

void main() {
  if (!kIsWeb && (Platform.isWindows || Platform.isLinux || Platform.isMacOS)) {
    WidgetsFlutterBinding.ensureInitialized();
    setWindowMinSize(const Size(800, 500));
  }
  Animate.restartOnHotReload = true;
  runApp(                                                // Edit from here...
    FutureProvider<FragmentPrograms?>(
      create: (context) => loadFragmentPrograms(),
      initialData: null,
      child: const NextGenApp(),
    ),
  );                                                     // to here.
}

class NextGenApp extends StatelessWidget {
  const NextGenApp({super.key});

  @override
  Widget build(BuildContext context) {
    return MaterialApp(
      themeMode: ThemeMode.dark,
      darkTheme: ThemeData(brightness: Brightness.dark),
      home: const TitleScreen(),
    );
  }
}
- Pour profiter du package
provideret des utilitaires de nuanceur inclus dansstep_01, vous devez les importer. Ajoutez de nouvelles importations danslib/title_screen/title_screen_ui.dart, comme suit :
lib/title_screen/title_screen_ui.dart
import 'package:extra_alignments/extra_alignments.dart';
import 'package:flutter/material.dart';
import 'package:flutter_animate/flutter_animate.dart';
import 'package:focusable_control_builder/focusable_control_builder.dart';
import 'package:gap/gap.dart';
import 'package:provider/provider.dart';                 // Add this import

import '../assets.dart';
import '../common/shader_effect.dart';                   // And this import
import '../common/ticking_builder.dart';                 // And this import
import '../common/ui_scaler.dart';
import '../styles.dart';

class TitleScreenUi extends StatelessWidget {
- Déformez le titre avec le nuanceur en modifiant le widget
_TitleText, comme suit :
lib/title_screen/title_screen_ui.dart
class _TitleText extends StatelessWidget {
  const _TitleText();

  @override
  Widget build(BuildContext context) {
    Widget content = Column(                             // Modify this line
      mainAxisSize: MainAxisSize.min,
      crossAxisAlignment: CrossAxisAlignment.start,
      children: [
        const Gap(20),
        Row(
          mainAxisSize: MainAxisSize.min,
          children: [
            Transform.translate(
              offset: Offset(-(TextStyles.h1.letterSpacing! * .5), 0),
              child: Text('OUTPOST', style: TextStyles.h1),
            ),
            Image.asset(AssetPaths.titleSelectedLeft, height: 65),
            Text('57', style: TextStyles.h2),
            Image.asset(AssetPaths.titleSelectedRight, height: 65),
          ],
        ).animate().fadeIn(delay: .8.seconds, duration: .7.seconds),
        Text('INTO THE UNKNOWN', style: TextStyles.h3)
            .animate()
            .fadeIn(delay: 1.seconds, duration: .7.seconds),
      ],
    );
    return Consumer<FragmentPrograms?>(                  // Add from here...
      builder: (context, fragmentPrograms, _) {
        if (fragmentPrograms == null) return content;
        return TickingBuilder(
          builder: (context, time) {
            return AnimatedSampler(
              (image, size, canvas) {
                const double overdrawPx = 30;
                final shader = fragmentPrograms.ui.fragmentShader();
                shader
                  ..setFloat(0, size.width)
                  ..setFloat(1, size.height)
                  ..setFloat(2, time)
                  ..setImageSampler(0, image);
                Rect rect = Rect.fromLTWH(-overdrawPx, -overdrawPx,
                    size.width + overdrawPx, size.height + overdrawPx);
                canvas.drawRect(rect, Paint()..shader = shader);
              },
              child: content,
            );
          },
        );
      },
    );                                                   // to here.
  }
}
Le titre devrait se déformer, comme on peut s'y attendre dans un avenir dystopique.
Ajouter l'orbe
Ajoutez maintenant l'orbe au centre de la fenêtre. Vous devez ajouter un rappel onPressed au bouton de démarrage.
- Dans
lib/title_screen/title_screen_ui.dart, modifiezTitleScreenUicomme suit :
lib/title_screen/title_screen_ui.dart
class TitleScreenUi extends StatelessWidget {
  const TitleScreenUi({
    super.key,
    required this.difficulty,
    required this.onDifficultyPressed,
    required this.onDifficultyFocused,
    required this.onStartPressed,                         // Add this argument
  });

  final int difficulty;
  final void Function(int difficulty) onDifficultyPressed;
  final void Function(int? difficulty) onDifficultyFocused;
  final VoidCallback onStartPressed;                      // Add this attribute

  @override
  Widget build(BuildContext context) {
    return Padding(
      padding: const EdgeInsets.symmetric(vertical: 40, horizontal: 50),
      child: Stack(
        children: [
          /// Title Text
          const TopLeft(
            child: UiScaler(
              alignment: Alignment.topLeft,
              child: _TitleText(),
            ),
          ),

          /// Difficulty Btns
          BottomLeft(
            child: UiScaler(
              alignment: Alignment.bottomLeft,
              child: _DifficultyBtns(
                difficulty: difficulty,
                onDifficultyPressed: onDifficultyPressed,
                onDifficultyFocused: onDifficultyFocused,
              ),
            ),
          ),

          /// StartBtn
          BottomRight(
            child: UiScaler(
              alignment: Alignment.bottomRight,
              child: Padding(
                padding: const EdgeInsets.only(bottom: 20, right: 40),
                child: _StartBtn(onPressed: onStartPressed),  // Edit this line
              ),
            ),
          ),
        ],
      ),
    );
  }
}
Maintenant que vous avez modifié le bouton de démarrage avec un rappel, vous devez apporter des modifications importantes au fichier lib/title_screen/title_screen.dart.
- Modifiez les importations comme suit :
lib/title_screen/title_screen.dart
import 'dart:math';                                       // Add this import
import 'dart:ui';                                         // And this import

import 'package:flutter/material.dart';
import 'package:flutter/services.dart';                   // Add this import
import 'package:flutter_animate/flutter_animate.dart';

import '../assets.dart';
import '../orb_shader/orb_shader_config.dart';            // And this import
import '../orb_shader/orb_shader_widget.dart';            // And this import too
import '../styles.dart';
import 'title_screen_ui.dart';

class TitleScreen extends StatefulWidget {
- Modifiez
_TitleScreenStatecomme suit. Presque toutes les parties de la classe sont modifiées d'une manière ou d'une autre.
lib/title_screen/title_screen.dart
class _TitleScreenState extends State<TitleScreen>
    with SingleTickerProviderStateMixin {
  final _orbKey = GlobalKey<OrbShaderWidgetState>();

  /// Editable Settings
  /// 0-1, receive lighting strength
  final _minReceiveLightAmt = .35;
  final _maxReceiveLightAmt = .7;

  /// 0-1, emit lighting strength
  final _minEmitLightAmt = .5;
  final _maxEmitLightAmt = 1;

  /// Internal
  var _mousePos = Offset.zero;

  Color get _emitColor =>
      AppColors.emitColors[_difficultyOverride ?? _difficulty];
  Color get _orbColor =>
      AppColors.orbColors[_difficultyOverride ?? _difficulty];

  /// Selected difficulty
  int _difficulty = 0;

  /// Focused difficulty (if any)
  int? _difficultyOverride;
  double _orbEnergy = 0;
  double _minOrbEnergy = 0;

  double get _finalReceiveLightAmt {
    final light =
        lerpDouble(_minReceiveLightAmt, _maxReceiveLightAmt, _orbEnergy) ?? 0;
    return light + _pulseEffect.value * .05 * _orbEnergy;
  }

  double get _finalEmitLightAmt {
    return lerpDouble(_minEmitLightAmt, _maxEmitLightAmt, _orbEnergy) ?? 0;
  }

  late final _pulseEffect = AnimationController(
    vsync: this,
    duration: _getRndPulseDuration(),
    lowerBound: -1,
    upperBound: 1,
  );

  Duration _getRndPulseDuration() => 100.ms + 200.ms * Random().nextDouble();

  double _getMinEnergyForDifficulty(int difficulty) => switch (difficulty) {
        1 => 0.3,
        2 => 0.6,
        _ => 0,
      };


  @override
  void initState() {
    super.initState();
    _pulseEffect.forward();
    _pulseEffect.addListener(_handlePulseEffectUpdate);
  }

  void _handlePulseEffectUpdate() {
    if (_pulseEffect.status == AnimationStatus.completed) {
      _pulseEffect.reverse();
      _pulseEffect.duration = _getRndPulseDuration();
    } else if (_pulseEffect.status == AnimationStatus.dismissed) {
      _pulseEffect.duration = _getRndPulseDuration();
      _pulseEffect.forward();
    }
  }

  void _handleDifficultyPressed(int value) {
    setState(() => _difficulty = value);
    _bumpMinEnergy();
  }

  Future<void> _bumpMinEnergy([double amount = 0.1]) async {
    setState(() {
      _minOrbEnergy = _getMinEnergyForDifficulty(_difficulty) + amount;
    });
    await Future<void>.delayed(.2.seconds);
    setState(() {
      _minOrbEnergy = _getMinEnergyForDifficulty(_difficulty);
    });
  }

  void _handleStartPressed() => _bumpMinEnergy(0.3);

  void _handleDifficultyFocused(int? value) {
    setState(() {
      _difficultyOverride = value;
      if (value == null) {
        _minOrbEnergy = _getMinEnergyForDifficulty(_difficulty);
      } else {
        _minOrbEnergy = _getMinEnergyForDifficulty(value);
      }
    });
  }

  /// Update mouse position so the orbWidget can use it, doing it here prevents
  /// btns from blocking the mouse-move events in the widget itself.
  void _handleMouseMove(PointerHoverEvent e) {
    setState(() {
      _mousePos = e.localPosition;
    });
  }

  @override
  Widget build(BuildContext context) {
    return Scaffold(
      backgroundColor: Colors.black,
      body: Center(
        child: MouseRegion(
          onHover: _handleMouseMove,
          child: _AnimatedColors(
            orbColor: _orbColor,
            emitColor: _emitColor,
            builder: (_, orbColor, emitColor) {
              return Stack(
                children: [
                  /// Bg-Base
                  Image.asset(AssetPaths.titleBgBase),

                  /// Bg-Receive
                  _LitImage(
                    color: orbColor,
                    imgSrc: AssetPaths.titleBgReceive,
                    pulseEffect: _pulseEffect,
                    lightAmt: _finalReceiveLightAmt,
                  ),

                  /// Orb
                  Positioned.fill(
                    child: Stack(
                      children: [
                        // Orb
                        OrbShaderWidget(
                          key: _orbKey,
                          mousePos: _mousePos,
                          minEnergy: _minOrbEnergy,
                          config: OrbShaderConfig(
                            ambientLightColor: orbColor,
                            materialColor: orbColor,
                            lightColor: orbColor,
                          ),
                          onUpdate: (energy) => setState(() {
                            _orbEnergy = energy;
                          }),
                        ),
                      ],
                    ),
                  ),

                  /// Mg-Base
                  _LitImage(
                    imgSrc: AssetPaths.titleMgBase,
                    color: orbColor,
                    pulseEffect: _pulseEffect,
                    lightAmt: _finalReceiveLightAmt,
                  ),

                  /// Mg-Receive
                  _LitImage(
                    imgSrc: AssetPaths.titleMgReceive,
                    color: orbColor,
                    pulseEffect: _pulseEffect,
                    lightAmt: _finalReceiveLightAmt,
                  ),

                  /// Mg-Emit
                  _LitImage(
                    imgSrc: AssetPaths.titleMgEmit,
                    color: emitColor,
                    pulseEffect: _pulseEffect,
                    lightAmt: _finalEmitLightAmt,
                  ),

                  /// Fg-Rocks
                  Image.asset(AssetPaths.titleFgBase),

                  /// Fg-Receive
                  _LitImage(
                    imgSrc: AssetPaths.titleFgReceive,
                    color: orbColor,
                    pulseEffect: _pulseEffect,
                    lightAmt: _finalReceiveLightAmt,
                  ),

                  /// Fg-Emit
                  _LitImage(
                    imgSrc: AssetPaths.titleFgEmit,
                    color: emitColor,
                    pulseEffect: _pulseEffect,
                    lightAmt: _finalEmitLightAmt,
                  ),

                  /// UI
                  Positioned.fill(
                    child: TitleScreenUi(
                      difficulty: _difficulty,
                      onDifficultyFocused: _handleDifficultyFocused,
                      onDifficultyPressed: _handleDifficultyPressed,
                      onStartPressed: _handleStartPressed,
                    ),
                  ),
                ],
              ).animate().fadeIn(duration: 1.seconds, delay: .3.seconds);
            },
          ),
        ),
      ),
    );
  }
}
- Modifiez
_LitImagecomme suit :
lib/title_screen/title_screen.dart
class _LitImage extends StatelessWidget {
  const _LitImage({
    required this.color,
    required this.imgSrc,
    required this.pulseEffect,                            // Add this parameter
    required this.lightAmt,
  });
  final Color color;
  final String imgSrc;
  final AnimationController pulseEffect;                  // Add this attribute
  final double lightAmt;

  @override
  Widget build(BuildContext context) {
    final hsl = HSLColor.fromColor(color);
    return ListenableBuilder(                             // Edit from here...
      listenable: pulseEffect,
      builder: (context, child) {
        return Image.asset(
          imgSrc,
          color: hsl.withLightness(hsl.lightness * lightAmt).toColor(),
          colorBlendMode: BlendMode.modulate,
        );
      },
    );                                                    // to here.
  }
}
Voici le résultat de cet ajout.
7. Ajouter des animations de particules
Dans cette étape, vous allez ajouter des animations de particules pour créer un léger mouvement de pulsation dans l'application.
Ajouter des particules partout
- Créez un fichier
lib/title_screen/particle_overlay.dartet ajoutez le code suivant :
lib/title_screen/particle_overlay.dart
import 'dart:math';

import 'package:flutter/material.dart';
import 'package:particle_field/particle_field.dart';
import 'package:rnd/rnd.dart';

class ParticleOverlay extends StatelessWidget {
  const ParticleOverlay({super.key, required this.color, required this.energy});

  final Color color;
  final double energy;

  @override
  Widget build(BuildContext context) {
    return ParticleField(
      spriteSheet: SpriteSheet(
        image: const AssetImage('assets/images/particle-wave.png'),
      ),
      // blend the image's alpha with the specified color:
      blendMode: BlendMode.dstIn,

      // this runs every tick:
      onTick: (controller, _, size) {
        List<Particle> particles = controller.particles;

        // add a new particle with random angle, distance & velocity:
        double a = rnd(pi * 2);
        double dist = rnd(1, 4) * 35 + 150 * energy;
        double vel = rnd(1, 2) * (1 + energy * 1.8);
        particles.add(Particle(
          // how many ticks this particle will live:
          lifespan: rnd(1, 2) * 20 + energy * 15,
          // starting distance from center:
          x: cos(a) * dist,
          y: sin(a) * dist,
          // starting velocity:
          vx: cos(a) * vel,
          vy: sin(a) * vel,
          // other starting values:
          rotation: a,
          scale: rnd(1, 2) * 0.6 + energy * 0.5,
        ));

        // update all of the particles:
        for (int i = particles.length - 1; i >= 0; i--) {
          Particle p = particles[i];
          if (p.lifespan <= 0) {
            // particle is expired, remove it:
            particles.removeAt(i);
            continue;
          }
          p.update(
            scale: p.scale * 1.025,
            vx: p.vx * 1.025,
            vy: p.vy * 1.025,
            color: color.withOpacity(p.lifespan * 0.001 + 0.01),
            lifespan: p.lifespan - 1,
          );
        }
      },
    );
  }
}
- Modifiez les importations pour
lib/title_screen/title_screen.dartcomme suit :
lib/title_screen/title_screen.dart
import 'dart:math';
import 'dart:ui';

import 'package:flutter/material.dart';
import 'package:flutter/services.dart';
import 'package:flutter_animate/flutter_animate.dart';

import '../assets.dart';
import '../orb_shader/orb_shader_config.dart';
import '../orb_shader/orb_shader_widget.dart';
import '../styles.dart';
import 'particle_overlay.dart';                          // Add this import
import 'title_screen_ui.dart';

class TitleScreen extends StatefulWidget {
- Ajoutez le
ParticleOverlayà l'UI en modifiant la méthodebuildde_TitleScreenState, comme suit :
lib/title_screen/title_screen.dart
@override
Widget build(BuildContext context) {
  return Scaffold(
    backgroundColor: Colors.black,
    body: Center(
      child: MouseRegion(
        onHover: _handleMouseMove,
        child: _AnimatedColors(
          orbColor: _orbColor,
          emitColor: _emitColor,
          builder: (_, orbColor, emitColor) {
            return Stack(
              children: [
                /// Bg-Base
                Image.asset(AssetPaths.titleBgBase),

                /// Bg-Receive
                _LitImage(
                  color: orbColor,
                  imgSrc: AssetPaths.titleBgReceive,
                  pulseEffect: _pulseEffect,
                  lightAmt: _finalReceiveLightAmt,
                ),

                /// Orb
                Positioned.fill(
                  child: Stack(
                    children: [
                      // Orb
                      OrbShaderWidget(
                        key: _orbKey,
                        mousePos: _mousePos,
                        minEnergy: _minOrbEnergy,
                        config: OrbShaderConfig(
                          ambientLightColor: orbColor,
                          materialColor: orbColor,
                          lightColor: orbColor,
                        ),
                        onUpdate: (energy) => setState(() {
                          _orbEnergy = energy;
                        }),
                      ),
                    ],
                  ),
                ),

                /// Mg-Base
                _LitImage(
                  imgSrc: AssetPaths.titleMgBase,
                  color: orbColor,
                  pulseEffect: _pulseEffect,
                  lightAmt: _finalReceiveLightAmt,
                ),

                /// Mg-Receive
                _LitImage(
                  imgSrc: AssetPaths.titleMgReceive,
                  color: orbColor,
                  pulseEffect: _pulseEffect,
                  lightAmt: _finalReceiveLightAmt,
                ),

                /// Mg-Emit
                _LitImage(
                  imgSrc: AssetPaths.titleMgEmit,
                  color: emitColor,
                  pulseEffect: _pulseEffect,
                  lightAmt: _finalEmitLightAmt,
                ),

                /// Particle Field
                Positioned.fill(                          // Add from here...
                  child: IgnorePointer(
                    child: ParticleOverlay(
                      color: orbColor,
                      energy: _orbEnergy,
                    ),
                  ),
                ),                                        // to here.

                /// Fg-Rocks
                Image.asset(AssetPaths.titleFgBase),

                /// Fg-Receive
                _LitImage(
                  imgSrc: AssetPaths.titleFgReceive,
                  color: orbColor,
                  pulseEffect: _pulseEffect,
                  lightAmt: _finalReceiveLightAmt,
                ),

                /// Fg-Emit
                _LitImage(
                  imgSrc: AssetPaths.titleFgEmit,
                  color: emitColor,
                  pulseEffect: _pulseEffect,
                  lightAmt: _finalEmitLightAmt,
                ),

                /// UI
                Positioned.fill(
                  child: TitleScreenUi(
                    difficulty: _difficulty,
                    onDifficultyFocused: _handleDifficultyFocused,
                    onDifficultyPressed: _handleDifficultyPressed,
                    onStartPressed: _handleStartPressed,
                  ),
                ),
              ],
            ).animate().fadeIn(duration: 1.seconds, delay: .3.seconds);
          },
        ),
      ),
    ),
  );
}
Le résultat final inclut des animations, des nuanceurs de fragments et des effets de particules sur plusieurs plates-formes.
Ajouter des particules partout, même sur le Web
Il y a un petit problème avec le code tel qu'il est actuellement. Lorsque Flutter s'exécute sur le Web, deux moteurs de rendu alternatifs peuvent être utilisés : le moteur CanvasKit, qui est utilisé par défaut sur les navigateurs pour ordinateur, et un moteur de rendu HTML DOM, qui est utilisé par défaut pour les appareils mobiles. Le problème est que le moteur de rendu HTML DOM n'est pas compatible avec les nuanceurs de fragment.
La solution consiste à créer l'application pour le Web en utilisant uniquement le moteur de rendu CanvasKit. Pour ce faire, ajoutez un indicateur à la commande de compilation comme suit :
$ flutter build web --web-renderer canvaskit
Font asset "MaterialIcons-Regular.otf" was tree-shaken, reducing it from 1645184 to 7692 bytes (99.5% reduction). Tree-shaking can be disabled by providing the --no-tree-shake-icons flag
when building your app.
Font asset "CupertinoIcons.ttf" was tree-shaken, reducing it from 257628 to 1172 bytes (99.5% reduction). Tree-shaking can be disabled by providing the --no-tree-shake-icons flag when
building your app.
Compiling lib/main.dart for the Web...                             15.6s
✓ Built build/web
Voici tout votre travail, cette fois-ci affiché dans un navigateur Chrome.
8. Félicitations
Vous avez créé un écran d'introduction de jeu complet avec des animations, des nuanceurs de fragment et des animations de particules. Vous pouvez désormais utiliser ces techniques sur toutes les plates-formes compatibles avec Flutter.
En savoir plus
- Découvrez le package
flutter_animate. - Consultez la documentation sur la prise en charge des nuanceurs de fragments par Flutter.
- The Book of Shaders de Patricio Gonzalez Vivo et Jen Lowe
- Shader Toy, un terrain de jeu collaboratif pour les nuanceurs
- simple_shader, un exemple de projet de nuanceurs de fragments Flutter


