
1. 總覽
在本研究室中,您將設定 GitHub Actions 工作流程,並與 Gemini 整合,以便自動執行程式碼審查步驟。

學習目標
在本實驗室中,您將瞭解如何執行下列操作:
- 如何在 GitHub 中新增生成式 AI 程式碼審查自動化步驟
- 如何在本機執行 devai 命令列,以便自動執行程式碼審查
必要條件
- 本實驗室假設您已熟悉 Cloud 控制台和 Cloud Shell 環境。
2. 設定和需求
Cloud 專案設定
- 登入 Google Cloud 控制台,然後建立新專案或重複使用現有專案。如果您還沒有 Gmail 或 Google Workspace 帳戶,請務必建立帳戶。


- 「Project name」是這個專案參與者的顯示名稱。這是 Google API 不會使用的字元字串。您隨時可以更新。
- 專案 ID 在所有 Google Cloud 專案中都是不重複的值,且無法變更 (設定後即無法變更)。Cloud 控制台會自動產生專屬字串,您通常不需要特別在意。在大多數程式碼研究室中,您都需要參照專案 ID (通常會以
PROJECT_ID表示)。如果您不喜歡系統產生的 ID,可以隨機產生另一個 ID。或者,您也可以自行嘗試,看看是否可用。在這個步驟完成後就無法變更,且會在專案期間維持不變。 - 提醒您,有些 API 會使用第三個值,也就是「專案編號」。如要進一步瞭解這三個值,請參閱說明文件。
- 接下來,您需要在 Cloud 控制台中啟用帳單功能,才能使用 Cloud 資源/API。執行這個程式碼研究室不會產生太多費用,甚至可能完全不會產生費用。如要關閉資源,避免在本教學課程結束後繼續產生費用,您可以刪除建立的資源或專案。Google Cloud 新使用者可享有 $300 美元的免費試用期。
環境設定
開啟 Gemini 對話。

或者,在搜尋列中輸入「問問 Gemini」。

啟用 Gemini for Google Cloud API:

按一下「Start chatting」,然後按照其中一個範例問題操作,或自行輸入提示,即可試用這項功能。
建議提示:
- 以 5 個重點說明 Cloud Run。
- 您是 Google Cloud Run 產品經理,向學生解釋 Cloud Run 的 5 大重點。
- 您是 Google Cloud Run 產品經理,向 Kubernetes 認證開發人員解釋 Cloud Run 的 5 大重點。
- 您是 Google Cloud Run 產品經理,請向資深開發人員說明在哪些情況下應使用 Cloud Run 而非 GKE,並以 5 個重點說明。
請參閱提示指南,進一步瞭解如何撰寫更優質的提示。
Gemini for Google Cloud 如何使用您的資料
Google 的隱私權承諾
Google 是第一間發表 AI/機器學習隱私權承諾的公司,該文中也提到我們的信念:除了極致的安全性之外,客戶也應該對儲存在雲端的自家資料保有最大的掌控權。
您提交及接收的資料
您向 Gemini 提出的問題,包括您提交給 Gemini 以便分析或完成的任何輸入資訊或程式碼,都稱為提示。您從 Gemini 收到的答案或程式碼完成作業稱為回覆。Gemini 不會使用提示或回覆內容做為模型訓練資料。
提示訊息的加密
向 Gemini 提交提示時,您的資料會在傳輸過程中加密,並做為輸入內容傳送至 Gemini 中的基礎模型。
由 Gemini 產生的節目資料
Gemini 是根據第一方 Google Cloud 程式碼和精選第三方程式碼進行訓練。您必須負責程式碼的安全性、測試和效能,包括 Gemini 提供的任何程式碼完成、產生或分析功能。
進一步瞭解 Google 如何處理提示。
3. 測試提示的選項
如果您想變更/擴充現有的 devai 指令列提示,可以選擇以下幾種做法。
Vertex AI Studio 是 Google Cloud Vertex AI 平台的一部分,專門用於簡化及加速生成式 AI 模型的開發及使用。
Google AI Studio 是網頁式工具,可用於設計原型,並透過提示設計和 Gemini API 進行實驗。
- Gemini 網頁應用程式 (gemini.google.com)
Google Gemini 網頁應用程式 (gemini.google.com) 是一款網頁工具,可協助您探索並運用 Google Gemini AI 模型的強大功能。
4. 建立服務帳戶
按一下搜尋列右側的圖示,即可啟用 Cloud Shell。

在開啟的終端機中,啟用必要服務,以便使用 Vertex AI API 和 Gemini 即時通訊。
gcloud services enable \
    aiplatform.googleapis.com \
    cloudaicompanion.googleapis.com \
    cloudresourcemanager.googleapis.com \
    secretmanager.googleapis.com
如果系統要求您授權,請點選「授權」繼續操作。

執行下列指令,建立新的服務帳戶和金鑰。
您將使用這個服務帳戶,透過 CICD 管道向 Vertex AI Gemini API 發出 API 呼叫。
PROJECT_ID=$(gcloud config get-value project)
SERVICE_ACCOUNT_NAME='vertex-client'
DISPLAY_NAME='Vertex Client'
KEY_FILE_NAME='vertex-client-key'

gcloud iam service-accounts create $SERVICE_ACCOUNT_NAME --display-name "$DISPLAY_NAME"
授予角色。
gcloud projects add-iam-policy-binding $PROJECT_ID --member="serviceAccount:$SERVICE_ACCOUNT_NAME@$PROJECT_ID.iam.gserviceaccount.com" --role="roles/aiplatform.admin" --condition None

gcloud projects add-iam-policy-binding $PROJECT_ID --member="serviceAccount:$SERVICE_ACCOUNT_NAME@$PROJECT_ID.iam.gserviceaccount.com" --role="roles/secretmanager.secretAccessor" --condition None

gcloud iam service-accounts keys create $KEY_FILE_NAME.json --iam-account=$SERVICE_ACCOUNT_NAME@$PROJECT_ID.iam.gserviceaccount.com
5. 將 GitHub 存放區分支至您的個人 GitHub 存放區
前往 https://github.com/GoogleCloudPlatform/genai-for-developers/fork,然後選取您的 GitHub 使用者 ID 做為擁有者。
請按一下 [Create fork]。
6. 啟用 GitHub Actions 工作流程
在瀏覽器中開啟已分支的 GitHub 存放區,然後切換至「Actions」分頁,啟用工作流程。

7. 新增存放區機密資料
在分支的 GitHub 存放區中,在「Settings / Secrets and variables / Actions」下方建立存放區密鑰。
新增名稱為「GOOGLE_API_CREDENTIALS」的存放區密鑰。

切換至 Google Cloud Shell 視窗/分頁,然後在 Cloud Shell 終端機中執行下列指令。
cat ~/vertex-client-key.json
複製檔案內容,並將其貼上做為密鑰的值。

新增 PROJECT_ID 機密資料,並將 Qwiklabs 專案 ID 設為值:

8. 執行 GitHub Actions 工作流程
在瀏覽器中前往 GitHub 存放區,然後執行工作流程。
工作流程已設定為隨選執行。

9. 查看工作流程輸出結果

管道指令總覽
GitHub Actions 工作流程設定:devai-review.yml
測試涵蓋率指令的結果:
devai review testcoverage -c ${{ github.workspace }}/sample-app/src/main/java/anthos/samples/bankofanthos/balancereader
這個 devai review testcoverage 指令會使用生成式 AI 模型 Gemini 分析程式碼及其相關的測試套件 (如有)。它會評估提供的程式碼測試涵蓋率,找出含有和不含單元測試的檔案和方法。接著,指令會利用模型提供涵蓋率摘要,包括涵蓋的程式碼行數和分支/條件等指標。系統會根據分析結果提供改善測試涵蓋率的建議,建議您新增特定測試,並提供測試最佳做法的一般建議。最後,它會輸出 Gemini 模型的回應,其中包含檔案缺乏涵蓋率等詳細資料,以及透過指令列向使用者提供改善現有測試的建議。

程式碼審查指令的結果:
devai review code -c ${{ github.workspace }}/sample-app/src/main/java/anthos/samples/bankofanthos/balancereader
devai review code 指令會使用生成式 AI 模型,對提供的程式碼片段進行全面的程式碼審查。這項服務會將要審查的程式碼視為輸入內容 (背景資訊),並提供輸出格式偏好設定 (輸出內容)。這項工具會運用大型語言模型分析程式碼,檢查其正確性、效率、可維護性、安全性和是否遵循最佳做法。這項指令會建立詳細提示,指示 Gemini 如何進行審查,然後將提示傳送至模型,以便評估提供的程式碼。最後,處理 Gemini 的回應,並根據使用者的偏好,以 Markdown、JSON 或表格格式輸出檢查結果。

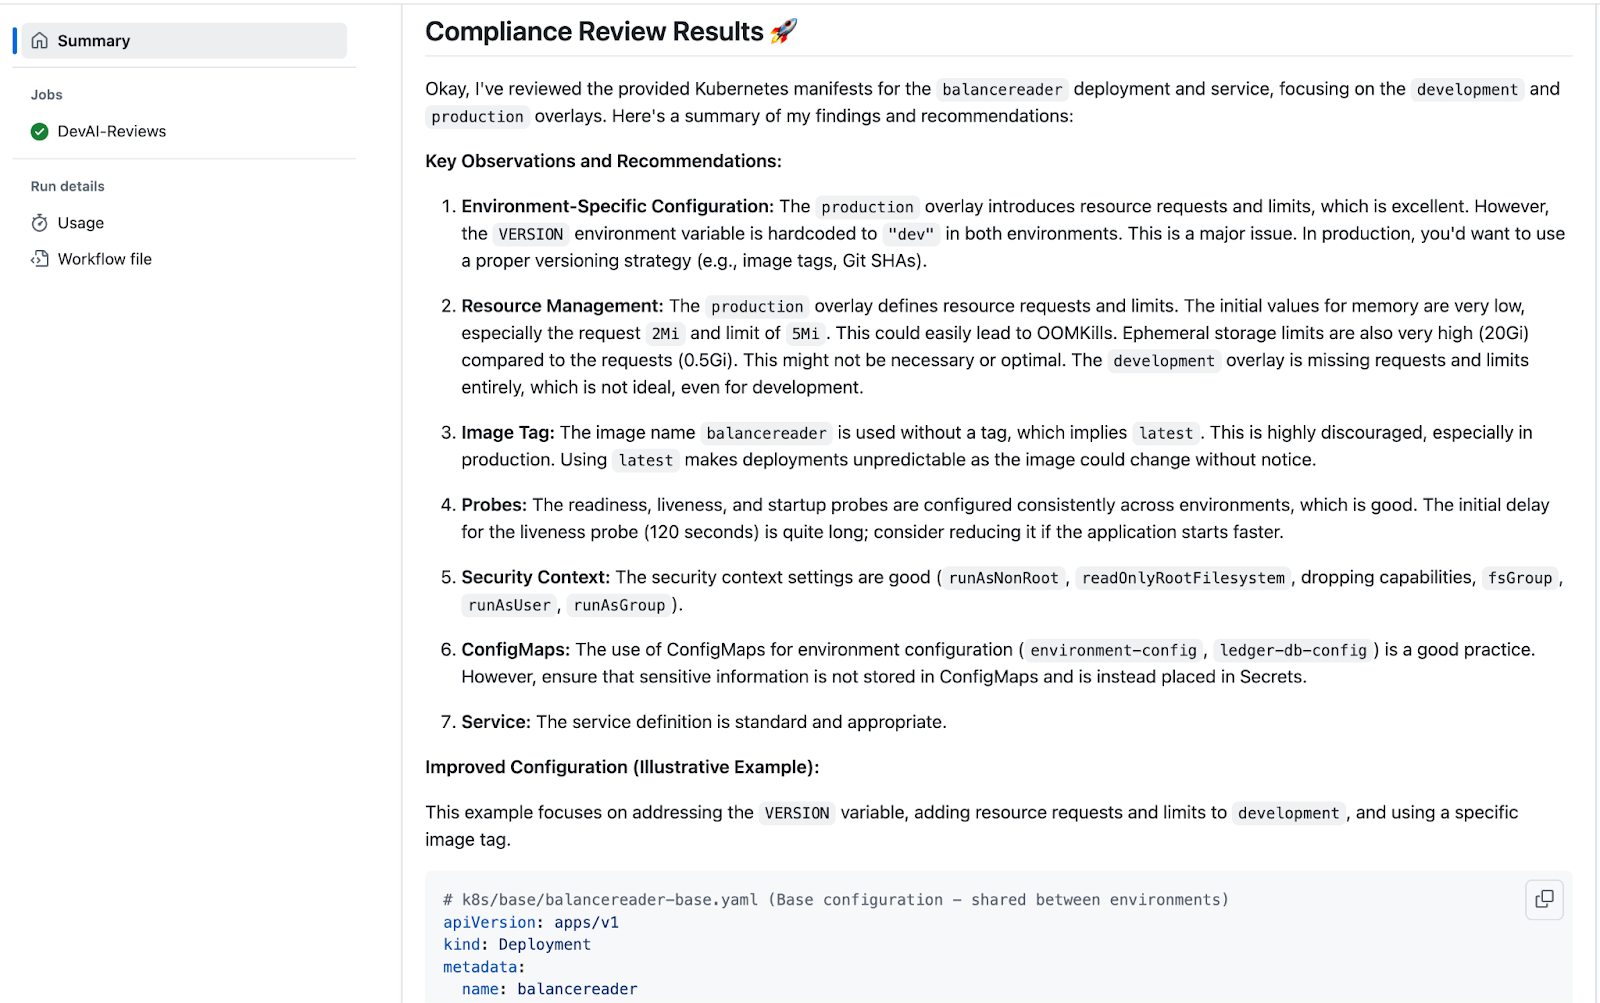
法規遵循審查指令的結果:
devai review compliance -c ${{ github.workspace }}/sample-app/k8s --config ${{ github.workspace }}/devai-cli/gemini/styleguide.md
devai review compliance 指令會根據一組最佳做法分析程式碼,通常是 Kubernetes 設定。這個指令會利用 Gemini 模型審查提供的程式碼 (context),並與個別設定檔 (config) 中定義的特定標準進行比較。這項指令會利用提示,指示 Gemini 模型扮演 Kubernetes 專家工程師的角色,並提供符合規定的報告。接著,系統會將發現的結果以簡短說明的形式呈現,並著重於程式碼範例,說明如何解決任何已發現的問題。最後,這個指令會將 Gemini 的合規性審查輸出內容列印到主控台。這樣一來,使用者就能輕鬆稽核程式碼是否符合規定。
10. 複製存放區
返回 Cloud Shell 終端機並複製存放區。
請先將 YOUR-GITHUB-USERID 變更為您的 GitHub 使用者 ID,再執行指令。
git clone https://github.com/YOUR-GITHUB-USERID/genai-for-developers.git
在 Cloud Shell 編輯器中變更資料夾並開啟工作流程檔案。
cd genai-for-developers

cloudshell edit .github/workflows/devai-review.yml
等待 IDE 顯示設定檔。
11. 使用 Gemini Code Assist 說明程式碼
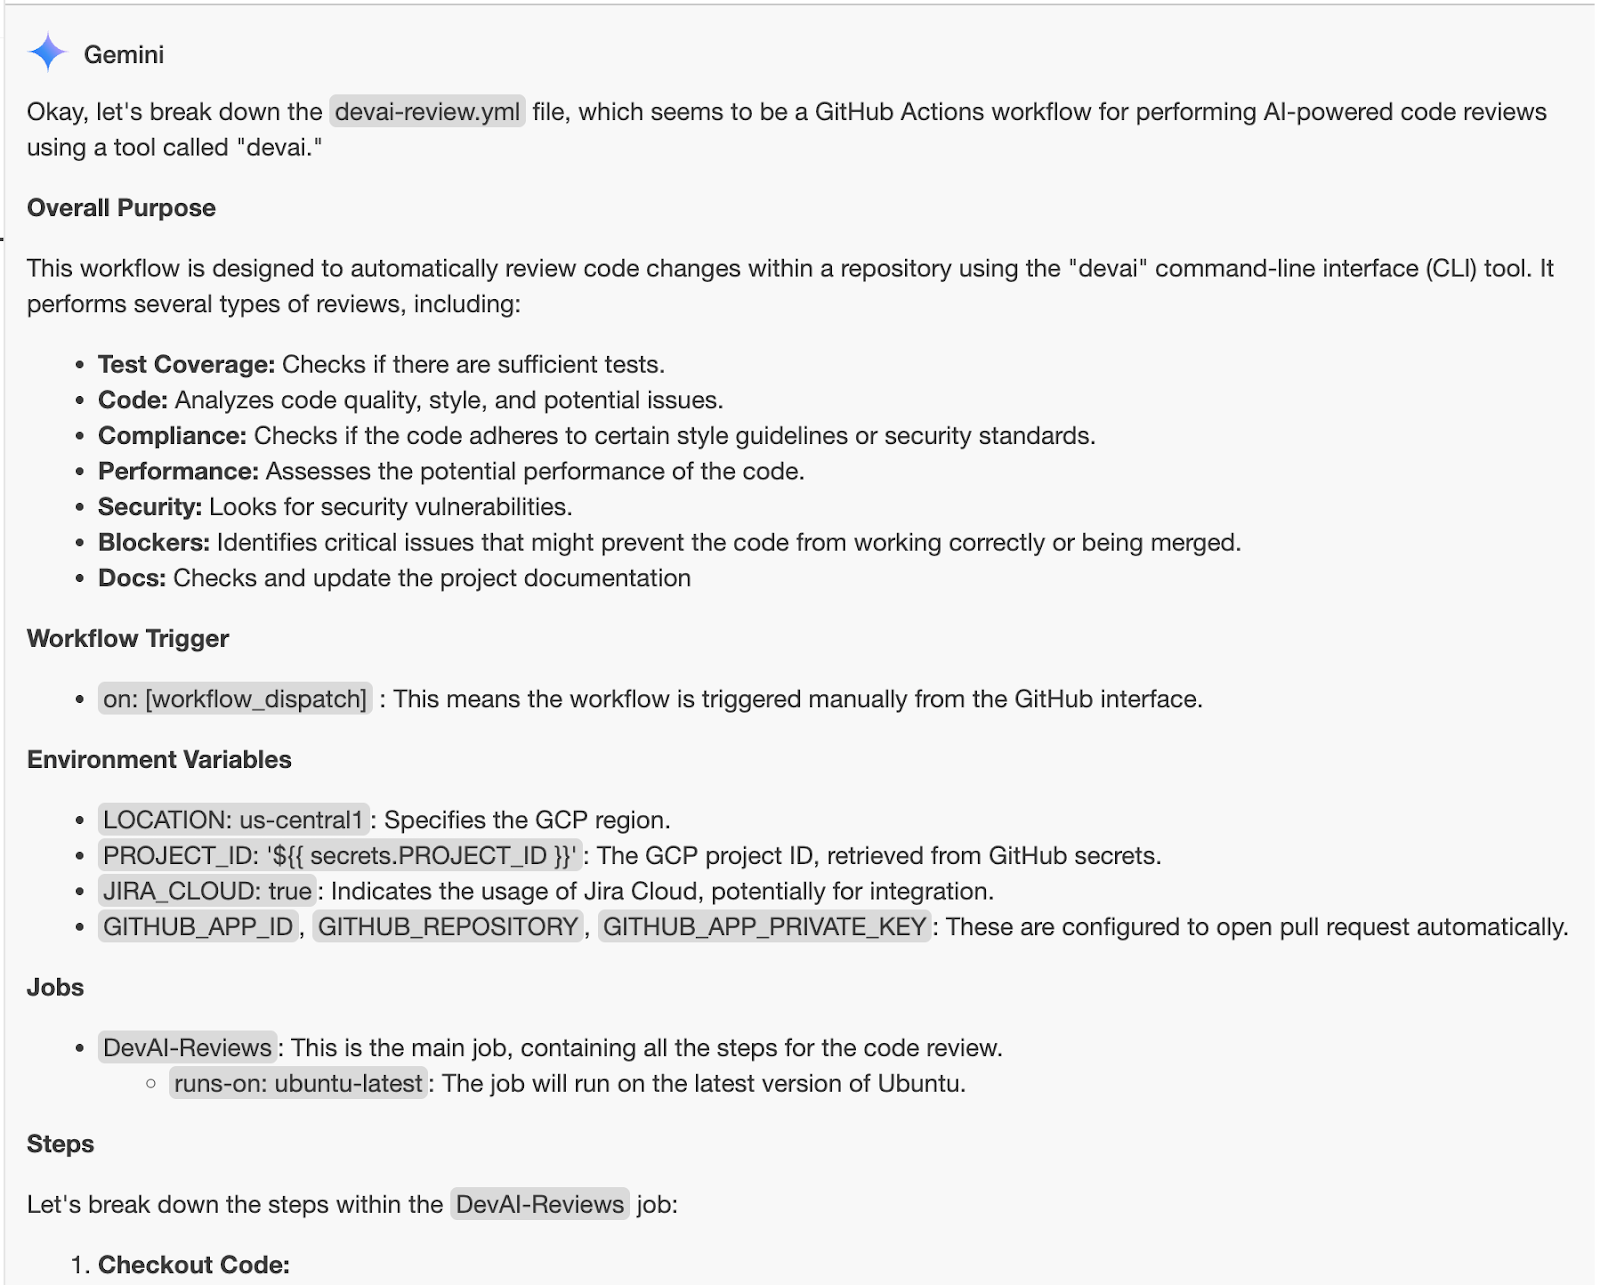
在 devai-review.yml 檔案的任一處按一下滑鼠右鍵,然後選取 Gemini Code Assist > Explain 這個項目。

審查說明:
12. DevAI CLI 開發
在本節中,您將對 devai cli 進行變更。
首先,請設定 Python 虛擬環境、安裝必要元件,然後執行範例指令。
cd ~/genai-for-developers/devai-cli
python3 -m venv venv
. venv/bin/activate
pip3 install -r src/requirements.txt
pip3 install --editable ./src
devai echo
設定必要的環境變數。
export PROJECT_ID=$(gcloud config get-value project)
export LOCATION=us-central1
執行程式碼審查指令,確認一切運作正常:
devai review code -c ~/genai-for-developers/sample-app/src/main/java/anthos/samples/bankofanthos/balancereader > code-review.md

cloudshell edit code-review.md
在 Cloud Shell 編輯器中使用 Markdown 預覽功能查看結果。
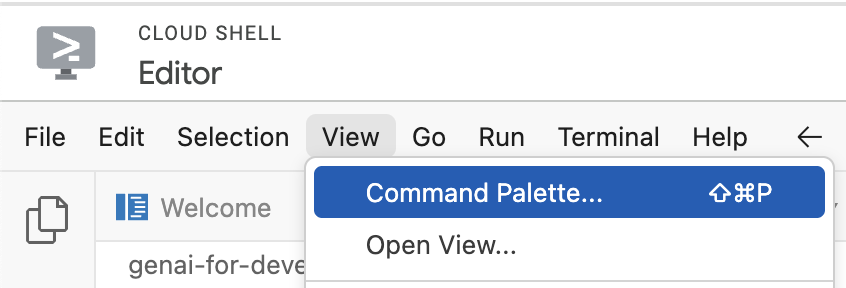
使用指令區塊面板,然後選取「Markdown: Open Preview」。


13. 探索 devai CLI 指令
測試涵蓋率檢查指令
devai review testcoverage -c ~/genai-for-developers/sample-app/src > testcoverage.md

cloudshell edit testcoverage.md
法規遵循審查指令
devai review compliance --context ~/genai-for-developers/sample-app/k8s --config ~/genai-for-developers/devai-cli/.gemini/styleguide.md > k8s-review.md

cloudshell edit k8s-review.md
成效回顧指令
devai review performance -c ~/genai-for-developers/sample-app/src/main/java > performance-review.md

cloudshell edit performance-review.md
安全性檢查指令
devai review security -c ~/genai-for-developers/sample-app/src/main/java > security-review.md

cloudshell edit security-review.md
封鎖器審查指令
devai review blockers -c ~/genai-for-developers/sample-app/pom.xml
devai review blockers -c ~/genai-for-developers/sample-app/setup.md
圖片/圖表審查和摘要
輸入圖表 [~/genai-for-developers/images/extension-diagram.png]:

查看指令:
devai review image \
  -f ~/genai-for-developers/images/extension-diagram.png \
  -p "Review and summarize this diagram" > image-review.md

cloudshell edit image-review.md
輸出:
The diagram outlines a process for conducting local code reviews using a VS Code extension or CLI, leveraging Google Cloud's Vertex AI (Gemini Pro) for generating review prompts.

**Process Flow:**

1. **Code Style Check:** Developers initiate the process by checking their code for adherence to pre-defined style guidelines.
2. **Prompt Generation:** The VS Code extension/CLI sends the code to Vertex AI (Gemini Pro) on Google Cloud.
3. **Vertex AI Review:**  Vertex AI analyzes the code and generates relevant review prompts.
4. **Local Review:** The prompts are sent back to the developer's IDE for their consideration.
5. **Optional Actions:** Developers can optionally:
    - Create new JIRA issues directly from the IDE based on the review prompts.
    - Generate new issues in a GitLab repository.

**Key Components:**

* **VS Code Extension/CLI:** Tools facilitating the interaction with Vertex AI and potential integrations with JIRA and GitLab.
* **Vertex AI (Gemini Pro):**  Google Cloud's generative AI service responsible for understanding the code and generating meaningful review prompts.
* **Google Cloud Secret Manager:** Securely stores API keys and access tokens required to authenticate and interact with Google Cloud services.
* **JIRA/GitLab (Optional):** Issue tracking and project management tools that can be integrated for a streamlined workflow.

**Benefits:**

* **Automated Review Assistance:**  Leveraging AI to generate review prompts saves time and improves the consistency and quality of code reviews.
* **Local Development:** The process empowers developers to conduct reviews locally within their familiar IDE.
* **Integration Options:** The flexibility to integrate with project management tools like JIRA and GitLab streamlines workflow and issue tracking.
圖片差異分析
devai review imgdiff \
  -c ~/genai-for-developers/images/devai-api.png \
  -t ~/genai-for-developers/images/devai-api-slack.png > image-diff-review.md

cloudshell edit image-diff-review.md
輸出:
The following UI elements are missing in the "AFTER UPGRADE STATE" image compared to the "BEFORE UPGRADE STATE" image:

1. **Slack:** The entire Slack element, including the icon, "Team channel" label, and the arrow indicating interaction, is absent in the AFTER UPGRADE image.
2. **Storage Bucket:**  The "Storage Bucket" element with its icon and "PDFs" label is missing in the AFTER UPGRADE image.
3. **"GenAI Agents" label in Vertex AI block:** The BEFORE UPGRADE image has "Vertex AI Agents" and "GenAI Agent" labels within the Vertex AI block, while the AFTER UPGRADE image only has "Vertex AI."
4. **"Open JIRA Issue" and "Team Project" labels:** In the BEFORE UPGRADE image, these labels are connected to the JIRA block with an arrow. These are missing in the AFTER UPGRADE image.

**Decision Explanation:**

The analysis is based on a direct visual comparison of the two provided images, noting the presence and absence of specific UI elements and their associated labels. The elements listed above are present in the BEFORE UPGRADE image but absent in the AFTER UPGRADE image.
影片檔案分析:
devai review video \
  -f "/tmp/video.mp4" \
  -p "Review user journey video and create unit tests using jest framework"
說明文件產生指令
devai document readme -c ~/genai-for-developers/sample-app/src/main/
輸出:
# Bank of Anthos - Balance Reader Service

## Description

The Balance Reader service is a component of the Bank of Anthos sample application. It provides a REST endpoint for retrieving the current balance of a user account. This service demonstrates key concepts for building microservices with Spring Boot and deploying them to a Kubernetes cluster.

## Features
...
在 Cloud Shell 編輯器中查看可用的 devai cli 指令:
cloudshell edit ~/genai-for-developers/devai-cli/README.md
或者,您也可以查看 GitHub 存放區中的 README.md。
14. 恭喜!
恭喜,您已完成程式碼研究室!
涵蓋的內容:
- 在 GitHub 中新增生成式 AI 程式碼審查自動化步驟
- 在本機執行 devai CLI
下一步:
- 更多實作課程即將推出!
清除所用資源
如要避免系統向您的 Google Cloud 帳戶收取本教學課程所用資源的費用,請刪除含有相關資源的專案,或者保留專案但刪除個別資源。
刪除專案
如要避免付費,最簡單的方法就是刪除您為了本教學課程所建立的專案。
© 2024 Google LLC 保留所有權利。Google 和 Google 標誌是 Google LLC 的商標,其他公司和產品名稱則有可能是其關聯公司的商標。