
1. Overview
An agent is an autonomous program that talks to an AI model to perform a goal-based operation using the tools and context it has and is capable of autonomous decision making grounded in truth!
When your application has multiple agents working together autonomously and together as required to cater to its larger purpose with each of its agents being independently knowledgeable and responsible for a specific focus area, then your application becomes a multi-agent system.
The Agent Development Kit (ADK)
Agent Development Kit (ADK) is a flexible and modular framework for developing and deploying AI agents. ADK supports building sophisticated applications by composing multiple, distinct agent instances into a Multi-Agent System (MAS).
In ADK, a multi-agent system is an application where different agents, often forming a hierarchy, collaborate or coordinate to achieve a larger goal. Structuring your application this way offers significant advantages, including enhanced modularity, specialization, reusability, maintainability, and the ability to define structured control flows using dedicated workflow agents.
Things to keep in mind for a multi-agent system
First, It's important to have a proper understanding and reasoning of the specialization for each agent. — "do you know why you need a specific sub-agent for something", work that out first.
Second, How to bring them together with a root agent to route and make sense of each of the responses.
Third, There are multiple types of agent routing that you can find here in this documentation. Make sure which one suits your application's flow. Also what are the various contexts and states that you need for your multi-agent system's flow control.
What you'll build
Let's build a multi-agent system to handle kitchen renovations using MCP Toolbox for AlloyDB & ADK.
- Renovation Proposal Agent
- Permits and Compliance Check Agent
- Order Status Check (Tool using MCP Toolbox for Databases)
Renovation Proposal Agent, to generate the kitchen renovation proposal document.
Permits and Compliance Agent, to take care of permits and compliance related tasks.
Order Status Check Agent, to check order status of materials by working on the order management database that we have set up in AlloyDB. But for this database part, we will use the MCP Toolbox for AlloyDB to implement the status retrieval logic for orders.
2. MCP
MCP stands for Model Context Protocol, an open standard developed by Anthropic that provides a consistent way for AI agents to connect with external tools, services, and data. It essentially functions as a common standard for AI applications, allowing them to seamlessly interact with different data sources and tools.
- It uses a client-server model, where AI applications (the hosts) run the MCP client, which communicates with MCP servers.
- When an AI agent needs to access a specific tool or data, it sends a structured request to the MCP client, which forwards it to the appropriate MCP server.
- Allows AI models to access external data and tools without requiring custom code for each integration.
- Simplifies the process of building agents and complex workflows on top of Large Language Models (LLMs).
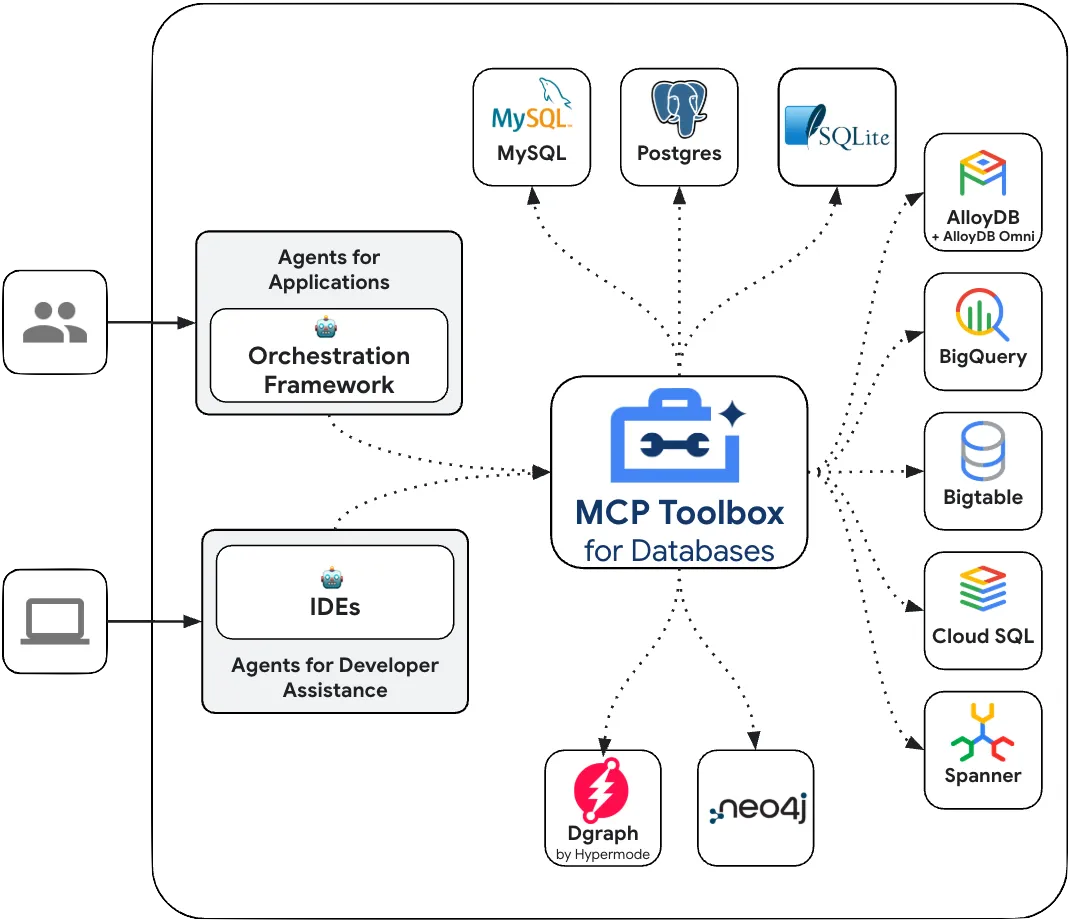
MCP Toolbox for Databases
Google's MCP Toolbox for Databases is an open source MCP server for databases. It was designed with enterprise-grade and production-quality in mind. It enables you to develop tools easier, faster, and more securely by handling the complexities such as connection pooling, authentication, and more.
Let your agents access data in your database!!! How?
Simplified development: Integrate tools to your agent in less than 10 lines of code, reuse tools between multiple agents or frameworks, and deploy new versions of tools more easily.
Better performance: Best practices such as connection pooling, authentication, and more.
Enhanced security: Integrated auth for more secure access to your data
End-to-end observability: Out of the box metrics and tracing with built-in support for OpenTelemetry.
Have to call out the fact that this predated MCP!!!
MCP Toolbox for Databases sits between your agentic application's orchestration framework and your database, providing a control plane that is used to modify, distribute, or invoke tools. It simplifies the management of your tools by providing you with a centralized location to store and update tools, allowing you to share tools between agents and applications and update those tools without necessarily redeploying your application.
We'll have a root agent that orchestrates these agents based on the requirement.
Requirements
3. Before you begin
Create a project
- In the Google Cloud Console, on the project selector page, select or create a Google Cloud project.
- Make sure that billing is enabled for your Cloud project. Learn how to check if billing is enabled on a project .
Also if you are reading this and would like to get some credits to help you get started with Google Cloud and to use ADK, use this link to redeem credits. You can follow the instructions here to redeem it. Please note that this link is valid only till the end of May for redemption.
- Activate Cloud Shell by clicking this link. You can toggle between Cloud Shell Terminal (for running cloud commands) and Editor (for building projects) by clicking on the corresponding button from Cloud Shell.
- Once connected to Cloud Shell, you check that you're already authenticated and that the project is set to your project ID using the following command:
gcloud auth list
- Run the following command in Cloud Shell to confirm that the gcloud command knows about your project.
gcloud config list project
- If your project is not set, use the following command to set it:
gcloud config set project <YOUR_PROJECT_ID>
- Enable the following APIs by running the following commands:
gcloud services enable artifactregistry.googleapis.com \cloudbuild.googleapis.com \run.googleapis.com \aiplatform.googleapis.com \alloydb.googleapis.com
- Make sure to have Python 3.9+
- Refer documentation for gcloud commands and usage.
4. ADK setup
- Create & Activate Virtual Environment (Recommended)
From your Cloud Shell Terminal, create a Virtual Environment:
python -m venv .venv
Activate the Virtual Environment:
source .venv/bin/activate
- Install ADK
pip install google-adk
5. Project Structure
- From Cloud Shell Terminal, run the following commands one by one to create root and project folders:
mkdir agentic-apps
cd agentic-apps
mkdir renovation-agent
- Go to Cloud Shell editor and create the following project structure by creating the files (empty to begin with):
renovation-agent/
        __init__.py
        agent.py
        .env
6. Source Code
- Go to init.py and update with the following content:
from . import agent
- Go to agent.py and update the file with following content from the following path:
https://github.com/AbiramiSukumaran/renovation-agent-adk-mcp-toolbox/blob/main/agent.py
In agent.py, we import necessary dependencies, retrieve configuration parameters from the .env file and define the root_agent which uses 1 tool to invoke the toolbox tool.
- Go to requirements.txt and update it with content from the following:
https://github.com/AbiramiSukumaran/renovation-agent-adk-mcp-toolbox/blob/main/requirements.txt
7. Database Setup
In one of the tools used by the ordering_agent, called "check_status", we access the AlloyDB orders database to get the status of orders. In this section, we'll set up AlloyDB database cluster and instance.
Create a cluster and instance
- Navigate the AlloyDB page in the Cloud Console. An easy way to find most pages in Cloud Console is to search for them using the search bar of the console.
- Select CREATE CLUSTER from that page:
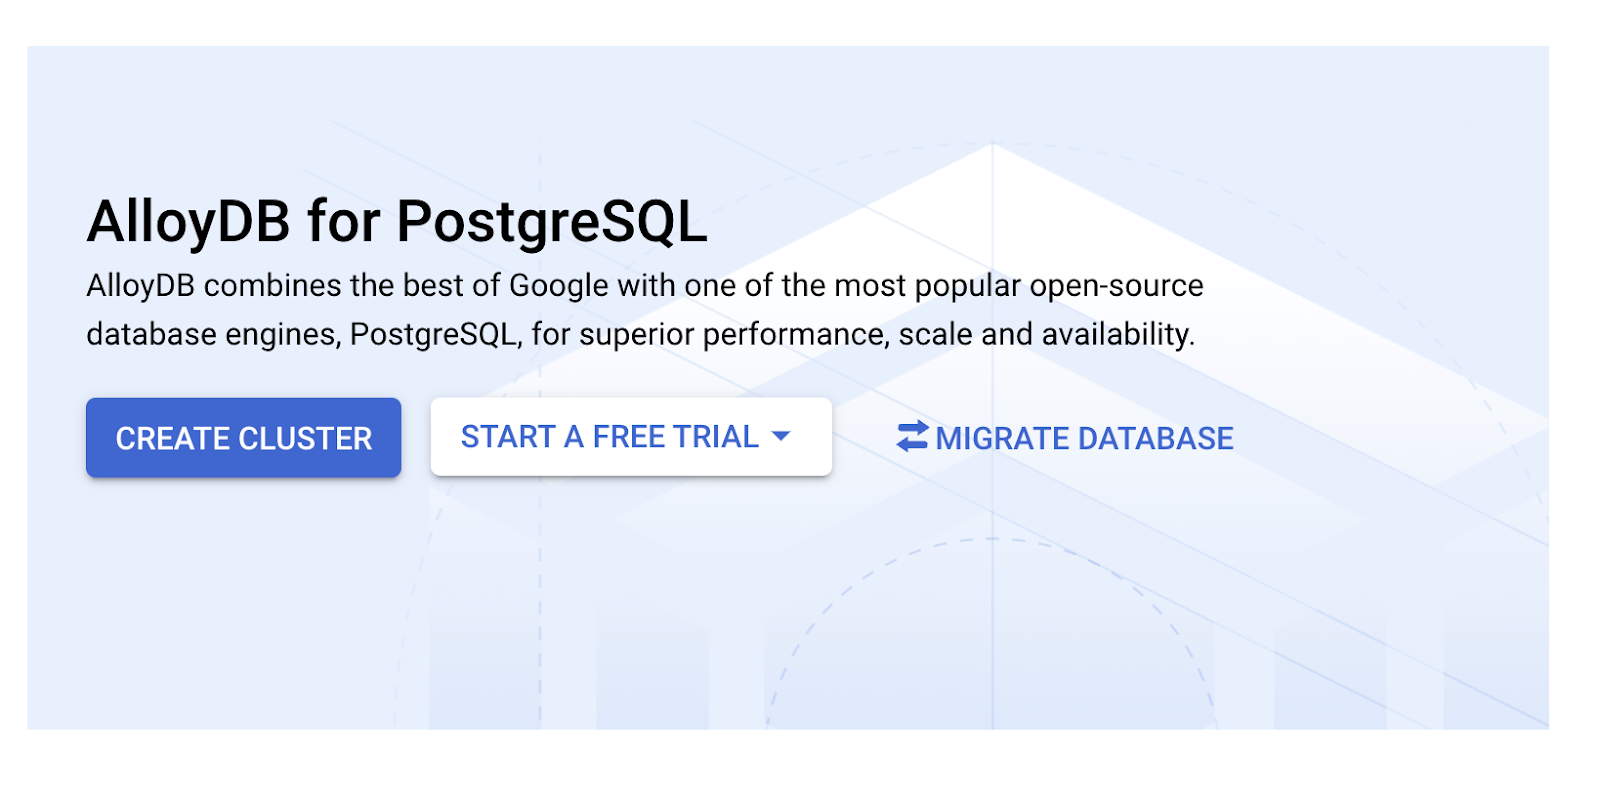
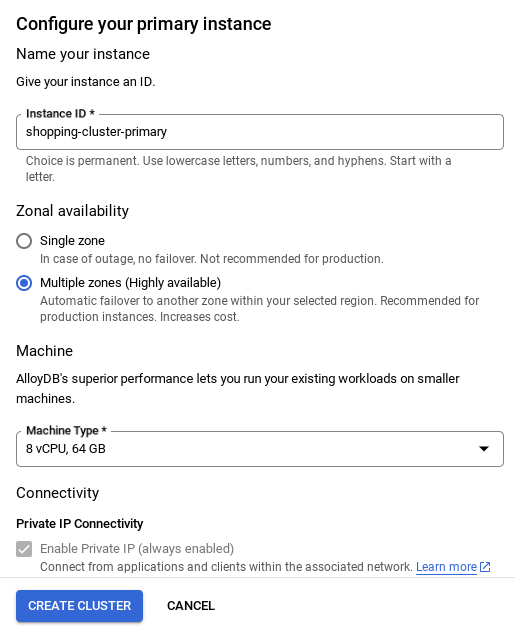
- You'll see a screen like the one below. Create a cluster and instance with the following values (Make sure the values match in case you are cloning the application code from the repo):
- cluster id: "
vector-cluster" - password: "
alloydb" - PostgreSQL 16 compatible / whatever is latest is recommended
- Region: "
us-central1" - Networking: "
default"

- When you select the default network, you'll see a screen like the one below.
Select SET UP CONNECTION.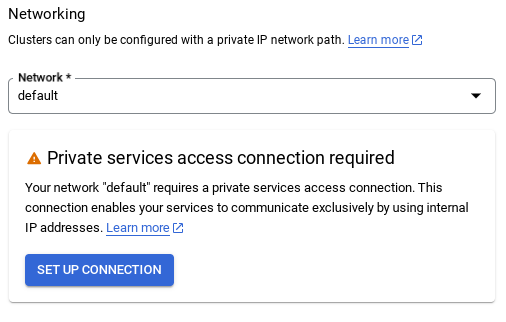
- From there, select "Use an automatically allocated IP range" and Continue. After reviewing the information, select CREATE CONNECTION.

6. IMPORTANT NOTE: Make sure to change the instance id (which you can find at the time of configuration of the cluster / instance) to
vector-instance. If you cannot change it, remember to use your instance id in all the upcoming references.
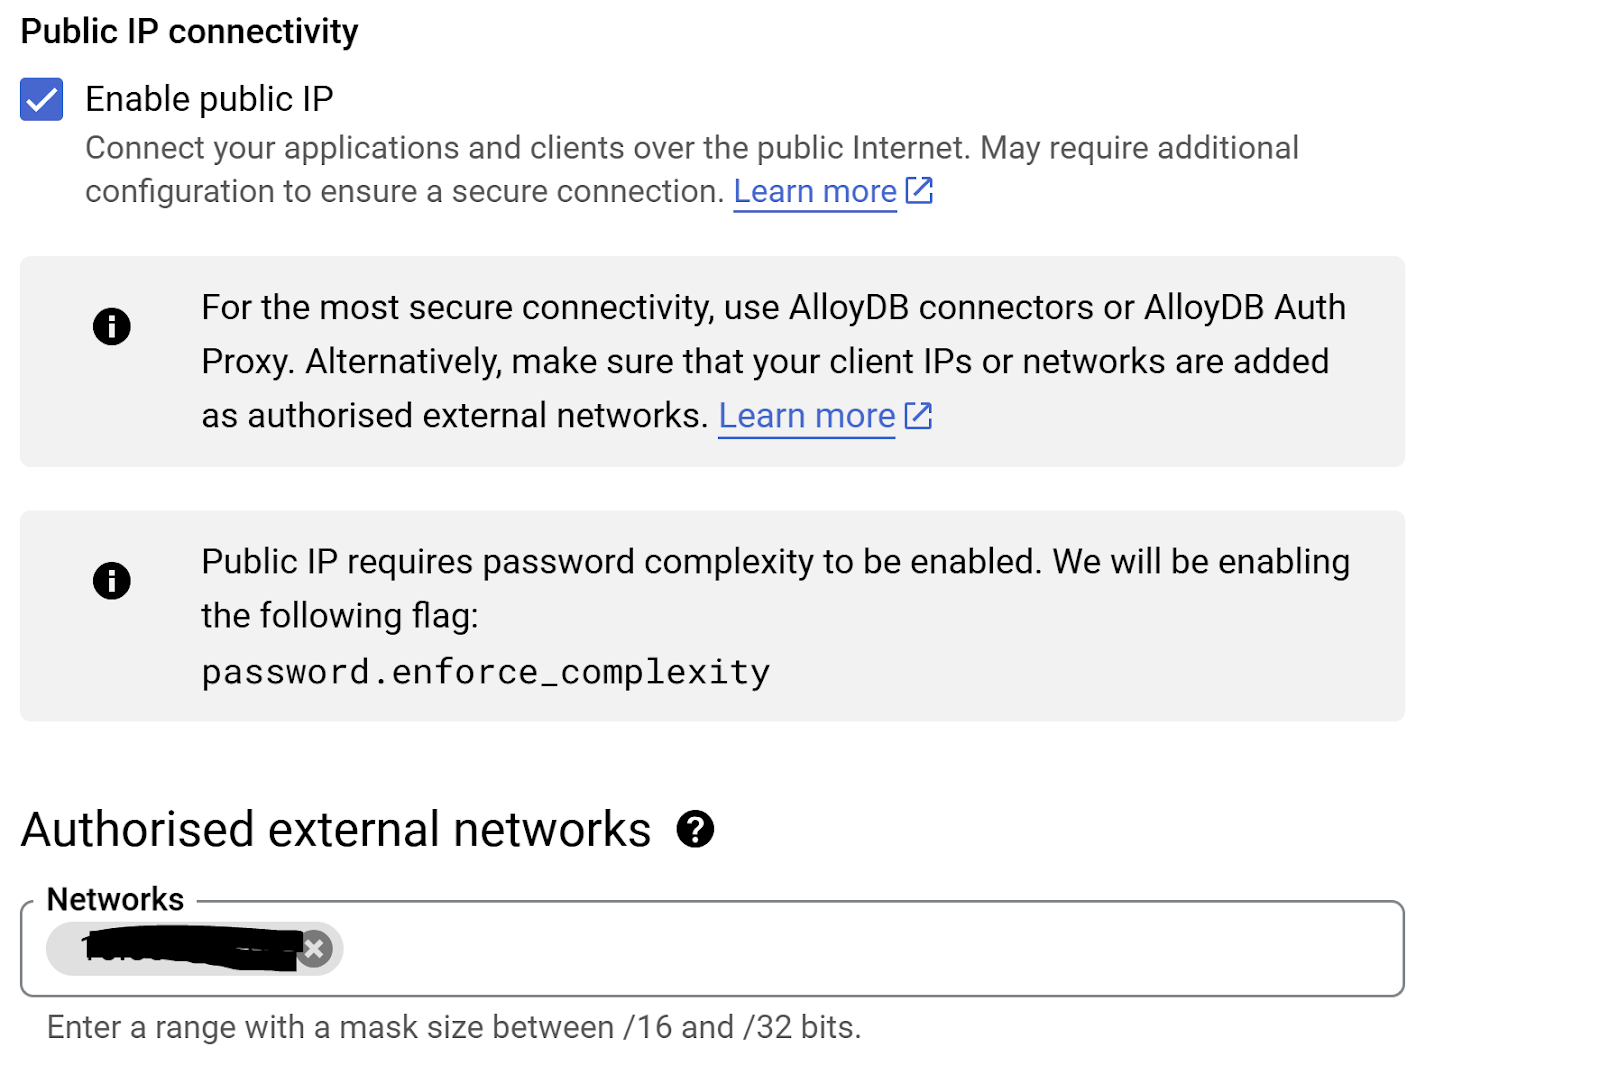
- In preparation for setting up Toolbox, let's enable public IP connectivity in our AlloyDB instance so the new tool can access the database.
- Go to the Public IP connectivity section, check the Enable Public IP checkbox and enter the IP address of your Cloud Shell machine.
- To get your IP of your Cloud Shell machine, go to Cloud Shell Terminal and enter ifconfig. From the result identify the eth0 inet address and replace the last 2 digits with 0.0 with a mask size ‘/16'. For Example it would look like "XX.XX.0.0/16" where XX are numbers.
- Paste this IP in the Authorized external networks "Networks" textbox of the edit instance page.
- Once your network is set up, you can continue to create your cluster. Click CREATE CLUSTER to complete setting up of the cluster as shown below:
Note that the Cluster creation will take around 10 minutes. Once it is successful, you should see a screen that shows the overview of your cluster you just created.
Data ingestion
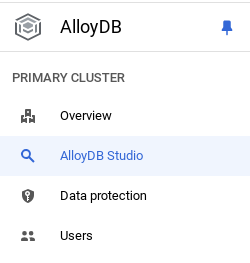
Now it's time to add a table with the data about the store. Navigate to AlloyDB, select the primary cluster and then AlloyDB Studio:
You may need to wait for your instance to finish being created. Once it is, sign into AlloyDB using the credentials you created when you created the cluster. Use the following data for authenticating to PostgreSQL:
- Username : "
postgres" - Database : "
postgres" - Password : "
alloydb"
Once you have authenticated successfully into AlloyDB Studio, SQL commands are entered in the Editor. You can add multiple Editor windows using the plus to the right of the last window.

You'll enter commands for AlloyDB in editor windows, using the Run, Format, and Clear options as necessary.
Create a table
You can create a table using the DDL statement below in the AlloyDB Studio:
-- Table DDL for Procurement Material Order Status

CREATE TABLE material_order_status (
    order_id VARCHAR(50) PRIMARY KEY,
    material_name VARCHAR(100) NOT NULL,
    supplier_name VARCHAR(100) NOT NULL,
    order_date DATE NOT NULL,
    estimated_delivery_date DATE,
    actual_delivery_date DATE,
    quantity_ordered INT NOT NULL,
    quantity_received INT,
    unit_price DECIMAL(10, 2) NOT NULL,
    total_amount DECIMAL(12, 2),
    order_status VARCHAR(50) NOT NULL, -- e.g., "Ordered", "Shipped", "Delivered", "Cancelled"
    delivery_address VARCHAR(255),
    contact_person VARCHAR(100),
    contact_phone VARCHAR(20),
    tracking_number VARCHAR(100),
    notes TEXT,
    created_at TIMESTAMP DEFAULT CURRENT_TIMESTAMP,
    updated_at TIMESTAMP DEFAULT CURRENT_TIMESTAMP,
    quality_check_passed BOOLEAN,  -- Indicates if the material passed quality control
    quality_check_notes TEXT,        -- Notes from the quality control check
    priority VARCHAR(20),            -- e.g., "High", "Medium", "Low"
    project_id VARCHAR(50),          -- Link to a specific project
    receiver_name VARCHAR(100),        -- Name of the person who received the delivery
    return_reason TEXT,               -- Reason for returning material if applicable
    po_number VARCHAR(50)             -- Purchase order number
);
Insert Records
Copy the insert query statement from the database_script.sql script mentioned above to the editor.
Click Run.
Now that the dataset is ready, let's set up the MCP Toolbox for Databases to act as the control plane for all our Order Database interactions in AlloyDB!!!
8. MCP Toolbox for Databases Setup
Toolbox sits between your application's orchestration framework and your database, providing a control plane that is used to modify, distribute, or invoke tools. It simplifies the management of your tools by providing you with a centralized location to store and update tools, allowing you to share tools between agents and applications and update those tools without necessarily redeploying your application.
You can see that one of the databases supported by MCP Toolbox for Databases is AlloyDB and since we have already provisioned that in the previous section, let's go ahead and set up Toolbox.
- Navigate to your Cloud Shell Terminal and make sure your project is selected and shown in the terminal's prompt. Run the below command from your Cloud Shell Terminal to navigate into your project directory:
cd adk-renovation-agent
- Run the below command to download and install toolbox in your new folder:
# see releases page for other versions
export VERSION=0.7.0
curl -O https://storage.googleapis.com/genai-toolbox/v$VERSION/linux/amd64/toolbox
chmod +x toolbox
- Navigate to the Cloud Shell Editor (for code edit mode) and in the project root folder, add a file called "tools.yaml"
sources:
    alloydb-orders:
        kind: "alloydb-postgres"
        project: "<<YOUR_PROJECT_ID>>"
        region: "us-central1"
        cluster: "<<YOUR_ALLOYDB_CLUSTER>>"
        instance: "<<YOUR_ALLOYDB_INSTANCE>>"
        database: "<<YOUR_ALLOYDB_DATABASE>>"
        user: "<<YOUR_ALLOYDB_USER>>"
        password: "<<YOUR_ALLOYDB_PASSWORD>>"

tools:
  get-order-data:
    kind: postgres-sql
    source: alloydb-orders
    description: Get the status of an order based on the material description.
    parameters:
      - name: description
        type: string
        description: A description of the material to search for its order status.
    statement: |
      select order_status from material_order_status where lower(material_name) like lower($1)
      LIMIT 1;
In the query part (refer to "statement" parameter above), we are just retrieving the value for the field order_status when the material name matches the user's search text.
Let's understand tools.yaml
Sources represent your different data sources that a tool can interact with. A Source represents a data source that a tool can interact with. You can define Sources as a map in the sources section of your tools.yaml file. Typically, a source configuration will contain any information needed to connect with and interact with the database.
Tools define actions an agent can take – such as reading and writing to a source. A tool represents an action your agent can take, such as running a SQL statement. You can define Tools as a map in the tools section of your tools.yaml file. Typically, a tool will require a source to act on.
For more details on configuring your tools.yaml, refer to this documentation.
Let's run the MCP Toolbox for Databases Server
Run the following command (from the mcp-toolbox folder) to start the server:
./toolbox --tools-file "tools.yaml"
Now if you open the server in a web preview mode on the cloud, you should be able to see the Toolbox server up and running with your new tool named get-order-data.
The MCP Toolbox Server runs by default on port 5000. Let us use Cloud Shell to test this out.
Click on Web Preview in Cloud Shell as shown below:
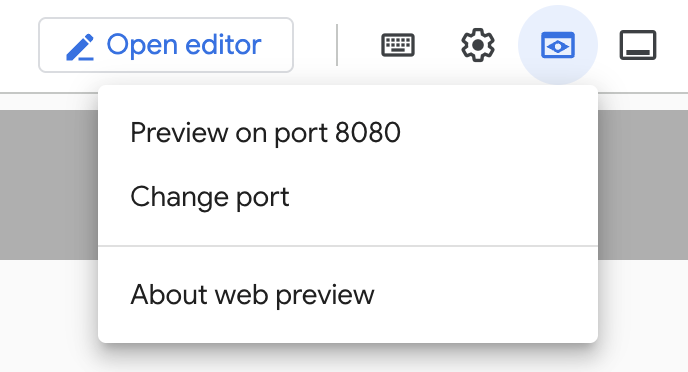
Click on Change port and set the port to 5000 as shown below and click on Change and Preview.
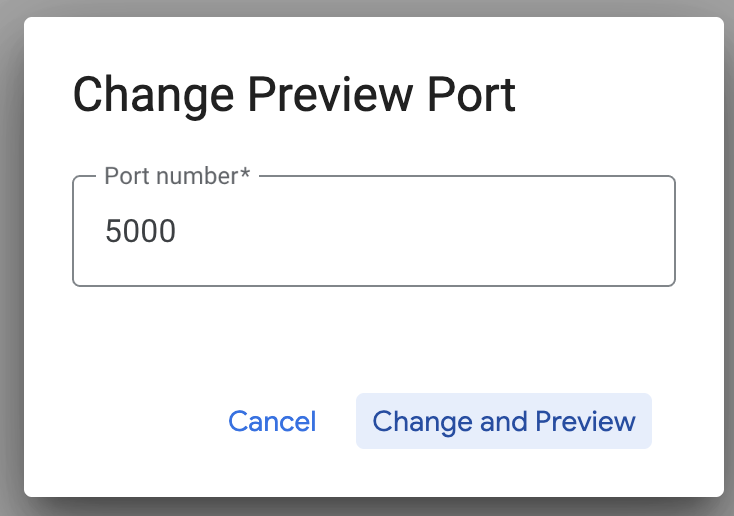
This should bring the output:

The MCP Toolkit for Databases describes a Python SDK for you to validate and test out the tools, which is documented over here. We will skip that and jump directly into the Agent Development Kit (ADK) in the next section that will utilize these tools.
Let's deploy our Toolbox to Cloud Run
First up, we can start with the MCP Toolbox server and host it on Cloud Run. This would then give us a public endpoint that we can integrate with any other application and/or the Agent applications too. The instructions for hosting this on Cloud Run is given here. We shall go through the key steps now.
- Launch a new Cloud Shell Terminal or use an existing Cloud Shell Terminal. Go to the project folder where the toolbox binary and tools.yaml are present, in this case adk-renovation-agent
- Set the PROJECT_ID variable to point to your Google Cloud Project Id.
export PROJECT_ID="<<YOUR_GOOGLE_CLOUD_PROJECT_ID>>"
- Enable these Google Cloud services
gcloud services enable run.googleapis.com \
                       cloudbuild.googleapis.com \
                       artifactregistry.googleapis.com \
                       iam.googleapis.com \
                       secretmanager.googleapis.com
- Let's create a separate service account that will be acting as the identity for the Toolbox service that we will be deploying on Google Cloud Run.
gcloud iam service-accounts create toolbox-identity
- We are also ensuring that this service account has the correct roles i.e. ability to access Secret Manager and talk to AlloyDB
gcloud projects add-iam-policy-binding $PROJECT_ID \
   --member serviceAccount:toolbox-identity@$PROJECT_ID.iam.gserviceaccount.com \
   --role roles/secretmanager.secretAccessor

gcloud projects add-iam-policy-binding $PROJECT_ID \
   --member serviceAccount:toolbox-identity@$PROJECT_ID.iam.gserviceaccount.com \
   --role roles/alloydb.client

gcloud projects add-iam-policy-binding $PROJECT_ID \
   --member serviceAccount:toolbox-identity@$PROJECT_ID.iam.gserviceaccount.com \
   --role roles/serviceusage.serviceUsageConsumer
- We will upload the tools.yaml file as a secret:
gcloud secrets create tools --data-file=tools.yaml
If you already have a secret and want to update the secret version, execute the following:
gcloud secrets versions add tools --data-file=tools.yaml
Set an environment variable to the container image that you want to use for Cloud Run:
export IMAGE=us-central1-docker.pkg.dev/database-toolbox/toolbox/toolbox:latest
- The last step in the familiar deployment command to Cloud Run:
gcloud run deploy toolbox \
--image $IMAGE \
--service-account toolbox-identity \
--region us-central1 \
--set-secrets "/app/tools.yaml=tools:latest" \
--args="--tools-file=/app/tools.yaml","--address=0.0.0.0","--port=8080" \
--allow-unauthenticated
This should start the process of deploying the Toolbox Server with our configured tools.yaml to Cloud Run. On successful deployment, you should see a message similar to the following:
Deploying container to Cloud Run service [toolbox] in project [YOUR_PROJECT_ID] region [us-central1]
OK Deploying new service... Done.
  OK Creating Revision...
  OK Routing traffic...
  OK Setting IAM Policy...
Done.
Service [toolbox] revision [toolbox-00001-zsk] has been deployed and is serving 100 percent of traffic.
Service URL: https://toolbox-<SOME_ID>.us-central1.run.app
You are all set to use your newly deployed tool in your agentic application!!!
Let's connect the Toolbox Tool to our Agent!!!
We have already created the source for our agent application. Let's update that to include a new MCP Toolbox for Databases tool that we just deployed in Cloud Run.
- Observe your requirements.txt file with source from the repo:
We are including the dependency for MCP Toolbox for Databases in requirements.txt
https://github.com/AbiramiSukumaran/renovation-agent-adk-mcp-toolbox/blob/main/requirements.txt
- Observe your agent.py file with the code from the repo:
We are including the tool that invokes the toolbox endpoint to fetch order data for a specific material ordered.
https://github.com/AbiramiSukumaran/renovation-agent-adk-mcp-toolbox/blob/main/agent.py
9. Model Setup
Your agent's ability to understand user requests and generate responses is powered by a Large Language Model (LLM). Your agent needs to make secure calls to this external LLM service, which requires authentication credentials. Without valid authentication, the LLM service will deny the agent's requests, and the agent will be unable to function.
- Get an API key from Google AI Studio.
- In the next step where you set up the .env file, replace
<<your API KEY>>with your actual API KEY value.
10. ENV Variables Setup
- Set up your values for the parameters in the template .env file. In my case, the .env has these variables:
GOOGLE_GENAI_USE_VERTEXAI=FALSE
GOOGLE_API_KEY=<<your API KEY>>
GOOGLE_CLOUD_LOCATION=us-central1 <<or your region>>
GOOGLE_CLOUD_PROJECT=<<your project id>>
PROJECT_ID=<<your project id>>
GOOGLE_CLOUD_REGION=us-central1 <<or your region>>
Replace placeholders with your values.
11. Run Your Agent
- Using the terminal, navigate to the parent directory of your agent project:
cd renovation-agent
- Install dependencies:
pip install -r requirements.txt
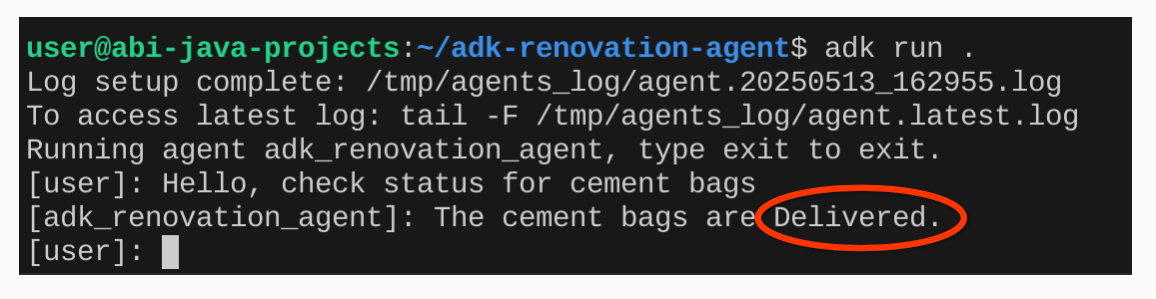
- You can run the following command in your Cloud Shell terminal to execute the agent:
adk run .
- You can run the following to run it in an ADK provisioned web UI:
adk web
- Test with the following prompts:
user>>

Hello. Check order status for Cement Bags.
12. Result
13. Clean up
To avoid incurring charges to your Google Cloud account for the resources used in this post, follow these steps:
- In the Google Cloud console, go to the Manage resources page.
- In the project list, select the project that you want to delete, and then click Delete.
- In the dialog, type the project ID, and then click Shut down to delete the project.
14. Congratulations
Congratulations! You have successfully created a multi-agent application using ADK and MCP Toolbox for Databases! For more information, refer product docs: Agent Development Kit and MCP Toolbox for Databases.