
1. 總覽
BigQuery 是 Google 推出的 PB 規模全代管數據分析資料倉儲系統,由於 BigQuery 沒有基礎架構且不需管理,也不需要資料庫管理員,因此免人工管理。因此,您可以專心分析資料,找出有意義的結果、使用熟悉的 SQL,以及運用我們的即付即用模式。
在本程式碼研究室中,您將使用 Google Cloud BigQuery 用戶端程式庫,透過 Node.js 查詢 BigQuery 公開資料集。
課程內容
- 如何使用 Cloud Shell
- 如何啟用 BigQuery API
- 如何驗證 API 要求
- 如何安裝 Node.js 適用的 BigQuery 用戶端程式庫
- 如何查詢莎士比亞的作品
- 如何查詢 GitHub 資料集
- 如何調整快取及顯示統計資料
軟硬體需求
問卷調查
您會如何使用這個教學課程?
您對 Node.js 的使用體驗有何評價?
根據您使用 Google Cloud Platform 服務的經驗,您會給予什麼評價?
2. 設定和需求
自修環境設定


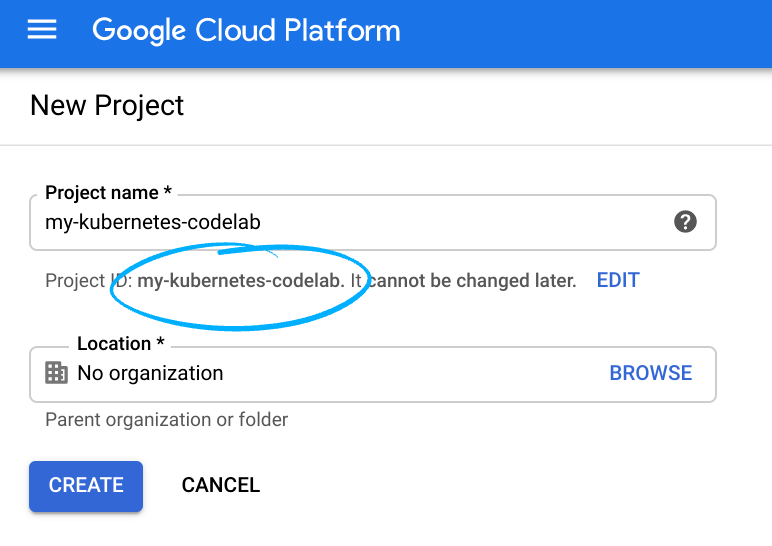
提醒您,專案 ID 是所有 Google Cloud 專案的專屬名稱 (已經有人使用上述名稱,很抱歉對您不符!)。稍後在本程式碼研究室中會稱為 PROJECT_ID。
- 接下來,您需要在 Cloud 控制台中啟用計費功能,才能使用 Google Cloud 資源。
執行這個程式碼研究室並不會產生任何費用,如果有的話。請務必依照「清除所用資源」一節指示本節將說明如何關閉資源,這樣您就不會產生本教學課程結束後產生的費用。Google Cloud 的新使用者符合 $300 美元免費試用計畫的資格。
啟動 Cloud Shell
雖然您可以使用筆記型電腦遠端操作 Cloud SDK 指令列工具,但在本程式碼研究室中,您將使用 Google Cloud Shell,這是在雲端執行的指令列環境。
啟用 Cloud Shell
- 在 Cloud 控制台中,按一下「啟用 Cloud Shell」圖示
。

如果您先前從未啟動 Cloud Shell,您會看見中繼畫面 (需捲動位置),說明螢幕內容。如果出現這種情況,請按一下「繼續」 (之後不會再顯示)。以下是單次畫面的外觀:

佈建並連線至 Cloud Shell 只需幾分鐘的時間。

這個虛擬機器搭載您需要的所有開發工具。提供永久的 5 GB 主目錄,而且在 Google Cloud 中運作,大幅提高網路效能和驗證能力。在本程式碼研究室中,您的大部分作業都可以透過瀏覽器或 Chromebook 完成。
連線至 Cloud Shell 後,您應會發現自己通過驗證,且專案已設為您的專案 ID。
- 在 Cloud Shell 中執行下列指令,確認您已通過驗證:
gcloud auth list
指令輸出
 Credentialed Accounts
ACTIVE  ACCOUNT
*       <my_account>@<my_domain.com>

To set the active account, run:
    $ gcloud config set account `ACCOUNT`
gcloud config list project
指令輸出
[core]
project = <PROJECT_ID>
如果尚未設定,請使用下列指令進行設定:
gcloud config set project <PROJECT_ID>
指令輸出
Updated property [core/project].
3. 啟用 BigQuery API
根據預設,所有 Google Cloud 專案都應啟用 BigQuery API。您可以使用下列指令在 Cloud Shell 中檢查結果是否一致:
gcloud services list
畫面上應會列出 BigQuery:
NAME                              TITLE
bigquery-json.googleapis.com      BigQuery API
...
如果尚未啟用 BigQuery API,可以在 Cloud Shell 中執行下列指令來啟用:
gcloud services enable bigquery-json.googleapis.com
4. 驗證 API 要求
為了向 BigQuery API 傳送要求,您必須使用服務帳戶。服務帳戶屬於您的專案,可供 Google BigQuery Node.js 用戶端程式庫使用 BigQuery API 要求。就像任何其他使用者帳戶一樣,服務帳戶都是以電子郵件地址表示。在本節中,您將使用 Cloud SDK 建立服務帳戶,然後建立必要憑證以服務帳戶身分進行驗證。
首先,使用 PROJECT_ID 設定環境變數,本程式碼研究室將全程使用這個環境變數:
export GOOGLE_CLOUD_PROJECT=$(gcloud config get-value core/project)
接下來,使用下列方法建立新的服務帳戶來存取 BigQuery API:
gcloud iam service-accounts create my-bigquery-sa --display-name "my bigquery codelab service account"
接下來,建立 Node.js 程式碼將用來登入做為新服務帳戶的憑證。建立這些憑證,並將其儲存為 JSON 檔案「~/key.json」使用以下指令:
gcloud iam service-accounts keys create ~/key.json --iam-account my-bigquery-sa@${GOOGLE_CLOUD_PROJECT}.iam.gserviceaccount.com
最後,設定 GOOGLE_APPLICATION_CREDENTIALS 環境變數 (在下個步驟中說明),BigQuery API C# 程式庫會使用這個環境變數來尋找您的憑證。環境變數應設為所建立 JSON 憑證檔案的完整路徑。使用下列指令設定環境變數:
export GOOGLE_APPLICATION_CREDENTIALS="/home/${USER}/key.json"
如要進一步瞭解如何驗證 BigQuery API,請參閱本文。
5. 設定存取權控管
BigQuery 使用 Identity and Access Management (IAM) 來管理資源的存取權。BigQuery 有數個預先定義的角色 (使用者、dataOwner、dataViewer 等),可供指派給您在上一個步驟中建立的服務帳戶。如要進一步瞭解存取權控管,請參閱 BigQuery 說明文件。
查詢公開資料集之前,請先確認服務帳戶至少具備 bigquery.user 角色。在 Cloud Shell 中執行下列指令,將 bigquery.user 角色指派給服務帳戶:
gcloud projects add-iam-policy-binding ${GOOGLE_CLOUD_PROJECT} --member "serviceAccount:my-bigquery-sa@${GOOGLE_CLOUD_PROJECT}.iam.gserviceaccount.com" --role "roles/bigquery.user"
您可以執行下列指令,確認服務帳戶是否已指派給使用者角色:
gcloud projects get-iam-policy $GOOGLE_CLOUD_PROJECT
6. 安裝 Node.js 適用的 BigQuery 用戶端程式庫
首先,請建立 BigQueryDemo 資料夾,並前往該資料夾:
mkdir BigQueryDemo
cd BigQueryDemo
接著,建立用於執行 BigQuery 用戶端程式庫範例的 Node.js 專案:
npm init -y
您應該會看到已建立的 Node.js 專案:
{
  "name": "BigQueryDemo",
  "version": "1.0.0",
  "description": "",
  "main": "index.js",
  "scripts": {
    "test": "echo \"Error: no test specified\" && exit 1"
  },
  "keywords": [],
  "author": "",
  "license": "ISC"
}
安裝 BigQuery 用戶端程式庫:
npm install --save @google-cloud/bigquery
npm notice created a lockfile as package-lock.json. You should commit this file.
npm WARN BigQueryDemo@1.0.0 No description
npm WARN BigQueryDemo@1.0.0 No repository field.
+ @google-cloud/bigquery@2.1.0
added 69 packages from 105 contributors and audited 147 packages in 4.679s
found 0 vulnerabilities
您現在可以使用 BigQuery Node.js 用戶端程式庫了!
7. 查詢莎士比亞的作品
公開資料集是儲存在 BigQuery 中且可供一般大眾使用的任何資料集。還有許多其他公開資料集可供您查詢,其中有些也由 Google 代管,但許多則由第三方代管。詳情請參閱「公開資料集」頁面。
除了公開資料集,BigQuery 還提供一些範例資料表供您查詢。這些資料表包含在 bigquery-public-data:samples dataset 中。其中一個資料表的名稱是 shakespeare.。它內含莎士比亞作品的字詞索引,能夠提供每個字詞在各語料庫中出現的次數。
在這個步驟中,您將查詢 shakespeare 資料表。
首先,開啟 Cloud Shell 右上角的程式碼編輯器:

在 BigQueryDemo 資料夾中建立 queryShakespeare.js 檔案:
touch queryShakespeare.js
請前往 queryShakespeare.js 檔案並插入以下程式碼:
'use strict';

function main() {

    // Import the Google Cloud client library
    const {BigQuery} = require('@google-cloud/bigquery');

    async function queryShakespeare() {
    // Queries a public Shakespeare dataset.

        // Create a client
        const bigqueryClient = new BigQuery();

        // The SQL query to run
        const sqlQuery = `SELECT word, word_count
            FROM \`bigquery-public-data.samples.shakespeare\`
            WHERE corpus = @corpus
            AND word_count >= @min_word_count
            ORDER BY word_count DESC`;

        const options = {
        query: sqlQuery,
        // Location must match that of the dataset(s) referenced in the query.
        location: 'US',
        params: {corpus: 'romeoandjuliet', min_word_count: 250},
        };

        // Run the query
        const [rows] = await bigqueryClient.query(options);

        console.log('Rows:');
        rows.forEach(row => console.log(row));
    }

    queryShakespeare();
  }

main();
請花一兩分鐘研究程式碼,看看資料表如何查詢。
返回 Cloud Shell,執行應用程式:
node queryShakespeare.js
您應該會看到字詞及其發生情況的清單:
Rows:
{ word: 'the', word_count: 614 }
{ word: 'I', word_count: 577 }
{ word: 'and', word_count: 490 }
{ word: 'to', word_count: 486 }
{ word: 'a', word_count: 407 }
{ word: 'of', word_count: 367 }
{ word: 'my', word_count: 314 }
{ word: 'is', word_count: 307 }
...
8. 查詢 GitHub 資料集
為了進一步瞭解 BigQuery,現在請查詢 GitHub 公開資料集。您可以在 GitHub 找到最常見的修訂版本訊息。您也可以使用 BigQuery 的網頁版 UI 來預覽及執行臨時查詢。
如要查看資料,請在 BigQuery 網頁版 UI 中開啟 GitHub 資料集:
如要快速預覽資料,請按一下「預覽」分頁標籤:

在 BigQueryDemo 資料夾中建立 queryGitHub.js 檔案:
touch queryGitHub.js
請前往 queryGitHub.js 檔案並插入以下程式碼:
'use strict';

function main() {

    // Import the Google Cloud client library
    const {BigQuery} = require('@google-cloud/bigquery');


    async function queryGitHub() {
        // Queries a public GitHub dataset.

        // Create a client
        const bigqueryClient = new BigQuery();

        // The SQL query to run
        const sqlQuery = `SELECT subject AS subject, COUNT(*) AS num_duplicates
        FROM \`bigquery-public-data.github_repos.commits\`
        GROUP BY subject
        ORDER BY num_duplicates
        DESC LIMIT 10`;

        const options = {
        query: sqlQuery,
        // Location must match that of the dataset(s) referenced in the query.
        location: 'US',
        };

        // Run the query
        const [rows] = await bigqueryClient.query(options);

        console.log('Rows:');
        rows.forEach(row => console.log(`${row.subject}: ${row.num_duplicates}`));
    }

    queryGitHub();
}

main();
請花一兩分鐘研究程式碼,看看如何查詢最常見的修訂版本訊息。
返回 Cloud Shell,執行應用程式:
node queryGitHub.js
您應該會看到修訂訊息及其發生情況的清單:
Rows:
Update README.md: 2572220
: 1985733
Initial commit: 1940228
Mirroring from Micro.blog.: 646772
update: 592520
Update data.json: 548730
Update data.js: 548354
...
9. 快取與統計資料
當您執行查詢時,BigQuery 會快取結果。因此,後續的相同的查詢將耗費很多時間。您可以使用查詢選項停用快取。BigQuery 也會追蹤部分查詢的統計資料,例如建立時間、結束時間,以及已處理的位元組總數。
在這個步驟中,您將停用快取,並顯示查詢的相關統計資料。
前往 BigQueryDemo 資料夾中的 queryShakespeare.js 檔案,然後將程式碼替換為以下程式碼:
'use strict';

function main() {

    // Import the Google Cloud client library
    const {BigQuery} = require('@google-cloud/bigquery');

    async function queryShakespeareDisableCache() {
        // Queries the Shakespeare dataset with the cache disabled.

        // Create a client
        const bigqueryClient = new BigQuery();

        const sqlQuery = `SELECT word, word_count
            FROM \`bigquery-public-data.samples.shakespeare\`
            WHERE corpus = @corpus
            AND word_count >= @min_word_count
            ORDER BY word_count DESC`;

        const options = {
            query: sqlQuery,
            // Location must match that of the dataset(s) referenced in the query.
            location: 'US',
            params: {corpus: 'romeoandjuliet', min_word_count: 250},
            useQueryCache: false,
        };

        // Run the query as a job
        const [job] = await bigqueryClient.createQueryJob(options);
        console.log(`Job ${job.id} started.`);

        // Wait for the query to finish
        const [rows] = await job.getQueryResults();

        // Print the results
        console.log('Rows:');
        rows.forEach(row => console.log(row));

        // Print job statistics
        console.log('JOB STATISTICS:')
        console.log(`Status: ${job.metadata.status.state}`);
        console.log(`Creation time: ${job.metadata.statistics.creationTime}`);
        console.log(`Start time: ${job.metadata.statistics.startTime}`);
        console.log(`Statement type: ${job.metadata.statistics.query.statementType}`);
    }
    queryShakespeareDisableCache();
}

main();
程式碼的幾個注意事項。首先,在 options 物件內將 UseQueryCache 設為 false,即可停用快取。其次,您從工作物件存取了有關查詢的統計資料。
返回 Cloud Shell,執行應用程式:
node queryShakespeare.js
您應該會看到修訂版本訊息及其發生情況的清單。此外,您也應該會看到有關查詢的一些統計資料:
Rows:
{ word: 'the', word_count: 614 }
{ word: 'I', word_count: 577 }
{ word: 'and', word_count: 490 }
{ word: 'to', word_count: 486 }
{ word: 'a', word_count: 407 }
{ word: 'of', word_count: 367 }
{ word: 'my', word_count: 314 }
{ word: 'is', word_count: 307 }
{ word: 'in', word_count: 291 }
{ word: 'you', word_count: 271 }
{ word: 'that', word_count: 270 }
{ word: 'me', word_count: 263 }
JOB STATISTICS:
Status: RUNNING
Creation time: 1554309220660
Start time: 1554309220793
Statement type: SELECT
10. 將資料載入 BigQuery
如要查詢自己的資料,就必須先將資料載入 BigQuery。BigQuery 支援從許多來源載入資料,例如 Google Cloud Storage、其他 Google 服務或可讀取的本機來源。甚至可以串流資料。詳情請參閱將資料載入 BigQuery 頁面。
在這個步驟中,您將將儲存在 Google Cloud Storage 中的 JSON 檔案載入 BigQuery 資料表。JSON 檔案位於:gs://cloud-samples-data/bigquery/us-states/us-states.json
如要進一步瞭解 JSON 檔案的內容,可以使用 gsutil 指令列工具,下載至 Cloud Shell 中:
gsutil cp gs://cloud-samples-data/bigquery/us-states/us-states.json .
Copying gs://cloud-samples-data/bigquery/us-states/us-states.json...
/ [1 files][  2.0 KiB/  2.0 KiB]
Operation completed over 1 objects/2.0 KiB.
可以看到其中包含美國州份清單,且每個州都是 JSON 物件,每行一個:
less us-states.json
{"name": "Alabama", "post_abbr": "AL"}
{"name": "Alaska", "post_abbr":  "AK"}
...
如要將這個 JSON 檔案載入 BigQuery,請在 BigQueryDemo 資料夾中建立 createDataset.js 檔案和 loadBigQueryJSON.js 檔案:
touch createDataset.js
touch loadBigQueryJSON.js
安裝 Google Cloud Storage Node.js 用戶端程式庫:
npm install --save @google-cloud/storage
請前往 createDataset.js 檔案並插入以下程式碼:
'use strict';

function main() {
    // Import the Google Cloud client libraries
    const {BigQuery} = require('@google-cloud/bigquery');

    async function createDataset() {
        const datasetId = "my_states_dataset3";

        const bigqueryClient = new BigQuery();

        // Specify the geographic location where the dataset should reside
        const options = {
        location: 'US',
        };

        // Create a new dataset
        const [dataset] = await bigqueryClient.createDataset(datasetId, options);
        console.log(`Dataset ${dataset.id} created.`);
    }

    createDataset();
}

main();
接著,前往 loadBigQueryJSON.js 檔案並插入以下程式碼:
'use strict';

function main() {
    // Import the Google Cloud client libraries
    const {BigQuery} = require('@google-cloud/bigquery');
    const {Storage} = require('@google-cloud/storage');

    const datasetId = "my_states_dataset3";
    const tableId = "my_states_table";


    async function createTable(datasetId, tableId) {
        // Creates a new table

        // Create a client
        const bigqueryClient = new BigQuery();

        const options = {
            location: 'US',
            };

        // Create a new table in the dataset
        const [table] = await bigqueryClient
        .dataset(datasetId)
        .createTable(tableId, options);

        console.log(`Table ${table.id} created.`);
    }

    async function loadJSONFromGCS(datasetId, tableId) {
        // Import a GCS file into a table with manually defined schema.

        // Instantiate clients
        const bigqueryClient = new BigQuery();
        const storageClient = new Storage();

        const bucketName = 'cloud-samples-data';
        const filename = 'bigquery/us-states/us-states.json';

        // Configure the load job.
        const metadata = {
        sourceFormat: 'NEWLINE_DELIMITED_JSON',
        schema: {
            fields: [
            {name: 'name', type: 'STRING'},
            {name: 'post_abbr', type: 'STRING'},
            ],
        },
        location: 'US',
        };

        // Load data from a Google Cloud Storage file into the table
        const [job] = await bigqueryClient
        .dataset(datasetId)
        .table(tableId)
        .load(storageClient.bucket(bucketName).file(filename), metadata);

        // load() waits for the job to finish
        console.log(`Job ${job.id} completed.`);

        // Check the job's status for errors
        const errors = job.status.errors;
        if (errors && errors.length > 0) {
        throw errors;
        }
    }

    // createDataset(datasetId);
    createTable(datasetId, tableId);
    loadJSONFromGCS(datasetId, tableId);
}

main();
請花一兩分鐘研究一下程式碼如何載入 JSON 檔案,並在資料集中建立資料表 (含結構定義)。
返回 Cloud Shell,執行應用程式:
node createDataset.js
node loadBigQueryJSON.js
資料集和資料表是在 BigQuery 中建立:
Table my_states_table created.
Job [JOB ID] completed.
如要確認資料集是否建立完成,請前往 BigQuery 網頁版 UI。畫面上會顯示新的資料集和資料表。如果您切換至表格的「預覽」分頁,就可以查看實際資料:

11. 恭喜!
您已瞭解如何透過 Node.js 使用 BigQuery!
清除所用資源
如何避免系統向您的 Google Cloud Platform 帳戶收取您在本快速入門導覽課程中所用資源的相關費用:
- 前往 Cloud Platform 主控台。
- 選取您要關閉的專案,然後按一下「刪除」會安排將專案刪除。
瞭解詳情
- Google BigQuery:https://cloud.google.com/bigquery/docs/
- Google Cloud Platform 上的 Node.js:https://cloud.google.com/nodejs/
- Google BigQuery Node.js 用戶端程式庫:https://github.com/googleapis/nodejs-bigquery
授權
這項內容採用的是創用 CC 姓名標示 2.0 通用授權。