
关于此 Codelab
1. 概览
在本实验中,您将构建一个解决方案,以便使用 GenAI 自动实现 JIRA 用户故事。

学习内容
本实验包含几个主要部分:
- 部署 Cloud Run 应用以集成 Gemini API
- 创建和部署适用于 JIRA 的 Atlassian Forge 应用
- 使用 LangChain ReAct Agent 自动执行 GitLab 任务
前提条件
- 本实验假设您熟悉 Cloud 控制台和 Cloud Shell 环境。
2. 设置和要求
Cloud 项目设置
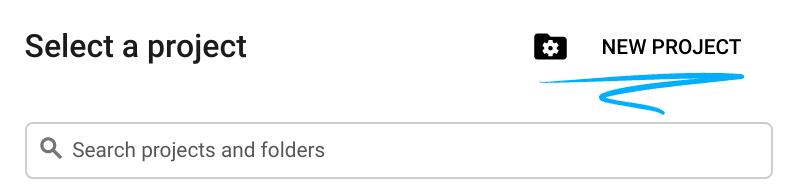
- 登录 Google Cloud 控制台,然后创建一个新项目或重复使用现有项目。如果您还没有 Gmail 或 Google Workspace 账号,则必须创建一个。


- 项目名称是此项目参与者的显示名称。它是 Google API 尚未使用的字符串。您可以随时对其进行更新。
- 项目 ID 在所有 Google Cloud 项目中是唯一的,并且是不可变的(一经设置便无法更改)。Cloud 控制台会自动生成一个唯一字符串;通常情况下,您无需关注该字符串。在大多数 Codelab 中,您都需要引用项目 ID(通常用
PROJECT_ID标识)。如果您不喜欢生成的 ID,可以再随机生成一个 ID。或者,您也可以尝试自己的项目 ID,看看是否可用。完成此步骤后便无法更改该 ID,并且此 ID 在项目期间会一直保留。 - 此外,还有第三个值,即部分 API 使用的项目编号,供您参考。如需详细了解所有这三个值,请参阅文档。
- 接下来,您需要在 Cloud 控制台中启用结算功能,以便使用 Cloud 资源/API。运行此 Codelab 应该不会产生太多的费用(如果有的话)。若要关闭资源以避免产生超出本教程范围的结算费用,您可以删除自己创建的资源或删除项目。Google Cloud 新用户符合参与 300 美元免费试用计划的条件。
环境设置
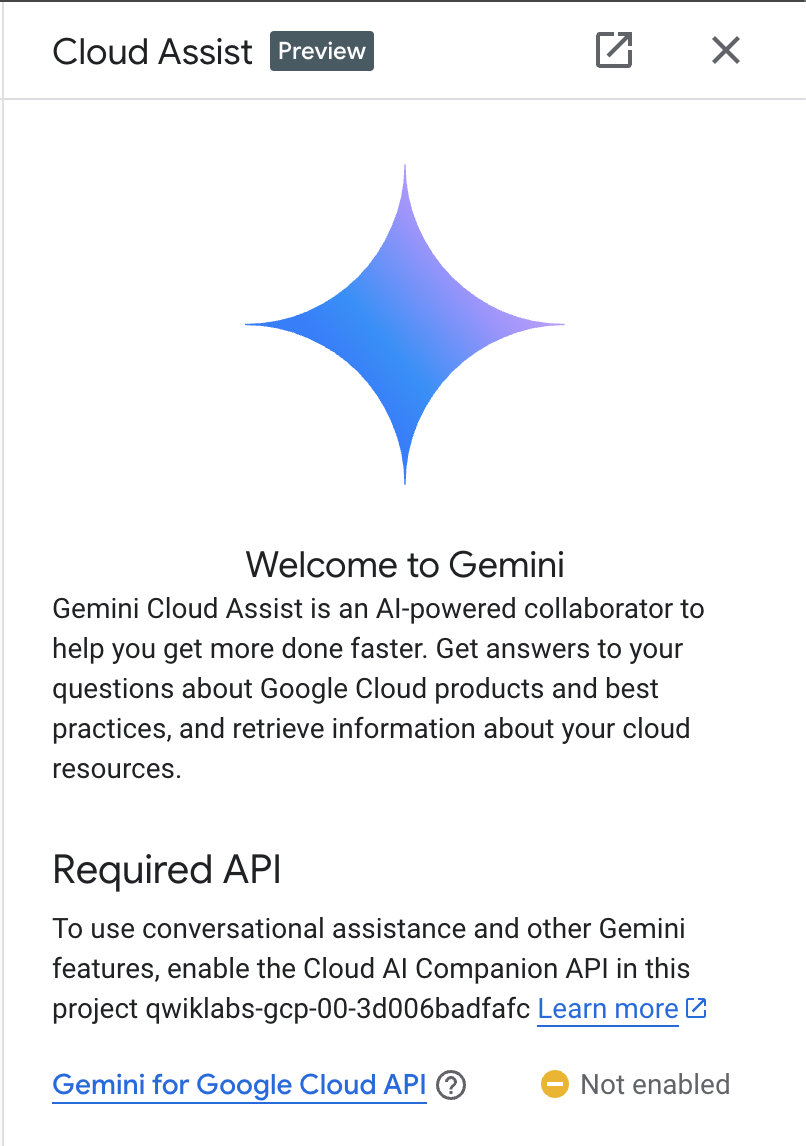
打开 Gemini 聊天。

或者,在搜索栏中输入“问一问 Gemini”。

为 Google Cloud API 启用 Gemini:
点击“Start chatting”,然后按照其中一个示例问题操作,或输入您自己的问题进行试用。

建议尝试的提示:
- 通过 5 个要点介绍 Cloud Run。
- 您是 Google Cloud Run 产品经理,需要用 5 个简短的要点向学生介绍 Cloud Run。
- 您是 Google Cloud Run 产品经理,需要向一名经过认证的 Kubernetes 开发者简要说明 5 个 Cloud Run 要点。
- 您是 Google Cloud Run 产品经理,请用 5 个关键要点向一名高级开发者说明何时使用 Cloud Run 而非 GKE。
如需详细了解如何撰写更优质的提示,请参阅提示指南。
Google Cloud 专用 Gemini 如何使用您的数据
Google 的隐私保护承诺
Google 是业界首家发布 AI/机器学习隐私权承诺的公司之一,该承诺概述了我们的信念:客户应拥有最高级别的安全性,并能够控制其在云中存储的数据。
您提交和接收的数据
您向 Gemini 提出的问题(包括您提交给 Gemini 以供分析或完成的任何输入信息或代码)称为“提示”。您从 Gemini 收到的答案或代码补全项称为“回答”。Gemini 不会将您的提示或其回答用作训练模型的数据。
提示的加密
当您向 Gemini 提交问题时,您的数据会在传输过程中进行加密,以便作为 Gemini 中底层模型的输入。
通过 Gemini 生成的节目数据
Gemini 使用第一方 Google Cloud 代码和部分第三方代码进行训练。您负责代码的安全性、测试和有效性,包括 Gemini 为您提供的任何代码补全、生成或分析。
详细了解 Google 如何处理你的提示。
3. 用于测试提示的选项
您可以通过多种方式测试提示。
Vertex AI Studio 是 Google Cloud 的 Vertex AI 平台的一部分,专为简化和加速生成式 AI 模型的开发和使用而设计。
Google AI Studio 是一款基于网络的工具,可用于对问题生成技术和 Gemini API 进行原型设计和实验。
- Gemini Web 应用 (gemini.google.com)
Google Gemini Web 应用 (gemini.google.com) 是一款基于 Web 的工具,旨在帮助您探索和利用 Google 的 Gemini AI 模型的强大功能。
- Android 版 Google Gemini 移动应用和 iOS 版 Google 应用
4. 审核申请
创建服务账号
返回 Google Cloud 控制台,然后点击搜索栏右侧的图标激活 Cloud Shell。

在打开的终端中,运行以下命令以创建新的服务账号和密钥。
您将使用此服务账号从 Cloud Run 应用对 Vertex AI Gemini API 进行 API 调用。
使用您的 Qwiklabs 项目详细信息配置项目详细信息。
示例:qwiklabs-gcp-00-2c10937585bb
gcloud config set project YOUR_QWIKLABS_PROJECT_ID
创建服务账号。
PROJECT_ID=$(gcloud config get-value project)
SERVICE_ACCOUNT_NAME='vertex-client'
DISPLAY_NAME='Vertex Client'

gcloud iam service-accounts create $SERVICE_ACCOUNT_NAME --project $PROJECT_ID --display-name "$DISPLAY_NAME"
授予角色。
gcloud projects add-iam-policy-binding $PROJECT_ID --member="serviceAccount:$SERVICE_ACCOUNT_NAME@$PROJECT_ID.iam.gserviceaccount.com" --role="roles/aiplatform.admin"

gcloud projects add-iam-policy-binding $PROJECT_ID --member="serviceAccount:$SERVICE_ACCOUNT_NAME@$PROJECT_ID.iam.gserviceaccount.com" --role="roles/aiplatform.user"

gcloud projects add-iam-policy-binding $PROJECT_ID --member="serviceAccount:$SERVICE_ACCOUNT_NAME@$PROJECT_ID.iam.gserviceaccount.com" --role="roles/cloudbuild.builds.editor"

gcloud projects add-iam-policy-binding $PROJECT_ID --member="serviceAccount:$SERVICE_ACCOUNT_NAME@$PROJECT_ID.iam.gserviceaccount.com" --role="roles/artifactregistry.admin"

gcloud projects add-iam-policy-binding $PROJECT_ID --member="serviceAccount:$SERVICE_ACCOUNT_NAME@$PROJECT_ID.iam.gserviceaccount.com" --role="roles/storage.admin"

gcloud projects add-iam-policy-binding $PROJECT_ID --member="serviceAccount:$SERVICE_ACCOUNT_NAME@$PROJECT_ID.iam.gserviceaccount.com" --role="roles/run.admin"

gcloud projects add-iam-policy-binding $PROJECT_ID --member="serviceAccount:$SERVICE_ACCOUNT_NAME@$PROJECT_ID.iam.gserviceaccount.com" --role="roles/secretmanager.secretAccessor"
如果系统提示您进行授权,请点击“授权”以继续。

启用所需服务,以便使用 Vertex AI API 和 Gemini 聊天功能。
gcloud services enable \
    generativelanguage.googleapis.com \
    aiplatform.googleapis.com \
    cloudaicompanion.googleapis.com \
    run.googleapis.com \
    cloudresourcemanager.googleapis.com
启用所需服务,以便使用 Vertex AI API 和 Gemini 聊天功能。
gcloud services enable \
    artifactregistry.googleapis.com \
    cloudbuild.googleapis.com \
    runapps.googleapis.com \
    workstations.googleapis.com \
    servicemanagement.googleapis.com \
    secretmanager.googleapis.com \
    containerscanning.googleapis.com
克隆 GitHub 代码库
克隆 GitHub 代码库。
git clone https://github.com/GoogleCloudPlatform/genai-for-developers.git
打开 Cloud Shell Editor

使用“File / Open Folder”菜单项打开“genai-for-developers”。
打开文件“devai-api/app/routes.py”,然后右键点击文件中的任意位置,并从上下文菜单中选择“Gemini > Explain this"”。

查看 Gemini 对所选文件的说明。

5. GitLab 代码库和工具包配置
在本实验中,您将使用 GitLabToolkit 自动创建 GitLab 合并请求。
LangChain 工具包概览
LangChain 工具包是一组工具,旨在简化和提升使用 LangChain 开发应用的效率。它们提供的功能因具体工具包而异,但通常有助于:
- 连接到外部数据源:访问 API、数据库和其他外部来源中的信息,并将其纳入 LangChain 应用。
- 高级提示技巧:利用预构建的提示或创建自定义提示,以优化与语言模型的互动。
- 创建和管理链:轻松构建复杂的链,并高效地进行管理。
- 评估和监控:分析 LangChain 应用和链的性能。
一些热门的 LangChain 工具包包括:
- 代理执行器工具包:用于开发可通过网络浏览或代码执行等操作与现实世界互动的代理的工具。
- 提示工程工具包:一系列用于撰写有效提示的资源。
GitLab 工具包概览
Gitlab 工具包包含一些工具,可让 LLM 代理与 gitlab 代码库进行交互。该工具是 python-gitlab 库的封装容器。
GitLab 工具包可以执行以下任务:
- 创建文件 - 在代码库中创建新文件。
- 读取文件 - 从代码库中读取文件。
- 更新文件 - 更新代码库中的文件。
- 创建拉取请求 - 从聊天机器人的工作分支创建一个拉取请求,将其发送到基础分支。
- Get Issue - 从代码库提取问题。
- Get Issue - 提取有关特定问题的详细信息。
- 对问题发表评论 - 针对特定问题发表评论。
- 删除文件 - 从代码库中删除文件。
GitLab 项目设置
打开 GitLab,创建一个新项目,然后在“Settings / Access Tokens”下设置项目访问令牌。
使用以下详细信息:
- 令牌名称:
devai-api-qwiklabs - 角色:
Maintainer - 选择镜重:
api
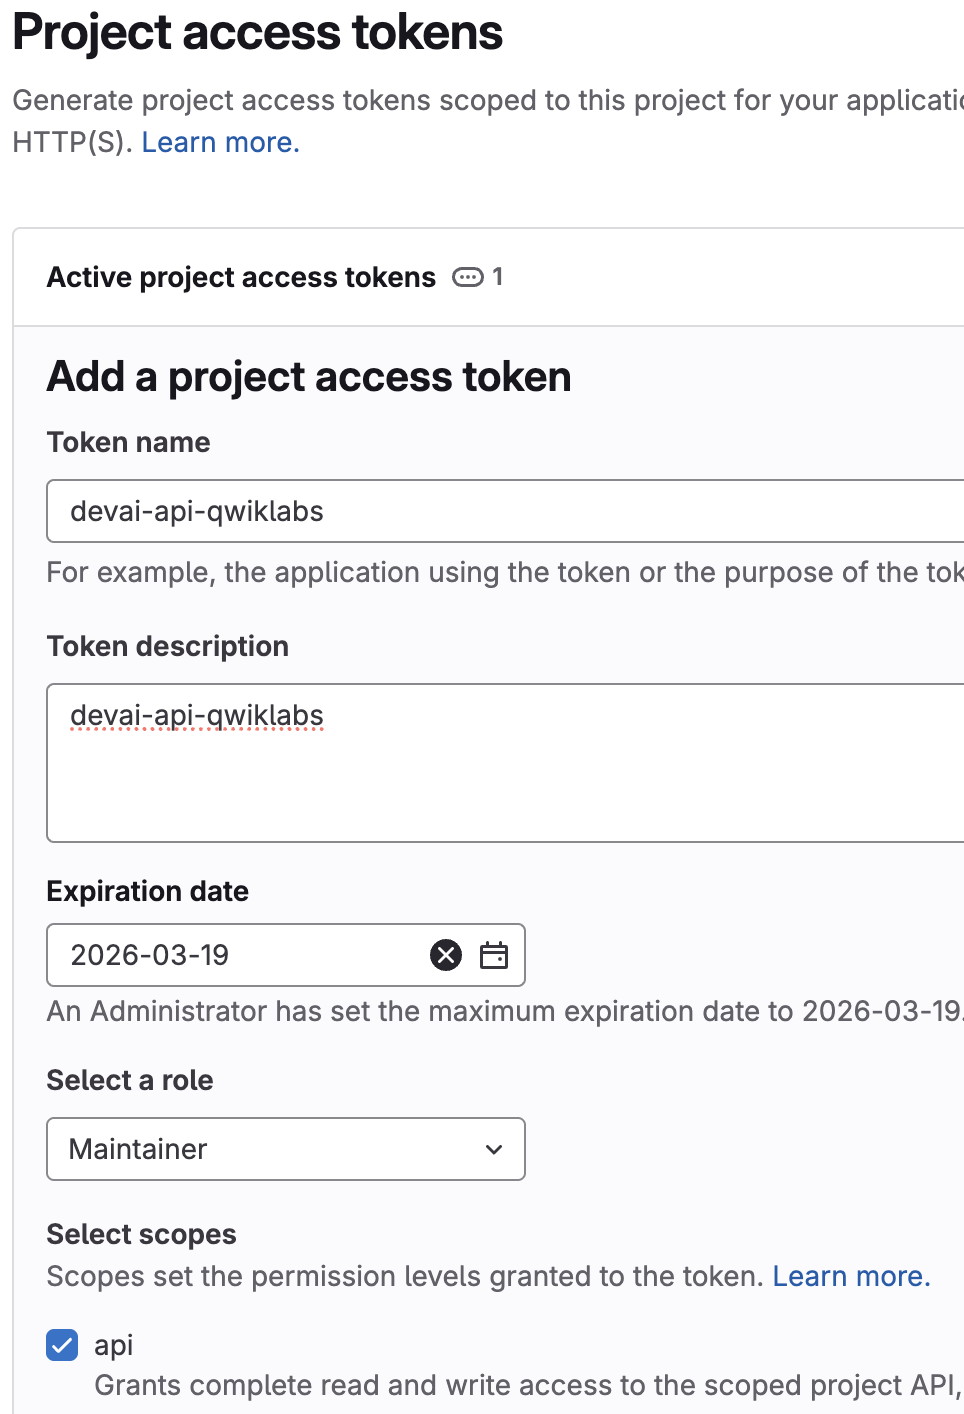
将访问令牌值复制并粘贴到笔记本电脑上的临时文件中,以便在后续步骤中使用。
6. 准备在 Cloud Run 上部署应用
返回 Cloud Shell Editor,然后使用现有终端或打开新终端。

使用您的 Qwiklabs 项目详细信息配置项目详细信息。
示例:qwiklabs-gcp-00-2c10937585bb
gcloud config set project YOUR-QWIKLABS-PROJECT-ID
设置其余的环境变量:
export PROJECT_ID=$(gcloud config get-value project)
export LOCATION=us-central1
export REPO_NAME=devai-api
export SERVICE_NAME=devai-api
设置 GitLab 集成所需的环境变量。
export GITLAB_PERSONAL_ACCESS_TOKEN=gitlab-token
为避免在终端中泄露敏感信息,最佳做法是使用 read -s GITLAB_PERSONAL_ACCESS_TOKEN,这是设置环境变量的安全方式,不会在控制台的命令历史记录中显示值。运行该脚本后,您必须粘贴该值并按 Enter 键。您还需要导出环境变量:export GITLAB_PERSONAL_ACCESS_TOKEN
此命令要求您更新 GitLab 用户 ID 和代码库名称。
示例:export GITLAB_REPOSITORY="gitrey/qwiklabs-test"

export GITLAB_REPOSITORY="USERID/REPOSITORY"
设置其余的环境变量:
export GITLAB_URL="https://gitlab.com"
export GITLAB_BRANCH="devai"
export GITLAB_BASE_BRANCH="main"
LangSmith LLM 跟踪配置
如果您想在 LangSmith 中查看代理跟踪信息,请设置账号;否则,请按原样执行命令。
创建 LangSmith 账号,然后在“设置”部分生成 Service API 密钥。https://smith.langchain.com/settings
设置 LangSmith 集成所需的环境变量。
export LANGCHAIN_TRACING_V2=true
export LANGCHAIN_ENDPOINT="https://api.smith.langchain.com"

export LANGCHAIN_API_KEY=langchain-service-api-key
JIRA 配置
本实验不会使用这些值,因此您无需在执行命令之前将其更新为您的特定 JIRA 项目值。
设置 Cloud Run 服务部署所需的环境变量。
export JIRA_API_TOKEN=jira-token
export JIRA_USERNAME="YOUR-EMAIL"
export JIRA_INSTANCE_URL="https://YOUR-JIRA-PROJECT.atlassian.net"
export JIRA_PROJECT_KEY="YOUR-JIRA-PROJECT-KEY"
export JIRA_CLOUD=true
创建 API 密钥
在 Cloud 控制台的“API 和服务”/“凭据”部分中创建新的 API 密钥。
此密钥将用于对 Cloud Run 应用的 JIRA API 调用进行身份验证。
对于生产环境,您需要为创建的 API 密钥配置应用和 API 限制。应用限制会将 API 密钥的使用范围限制为特定网站(例如您的 JIRA 实例)。
设置 Cloud Run 服务部署所需的环境变量。
export DEVAI_API_KEY=your-api-key
在 Secret Manager 中创建 Secret
在本实验中,我们将遵循最佳实践,使用 Secret Manager 在 Cloud Run 中存储和引用访问令牌、API 密钥和 LangChain API 密钥值。
在 Secret Manager 中创建和存储所需的 Secret。
echo -n $DEVAI_API_KEY | \
 gcloud secrets create DEVAI_API_KEY \
 --data-file=-

echo -n $JIRA_API_TOKEN | \
 gcloud secrets create JIRA_API_TOKEN \
 --data-file=-

echo -n $GITLAB_PERSONAL_ACCESS_TOKEN | \
 gcloud secrets create GITLAB_PERSONAL_ACCESS_TOKEN \
 --data-file=-

echo -n $LANGCHAIN_API_KEY | \
 gcloud secrets create LANGCHAIN_API_KEY \
 --data-file=-
7. 将 Devai-API 部署到 Cloud Run
检查您是否位于正确的文件夹中。
cd ~/genai-for-developers/devai-api
将应用部署到 Cloud Run。
gcloud run deploy "$SERVICE_NAME" \
  --source=. \
  --region="$LOCATION" \
  --allow-unauthenticated \
  --service-account vertex-client \
  --set-env-vars PROJECT_ID="$PROJECT_ID" \
  --set-env-vars LOCATION="$LOCATION" \
  --set-env-vars GITLAB_URL="$GITLAB_URL" \
  --set-env-vars GITLAB_REPOSITORY="$GITLAB_REPOSITORY" \
  --set-env-vars GITLAB_BRANCH="$GITLAB_BRANCH" \
  --set-env-vars GITLAB_BASE_BRANCH="$GITLAB_BASE_BRANCH" \
  --set-env-vars JIRA_USERNAME="$JIRA_USERNAME" \
  --set-env-vars JIRA_INSTANCE_URL="$JIRA_INSTANCE_URL" \
  --set-env-vars JIRA_PROJECT_KEY="$JIRA_PROJECT_KEY" \
  --set-env-vars JIRA_CLOUD="$JIRA_CLOUD" \
  --set-env-vars LANGCHAIN_TRACING_V2="$LANGCHAIN_TRACING_V2" \
  --update-secrets="LANGCHAIN_API_KEY=LANGCHAIN_API_KEY:latest" \
  --update-secrets="GITLAB_PERSONAL_ACCESS_TOKEN=GITLAB_PERSONAL_ACCESS_TOKEN:latest" \
  --update-secrets="JIRA_API_TOKEN=JIRA_API_TOKEN:latest" \
  --update-secrets="DEVAI_API_KEY=DEVAI_API_KEY:latest" \
  --min-instances=1 \
  --max-instances=3
回答 Y 以创建 Artifact Registry Docker 仓库。
Deploying from source requires an Artifact Registry Docker repository to store built containers. A repository named [cloud-run-source-deploy] in
region [us-central1] will be created.

Do you want to continue (Y/n)?  y
请查看下面的 gcloud run deploy SERVICE_NAME --source=. 流程。了解详情。

在后台,此命令使用 Google Cloud 的 buildpacks 和 Cloud Build 从源代码自动构建容器映像,而无需在机器上安装 Docker 或者设置 Buildpack 或 Cloud Build。也就是说,上述单个命令完成了本来还需要执行 gcloud builds submit 和 gcloud run deploy 命令才能完成的任务。
如果您提供了 Dockerfile(我们在本代码库中就提供了),Cloud Build 将使用它来构建容器映像,而不是依赖于 Buildpack 自动检测和构建容器映像。如需详细了解 Buildpack,请参阅文档。
在 Cloud 控制台中查看 Cloud Build 日志。
在 Artifact Registry 中查看创建的 Docker 映像。
在 Cloud 控制台中查看 Cloud Run 实例详情。
测试应用
运行 curl 命令来测试端点。
请先使用您的 Cloud Run 服务网址进行更新,然后再运行该命令。
示例:
curl -H "X-devai-api-key: $DEVAI_API_KEY" https://devai-api-1110000001.us-central1.run.app/test
8. 自动实现故事
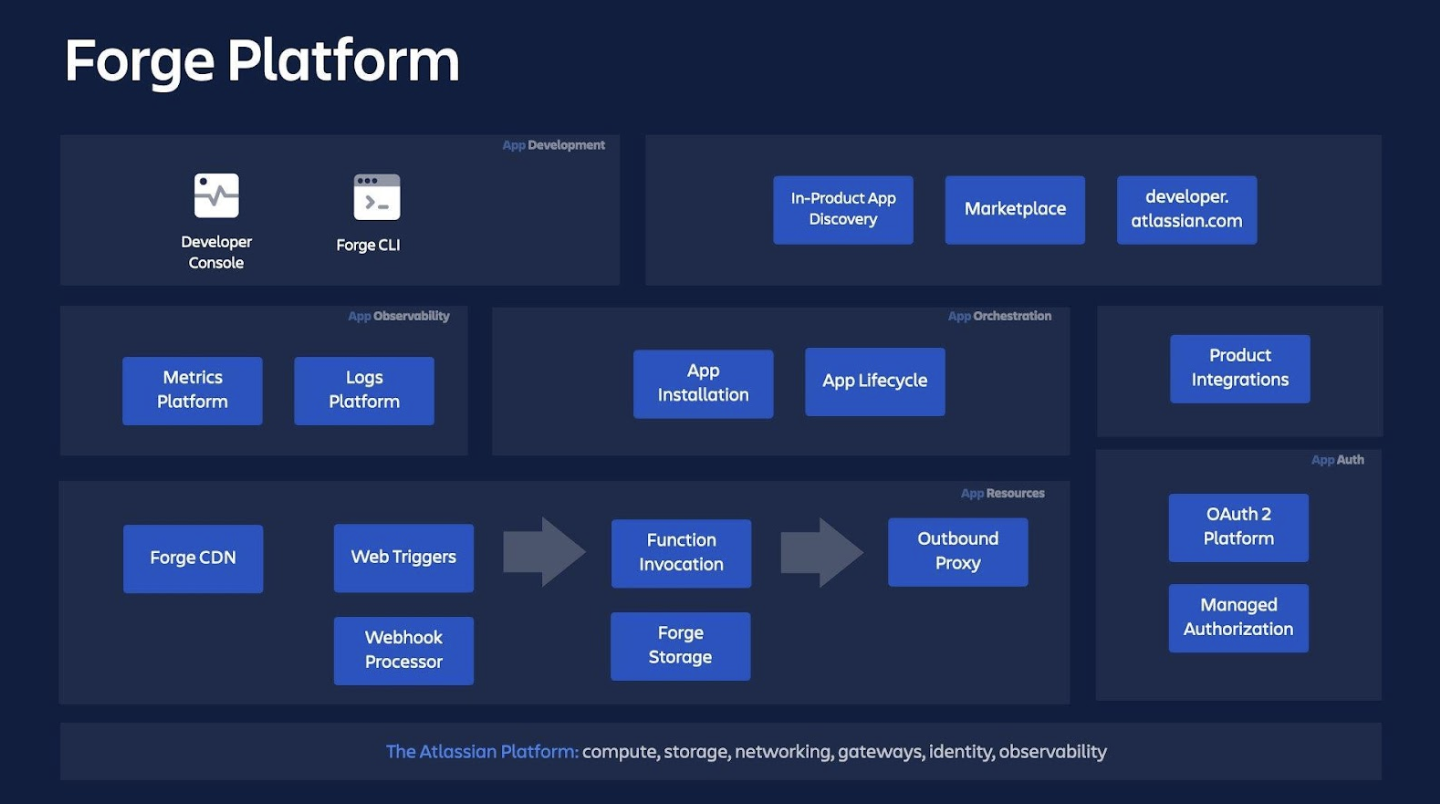
Forge 是一个平台,可让开发者构建可与 Atlassian 产品(例如 Jira、Confluence、Compass 和 Bitbucket)集成的应用。
安装 Forge CLI
运行以下命令以全局安装 Forge CLI:
npm install -g @forge/cli
在本实验中,我们将使用环境变量进行登录。

设置 JIRA 项目
使用您的个人账号创建/查看 JIRA 项目。
查看您现有的 JIRA 项目:https://admin.atlassian.com/
使用您的个人账号创建一个新的 JIRA 项目。
前往 https://team.atlassian.com/your-work,点击  ,然后选择
,然后选择  。然后,依次选择“JIRA Software”-“立即试用”。按照提示完成项目/网站的创建。

选择 JIRA Software。

创建新项目。

创建 Atlassian API 令牌
创建或使用现有的 Atlassian API 令牌登录 CLI。
CLI 在运行命令时会使用您的令牌。
- 前往 https://id.atlassian.com/manage/api-tokens。
- 点击 Create API token(创建 API 令牌)。
- 输入一个标签来描述您的 API 令牌。例如,forge-api-token。
- 点击创建。
- 点击复制到剪贴板,然后关闭对话框。
配置 Forge 环境设置
返回 Cloud 控制台,然后在终端中运行以下命令。
登录 Forge CLI 即可开始使用 Forge 命令。
设置您的 JIRA/FORGE 电子邮件地址。请将此处的 替换为您的电子邮件地址。
export FORGE_EMAIL=your-email
设置 Forge API 令牌。请将其替换为您的 JIRA API 令牌。
export FORGE_API_TOKEN=your-jira-api-token
运行以下命令,测试 Forge CLI。当系统要求收集分析数据时,回答“No”。
forge settings set usage-analytics false
检查您是否已登录。
forge whoami
示例输出。
Logged in as John Green (johngreen@email.com)
Account ID: 123090:aaabbcc-076a-455c-99d0-d1aavvccdd
创建 Forge 应用
检查您是否位于“~/genai-for-developers”文件夹中。
运行命令以创建 Forge 应用。
forge create
出现提示时,请使用以下值:
- 应用名称:
devai-jira-ui-qwiklabs - 选择类别:
UI Kit - 选择产品:
Jira - 选择模板:
jira-issue-panel

切换到应用文件夹。
cd devai-jira-ui-qwiklabs/
运行命令以安装依赖项。
npm install
运行部署命令。
forge deploy
示例输出:
Deploying your app to the development environment.
Press Ctrl+C to cancel.

Running forge lint...
No issues found.

✔ Deploying devai-jira-ui-qwiklabs to development...

ℹ Packaging app files
ℹ Uploading app
ℹ Validating manifest
ℹ Snapshotting functions
ℹ Deploying to environment

✔ Deployed

Deployed devai-jira-ui-qwiklabs to the development environment.
安装应用。
forge install
出现提示时,请使用以下值:
- 选择产品:
Jira - 输入网站网址:
your-domain.atlassian.net
示例输出:
Select the product your app uses.

? Select a product: Jira

Enter your site. For example, your-domain.atlassian.net

? Enter the site URL: genai-for-developers.atlassian.net

Installing your app onto an Atlassian site.
Press Ctrl+C to cancel.

? Do you want to continue? Yes

✔ Install complete!

Your app in the development environment is now installed in Jira on genai-for-developers.atlassian.net
打开您的 JIRA 网站,然后创建一个新的 JIRA 任务,并添加以下说明:
Create HTML, CSS and JavaScript using React.js framework to implement Login page with username and password fields, validation and documentation. Provide complete implementation, do not omit anything.
打开任务后,您会看到“devai-jira-ui-qwiklabs”按钮。
点击该按钮,然后在界面中查看更改。

查看 Forge 后端日志。
forge logs
Atlassian 开发者控制台
您还可以在 Atlassian Developer Console 中查看和管理已部署的应用。

查看日志 - 切换到 Development 环境,

查看 Forge 应用清单和源代码
打开“devai-jira-ui-qwiklabs/manifest.yml”文件,然后使用 Gemini Code Assist 解释配置。

查看说明。

打开以下文件,并让 Gemini Code Assist 对其进行解释:
devai-jira-ui-qwiklabs/src/frontend/index.jsxdevai-jira-ui-qwiklabs/src/resolvers/index.js

使用 DevAI API Cloud Run 端点更新 Forge 应用
检查是否已设置 GCP 项目 ID:
gcloud config get project
如果没有,请使用 Qwiklabs 实验页面中的项目 ID 设置您的 GCP 项目:
示例:qwiklabs-gcp-00-2c10937585bb
gcloud config set project YOUR_QWIKLABS_PROJECT_ID
设置 Cloud Run 服务网址:
export DEVAI_API_URL=$(gcloud run services list --filter="(devai-api)" --format="value(URL)")

forge variables set DEVAI_API_URL $DEVAI_API_URL
设置 DEVAI API 密钥:
export DEVAI_API_KEY=api-key-that-you-created

forge variables set --encrypt DEVAI_API_KEY $DEVAI_API_KEY
运行以下命令进行确认:
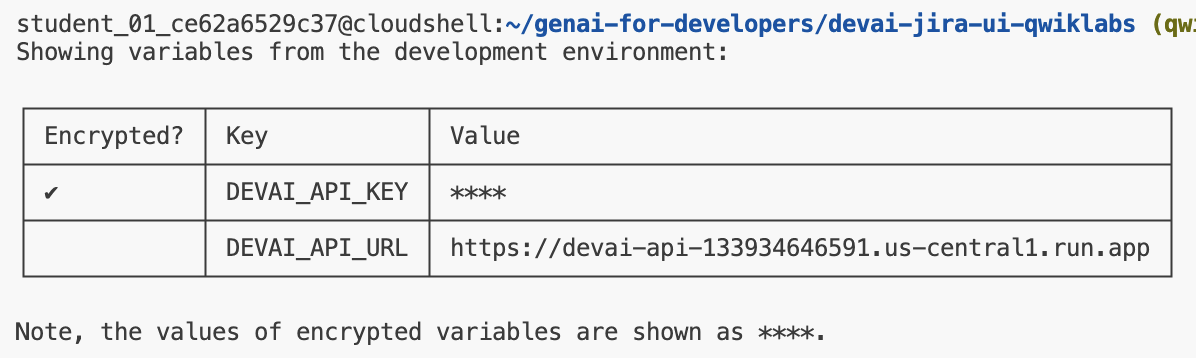
forge variables list
示例输出
更新 Forge 应用清单和代码
您可以在代码库的 sample-devai-jira-ui 文件夹下找到这些代码段。
在编辑器中打开清单文件:devai-jira-ui-qwiklabs/manifest.yml
将以下代码行添加到文件末尾,并将 Cloud Run 端点替换为您部署的端点。
permissions:
  scopes:
    - read:jira-work
    - write:jira-work
  external:
    fetch:
      client:
        - devai-api-gjerpi6qqq-uc.a.run.app/create-gitlab-mr # replace with YOUR CLOUD RUN URL
在编辑器中打开解析器/索引文件:devai-jira-ui-qwiklabs/src/resolvers/index.js
将以下代码行添加到现有 getText 函数后面。
resolver.define('getApiKey', (req) => {
  return process.env.DEVAI_API_KEY;
});

resolver.define('getDevAIApiUrl', (req) => {
  return process.env.DEVAI_API_URL;
});
在编辑器中打开 frontend/index 文件:devai-jira-ui-qwiklabs/src/frontend/index.jsx
将 index.jsx 替换为以下内容。更新指向您的 GitLab 用户 ID/代码库的链接。
您需要在两个位置更新 YOUR-GIT-USERID 和 YOUR-GIT-REPO。
在文件中搜索此行并进行更改:
https://gitlab.com/YOUR-GIT-USERID/YOUR-GIT-REPO/-/merge_requests
import React from 'react';
import ForgeReconciler, { Text, Link, useProductContext } from '@forge/react';
import { requestJira } from '@forge/bridge';
import { invoke } from '@forge/bridge';
import api, { route, assumeTrustedRoute } from '@forge/api';

const devAIApiKey = await invoke("getApiKey")
const devAIApiUrl = await invoke("getDevAIApiUrl")


const App = () => {
  const context = useProductContext();

  const [description, setDescription] = React.useState();

  const fetchDescriptionForIssue = async () => {
    const issueId = context?.extension.issue.id;

    const res = await requestJira(`/rest/api/2/issue/${issueId}`);
    const data = await res.json();

    const bodyGenerateData = `{"prompt": ${JSON.stringify(data.fields.description)}}`;

    const generateRes = await api.fetch(devAIApiUrl+'/create-gitlab-mr,
      {
        body: bodyGenerateData,
        method: 'post',
        headers: {
          'Content-Type': 'application/json',
          'x-devai-api-key': devAIApiKey,
         },
      }
    )

    const resData = await generateRes.text();

    // Add link to the GitLab merge request page as a comment
    await requestJira(`/rest/api/2/issue/${issueId}/comment`, {
      method: 'POST',
      headers: {
        'Accept': 'application/json',
        'Content-Type': 'application/json'
      },
      body: `{"body": "[GitLab Merge Request|https://gitlab.com/YOUR-GIT-USERID/YOUR-GIT-REPO/-/merge_requests]"}`
    });


    return "Response will be added as a comment. Please refresh in a few moments.";
  };

  React.useEffect(() => {
    if (context) {
      fetchDescriptionForIssue().then(setDescription);
    }
  }, [context]);

  return (
    <>
      <Text>{description}</Text>
      <Link href='https://gitlab.com/YOUR-GIT-USERID/YOUR-GIT-REPO/-/merge_requests' openNewTab={true}>GitLab Merge Request</Link>
    </>
  );
};

ForgeReconciler.render(
  <React.StrictMode>
    <App />
  </React.StrictMode>
);
重新部署 Forge 应用
在 package.json 文件中添加依赖项:
"@forge/api": "4.0.0",
运行命令以安装依赖项:
npm install
部署更新后的应用:
forge deploy
示例输出:
ℹ Uploading app
ℹ Validating manifest
ℹ Snapshotting functions
ℹ Deploying to environment

✔ Deployed

Deployed devai-jira-ui-qwiklabs to the development environment.

We've detected new scopes or egress URLs in your app.
Run forge install --upgrade and restart your tunnel to put them into effect.
安装更新后的应用:
forge install --upgrade

示例输出:
Upgrading your app on the Atlassian site.

Your app will be upgraded with the following additional scopes:
- read:jira-work
- write:jira-work

Your app will exchange data with the following urls:
- devai-api-7su2ctuqpq-uc.a.run.app

? Do you want to continue? Yes

✔ Upgrade complete!

Your app in the development environment is now the latest in Jira on genai-for-developers.atlassian.net.
测试 Forge 应用
在 JIRA 项目中打开现有 JIRA 任务或创建新任务。
如果之前已添加面板,您需要将其移除。
点击“...”,然后从菜单中选择“移除”。之后,您可以再次点击该按钮。

查看 Jira 评论
收到 DEVAI API 的响应后,系统会在 JIRA 问题中添加一条评论。
- GitLab 合并请求链接
在“History”和“Comments”标签页之间切换以刷新视图。

验证 GitLab 合并请求
打开 GitLab,然后检查项目中是否有新的合并请求。


LangSmith LLM 轨迹
如果您配置了 LLM 跟踪,请打开 LangSmith 门户,然后查看 GitLab 合并请求创建调用的 LLM 轨迹。
LangSmith LLM 轨迹示例。

9. 将更改推送到 GitHub 代码库
(OPTIONAL SECTION)
前往 GitHub 网站,创建一个新的代码库,以将本实验的更改推送到您的个人代码库。
返回 Cloud 控制台,然后在终端中设置 Git 用户名和电子邮件地址。
请先更新值,然后再运行命令。
git config --global user.name "Your Name"
git config --global user.email "your_email@example.com"
生成 SSH 密钥并将其添加到 GitHub 代码库中。
请先更新您的电子邮件地址,然后再运行命令。
请勿输入口令,然后按 Enter 键多次以完成密钥生成。
ssh-keygen -t ed25519 -C "your-email-address"
eval "$(ssh-agent -s)"

ssh-add ~/.ssh/id_ed25519

cat ~/.ssh/id_ed25519.pub
将生成的公钥添加到您的 GitHub 账号。
打开 https://github.com/settings/keys,然后点击“New SSH key”。
使用“qwiklabs-key”作为键名称,然后复制/粘贴上一个命令的输出。
返回终端,提交并推送更改。
cd ~/genai-for-developers

git remote rm origin
使用上面创建的代码库设置远程源代码。
请将其替换为您的代码库网址。
git remote add origin git@github.com:YOUR-GITHUB-USERID/YOUR-GITHUB-REPO.git
添加、提交并推送更改。
git add .

git commit -m "lab changes"

git push -u origin main
10. 恭喜!
恭喜,您已完成此实验!
所学内容:
- 如何部署 Cloud Run 应用以与 Gemini API 集成。
- 如何为 JIRA 创建和部署 Atlassian Forge 应用。
- 如何使用 LangChain ReAct 智能体实现 GitLab 任务自动化。
- 如何在 LangSmith 中查看 LLM 轨迹。
后续步骤:
- 我们将推出更多实操课程,敬请期待!
清理
为避免因本教程中使用的资源导致您的 Google Cloud 账号产生费用,请删除包含这些资源的项目,或者保留项目但删除各个资源。
删除项目
若要避免产生费用,最简单的方法是删除您为本教程创建的项目。
©2024 Google LLC 保留所有权利。Google 和 Google 徽标是 Google LLC 的商标。其他所有公司名称和产品名称可能是其各自相关公司的商标。