
1. Before you begin
This self-paced codelab will guide you through building AI Agents with Google Cloud's Vertex AI Agent Builder. Each step will highlight a specific Agent Builder feature and explain its purpose.
Prerequisites
- A basic understanding of Generative AI on Google Cloud
- A basic understanding of AI Agent Concepts
- A basic understanding of Gemini CodeAssist (Optional)
What you'll learn
- How to create a simple AI Agent using Vertex AI Agent Builder
- How to ground the created agent by attaching a datastore
- How to integrate AI Agent to your website(Optional)
What you'll need
- A curious mind
- A working computer and reliable wifi
- A Google Cloud project with billing attached.
Note: If you don't have a Google Cloud project yet, you can create one by following the instructions. You may also check out the Google Cloud Free Tier Services.
2. Designing Your First AI Agent
Now you're ready to create your own AI agent. But before diving into development, it's essential to establish a clear vision for your agent. Ask yourself these key questions:
- What problem will it solve? Will it automate tasks, provide information, offer entertainment, or facilitate creative exploration?
- What are its primary functions? Will it execute tasks or delegate tasks? Will it generate text, or generate a combination of different media?
- What are its limitations? Will it be able to do everything autonomously?
- What personality or persona should it have? Will it be formal, informal, humorous, helpful, or informative?
- What are the success metrics? How will you measure the agent's effectiveness?
To speed up the process, here are the answers to those questions for the travel agent you will be creating today:
- What problem will it solve?
- Planning a trip can be time-consuming and overwhelming. This travel agent will help users discover destinations, plan itineraries, book flights and accommodations.
- What are its primary functions?
- The agent should be able to
- answer questions about destinations, such as visa requirements
- plan itineraries that work for users' schedules and objectives
- book flights and accommodations
- What are its limitations?
- The agent might not be able to answer complicated queries by default
- The agent won't be able to generate visual images
- The agent's knowledge will limited by the underlying model
- What personality or persona should it have?
- This agent should be knowledgeable, helpful, and enthusiastic about travel. It should be able to communicate information clearly and concisely.
- What are the success metrics?
- Success for this agent could be measured by how satisfied users are with its recommendations (exploring, planning, booking)
3. Building an AI Agent with Vertex AI Agent Builder
With Vertex AI Agent Builder, AI Agents can be created in just a few steps.
Step 1:
- Head over to Vertex AI Agent Builder.
- You should see the welcome page.
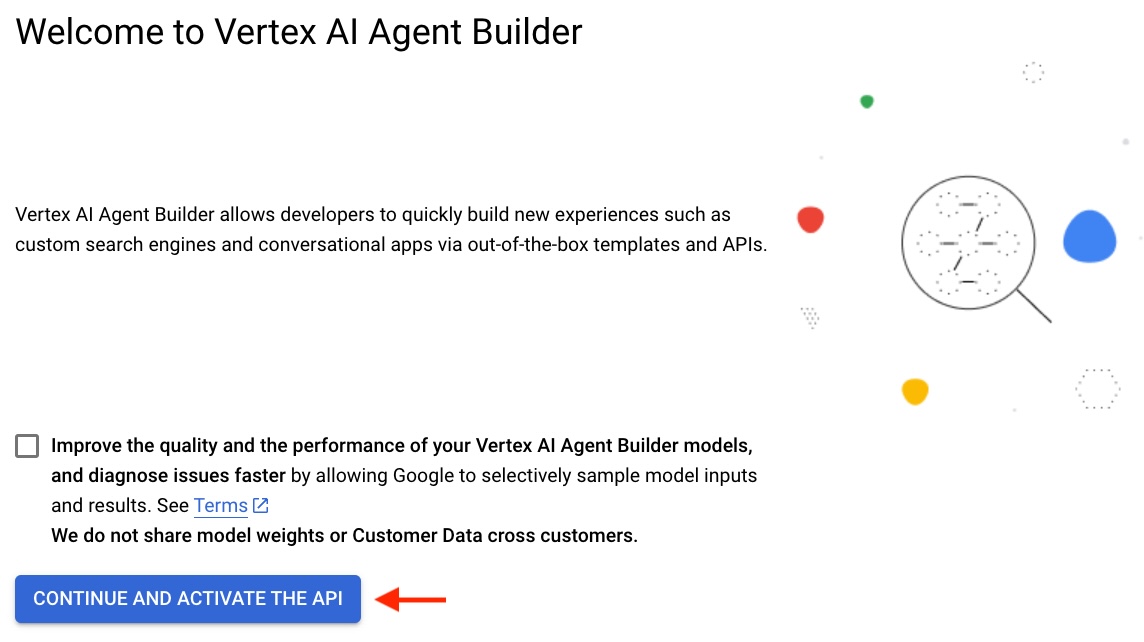
- Click on the CONTINUE AND ACTIVATE THE API button.
Step 2:
- You will be redirected to the App Creation page.

- Click on the CREATE A NEW APP button.
Step 3:
- Choose Conversational agent, and click on CREATE

Note:
- Once you click on CREATE a new tab of Diaglogflow Conversational Agents will open.
- If it asks you to choose a Google Cloud Project, please select your Google Cloud project associated with your correct gmail account.
- If you're doing this lab in a new account, it will ask you to enable the Dialogflow API, click Enable API to enable it.

- If clicking the button doesn't work, you can enable it manually by going to the API page directly.
- In the newly opened Diaglogflow page, click on Create Agent

- Now, It will give you some options for creating an agent, choose Build your own.

Step 4:
- Pick a Display Name (e.g. Travel Buddy)
- For Location, Select global (Global serving, data-at-rest in US) as Region
- Keep other configuration, default
- Click on the CREATE button

Step 5:
- Pick a Playbook Name (e.g. Info Agent)
- Add a Goal (e.g. Help customers answer travel related queries)
- Define an Instruction (e.g. - Greet the users, then ask how you can help them today)
- Press Save once everything is finalized

Step 6:
- Click on the Toggle Simulator icon

- Select the agent that you just created (e.g. Info Agent)
- Choose the underlying generative AI model for your agent (e.g. gemini-1.5-flash)
- Test your agent by having a conversation with it (i.e. Type something in "Enter User Input" text box)

Congratulations! You just successfully created an AI Agent using Vertex AI Agent Builder.
4. Attaching Datastores to the Agent
Try asking your agent about getting to Wakanda (e.g. "What's the best way to reach Wakanda?"), you will get a response like this:

While this is factually correct, instead of simply stating "I can't provide information" and ending the conversation, it would be more helpful to the user if the agent suggested similar places. This approach could potentially lead to users actually booking a trip through the agent.
In order for the agent to recommend similar places, you can provide more information to the agent through Datastores. It acts as an additional knowledge base for the agent to refer to if the agent is not able to answer user questions based on their built-in knowledge.
Note: If you want to close the simulator, click on the toggle simulator icon again
Creating a datastore is straight-forward, click on + Data store button at the bottom of the Agent Basics page.

Fill up the following information:
- Tool name: Alternative Location
- Type: Data store
- Description: Use this tool if user's request contains a location that doesn't exist
Click Save when you are done.
This creates a datastore tool for the agent to communicate with the datastore, but you still need to create an actual datastore that contains the information. To do that, click on add data stores and Create a data store.


Once you click on Create new data store, you'll be redirected to the Vertex AI agent builder page like below
Choose on Cloud Storage option

Once you are done with the step,
- click on FILE (This is very important otherwise your import will fail)
- type ai-workshops/agents/data/wakanda.txt
- click on CONTINUE

If you are curious, here is the content of the provided text file:
Places that are similar to Wakanda
- Oribi Gorge in South Africa: The rock formations here are reminiscent of the Warrior Falls in Wakanda.
- Iguazu Falls: Located on the border of Argentina and Brazil, these massive waterfalls were a major inspiration for the Warrior Falls.
- Immerse yourself in Wakandan culture: Read the Black Panther comics, watch the movies, and explore online resources to learn more about Wakandan culture, language, and technology.
- Visit a Disney theme park: While there isn't a dedicated Wakanda land yet, you might be able to meet Black Panther at Disneyland or on a Marvel Day at Sea Disney cruise.
On the next page, name your datastore (e.g. Wakanda Alternative) and click CREATE.

As a final step, SELECT the data source that you just created and click on CREATE, You can see the progress of your data store import by clicking on your data store**.**

Note: Import activity will take some time to be successfully completed so meanwhile this activity is ongoing you can explore more data store options available for your Vertex AI agent here

If everything went smoothly, go back to your dialogflow tab and click on refresh, you should see the datastore created under the Available data stores page.

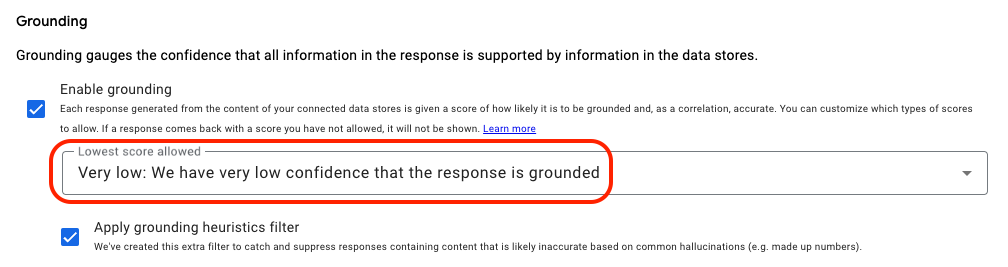
In order to prevent Agent from hallucinations, in the grounding configuration for your data store, set the setting to Very Low which applies tighter restrictions on Agent from making things up, for now keep it default but anytime you can explore it with different settings.
Now, select the added data store, click on confirm, then click on save.

Now, Head back to your Agent Basics page, at the bottom of the playbook configuration, you'll see your newly created data store(e.g. Alternative Location) will be available to use, check the Data Store (e.g. Alternative Location), and click on Save button at top of the page.


You are almost there! The final step is to include the "Alternative Location" tool in the agent's instructions. Add a line, - Use ${TOOL: Alternative Location} if the user's request contains a location that does not exist, to the agent's instructions and then click on save.

We're all set. Let's open the toggle simulator again and ask the same questions (i.e. What's the best way to reach Wakanda?)

Congratulations! Your agent is now recommending places using the provided information from a text file.
That's it, we're done with building our own agent builder AI agent, if you want to explore more in terms of customizing your agent for better experience, please check out the Additional Activities below.
5. Additional Activities - Make your AI agent live
In the preceding steps, you have developed an AI agent and grounded it with relevant reference data. In the following section, you will address the crucial question of how to embed this agent within your website, enabling real-time interaction with your visitors.
There are many ways to expose your agent. You can either export it or directly publish it. You can explore the documentation to find out about the possible options.
In the top right corner of your Dialogflow tab, click on Overflow menu and then Publish agent

Keep all the configuration as Default, and click on Enable unauthenticated API.
Note: Enabling the unauthenticated API is for the demo purposes only and this configuration is not recommended to use for production workload. If you are interested in publishing securely, check out this documentation.

Upon clicking, you should see a small CSS code snippet:

Just copy the code snippet. You will be integrating this code snippet into a website later on.
To create a website, you will be using the Cloud Editor environment. Here are the steps to open Cloud Editor:
- Open up Google Cloud Console on another tab.
- Click on the Activate Cloud Shell button on the top right corner
- Click on Open Editor button.
If there is a prompt to Authorize Cloud Shell, click on Authorize to continue.

In the following section, you will be using Gemini Code Assist to create a sample python flask web application to integrate with your Agent snippet.
Once Cloud Shell Editor is opened, click on Gemini Code Assist and login to your Google Cloud Project. If it asks you to enable the API, click on Enable.

Once done, let's ask Gemini Code Assist to create a flask app and integrate the AI agent code snippet to it.
Here is the sample prompt, you can use
Here is my Travel buddy Vertex AI agent builder agent publish code snippet,
<REPLACE IT WITH YOUR AI AGENT PUBLISH CODE SNIPPET>
can you create a sample flask app to use it
Note: Here we've asked for a python flask app. If you prefer any other programming language or framework, please feel free to use it. Gemini Code Assist has the capability to generate different programming languages. Check out Supported languages, IDEs, and interfaces for more details.
You will see that the provided code snippet is already integrated with the AI agent. To test if the provided code is valid and working as intended, you can follow the instructions given by Gemini Code Assist on how to run this code section of the output response.
Sample Output Response code snippet -
from flask import Flask, render_template_string
app = Flask(__name__)
# HTML template string with the provided Dialogflow Messenger code
html_template = """
<!DOCTYPE html>
<html lang="en">
<head>
<meta charset="UTF-8">
<meta name="viewport" content="width=device-width, initial-scale=1.0">
<title>Travel Buddy Chatbot</title>
<link rel="stylesheet" href="https://www.gstatic.com/dialogflow-console/fast/df-messenger/prod/v1/themes/df-messenger-default.css">
<script src="https://www.gstatic.com/dialogflow-console/fast/df-messenger/prod/v1/df-messenger.js"></script>
<style>
df-messenger {
z-index: 999;
position: fixed;
--df-messenger-font-color: #000;
--df-messenger-font-family: Google Sans;
--df-messenger-chat-background: #f3f6fc;
--df-messenger-message-user-background: #d3e3fd;
--df-messenger-message-bot-background: #fff;
bottom: 16px;
right: 16px;
}
body {
font-family: sans-serif;
margin: 20px;
}
</style>
</head>
<body>
<h1>Welcome to Travel Buddy!</h1>
<p>Start chatting with our AI Travel buddy, in the bottom right corner.</p>
<df-messenger
project-id="<SAMPLE>"
agent-id="<SAMPLE>"
language-code="en"
max-query-length="-1">
<df-messenger-chat-bubble
chat-title="Travel Buddy">
</df-messenger-chat-bubble>
</df-messenger>
</body>
</html>
"""
@app.route("/")
def index():
"""Renders the HTML template with the Dialogflow Messenger."""
return render_template_string(html_template)
if __name__ == "__main__":
app.run(debug=True)

As per given instruction
- Copy the provided sample flask app code snippet,
- Create a new file named app.py and save the file.

In the next step, it is asking to install the flask to run this snippet, that is not required for now as cloud shell already has all the commonly used utilities installed by default.

Save the file (Ctrl + S or CMD + S) and then click on the Open Terminal, where you will run the provided code.
In the terminal, run the below command
python app.py
Note: Make sure you're in the right folder, where your app.py file is present
The python flask app will be running on port 5000. To see the preview of this web application, click on the Web Preview icon in the cloud shell. Then you can click on Change Port, input 5000, and click Change and Preview to save it.

A sample website will come up and there will be an AI agent already available. Just click on the AI agent and start chatting with it.

Feel free to test it with different prompts. You may also ask Gemini Code Assist to beautify your website, or add more grounding data to the AI agent and make it more resourceful.
Once you are ready, as a next step, you can try hosting this AI agent on Google Cloud so that it can be accessed by anyone, anywhere. As for the reminder of this codelab, you will be deploying this sample flask application in Cloud Run as a container.
Note: It is not only limited to cloud run (If you don't know what is cloud run, even you can ask this), you can ask gemini code assist to assist you deploy this in Google Cloud or anywhere with the best practices, it can help you with that part as well.
Head back to the Cloud Shell Terminal and press Ctrl + C to kill the process. Click on the Open Editor again and ask Gemini Code Assist to help us with containerizing the application and deploy it in cloud run.
Can you help me deploy this sample flask app to cloud run service
It provides some instructions and command to follow to host our app in cloud run service, let's follow the instructions
Here is the sample output response
Steps to Deploy to Cloud Run
- Prerequisites:
- Google Cloud Account: You need a Google Cloud account with billing enabled.
- gcloud CLI: Install and initialize the Google Cloud SDK (gcloud CLI) on your local machine. You'll use this to interact with Google Cloud from your terminal.
- Docker: Install Docker on your local machine. Cloud Run uses Docker to containerize your application.
- Project Setup: Ensure you have a Google Cloud project selected in your gcloud CLI. You can check with
gcloud config list projectand set it withgcloud config set project YOUR_PROJECT_ID
Note: As we're performing this entire activity in cloud shell, there is not need of setting up projects
- Create **
requirements.txt****:**
- This file lists all the Python packages your app needs. In your project directory (where
main.pyis), create a file namedrequirements.txtand add the following linee
- Create **
Dockerfile****:**
- A
Dockerfiledefines how to build a Docker image for your application. Create a file namedDockerfile(no extension) in your project directory and add the following content:
# Use an official Python runtime as a parent imageFROM python:3.9-slim-buster
# Set the working directory to /appWORKDIR /app
# Copy the current directory contents into the container at /app
COPY . /app
# Install any needed packages specified in requirements.txt
RUN pip install --no-cache-dir -r requirements.txt
# Make port 5000 available to the world outside this container
EXPOSE 5000
# Define environment variable
ENV NAME World
# Run app.py when the container launches
CMD ["python", ".py"]
- Build the Docker Image:
- Open your terminal, navigate to your project directory, and run:
gcloud builds submit –tag gcr.io/bgr-workshop-23rd/travel-buddy
- Deploy to Cloud Run:
- After the image is built and uploaded, deploy it to Cloud Run with the following command:
gcloud run deploy travel-buddy --image gcr.io/bgr-workshop-23rd/travel-buddy --region us-central1
Once you're done with these steps, you'll see your application with integrated AI agent will be live for your end users.
Congratulations and happy learning.
6. Clean Up
To avoid incurring charges to your Google Cloud account for the resources used in this codelab, follow these steps:
- In the Google Cloud console, go to the Manage resources page.
- In the project list, select the project that you want to delete, and then click Delete.
- In the dialog, type the project ID, and then click Shut down to delete the project.
- Alternatively you can go to Cloud Run on the console, select the service you just deployed and delete.