
1. מבוא
בשיעור ה-Codelab הזה תלמדו איך להשתמש ב-Cloud SQL לשילוב AI ב-PostgreSQL על ידי שילוב של חיפוש וקטורים עם הטמעות (embeddings) של Vertex AI.

דרישות מוקדמות
- הבנה בסיסית של Google Cloud, מסוף
- מיומנויות בסיסיות בממשק שורת הפקודה וב-Cloud Shell
מה תלמדו
- פריסת מכונה של Cloud SQL ל-PostgreSQL
- איך יוצרים מסד נתונים ומפעילים את השילוב של Cloud SQL עם AI
- איך טוענים נתונים למסד הנתונים
- איך משתמשים במודל הטמעה של Vertex AI ב-Cloud SQL
- איך להעשיר את התוצאה באמצעות מודל גנרטיבי של Vertex AI
- איך לשפר את הביצועים באמצעות אינדקס וקטור
מה צריך להכין
- חשבון Google Cloud ופרויקט ב-Google Cloud
- דפדפן אינטרנט כמו Chrome שתומך במסוף Google Cloud וב-Cloud Shell
2. הגדרה ודרישות
הגדרת סביבה בקצב אישי
- נכנסים למסוף Google Cloud ויוצרים פרויקט חדש או משתמשים מחדש בפרויקט קיים. אם עדיין אין לכם חשבון Gmail או חשבון Google Workspace, עליכם ליצור חשבון.


- שם הפרויקט הוא השם המוצג של המשתתפים בפרויקט. זוהי מחרוזת תווים שלא משמשת את Google APIs. תמיד אפשר לעדכן אותו.
- מזהה הפרויקט הוא ייחודי לכל הפרויקטים ב-Google Cloud ואי אפשר לשנות אותו אחרי שמגדירים אותו. מסוף Cloud יוצר מחרוזת ייחודית באופן אוטומטי. בדרך כלל לא משנה מה המחרוזת הזו. ברוב ה-codelabs תצטרכו להפנות למזהה הפרויקט (בדרך כלל מזהים אותו בתור
PROJECT_ID). אם המזהה שנוצר לא מוצא חן בעיניכם, תוכלו ליצור מזהה אקראי אחר. לחלופין, אפשר לנסות כתובת משלכם ולבדוק אם היא זמינה. לא ניתן לשנות את השם אחרי השלב הזה, והוא יישאר למשך כל פרק הזמן של הפרויקט. - לידיעתך, יש ערך שלישי, מספר פרויקט, שמשתמשים בו בחלק מממשקי ה-API. מידע נוסף על כל שלושת הערכים האלה זמין במסמכי העזרה.
- בשלב הבא, כדי להשתמש במשאבים או ב-API של Cloud, תצטרכו להפעיל את החיוב במסוף Cloud. השלמת הקודלאב הזה לא תעלה הרבה, אם בכלל. כדי להשבית את המשאבים ולמנוע חיובים אחרי סיום המדריך, אפשר למחוק את המשאבים שיצרתם או למחוק את הפרויקט. משתמשים חדשים ב-Google Cloud זכאים להשתתף בתוכנית תקופת ניסיון בחינם בסך 300$.
הפעלת Cloud Shell
אפשר להפעיל את Google Cloud מרחוק מהמחשב הנייד, אבל בסדנת הקוד הזו נשתמש ב-Google Cloud Shell, סביבת שורת פקודה שפועלת ב-Cloud.
במסוף Google Cloud, לוחצים על סמל Cloud Shell בסרגל הכלים שבפינה הימנית העליונה:

תהליך ההקצאה והחיבור לסביבת העבודה אמור להימשך רק כמה רגעים. בסיום, אמור להופיע משהו כזה:

המכונה הווירטואלית הזו כוללת את כל הכלים הדרושים למפתחים. יש בה ספריית בית בנפח מתמיד של 5GB והיא פועלת ב-Google Cloud, משפרת מאוד את ביצועי הרשת ואת האימות. אתם יכולים לבצע את כל העבודה בקודלאב הזה בדפדפן. אין צורך להתקין שום דבר.
3. לפני שמתחילים
הפעלת ה-API
פלט:
ב-Cloud Shell, מוודאים שמזהה הפרויקט מוגדר:
gcloud config set project [YOUR-PROJECT-ID]
מגדירים את משתנה הסביבה PROJECT_ID:
PROJECT_ID=$(gcloud config get-value project)
מפעילים את כל השירותים הנדרשים:
gcloud services enable sqladmin.googleapis.com \
                       compute.googleapis.com \
                       cloudresourcemanager.googleapis.com \
                       servicenetworking.googleapis.com \
                       aiplatform.googleapis.com
הפלט הצפוי
student@cloudshell:~ (test-project-001-402417)$ gcloud config set project test-project-001-402417
Updated property [core/project].
student@cloudshell:~ (test-project-001-402417)$ PROJECT_ID=$(gcloud config get-value project)
Your active configuration is: [cloudshell-14650]
student@cloudshell:~ (test-project-001-402417)$
student@cloudshell:~ (test-project-001-402417)$ gcloud services enable sqladmin.googleapis.com \
                       compute.googleapis.com \
                       cloudresourcemanager.googleapis.com \
                       servicenetworking.googleapis.com \
                       aiplatform.googleapis.com
Operation "operations/acat.p2-4470404856-1f44ebd8-894e-4356-bea7-b84165a57442" finished successfully.
4. יצירת מכונה של Cloud SQL
יצירת מכונה של Cloud SQL עם שילוב של מסד נתונים עם Vertex AI.
יצירת סיסמה למסד נתונים
מגדירים סיסמה למשתמש ברירת המחדל של מסד הנתונים. אתם יכולים להגדיר סיסמה משלכם או להשתמש בפונקציה אקראית כדי ליצור סיסמה:
export CLOUDSQL_PASSWORD=`openssl rand -hex 12`
שימו לב לערך שנוצר עבור הסיסמה:
echo $CLOUDSQL_PASSWORD
יצירת מכונה של Cloud SQL ל-PostgreSQL
בסשן של Cloud Shell, מריצים את הפקודה:
gcloud sql instances create my-cloudsql-instance \
--database-version=POSTGRES_16 \
--tier=db-custom-1-3840 \
--region=us-central1 \
--edition=ENTERPRISE \
--enable-google-ml-integration \
--database-flags cloudsql.enable_google_ml_integration=on
אחרי יצירת המכונה, אנחנו צריכים להגדיר סיסמה למשתמש ברירת המחדל במכונה ולאמת אם אנחנו יכולים להתחבר באמצעות הסיסמה.
gcloud sql users set-password postgres \
    --instance=my-cloudsql-instance \
    --password=$CLOUDSQL_PASSWORD
מריצים את הפקודה ומזינים את הסיסמה בהודעה שמופיעה כשהיא מוכנה להתחברות.
gcloud sql connect my-cloudsql-instance --user=postgres
הפעלת השילוב עם Vertex AI
נותנים את ההרשאות הנדרשות לחשבון השירות הפנימי של Cloud SQL כדי שתוכלו להשתמש בשילוב עם Vertex AI.
איך מוצאים את כתובת האימייל של חשבון השירות הפנימי ב-Cloud SQL וייצוא אותה כמשתנה.
SERVICE_ACCOUNT_EMAIL=$(gcloud sql instances describe my-cloudsql-instance --format="value(serviceAccountEmailAddress)")
echo $SERVICE_ACCOUNT_EMAIL
מעניקים לחשבון השירות של Cloud SQL גישה ל-Vertex AI:
gcloud projects add-iam-policy-binding $PROJECT_ID \
  --member="serviceAccount:$SERVICE_ACCOUNT_EMAIL" \
  --role="roles/aiplatform.user"
מידע נוסף על יצירת מכונות והגדרתן זמין כאן במסמכי התיעוד של Cloud SQL.
5. הכנת מסד הנתונים
עכשיו צריך ליצור מסד נתונים ולהפעיל תמיכה בווקטורים.
יצירת מסד נתונים
יוצרים מסד נתונים בשם quickstart_db .כדי לעשות זאת, יש לנו אפשרויות שונות, כמו לקוחות מסדי נתונים בשורת הפקודה, כמו psql ל-PostgreSQL, SDK או Cloud SQL Studio. נשתמש ב-SDK (gcloud) כדי ליצור מסדי נתונים ולהתחבר למכונה.
מריצים את הפקודה ב-Cloud Shell כדי ליצור את מסד הנתונים
gcloud sql databases create quickstart_db --instance=my-cloudsql-instance
הפעלת תוספים
כדי שנוכל לעבוד עם Vertex AI ועם וקטורים, אנחנו צריכים להפעיל שני תוספים במסד הנתונים שיצרנו.
מריצים את הפקודה ב-Cloud Shell כדי להתחבר למסד הנתונים שנוצר (צריך לספק את הסיסמה)
gcloud sql connect my-cloudsql-instance --database quickstart_db --user=postgres
לאחר מכן, אחרי החיבור, צריך להריץ שתי פקודות בסשן ה-SQL:
CREATE EXTENSION IF NOT EXISTS google_ml_integration CASCADE;
CREATE EXTENSION IF NOT EXISTS vector CASCADE;
יציאה מסשן SQL:
exit;
6. טען נתונים
עכשיו צריך ליצור אובייקטים במסד הנתונים ולטעון נתונים. נשתמש בנתונים בדיוניים של חנות Cymbal. הנתונים זמינים בקטגוריה הציבורית של Google Storage בפורמט CSV.
קודם כול צריך ליצור את כל האובייקטים הנדרשים במסד הנתונים. לשם כך, נשתמש בפקודות gcloud sql connect ו-gcloud storage שכבר מוכרות לנו כדי להוריד ולייבא את אובייקטי הסכימה למסד הנתונים שלנו.
ב-Cloud Shell, מריצים את הפקודה ומזינים את הסיסמה שציינו כשיצרנו את המכונה:
gcloud storage cat gs://cloud-training/gcc/gcc-tech-004/cymbal_demo_schema.sql |gcloud sql connect my-cloudsql-instance --database quickstart_db --user=postgres
מה עשינו בדיוק בפקודה הקודמת? התחברנו למסד הנתונים שלנו והרצנו את קוד ה-SQL שהורדנו, שיצר טבלאות, אינדקסים ורצפים.
השלב הבא הוא טעינת הנתונים, ולשם כך צריך להוריד את קובצי ה-CSV מ-Google Cloud Storage.
gcloud storage cp gs://cloud-training/gcc/gcc-tech-004/cymbal_products.csv .
gcloud storage cp gs://cloud-training/gcc/gcc-tech-004/cymbal_inventory.csv .
gcloud storage cp gs://cloud-training/gcc/gcc-tech-004/cymbal_stores.csv .
לאחר מכן צריך להתחבר למסד הנתונים.
gcloud sql connect my-cloudsql-instance --database quickstart_db --user=postgres
וגם לייבא נתונים מקובצי ה-CSV שלנו.
\copy cymbal_products from 'cymbal_products.csv' csv header
\copy cymbal_inventory from 'cymbal_inventory.csv' csv header
\copy cymbal_stores from 'cymbal_stores.csv' csv header
יציאה מסשן SQL:
exit;
אם יש לכם נתונים משלכם וקובצי ה-CSV שלכם תואמים לכלי הייבוא של Cloud SQL שזמין במסוף Cloud, תוכלו להשתמש בו במקום בגישה של שורת הפקודה.
7. יצירת הטמעות
השלב הבא הוא ליצור הטמעות (embeddings) לתיאורי המוצרים שלנו באמצעות המודל textembedding-004 מ-Google Vertex AI ולאחסן אותן כנתוני וקטורים.
מתחברים למסד הנתונים:
gcloud sql connect my-cloudsql-instance --database quickstart_db --user=postgres
יוצרים עמודה וירטואלית מוטמעת בטבלה cymbal_products באמצעות פונקציית ההטמעה.
ALTER TABLE cymbal_products ADD COLUMN embedding vector(768) GENERATED ALWAYS AS (embedding('text-embedding-004',product_description)) STORED;
התהליך עשוי להימשך זמן מה, אבל עבור 900-1,000 שורות הוא לא אמור להימשך יותר מ-5 דקות, ובדרך כלל הוא מהיר הרבה יותר.
8. הפעלת חיפוש הדמיון
עכשיו אנחנו יכולים להריץ את החיפוש באמצעות חיפוש דמיון שמבוסס על ערכי וקטורים שמחושבים לתיאורים ועל ערך הווקטור שאנחנו מקבלים מהבקשה.
אפשר להריץ את שאילתה ה-SQL מאותו ממשק שורת הפקודה באמצעות gcloud sql connect, או לחלופין מ-Cloud SQL Studio. עדיף לנהל שאילתות מורכבות עם כמה שורות ב-Cloud SQL Studio.
הפעלת Cloud SQL Studio
במסוף, לוחצים על המכונה של Cloud SQL שיצרנו מקודם.
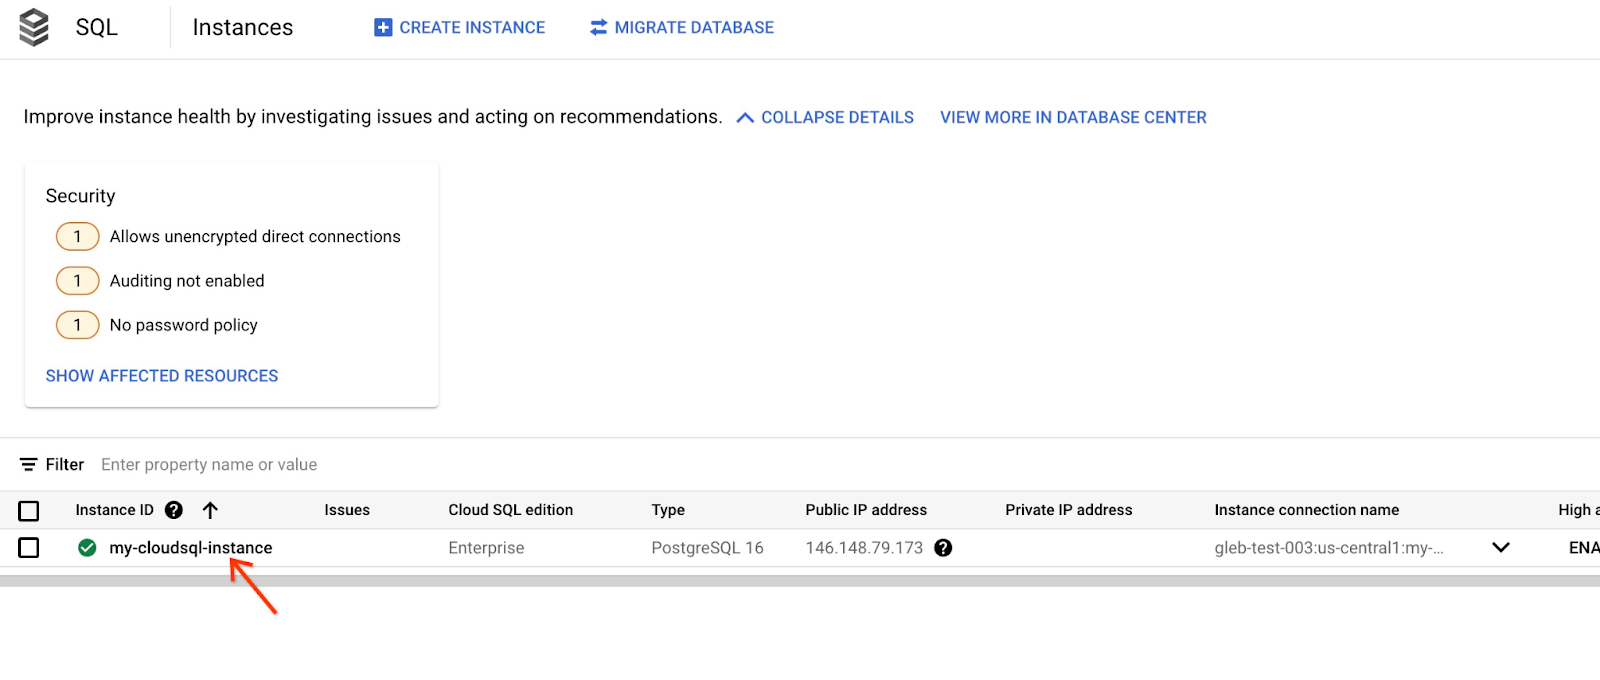
כשהחלונית פתוחה, אפשר לראות את Cloud SQL Studio בחלונית השמאלית. לוחצים עליו.

תיפתח תיבת דו-שיח שבה תצטרכו לספק את שם מסד הנתונים ואת פרטי הכניסה שלכם:
- מסד נתונים: quickstart_db
- משתמש: postgres
- סיסמה: הסיסמה שציינתם למשתמש הראשי במסד הנתונים
ולוחצים על הלחצן 'אימות'.

ייפתח החלון הבא, שבו לוחצים על הכרטיסייה 'עריכה' בצד שמאל כדי לפתוח את עורך ה-SQL.

עכשיו אנחנו מוכנים להריץ את השאילתות שלנו.
הרצת שאילתה
מריצים שאילתה כדי לקבל רשימה של מוצרים זמינים שקשורים בצורה הכי הדוקה לבקשה של הלקוח. הבקשה שנעביר ל-Vertex AI כדי לקבל את ערך הווקטור נשמעת כך: "What kind of fruit trees grow well here?"
זו השאילתה שאפשר להריץ כדי לבחור את 10 הפריטים הראשונים הכי מתאימים לבקשה שלנו:
SELECT
        cp.product_name,
        left(cp.product_description,80) as description,
        cp.sale_price,
        cs.zip_code,
        (cp.embedding <=> embedding('text-embedding-004','What kind of fruit trees grow well here?')::vector) as distance
FROM
        cymbal_products cp
JOIN cymbal_inventory ci on
        ci.uniq_id=cp.uniq_id
JOIN cymbal_stores cs on
        cs.store_id=ci.store_id
        AND ci.inventory>0
        AND cs.store_id = 1583
ORDER BY
        distance ASC
LIMIT 10;
מעתיקים את השאילתה ומדביקים אותה בעורך של Cloud SQL Studio, לוחצים על 'הפעלה' או מדביקים אותה בסשן של שורת הפקודה שמתחבר למסד הנתונים quickstart_db.

זו רשימת המוצרים שנבחרו בהתאם לשאילתה.
product_name       |                                   description                                    | sale_price | zip_code |      distance
-------------------------+----------------------------------------------------------------------------------+------------+----------+---------------------
 Cherry Tree             | This is a beautiful cherry tree that will produce delicious cherries. It is an d |      75.00 |    93230 | 0.43922018972266397
 Meyer Lemon Tree        | Meyer Lemon trees are California's favorite lemon tree! Grow your own lemons by  |         34 |    93230 |  0.4685112926118228
 Toyon                   | This is a beautiful toyon tree that can grow to be over 20 feet tall. It is an e |      10.00 |    93230 |  0.4835677149651668
 California Lilac        | This is a beautiful lilac tree that can grow to be over 10 feet tall. It is an d |       5.00 |    93230 |  0.4947204525907498
 California Peppertree   | This is a beautiful peppertree that can grow to be over 30 feet tall. It is an e |      25.00 |    93230 |  0.5054166905547247
 California Black Walnut | This is a beautiful walnut tree that can grow to be over 80 feet tall. It is a d |     100.00 |    93230 |  0.5084219510932597
 California Sycamore     | This is a beautiful sycamore tree that can grow to be over 100 feet tall. It is  |     300.00 |    93230 |  0.5140519790508755
 Coast Live Oak          | This is a beautiful oak tree that can grow to be over 100 feet tall. It is an ev |     500.00 |    93230 |  0.5143126438081371
 Fremont Cottonwood      | This is a beautiful cottonwood tree that can grow to be over 100 feet tall. It i |     200.00 |    93230 |  0.5174774727252058
 Madrone                 | This is a beautiful madrona tree that can grow to be over 80 feet tall. It is an |      50.00 |    93230 |  0.5227400803389093
(10 rows)
9. שיפור התגובה של LLM באמצעות נתונים שאוחזרו
אנחנו יכולים לשפר את התשובה של LLM ב-Gen AI לאפליקציית לקוח באמצעות התוצאה של השאילתה שבוצעה, ולהכין פלט בעל משמעות באמצעות תוצאות השאילתה שסופקו כחלק מההנחיה ל-Vertex AI generative foundation language model.
כדי לעשות זאת, אנחנו צריכים ליצור קובץ JSON עם התוצאות שלנו מחיפוש הווקטור, ואז להשתמש בקובץ ה-JSON שנוצר כתוספת להנחיה של מודל LLM ב-Vertex AI כדי ליצור פלט בעל משמעות. בשלב הראשון יוצרים את קובץ ה-JSON, בשלב השני בודקים אותו ב-Vertex AI Studio ובשלב האחרון משלבים אותו בהצהרת SQL שאפשר להשתמש בה באפליקציה.
יצירת פלט בפורמט JSON
משנים את השאילתה כך שתייצר את הפלט בפורמט JSON ותחזיר רק שורה אחת להעברה אל Vertex AI
Cloud SQL ל-PostgreSQL
זו דוגמה לשאילתה:
WITH trees as (
SELECT
        cp.product_name,
        left(cp.product_description,80) as description,
        cp.sale_price,
        cs.zip_code,
        cp.uniq_id as product_id
FROM
        cymbal_products cp
JOIN cymbal_inventory ci on
        ci.uniq_id=cp.uniq_id
JOIN cymbal_stores cs on
        cs.store_id=ci.store_id
        AND ci.inventory>0
        AND cs.store_id = 1583
ORDER BY
        (cp.embedding <=> embedding('text-embedding-004','What kind of fruit trees grow well here?')::vector) ASC
LIMIT 1)
SELECT json_agg(trees) FROM trees;
זהו ה-JSON הצפוי בפלט:
[{"product_name":"Cherry Tree","description":"This is a beautiful cherry tree that will produce delicious cherries. It is an d","sale_price":75.00,"zip_code":93230,"product_id":"d536e9e823296a2eba198e52dd23e712"}]
הרצת ההנחיה ב-Vertex AI Studio
אפשר להשתמש ב-JSON שנוצר כדי לספק אותו כחלק מההנחיה למודל טקסט של AI גנרטיבי ב-Vertex AI Studio
פותחים את Vertex AI Studio Chat במסוף Cloud.

יכול להיות שתתבקשו להפעיל ממשקי API נוספים, אבל אתם יכולים להתעלם מהבקשה. אין צורך ב-API נוסף כדי לסיים את שיעור ה-Lab.
זו ההנחיה שבה נשתמש:
You are a friendly advisor helping to find a product based on the customer's needs.
Based on the client request we have loaded a list of products closely related to search.
The list in JSON format with list of values like {"product_name":"name","description":"some description","sale_price":10,"zip_code": 10234, "produt_id": "02056727942aeb714dc9a2313654e1b0"}
Here is the list of products:
[place your JSON here]
The customer asked "What tree is growing the best here?"
You should give information about the product, price and some supplemental information.
Do not ask any additional questions and assume location based on the zip code provided in the list of products.
כך זה נראה כשמחליפים את placeholder ה-JSON בתגובה מהשאילתה:
You are a friendly advisor helping to find a product based on the customer's needs.
Based on the client request we have loaded a list of products closely related to search.
The list in JSON format with list of values like {"product_name":"name","description":"some description","sale_price":10,"zip_code": 10234, "produt_id": "02056727942aeb714dc9a2313654e1b0"}
Here is the list of products:
[{"product_name":"Cherry Tree","description":"This is a beautiful cherry tree that will produce delicious cherries. It is an d","sale_price":75.00,"zip_code":93230,"product_id":"d536e9e823296a2eba198e52dd23e712"}]
The customer asked "What tree is growing the best here?"
You should give information about the product, price and some supplemental information.
Do not ask any additional questions and assume location based on the zip code provided in the list of products.
זו התוצאה כשמריצים את ההנחיה עם ערכי ה-JSON שלנו תוך שימוש במודל gemini-2.0-flash:
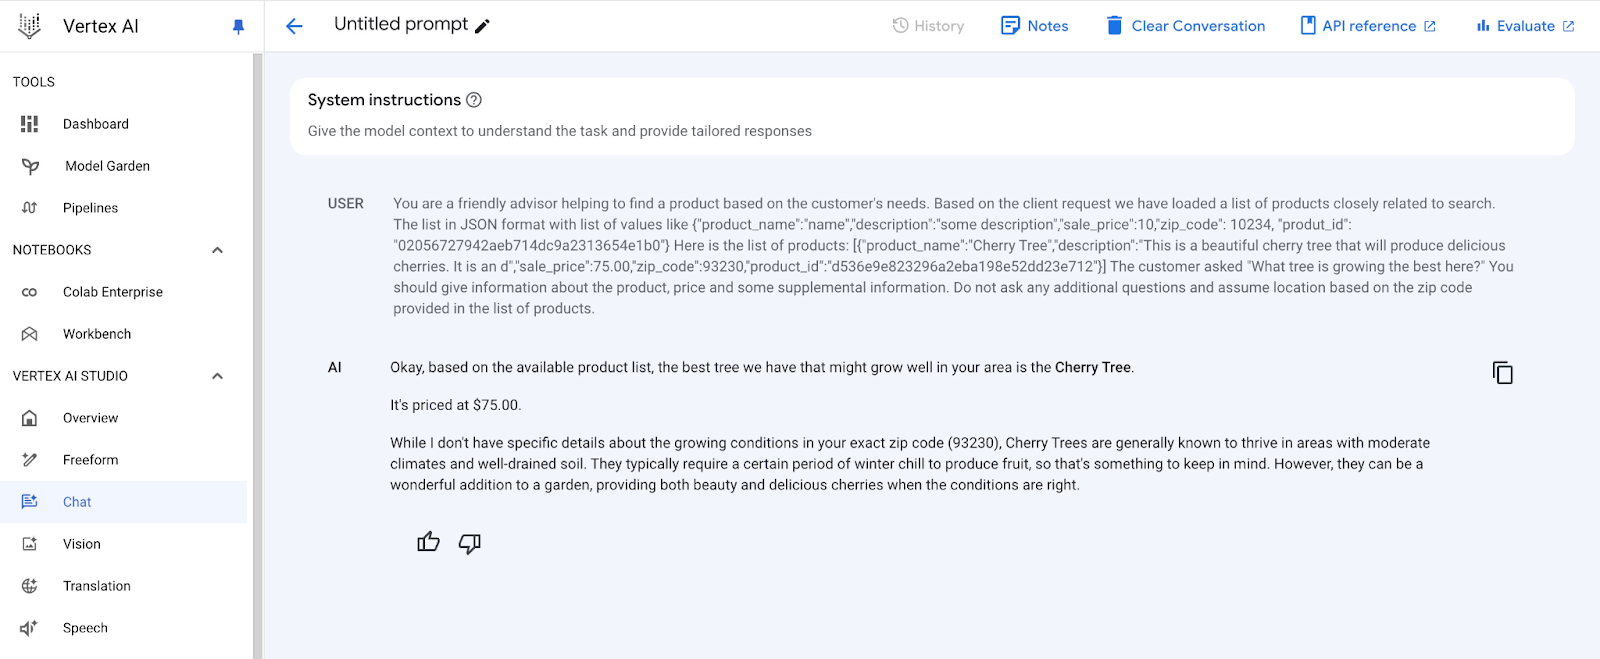
זו התשובה שקיבלנו מהמודל בדוגמה הזו. חשוב לזכור שהתשובה עשויה להיות שונה בגלל שינויים במודל ובפרמטרים לאורך זמן:
"בסדר, על סמך רשימת המוצרים הזמינים, העץ הטוב ביותר שיש לנו שעשוי לגדול היטב באזור שלך הוא עץ דובדבן.
המחיר הוא 75$.
אין לי פרטים ספציפיים לגבי תנאי הגידול במיקוד המדויק שלך (93230), אבל עצי דובדבן ידועים בדרך כלל כעצים שפורחים באזורים עם אקלים מתון ואדמה מנוקזת היטב. בדרך כלל, כדי שהן יניבו פירות, הן זקוקות לתקופה מסוימת של קור בחורף, לכן חשוב לזכור זאת. עם זאת, הן יכולות להיות תוספת נהדרת לגן, ולספק גם יופי וגם דובדבנים טעימים כשהתנאים מתאימים".
הרצת ההנחיה ב-PSQL
אפשר גם להשתמש בשילוב של Cloud SQL AI עם Vertex AI כדי לקבל תשובה דומה ממודל גנרטיבי באמצעות SQL ישירות במסד הנתונים. אבל כדי להשתמש במודל gemini-2.0-flash-exp, קודם צריך לרשום אותו.
הפעלה ב-Cloud SQL ל-PostgreSQL
משדרגים את התוסף לגרסה 1.4.2 ואילך (אם הגרסה הנוכחית נמוכה יותר). מתחברים למסד הנתונים quickstart_db באמצעות gcloud sql connect כפי שצוין קודם (או משתמשים ב-Cloud SQL Studio) ומבצעים את הפקודה:
SELECT extversion from pg_extension where extname='google_ml_integration';
אם הערך המוחזר נמוך מ-1.4.2, מריצים את הפקודה הבאה:
ALTER EXTENSION google_ml_integration UPDATE TO '1.4.2';
לאחר מכן, צריך להגדיר את הדגל של מסד הנתונים google_ml_integration.enable_model_support ל-'on'. כדי לעשות זאת, אפשר להשתמש בממשק של מסוף האינטרנט או להריץ את הפקודה הבאה ב-gcloud.
gcloud sql instances patch my-cloudsql-instance \
--database-flags google_ml_integration.enable_model_support=on,cloudsql.enable_google_ml_integration=on
הפקודה מופעלת ברקע תוך 1-3 דקות. לאחר מכן תוכלו לאמת את הדגל החדש בסשן psql או באמצעות Cloud SQL Studio שמתחבר למסד הנתונים quickstart_db.
show google_ml_integration.enable_model_support;
הפלט הצפוי מהסשן של psql הוא 'on':
quickstart_db => show google_ml_integration.enable_model_support;
 google_ml_integration.enable_model_support
--------------------------------------------
 on
(1 row)
לאחר מכן צריך לרשום שני מודלים. המודל הראשון הוא המודל text-embedding-004 שכבר נעשה בו שימוש. צריך לרשום אותו כי הפעלנו את היכולות של רישום הדגם.
כדי לרשום את הרצת המודל ב-psql או ב-Cloud SQL Studio, מזינים את הקוד הבא:
CALL
  google_ml.create_model(
    model_id => 'text-embedding-004',
    model_provider => 'google',
    model_qualified_name => 'text-embedding-004',
    model_type => 'text_embedding',
    model_auth_type => 'cloudsql_service_agent_iam',
    model_in_transform_fn => 'google_ml.vertexai_text_embedding_input_transform',
    model_out_transform_fn => 'google_ml.vertexai_text_embedding_output_transform');
המודל הבא שצריך לרשום הוא gemini-2.0-flash-001, שמשמש ליצירת הפלט שמתאים למשתמש.
CALL
  google_ml.create_model(
    model_id => 'gemini-2.0-flash-001',
    model_request_url => 'https://us-central1-aiplatform.googleapis.com/v1/projects/$PROJECT_ID/locations/us-central1/publishers/google/models/gemini-2.0-flash-001:streamGenerateContent',
    model_provider => 'google',
    model_auth_type => 'cloudsql_service_agent_iam');
תמיד אפשר לבדוק את רשימת המודלים הרשומים על ידי בחירת מידע מ-google_ml.model_info_view.
select model_id,model_type from google_ml.model_info_view;
הנה פלט לדוגמה
quickstart_db=> select model_id,model_type from google_ml.model_info_view;
               model_id               |   model_type
--------------------------------------+----------------
 textembedding-gecko                  | text_embedding
 textembedding-gecko@001              | text_embedding
 gemini-1.5-pro:streamGenerateContent | generic
 gemini-1.5-pro:generateContent       | generic
 gemini-1.0-pro:generateContent       | generic
 text-embedding-004                   | text_embedding
 gemini-2.0-flash-001                 | generic
עכשיו אפשר להשתמש ב-JSON שנוצר בשאילתת משנה כדי לספק אותו כחלק מההנחיה למודל טקסט של AI גנרטיבי באמצעות SQL.
מריצים את השאילתה בסשן psql או ב-Cloud SQL Studio למסד הנתונים.
WITH trees AS (
SELECT
        cp.product_name,
        cp.product_description AS description,
        cp.sale_price,
        cs.zip_code,
        cp.uniq_id AS product_id
FROM
        cymbal_products cp
JOIN cymbal_inventory ci ON
        ci.uniq_id = cp.uniq_id
JOIN cymbal_stores cs ON
        cs.store_id = ci.store_id
        AND ci.inventory>0
        AND cs.store_id = 1583
ORDER BY
        (cp.embedding <=> google_ml.embedding('text-embedding-004',
        'What kind of fruit trees grow well here?')::vector) ASC
LIMIT 1),
prompt AS (
SELECT
        'You are a friendly advisor helping to find a product based on the customer''s needs.
Based on the client request we have loaded a list of products closely related to search.
The list in JSON format with list of values like {"product_name":"name","product_description":"some description","sale_price":10}
Here is the list of products:' || json_agg(trees) || 'The customer asked "What kind of fruit trees grow well here?"
You should give information about the product, price and some supplemental information' AS prompt_text
FROM
        trees),
response AS (
SELECT
        json_array_elements(google_ml.predict_row( model_id =>'gemini-2.0-flash-001',
        request_body => json_build_object('contents',
        json_build_object('role',
        'user',
        'parts',
        json_build_object('text',
        prompt_text)))))->'candidates'->0->'content'->'parts'->0->'text' AS resp
FROM
        prompt)
SELECT
        string_agg(resp::text,
        ' ')
FROM
        response;
זהו הפלט הצפוי. הפלט עשוי להיות שונה בהתאם לגרסת המודל ולפרמטרים.
"That" "'s a great question! Based on your location (assuming you're" " in zip code 93230), I have a suggestion for a" " fruit tree that should thrive.\n\nWe have the **Cherry Tree** available.\n\n**Product Name:** Cherry Tree\n\n**Description:** This is a beautiful cherry" " tree that will produce delicious cherries. It's a deciduous tree (meaning it loses its leaves in the fall) growing to about 15 feet tall." " The leaves are dark green in summer, turning a beautiful red in the fall. Cherry trees are known for their beauty, shade, and privacy.\n\n**Sale Price:** $75.00\n\n**Important Considerations for Growing" " Cherry Trees:**\n\n* **Climate:** Cherry trees prefer a cool, moist climate, and 93230 falls within a suitable range (USDA zones 4-9). However, it's always a good idea to" " check the specific microclimate of your property (sun exposure, drainage etc.).\n* **Soil:** They do best in sandy soil. If your soil is different, you may need to amend it to improve drainage.\n* **Pollination:** Many cherry varieties require a second, compatible cherry tree for proper pollination" ". Check the specific pollination needs of this variety before purchase if you want a significant cherry yield.\n\nThis cherry tree is a beautiful addition to any yard and will provide you with delicious cherries if you can meet its needs. Would you like to know more about its pollination requirements, or perhaps see if we have any other" " fruit trees suitable for your area?\n" ""
10. יצירת אינדקס של השכן הקרוב ביותר
מערך הנתונים שלנו קטן למדי, וזמן המענה תלוי בעיקר באינטראקציות עם מודלים של AI. עם זאת, כשיש מיליוני וקטורים, חיפוש הוקטורים יכול להימשך חלק משמעותי מזמן התגובה שלנו ולהעמיס מאוד על המערכת. כדי לשפר את המצב, אפשר ליצור אינדקס מעל הווקטורים שלנו.
יצירת מדד HNSW
ננסה את סוג האינדקס HNSW בבדיקת ה-A/B שלנו. ראשי התיבות HNSW מייצגים את המונח Hierarchical Navigable Small World (עולם קטן היררכי שניתן לנווט בו), והם מייצגים אינדקס גרפי רב-שכבתי.
כדי ליצור את האינדקס של עמודת הטמעת הנתונים, צריך להגדיר את עמודת הטמעת הנתונים, פונקציית המרחק ופרמטרים אופציונליים כמו m או ef_constructions. מידע מפורט על הפרמטרים זמין במסמכי התיעוד.
CREATE INDEX cymbal_products_embeddings_hnsw ON cymbal_products
  USING hnsw (embedding vector_cosine_ops)
  WITH (m = 16, ef_construction = 64);
הפלט אמור להיראות כך:
quickstart_db=> CREATE INDEX cymbal_products_embeddings_hnsw ON cymbal_products
  USING hnsw (embedding vector_cosine_ops)
  WITH (m = 16, ef_construction = 64);
CREATE INDEX
quickstart_db=>
השוואת תגובות
עכשיו אפשר להריץ את שאילתת החיפוש של הווקטור במצב EXPLAIN ולאמת אם נעשה שימוש באינדקס.
EXPLAIN (analyze)
WITH trees as (
SELECT
        cp.product_name,
        left(cp.product_description,80) as description,
        cp.sale_price,
        cs.zip_code,
        cp.uniq_id as product_id
FROM
        cymbal_products cp
JOIN cymbal_inventory ci on
        ci.uniq_id=cp.uniq_id
JOIN cymbal_stores cs on
        cs.store_id=ci.store_id
        AND ci.inventory>0
        AND cs.store_id = 1583
ORDER BY
        (cp.embedding <=> embedding('text-embedding-004','What kind of fruit trees grow well here?')::vector) ASC
LIMIT 1)
SELECT json_agg(trees) FROM trees;
הפלט אמור להיראות כך:
 Aggregate  (cost=779.12..779.13 rows=1 width=32) (actual time=1.066..1.069 rows=1 loops=1)
   ->  Subquery Scan on trees  (cost=769.05..779.12 rows=1 width=142) (actual time=1.038..1.041 rows=1 loops=1)
         ->  Limit  (cost=769.05..779.11 rows=1 width=158) (actual time=1.022..1.024 rows=1 loops=1)
               ->  Nested Loop  (cost=769.05..9339.69 rows=852 width=158) (actual time=1.020..1.021 rows=1 loops=1)
                     ->  Nested Loop  (cost=768.77..9316.48 rows=852 width=945) (actual time=0.858..0.859 rows=1 loops=1)
                           ->  Index Scan using cymbal_products_embeddings_hnsw on cymbal_products cp  (cost=768.34..2572.47 rows=941 width=941) (actual time=0.532..0.539 rows=3 loops=1)
                                 Order By: (embedding <=> '[0.008864171,0.03693164,-0.024245683,...
<redacted>
...,0.017593635,-0.040275685,-0.03914233,-0.018452475,0.00826032,-0.07372604
]'::vector)
                           ->  Index Scan using product_inventory_pkey on cymbal_inventory ci  (cost=0.42..7.17 rows=1 width=37) (actual time=0.104..0.104 rows=0 loops=3)
                                 Index Cond: ((store_id = 1583) AND (uniq_id = (cp.uniq_id)::text))
                                 Filter: (inventory > 0)
                                 Rows Removed by Filter: 1
                     ->  Materialize  (cost=0.28..8.31 rows=1 width=8) (actual time=0.133..0.134 rows=1 loops=1)
                           ->  Index Scan using product_stores_pkey on cymbal_stores cs  (cost=0.28..8.30 rows=1 width=8) (actual time=0.129..0.129 rows=1 loops=1)
                                 Index Cond: (store_id = 1583)
 Planning Time: 112.398 ms
 Execution Time: 1.221 ms
אפשר לראות בבירור בפלט שהשאילתה השתמשה ב-'סריקת אינדקס באמצעות cymbal_products_embeddings_hnsw'.
אם מריצים את השאילתה בלי explain:
WITH trees as (
SELECT
        cp.product_name,
        left(cp.product_description,80) as description,
        cp.sale_price,
        cs.zip_code,
        cp.uniq_id as product_id
FROM
        cymbal_products cp
JOIN cymbal_inventory ci on
        ci.uniq_id=cp.uniq_id
JOIN cymbal_stores cs on
        cs.store_id=ci.store_id
        AND ci.inventory>0
        AND cs.store_id = 1583
ORDER BY
        (cp.embedding <=> embedding('text-embedding-004','What kind of fruit trees grow well here?')::vector) ASC
LIMIT 1)
SELECT json_agg(trees) FROM trees;
הפלט אמור להיראות כך:
[{"product_name":"Cherry Tree","description":"This is a beautiful cherry tree that will produce delicious cherries. It is an d","sale_price":75.00,"zip_code":93230,"product_id":"d536e9e823296a2eba198e52dd23e712"}]
אפשר לראות שהתוצאה זהה, ומוצג אותו עץ דובדבן שהופיע בראש החיפוש שלנו ללא הוספה לאינדקס. בהתאם לפרמטרים ולסוג האינדקס, יכול להיות שהתוצאה תהיה שונה במקצת. במהלך הבדיקות שלי, השאילתה שנוספה לאינדקס החזירה תוצאות תוך 131.301 אלפיות השנייה, לעומת 167.631 אלפיות השנייה ללא אינדקס. עם זאת, מדובר בקבוצת נתונים קטנה מאוד, וההבדל יהיה משמעותי יותר בקבוצות נתונים גדולות יותר.
במסמכי התיעוד תוכלו למצוא מדריכים נוספים לשימוש ב-Lab ובדוגמאות עם שילוב של שרשרת שפות, וגם לנסות אינדקסים שונים שזמינים לווקטורים.
11. פינוי הסביבה
מחיקת המכונה של Cloud SQL
השמדת המכונה של Cloud SQL בסיום העבודה במעבדה
אם התנתקתם וכל ההגדרות הקודמות אבדו, מגדירים את הפרויקט ומשתני הסביבה ב-Cloud Shell:
export INSTANCE_NAME=my-cloudsql-instance
export PROJECT_ID=$(gcloud config get-value project)
מוחקים את המכונה:
gcloud sql instances delete $INSTANCE_NAME --project=$PROJECT_ID
הפלט הצפוי במסוף:
student@cloudshell:~$ gcloud sql instances delete $INSTANCE_NAME --project=$PROJECT_ID
All of the instance data will be lost when the instance is deleted.

Do you want to continue (Y/n)?  y

Deleting Cloud SQL instance...done.
Deleted [https://sandbox.googleapis.com/v1beta4/projects/test-project-001-402417/instances/my-cloudsql-instance].
12. מזל טוב
כל הכבוד על השלמת ה-Codelab.
מה עסקנו בו
- פריסת מכונה של Cloud SQL ל-PostgreSQL
- איך יוצרים מסד נתונים ומפעילים את השילוב של Cloud SQL עם AI
- איך טוענים נתונים למסד הנתונים
- איך משתמשים במודל הטמעה של Vertex AI ב-Cloud SQL
- איך להעשיר את התוצאה באמצעות מודל גנרטיבי של Vertex AI
- איך לשפר את הביצועים באמצעות אינדקס וקטור
כדאי לנסות codelab דומה ל-AlloyDB עם אינדקס ScaNN במקום HNSW
13. סקר
פלט: