1. 概览
在本实验中,您将学习如何使用 Vertex AI(Google Cloud 新近发布的托管机器学习平台)构建端到端机器学习工作流。您将学习如何从原始数据到已部署的模型,并且在完成本研讨会后,您将能够使用 Vertex AI 开发和生产化自己的机器学习项目。在本实验中,我们将使用 Cloud Shell 构建自定义 Docker 映像,以演示如何使用 Vertex AI 进行训练的自定义容器。
虽然我们在此处使用 TensorFlow 构建模型代码,但您可以轻松地将其替换为其他框架。
学习内容
您将了解如何:
- 使用 Cloud Shell 构建模型训练代码并将其容器化
- 向 Vertex AI 提交自定义模型训练作业
- 将经过训练的模型部署到端点,并使用该端点获取预测结果
在 Google Cloud 上运行此实验的总费用约为 2 美元 。
2. Vertex AI 简介
本实验使用的是 Google Cloud 上提供的最新 AI 产品。Vertex AI 将整个 Google Cloud 的机器学习产品集成到无缝的开发体验中。以前,使用 AutoML 训练的模型和自定义模型是通过不同的服务访问的。现在,该新产品与其他新产品一起将这两种模型合并到一个 API 中。您还可以将现有项目迁移到 Vertex AI。如果您有任何反馈,请参阅支持页面。
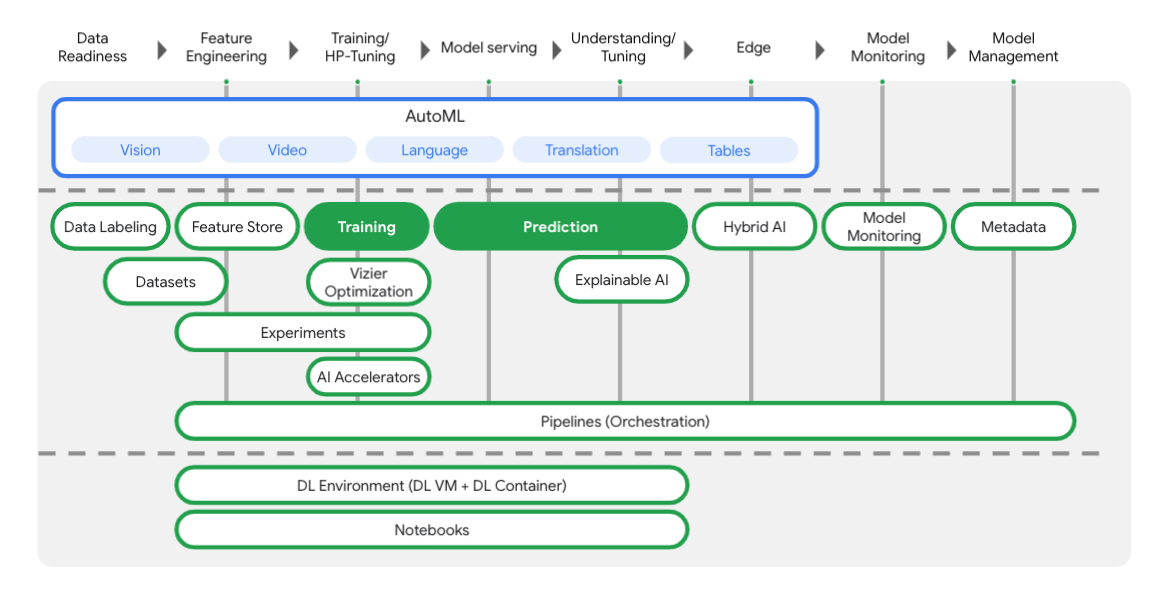
Vertex 包含许多不同的工具,可帮助您完成机器学习工作流的每个阶段,如下图所示。我们将重点介绍如何使用 Vertex 训练 和 预测,如下所示。
3. 设置环境
自定进度的环境设置
登录 Cloud 控制台,然后创建一个新项目或重复使用现有项目。 (如果您还没有 Gmail 或 Google Workspace 账号,则必须 创建一个。)

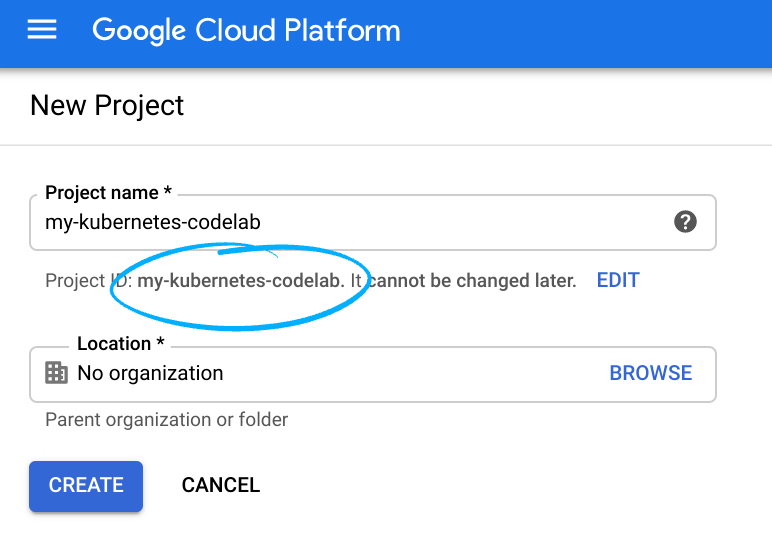
请记住项目 ID,它在所有 Google Cloud 项目中都是唯一的名称(上述名称已被占用,您无法使用,抱歉!)。
接下来,您需要在 Cloud 控制台中 启用结算功能,才能使用 Google Cloud 资源。
运行此 Codelab 应该不会产生太多的费用(如果有费用的话)。请务必按照“清理”部分中的所有说明操作,该部分介绍了如何关停资源,以免产生超出本教程范围的结算费用。Google Cloud 新用户有资格参加 300 美元的免费试用 计划。
第 1 步:启动 Cloud Shell
在本实验中,您将在 Cloud Shell 会话中工作,这是一个由在 Google Cloud 中运行的虚拟机托管的命令解释器。您也可以在自己的计算机上本地运行此部分,但使用 Cloud Shell 可让每个人在一致的环境中获得可重现的体验。实验结束后,欢迎您在自己的计算机上重试此部分。
激活 Cloud Shell
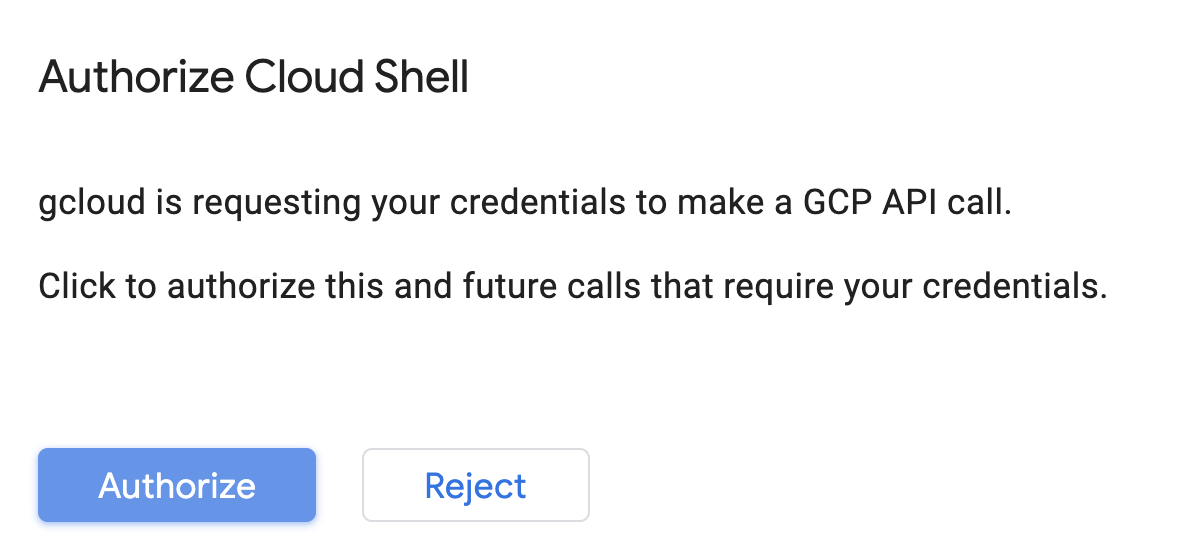
在 Cloud 控制台的右上角,点击下面的按钮以激活 Cloud Shell:

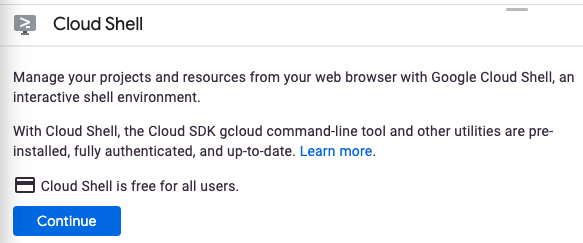
如果您以前从未启动过 Cloud Shell,将看到一个中间屏幕(非首屏),描述它是什么。如果是这种情况,请点击继续 (您将永远不会再看到它)。一次性屏幕如下所示:
预配和连接到 Cloud Shell 只需花几分钟时间。

这个虚拟机已加载了您需要的所有开发工具。它提供了一个持久的 5GB 主目录,并且在 Google Cloud 中运行,大大增强了网络性能和身份验证。 只需使用一个浏览器或 Chromebook 即可完成本 Codelab 中的大部分(甚至全部)工作。
在连接到 Cloud Shell 后,您应该会看到自己已通过身份验证,并且相关项目已设置为您的项目 ID:
在 Cloud Shell 中运行以下命令以确认您已通过身份验证:
gcloud auth list
命令输出
 Credentialed Accounts
ACTIVE  ACCOUNT
*       <my_account>@<my_domain.com>

To set the active account, run:
    $ gcloud config set account `ACCOUNT`
在 Cloud Shell 中运行以下命令,以确认 gcloud 命令了解您的项目:
gcloud config list project
命令输出
[core]
project = <PROJECT_ID>
如果不是上述结果,您可以使用以下命令进行设置:
gcloud config set project <PROJECT_ID>
命令输出
Updated property [core/project].
Cloud Shell 有几个环境变量,包括 GOOGLE_CLOUD_PROJECT,其中包含当前云项目的名称。我们将在本实验的各个位置使用此变量。您可以通过运行以下命令查看它:
echo $GOOGLE_CLOUD_PROJECT
第 2 步:启用 API
在后续步骤中,您将了解在何处需要这些服务(以及原因),但现在,请运行以下命令,让您的项目能够访问 Compute Engine、Container Registry 和 Vertex AI 服务:
gcloud services enable compute.googleapis.com         \
                       containerregistry.googleapis.com  \
                       aiplatform.googleapis.com
这应该会生成类似于以下内容的成功消息:
Operation "operations/acf.cc11852d-40af-47ad-9d59-477a12847c9e" finished successfully.
第 3 步:创建 Cloud Storage 存储分区
如需在 Vertex AI 上运行训练作业,我们需要一个存储分区来存储保存的模型资产。在 Cloud Shell 终端中运行以下命令以创建存储分区:
BUCKET_NAME=gs://$GOOGLE_CLOUD_PROJECT-bucket
gsutil mb -l us-central1 $BUCKET_NAME
第 4 步:为 Python 3 创建别名
本实验中的代码使用 Python 3。为确保您在运行本实验中创建的脚本时使用 Python 3,请在 Cloud Shell 中运行以下命令来创建别名:
alias python=python3
我们将在本实验中训练和部署的模型基于 本教程(摘自 TensorFlow 文档)。本教程使用 Kaggle 中的 Auto MPG 数据集 来预测车辆的燃料效率。
4. 容器化训练代码
我们将训练代码放入 Docker 容器中,并将此容器推送到 Google Container Registry,以将此训练作业提交到 Vertex。使用这种方法,我们可以训练使用任何框架构建的模型。
第 1 步:设置文件
首先,在 Cloud Shell 的终端中,运行以下命令来创建 Docker 容器所需的文件:
mkdir mpg
cd mpg
touch Dockerfile
mkdir trainer
touch trainer/train.py
您现在应该有一个 mpg/ 目录,如下所示:
+ Dockerfile
+ trainer/
    + train.py
如需查看和修改这些文件,我们将使用 Cloud Shell 的内置代码编辑器。您可以点击 Cloud Shell 右上角菜单栏中的按钮,在编辑器和终端之间来回切换:

第 2 步:创建 Dockerfile
如需容器化我们的代码,我们首先要创建一个 Dockerfile。在 Dockerfile 中,我们将包含运行映像所需的所有命令。它将安装我们使用的所有库,并为训练代码设置入口点。
在 Cloud Shell 文件编辑器中,打开 mpg/ 目录,然后双击以打开 Dockerfile:

然后将以下内容复制到此文件中:
FROM gcr.io/deeplearning-platform-release/tf2-cpu.2-3
WORKDIR /

# Copies the trainer code to the docker image.
COPY trainer /trainer

# Sets up the entry point to invoke the trainer.
ENTRYPOINT ["python", "-m", "trainer.train"]
此 Dockerfile 使用 Deep Learning Container TensorFlow 企业版 2.3 Docker 映像。Google Cloud 上的 Deep Learning Containers 预安装了许多常见的机器学习和数据科学框架。我们使用的框架包括 TF Enterprise 2.3、Pandas、Scikit-learn 等。下载该映像后,此 Dockerfile 会为训练代码设置入口点,我们将在下一步中添加该入口点。
第 3 步:添加模型训练代码
在 Cloud Shell 编辑器中,接下来打开 train.py 文件并复制以下代码(此代码改编自 教程 在 TensorFlow 文档中)。
# This will be replaced with your bucket name after running the `sed` command in the tutorial
BUCKET = "BUCKET_NAME"

import numpy as np
import pandas as pd
import pathlib
import tensorflow as tf

from tensorflow import keras
from tensorflow.keras import layers

print(tf.__version__)

"""## The Auto MPG dataset

The dataset is available from the [UCI Machine Learning Repository](https://archive.ics.uci.edu/ml/).

### Get the data
First download the dataset.
"""

"""Import it using pandas"""

dataset_path = "https://storage.googleapis.com/io-vertex-codelab/auto-mpg.csv"
dataset = pd.read_csv(dataset_path, na_values = "?")

dataset.tail()

"""### Clean the data

The dataset contains a few unknown values.
"""

dataset.isna().sum()

"""To keep this initial tutorial simple drop those rows."""

dataset = dataset.dropna()

"""The `"origin"` column is really categorical, not numeric. So convert that to a one-hot:"""

dataset['origin'] = dataset['origin'].map({1: 'USA', 2: 'Europe', 3: 'Japan'})

dataset = pd.get_dummies(dataset, prefix='', prefix_sep='')
dataset.tail()

"""### Split the data into train and test

Now split the dataset into a training set and a test set.

We will use the test set in the final evaluation of our model.
"""

train_dataset = dataset.sample(frac=0.8,random_state=0)
test_dataset = dataset.drop(train_dataset.index)

"""### Inspect the data

Have a quick look at the joint distribution of a few pairs of columns from the training set.

Also look at the overall statistics:
"""

train_stats = train_dataset.describe()
train_stats.pop("mpg")
train_stats = train_stats.transpose()
train_stats

"""### Split features from labels

Separate the target value, or "label", from the features. This label is the value that you will train the model to predict.
"""

train_labels = train_dataset.pop('mpg')
test_labels = test_dataset.pop('mpg')

"""### Normalize the data

Look again at the `train_stats` block above and note how different the ranges of each feature are.

It is good practice to normalize features that use different scales and ranges. Although the model *might* converge without feature normalization, it makes training more difficult, and it makes the resulting model dependent on the choice of units used in the input.

Note: Although we intentionally generate these statistics from only the training dataset, these statistics will also be used to normalize the test dataset. We need to do that to project the test dataset into the same distribution that the model has been trained on.
"""

def norm(x):
  return (x - train_stats['mean']) / train_stats['std']
normed_train_data = norm(train_dataset)
normed_test_data = norm(test_dataset)

"""This normalized data is what we will use to train the model.

Caution: The statistics used to normalize the inputs here (mean and standard deviation) need to be applied to any other data that is fed to the model, along with the one-hot encoding that we did earlier.  That includes the test set as well as live data when the model is used in production.

## The model

### Build the model

Let's build our model. Here, we'll use a `Sequential` model with two densely connected hidden layers, and an output layer that returns a single, continuous value. The model building steps are wrapped in a function, `build_model`, since we'll create a second model, later on.
"""

def build_model():
  model = keras.Sequential([
    layers.Dense(64, activation='relu', input_shape=[len(train_dataset.keys())]),
    layers.Dense(64, activation='relu'),
    layers.Dense(1)
  ])

  optimizer = tf.keras.optimizers.RMSprop(0.001)

  model.compile(loss='mse',
                optimizer=optimizer,
                metrics=['mae', 'mse'])
  return model

model = build_model()

"""### Inspect the model

Use the `.summary` method to print a simple description of the model
"""

model.summary()

"""Now try out the model. Take a batch of `10` examples from the training data and call `model.predict` on it.

It seems to be working, and it produces a result of the expected shape and type.

### Train the model

Train the model for 1000 epochs, and record the training and validation accuracy in the `history` object.

Visualize the model's training progress using the stats stored in the `history` object.

This graph shows little improvement, or even degradation in the validation error after about 100 epochs. Let's update the `model.fit` call to automatically stop training when the validation score doesn't improve. We'll use an *EarlyStopping callback* that tests a training condition for  every epoch. If a set amount of epochs elapses without showing improvement, then automatically stop the training.

You can learn more about this callback [here](https://www.tensorflow.org/api_docs/python/tf/keras/callbacks/EarlyStopping).
"""

model = build_model()

EPOCHS = 1000

# The patience parameter is the amount of epochs to check for improvement
early_stop = keras.callbacks.EarlyStopping(monitor='val_loss', patience=10)

early_history = model.fit(normed_train_data, train_labels,
                    epochs=EPOCHS, validation_split = 0.2,
                    callbacks=[early_stop])


# Export model and save to GCS
model.save(BUCKET + '/mpg/model')
将上述代码复制到 mpg/trainer/train.py 文件后,返回 Cloud Shell 中的终端,然后运行以下命令,将您自己的存储分区名称添加到该文件:
sed -i "s|BUCKET_NAME|$BUCKET_NAME|g" trainer/train.py
第 4 步:在本地构建和测试容器
在终端中,运行以下命令,使用 Google Container Registry 中容器映像的 URI 定义变量:
IMAGE_URI="gcr.io/$GOOGLE_CLOUD_PROJECT/mpg:v1"
然后,从 mpg 目录的根目录运行以下命令来构建容器:
docker build ./ -t $IMAGE_URI
构建容器后,将其推送到 Google Container Registry:
docker push $IMAGE_URI
如需验证映像是否已推送到 Container Registry,请前往控制台的 Container Registry 部分,您应该会看到类似以下内容:
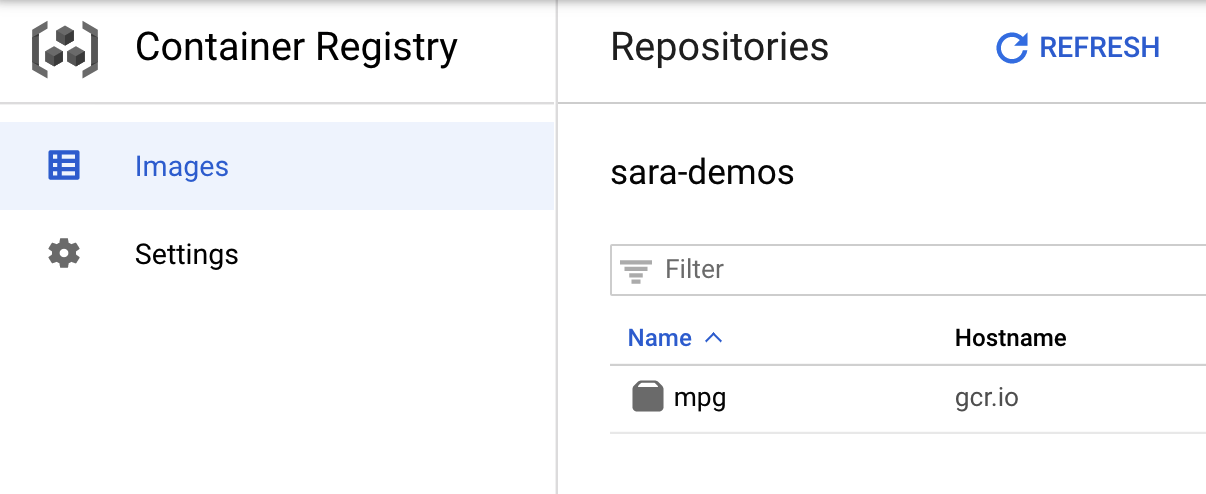
在将容器推送到 Container Registry 后,我们就可以启动自定义模型训练作业了。
5. 在 Vertex AI 上运行训练作业
Vertex 为您提供了两种训练模型的方式:
- AutoML:以最少的精力和机器学习专业知识训练高质量模型。
- 自定义训练:使用 Google Cloud 的预构建容器之一在云端运行自定义训练应用,也可以使用自己的容器。
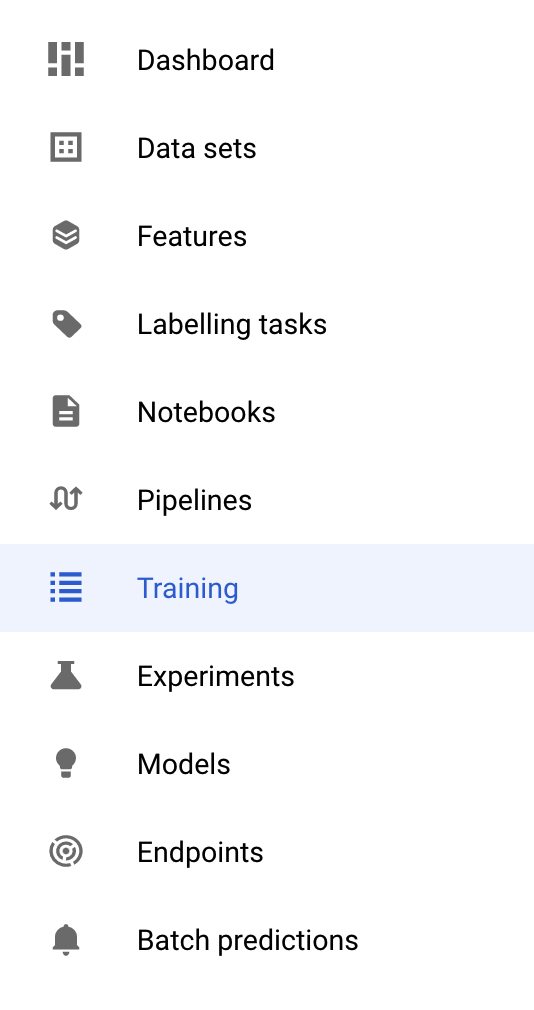
在本实验中,我们将通过 Google Container Registry 上的自定义容器使用自定义训练。首先,请前往 Cloud 控制台的“Vertex”部分中的训练 部分:
第 1 步:启动训练作业
点击创建 ,输入训练作业和已部署模型的参数:
- 在数据集 下,选择无托管数据集
- 然后选择自定义训练(高级) 作为训练方法,然后点击继续 。
- 为模型名称 输入
mpg(或您希望为模型命名的任何名称) - 点击继续
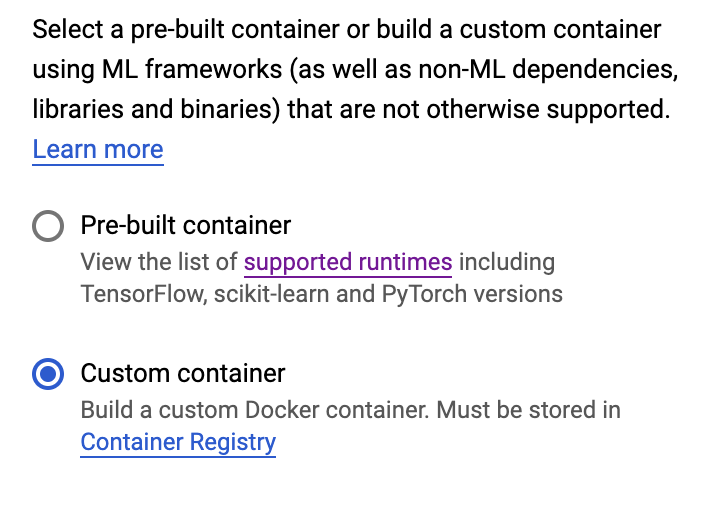
在“容器设置”步骤中,选择自定义容器:
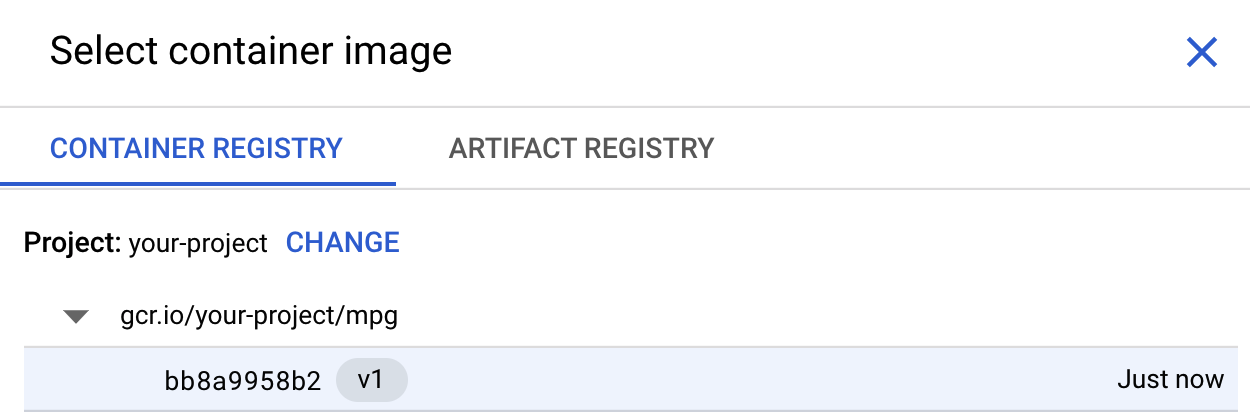
在第一个框(容器映像)中,点击浏览 ,然后找到您刚刚推送到 Container Registry 的容器。输出应如下所示:
将其余字段留空,然后点击继续 。
在本教程中,我们将不使用超参数调优,因此请取消选中 “启用超参数调优”框,然后点击继续 。
在计算和价格 中,将所选区域保留原样,然后选择 n1-standard-4 作为机器类型:
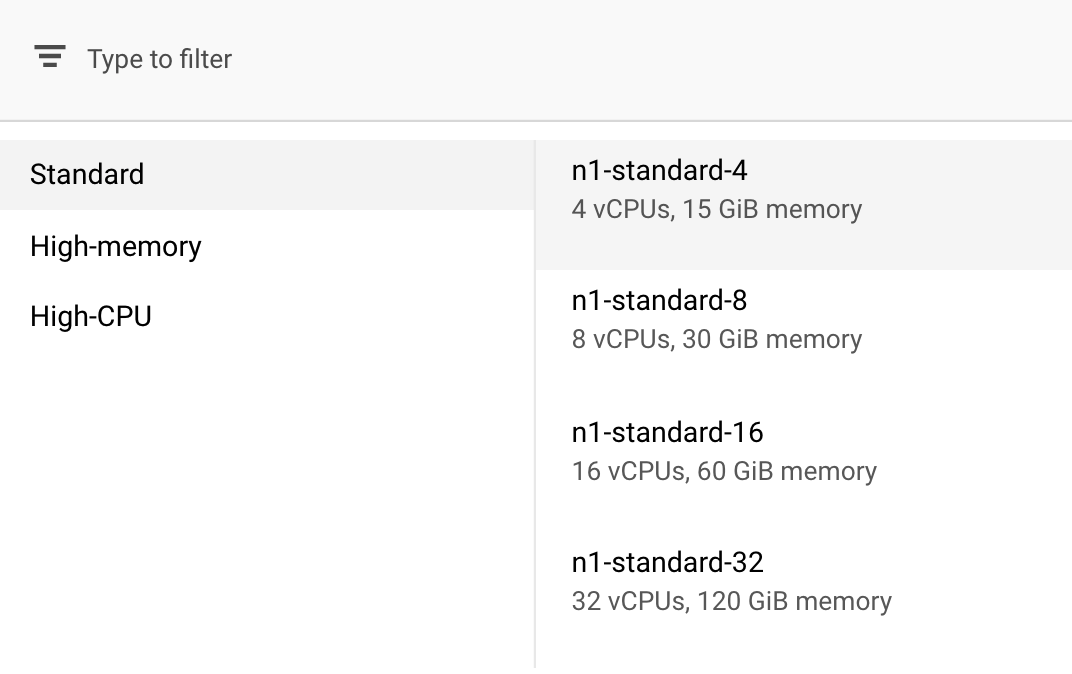
由于本演示中的模型训练速度很快,因此我们使用的是较小的机器类型。
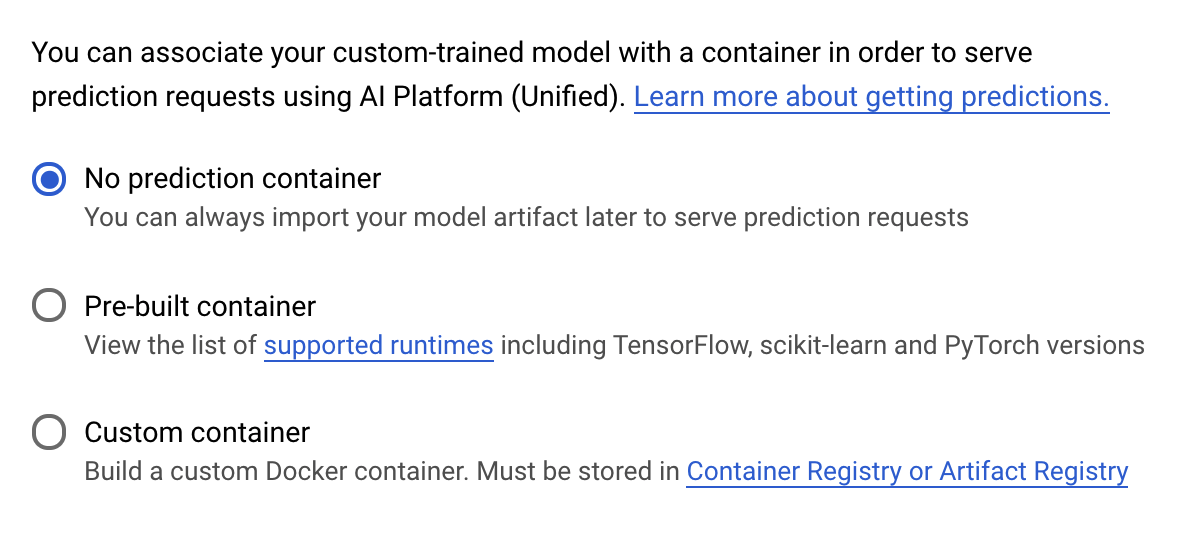
在预测容器 步骤中,选择无预测容器 :
6. 部署模型端点
在此步骤中,我们将为经过训练的模型创建一个端点。我们可以使用此端点通过 Vertex AI API 获取模型的预测结果。为此,我们已在公开 GCS 存储分区中提供导出后的经过训练的模型资产的版本。
在组织中,通常由一个团队或个人负责构建模型,而由另一个团队负责部署模型。我们在此处介绍的步骤将向您展示如何获取已训练的模型并将其部署以进行预测。
在这里,我们将使用 Vertex AI SDK 创建模型,将其部署到端点,并获取预测结果。
第 1 步:安装 Vertex SDK
在 Cloud Shell 终端中,运行以下命令以安装 Vertex AI SDK:
pip3 install google-cloud-aiplatform --upgrade --user
我们可以使用此 SDK 与 Vertex 的许多不同部分进行交互。
第 2 步:创建模型并部署端点
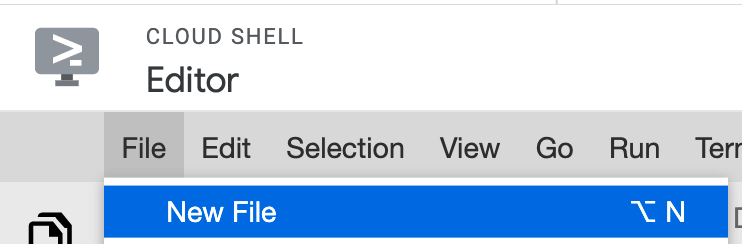
接下来,我们将创建一个 Python 文件,并使用 SDK 创建模型资源并将其部署到端点。在 Cloud Shell 的文件编辑器中,依次选择文件 和新建文件:
将文件命名为 deploy.py。在编辑器中打开此文件,然后复制以下代码:
from google.cloud import aiplatform

# Create a model resource from public model assets
model = aiplatform.Model.upload(
    display_name="mpg-imported",
    artifact_uri="gs://io-vertex-codelab/mpg-model/",
    serving_container_image_uri="gcr.io/cloud-aiplatform/prediction/tf2-cpu.2-3:latest"
)

# Deploy the above model to an endpoint
endpoint = model.deploy(
    machine_type="n1-standard-4"
)
接下来,返回 Cloud Shell 中的终端,cd 返回根目录,然后运行刚刚创建的 Python 脚本:
cd ..
python3 deploy.py | tee deploy-output.txt
您会看到在创建资源时记录到终端的更新。此过程需要 10-15 分钟才能运行完毕。为确保其正常运行,请前往 Vertex AI 控制台的“模型”部分”:
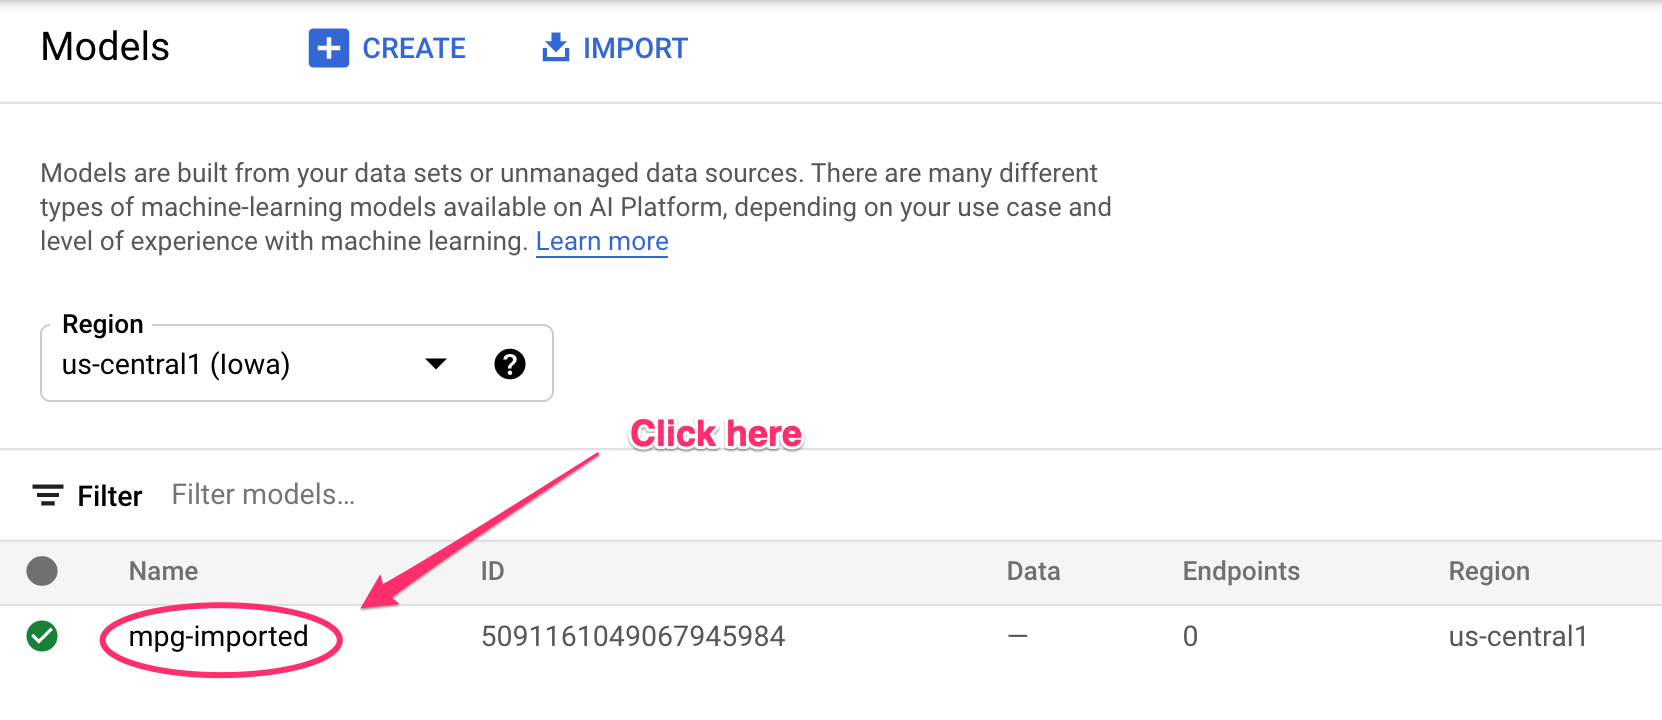
点击 mgp-imported ,您应该会看到正在为该模型创建端点:
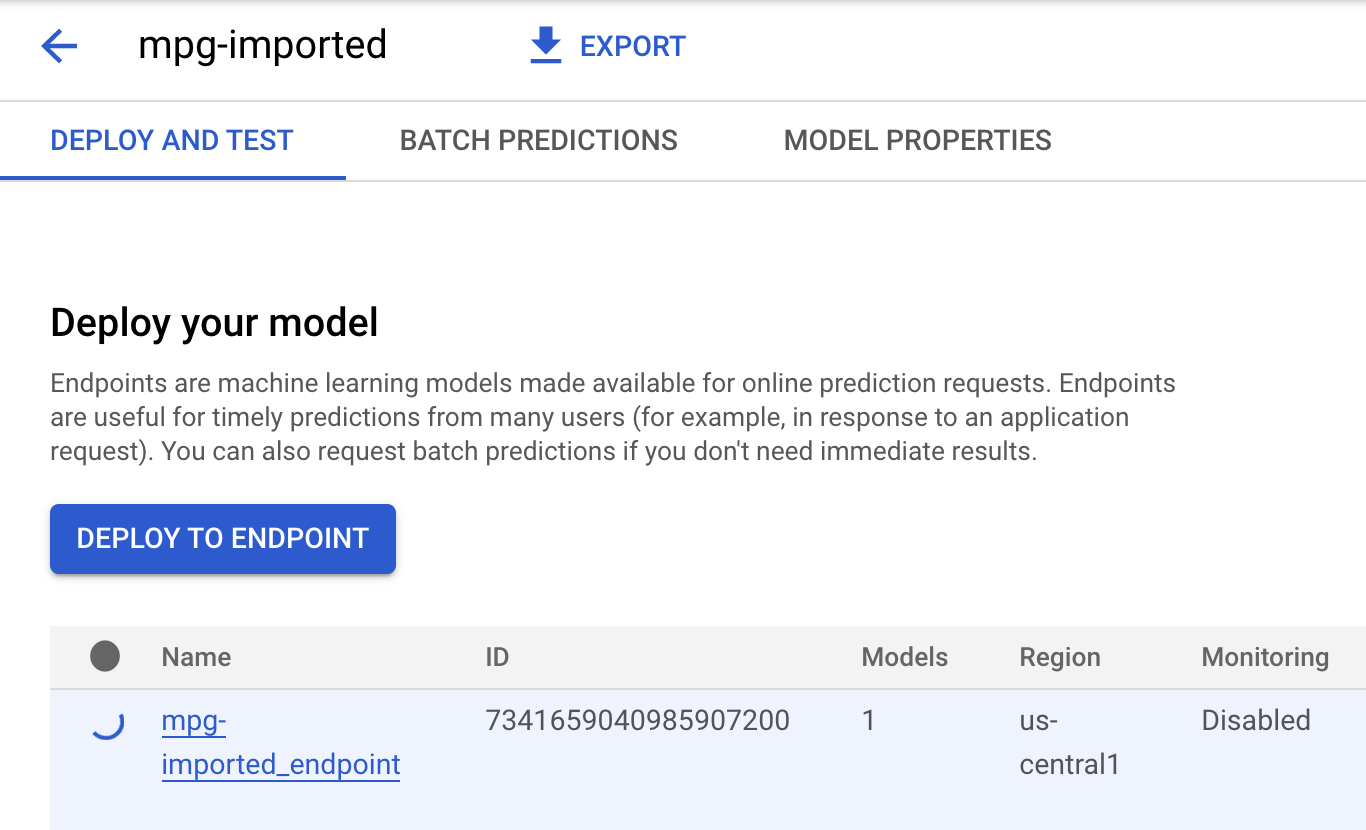
在 Cloud Shell 终端中,端点部署完成后,您会看到类似以下日志:
Endpoint model deployed. Resource name: projects/your-project-id/locations/us-central1/endpoints/your-endpoint-id
您将在下一步中使用此端点来获取已部署端点的预测结果。
第 3 步:获取已部署端点的预测结果
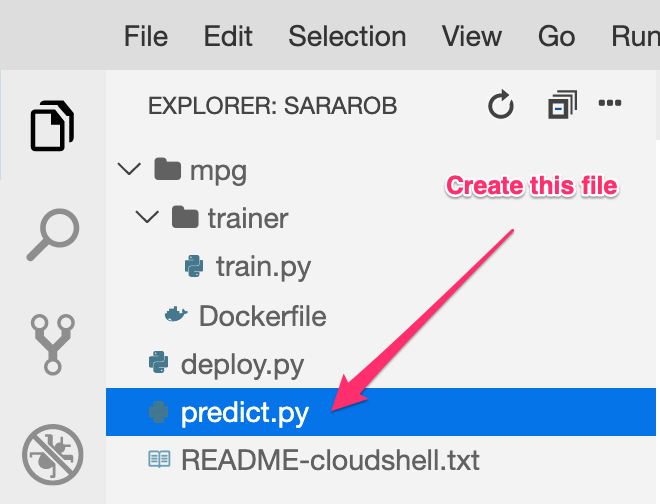
在 Cloud Shell 编辑器中,创建一个名为 predict.py 的新文件:
打开 predict.py 并将以下代码粘贴到其中:
from google.cloud import aiplatform

endpoint = aiplatform.Endpoint(
    endpoint_name="ENDPOINT_STRING"
)

# A test example we'll send to our model for prediction
test_mpg = [1.4838871833555929,
 1.8659883497083019,
 2.234620276849616,
 1.0187816540094903,
 -2.530890710602246,
 -1.6046416850441676,
 -0.4651483719733302,
 -0.4952254087173721,
 0.7746763768735953]

response = endpoint.predict([test_mpg])

print('API response: ', response)

print('Predicted MPG: ', response.predictions[0][0])
接下来,返回终端并输入以下内容,将预测文件中的 ENDPOINT_STRING 替换为您自己的端点:
ENDPOINT=$(cat deploy-output.txt | sed -nre 's:.*Resource name\: (.*):\1:p' | tail -1)
sed -i "s|ENDPOINT_STRING|$ENDPOINT|g" predict.py
现在,您可以运行 predict.py 文件,以从已部署的模型端点获取预测结果:
python3 predict.py
您应该会看到 API 的响应记录,以及测试预测的预测燃料效率。
🎉 恭喜!🎉
您学习了如何使用 Vertex AI 执行以下操作:
- 通过在自定义容器中提供训练代码来训练模型。您在本示例中使用了 TensorFlow 模型,但可以使用自定义容器训练通过任何框架构建的模型。
- 使用预构建容器部署 TensorFlow 模型,作为您用于训练的同一工作流的一部分。
- 创建模型端点并生成预测结果。
如需详细了解 Vertex AI 的各个部分,请参阅相关文档。如需查看您在第 5 步中启动的训练作业的结果,请前往 Vertex 控制台的 训练部分。
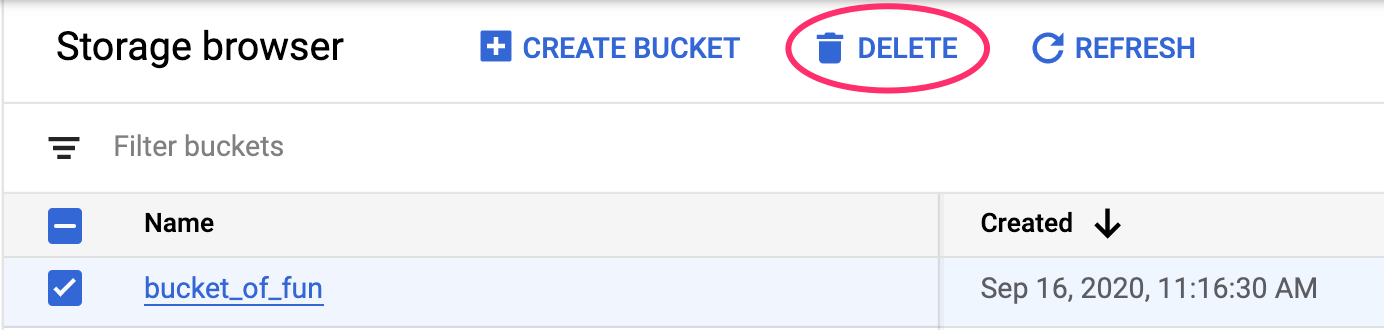
7. 清理
如需删除已部署的端点,请前往 Vertex 控制台的端点 部分,然后点击删除图标:

如需删除存储分区,请使用 Cloud 控制台中的导航菜单,浏览到“存储空间”,选择您的存储分区,然后点击“删除”: