1. Introduction
So you've created a custom machine learning model with TensorFlow.js but now you need to host it somewhere to use on a website of your choice. There are many options to do this, but today we shall see how easy it is to use Firebase Hosting which can also give you some extra benefits such as versioning, serving models over a secure connection, and more out of the box.
What you'll build
In this code lab you will create a full end to end system capable of hosting and running a custom saved TensorFlow.js model along with its related assets such as HTML, CSS, and JavaScript. We will make a very simple lightweight model that can predict a numerical output value given some input value (e.g. what is the price of a house given its square footage), and host it via Firebase Hosting so that it can be used at scale.
What you'll learn
- How to save a custom TensorFlow.js model in the right format
- How to setup a Firebase account for hosting
- How to deploy your assets to Firebase Hosting
- How to deploy new versions of a model.
Please note: The focus of this code lab is how to take a custom trained model and host it for deployment, rather than a course in making the perfect model architecture, so we will move fast through the creation of the machine learning model itself with a trivial example. The principles will be the same no matter what model you end up creating yourself.
Share what you make with us
If you have made something cool using this stack, let us know! We would love to see your creations.
Tag us on social media using the #MadeWithTFJS hashtag for a chance for your project to be featured on our TensorFlow blog or even future events like our Show & Tells.
2. What is Firebase Hosting?
Firebase Hosting provides fast and secure production-grade hosting for your web app, static / dynamic content, and microservices
With a single command, you can quickly deploy web apps and serve content to a global CDN (content delivery network) ensuring your content is available with low latency almost anywhere. You can also pair Firebase Hosting with Firebase Cloud Functions or Cloud Run to build and host microservices too, but that is beyond the scope of this codelab.
Firebase Hosting key capabilities
- Serve content over a secure connection - the modern web is secure. Often to access sensors on the client side the site must be delivered over a secure context. Zero-configuration SSL is built into Firebase Hosting, so content is always delivered securely for all files hosted.
- Host static and dynamic content plus microservices with support for authentication so only logged in users can load / view those files if desired.
- Deliver content fast - Each file that you upload is cached on SSDs at CDN edges around the world. No matter where your users are, the content is delivered fast.
- Deploy new versions with one command - Using the Firebase command line interface, you can get your app up and running in seconds.
- Rollback with one click - Quick deployments are great, but being able to undo mistakes is even better. Firebase Hosting provides full versioning and release management with one-click rollbacks.
Whether you are deploying a simple app landing page or a complex Progressive Web App (PWA), Hosting gives you the infrastructure, features, and tooling tailored to deploying and managing websites and apps.
By default, every Firebase project has free subdomains on the web.app and firebaseapp.com domains. These two sites serve the same deployed content and configuration. You can connect your own domain name to a Firebase-hosted site too if desired.
Steps to implementation
- Set up a project
- Install + configure the Firebase command line interface
- Deploy your site
- Link to Firebase web app for performance monitoring (optional)
But before we can do any of this we need a machine learning model and web app to deploy. So let's make one!
3. A simple Machine Learning model to predict house prices
For the purpose of this exercise we will make a very simple ML Model that predicts numerical values. We will try and use machine learning to predict the value of a fictional house given its size in square feet for illustrative purposes only. In fact for this demo we will simply 1000x the sqft of the house to get its predicted value for our training data, but the machine learning will need to learn this for itself.
In reality you would choose to use real world data which may have more complex relations (eg maybe for smaller houses its only 500x its size to estimate dollar value, but after a certain threshold it gradually becomes 1000x etc) and you may need a more advanced model to learn the best way to predict those values.
The model we will create today (linear regression) could be used to predict many other things given enough real world data and is simple to get started with for our hypothetical use case above. However our focus today is learning how to save and deploy a model vs designing and optimizing one for a given use case. So let's get to it!
Training & Testing data
All ML models begin with obtaining some example training data we can use to teach the model to be able to predict values in the future. Typically you may take such data from a database, folder of files, CSV or more, but here we will directly hardcode 20 examples as an array in JavaScript as shown below. We recommend replicating this code in an environment you are happy coding in for now such as Glitch.com, or your own text editor locally if you are able to run a server on localhost.
model.js
// House square footage.
const data =    [800, 850, 900, 950, 980, 1000, 1050, 1075, 1100, 1150, 1200, 1250, 1300, 1400, 1500, 1600, 1700, 1800, 1900, 2000];

// Estimated dollar cost of house for each piece of data above (1000x square footage).
const answers = [800000, 850000, 900000, 950000, 980000, 1000000, 1050000, 1075000, 1100000, 1150000, 1200000,  1250000 , 1300000, 1400000, 1500000, 1600000, 1700000, 1800000, 1900000, 2000000];

// Testing data separate from training data.
const dataTest =     [886, 1225, 500];
const answersTest =  [886000, 1225000, 500000];
As you can see for every piece of data we have a corresponding answer value which is the value we will try and predict in the future (you could imagine these as the x and y values on a simple 2D graph).
So for the value 800, we want to produce an output answer estimate of $800,000. For the value 900 we would output $900,000, and so on. Essentially the number is multiplied by 1000. However the ML model does not know about this simple relation of 1000 * N, and it must learn it by itself from these examples we provide.
Note how we also have some testing data that is entirely separate from the training data. This allows us to evaluate the trained model to see how well it performs on data it has never seen before.
We will load this script along with the TensorFlow.js library using the following html:
train.html
<!DOCTYPE html>
<html lang="en">
  <head>
    <title>Training Model</title>
    <meta charset="utf-8">
  </head>
  <body>
    <!-- Import TensorFlow.js library -->
    <script src="https://cdn.jsdelivr.net/npm/@tensorflow/tfjs/dist/tf.min.js" type="text/javascript"></script>
    <!-- Import our JS code to train the model -->
    <script src="/model.js" defer></script>
  </body>
</html>
Training the model
Next it is time to train the model by adding the code below to our existing JS code above at the end of the file.
Comments have been added for the curious, but as mentioned this codelab is more about taking a saved model and hosting it. There are further codelabs linked at the end if you would like to understand model creation in further detail. For now you can copy and paste the code to your project.
model.js
// Create Tensor representations of our vanilla JS arrays above
// so can be used to train our model.
const trainTensors = {
  data: tf.tensor2d(data, [data.length, 1]),
  answer: tf.tensor2d(answers, [answers.length, 1])
};

const testTensors = {
  data: tf.tensor2d(dataTest, [dataTest.length, 1]),
  answer: tf.tensor2d(answersTest, [answersTest.length, 1])
};


// Now actually create and define model architecture.
const model = tf.sequential();

// We will use one dense layer with 1 neuron and an input of
// a single value.
model.add(tf.layers.dense({inputShape: [1], units: 1}));

// Choose a learning rate that is suitable for the data we are using.
const LEARNING_RATE = 0.0001;

train();

async function train() {
  // Compile the model with the defined learning rate and specify
  // our loss function to use.
  model.compile({
    optimizer: tf.train.sgd(LEARNING_RATE),
    loss: 'meanAbsoluteError'
  });

  // Finally do the training itself over 500 iterations of the data.
  // As we have so little training data we use batch size of 1.
  // We also set for the data to be shuffled each time we try
  // and learn from it.
  let results = await model.fit(trainTensors.data, trainTensors.answer, {epochs: 500, batchSize: 1, shuffle: true});

  // Once trained we can evaluate the model.
  evaluate();
}

async function evaluate(stuff) {
  // Predict answer for a single piece of data.
  model.predict(tf.tensor2d([[768]])).print();
}
Using the code above we have been able to train a model capable of predicting an output value given the input value. Running the code above I get a prediction of 768,073 for input value 768 which is printed to the developer console of your browser (press F12 to open that if you do not already have it open). This is a pretty good estimate of the house price given that we gave examples that were 1000x higher than input. Note: Your value predicted may be slightly different and that is normal.
If we were happy with this performance, all we need to do now is save this model to disk so we can upload it to Firebase Hosting!
Saving the model
Adding the below code to the end of the evaluate function (after model.predict) above allows us to export the resulting model after training is complete directly from the web browser and save to disk so we can then host somewhere and use it in the future without needing to retrain every time we load the page.
model.js
await model.save('downloads://my-model');
If you now visit train.html and run the page it should train the model (which may take a few seconds) and then prompt to download the resulting trained model once complete.
4. Setting up Firebase
Sign in to Firebase and create a project
If you are new to Firebase sign up is easy using your Google account. Simply head on over to https://firebase.google.com/ and sign in with your regular Google account you wish to use. Once you are redirected to the home page, click on "go to console" at the top right of the page:

Once you are redirected to the console you should see a landing page something like this:
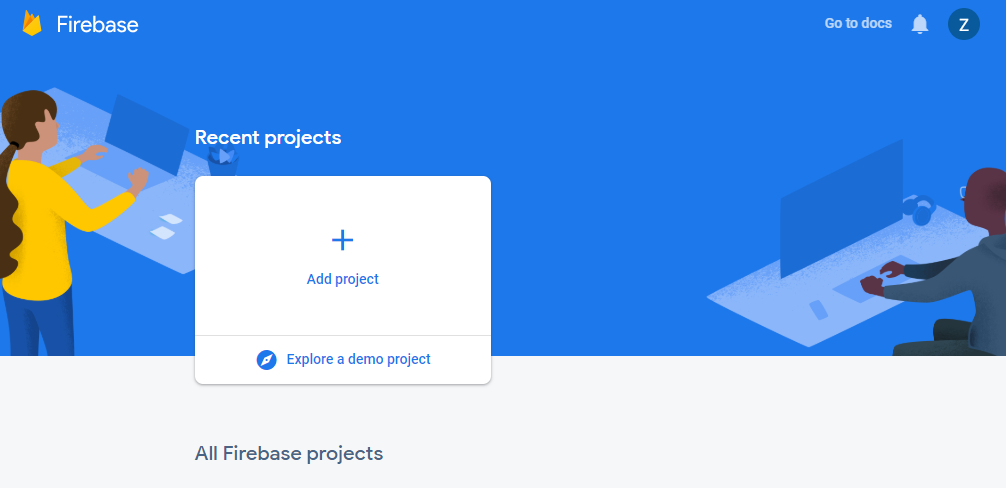
Simply click on Add Project as shown to create a new Firebase project, give your project a unique name, accept the terms, and click continue.
Next you will be asked if you want to add analytics to your project. If you would like to have access to such analytics then feel free to enable this option and click continue as shown:
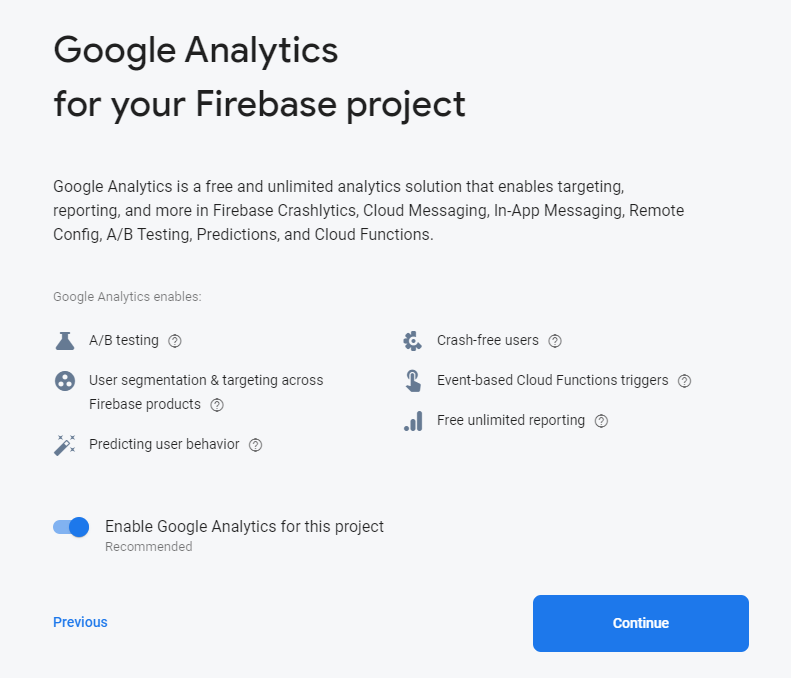
If all went well you should be greeted with a project ready page as shown:
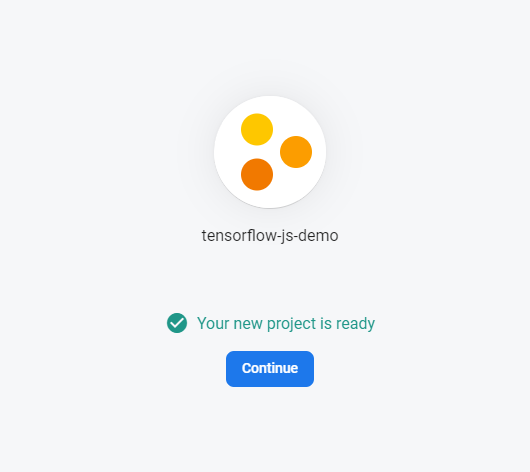
Woohoo! We have a project. Click continue to be taken to the console for the newly created project. Keep the page open for use later but for now we must install some tooling.
Installing and connecting the CLI
Firebase is available as a Node NPM package you can install and use via the command line interface (CLI) which makes it easy to deploy your local files and folders to Firebase Hosting. For today's tutorial we will be using a Linux environment, but if you have Windows or Mac, you can follow instructions here to set up CLI tooling on your device.
On Linux however, we will first install NPM and Node.js if it is not already (follow these instructions if using other environments) by using the following 3 commands in a terminal window:
Command Line Terminal:
sudo apt update
Command Line Terminal:
sudo apt install nodejs
Command Line Terminal:
sudo apt install npm
Now have Node.js and NPM installed you simply need to run the following in a terminal window to install the Firebase command line tools:
Command Line Terminal:
sudo npm install -g firebase-tools
Great! We are now ready to connect our firebase project to our system so we can push files to it and more.
Logging into Firebase
Log into Firebase using your Google account by running the following command:
Command Line Terminal:
firebase login
You will be asked to grant access to your Google Firebase Account as shown:
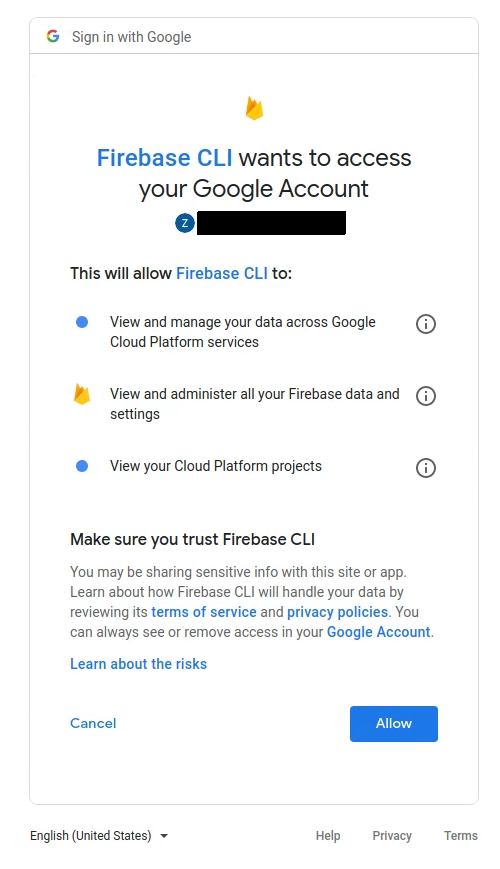
Allow this and you should finally see a successful connection of your command line tools to your firebase account:
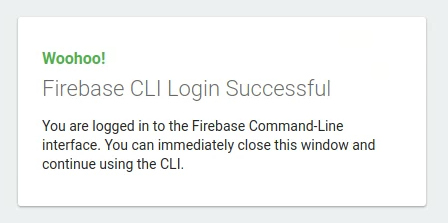
Close the window and head back to the command line terminal you were previously typing in which should now be ready to accept new commands as shown (we have hidden any private information in our screenshot):
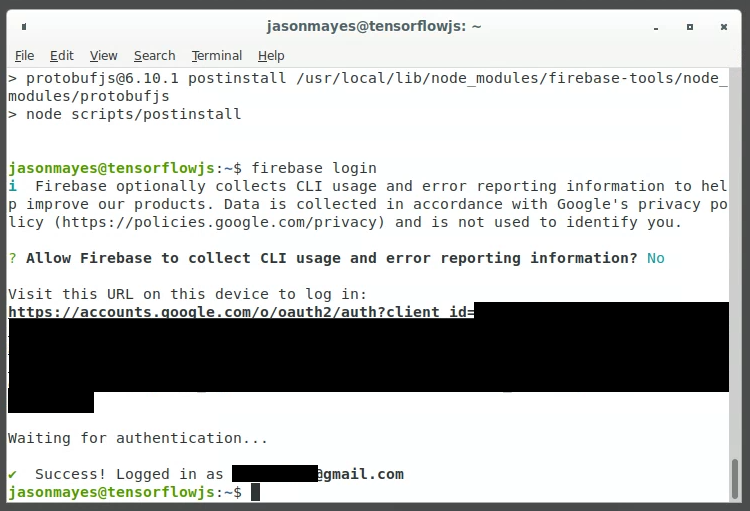
Congratulations! We are now ready to push files to our created project from our local machine.
Initializing your project to deploy to Firebase Hosting
To connect your local folder to your Firebase project, run the following command from the root of your local project directory (the folder that you want to use for uploading files from when you deploy).
Command Line Terminal:
firebase init
Upon executing this command, simply follow the instructions in terminal to complete setup as shown below:
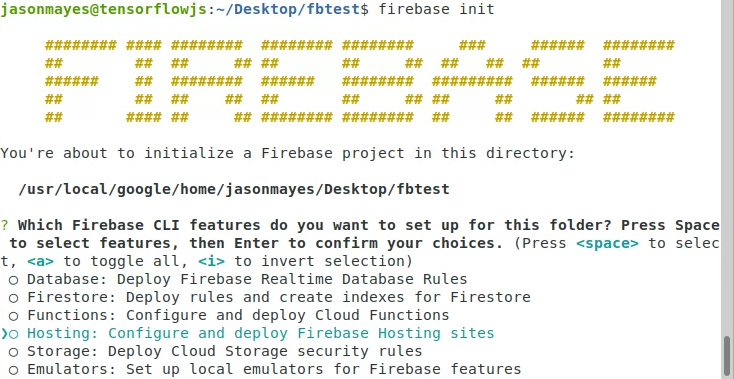
Here we can simply select Hosting using the down arrow on your keyboard and then press spacebar to select, and then enter to confirm.
Now we can select the existing project we created earlier to use:

Press enter on "use an existing project" and then select it using down arrow key as shown below:

Finally press enter to use it and then accept the defaults on the final screen that pops up and say "No" to configure as single page application:
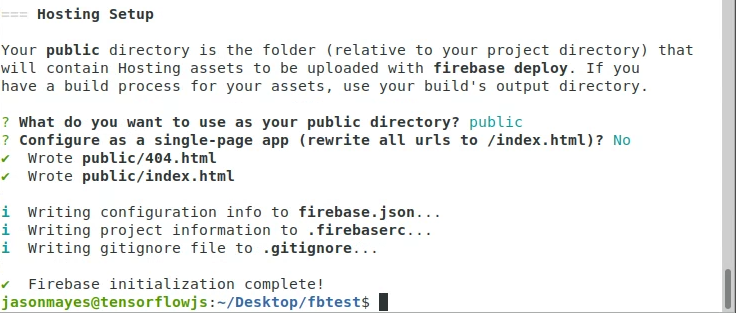
This will allow you to host multiple html pages if you choose to do so.
Now initialization is complete you will notice a firebase.json file and a "public" folder has been created in the directory we executed the commands above from.
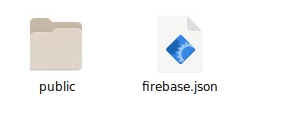
All we need to do now is move the files we want to deploy to the public folder we created and will be good to deploy! Let's do that now.
5. Creating your TensorFlow.js webpage
Loading your saved model
First let's ensure we copy the Machine Learning model we saved earlier on in the codelab to our public folder we just created with Firebase. Simply drag and drop your saved files to this folder as shown:

You will also notice Firebase created index.html and 404.html files for us. Let's go ahead and edit index.html using your favourite text editor on your machine so we can add our own custom code as shown:
index.html
<!DOCTYPE html>
<html lang="en">
  <head>
    <title>Hello World - TensorFlow.js</title>
    <meta charset="utf-8">
    <meta http-equiv="X-UA-Compatible" content="IE=edge">
    <meta name="viewport" content="width=device-width, initial-scale=1">
    <!-- Import the webpage's stylesheet -->
    <link rel="stylesheet" href="style.css">
  </head>
  <body>
    <h1>TensorFlow.js Hello World</h1>
    <p>Check the console (Press F12) to see predictions!</p>
    <!-- Import TensorFlow.js library -->
    <script src="https://cdn.jsdelivr.net/npm/@tensorflow/tfjs/dist/tf.min.js" type="text/javascript"></script>

    <!-- Import the page's JavaScript to do some stuff -->
    <script src="script.js" defer></script>
  </body>
</html>
In our new code for index.html above we specify a style sheet so we can add style to our page later if we chose to do so, and also script.js to host the code we need to write to use our TensorFlow.js saved model.
Let's go ahead and create those files now and populate them as follows so they do something useful:
style.css
/** Leave blank for now **/
script.js
// Load our saved model from current directory (which will be
// hosted via Firebase Hosting)
async function predict() {
  // Relative URL provided for my-model.json.
  const model = await tf.loadLayersModel('my-model.json');
  // Once model is loaded, let's try using it to make a prediction!
  // Print to developer console for now.
  model.predict(tf.tensor2d([[1337]])).print();
}

predict();
If you have followed steps correctly you should now see the following edited files in the public folder we created:
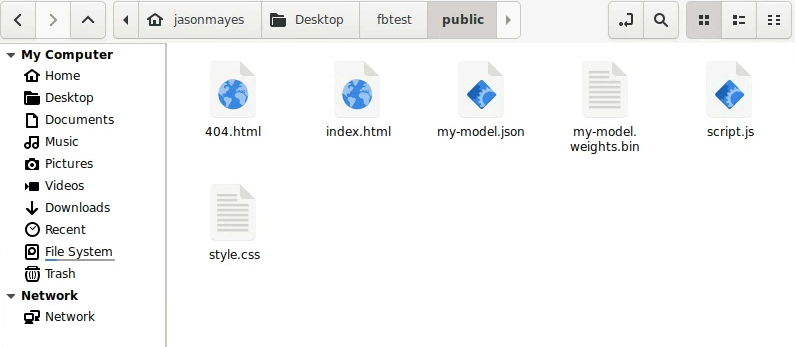
All we need to do now is deploy our files so we can check it works!
6. Deploying your model and website
Going live
Head back to the terminal window you had opened in your firebase project folder of your local machine (this is the folder that contains our "public" folder above along with the firebase init files).
Simply type the following to deploy your public folder files:
Command Line Terminal:
firebase deploy
Let the terminal command complete and you should have a successful release complete along with the URL you can use to use it:
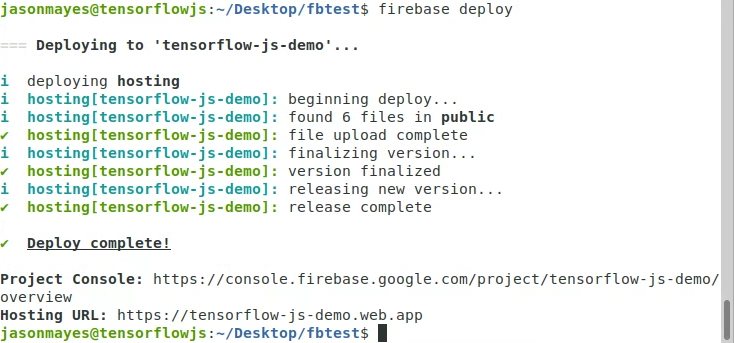
In our example above you can see the final url to view our deployment is:
https://tensorflow-js-demo.web.app (but your URL will be the name of the project you created).
Open this URL in a web browser to check it works which if successful should print something like this to the developer console of the page you open (press F12 to open the developer console).

As you can see the page loads on the deployed domain, and we correctly can see our model's prediction for 1337 square ft, which comes out as $1,336,999.25 which is a very good estimate indeed as we were expecting this to be 1000x the sqft. We can of course make as many predictions we like if we made a nice user interface to call the model instead and this would all run entirely in JavaScript keeping your queries private and secure.
Now that your model is deployed and hosted, you can share the website with anyone in the world and they will be able to use your application on their machine. Clearly you may wish to add a better user interface, and make it look great, but that is beyond the scope of this tutorial. There is no limit to the possible web apps you could host like this powered by machine learning that can work in a single click with zero install needed and we encourage you to think of other situations that could benefit from an in browser machine learning model.
Monitoring usage
In addition to any Google analytics you may add to your website code, Firebase also offers versioning and usage stats via the console for your project. After deploying you will see something like this which you can check from time to time as needed:
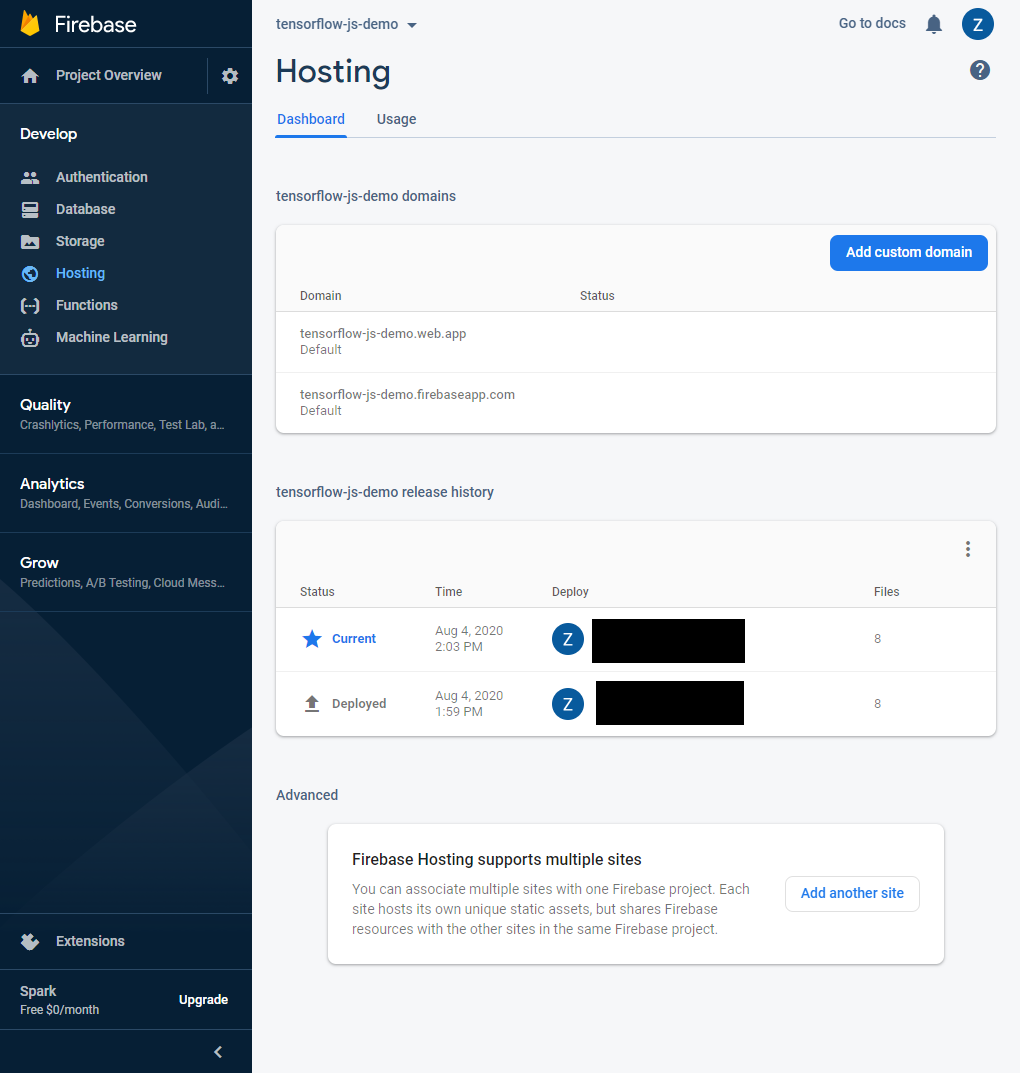
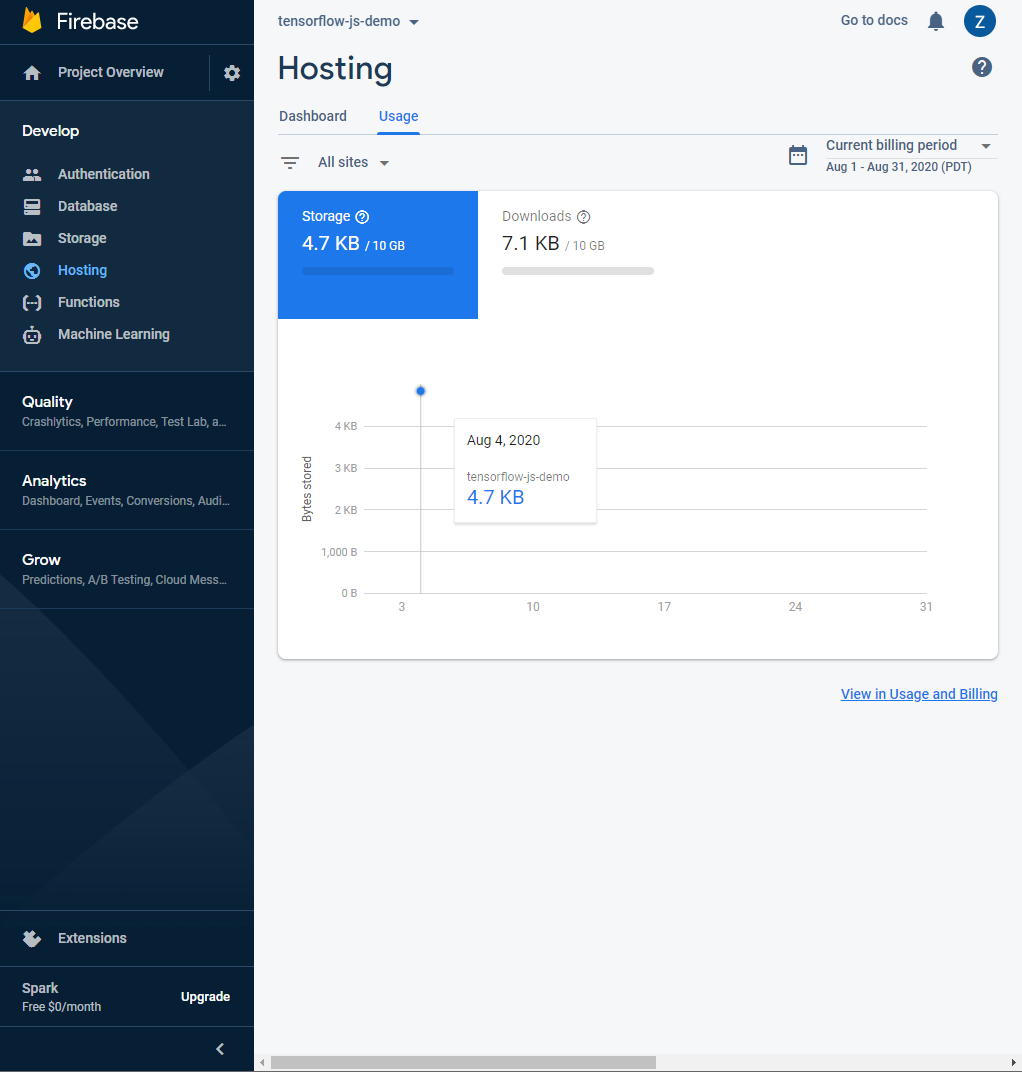
As you can see, by default, on the free tier you get 10GB of bandwidth per month for your hosted files. If your site is more popular you may need to add a billing account to use more than this in a given month. You can check out the firebase plans for larger projects here though most casual users for prototypes will probably not exceed the free tier if your model is small and usage is low so this is a great way to test and check it meets your needs before you commit to a paid plan as you grow your business or idea.
7. Congratulations
Congratulations, you have taken your first steps in using TensorFlow.js with Firebase to build and deploy a custom built machine learning model so you can share it with the world. Just imagine all the other things you could make using this powerful and scalable approach which is ready for production use cases if you wish as Firebase automatically scales with demand, so no matter if 10, or 10,000 users want to use this, it will just work.
Should you change any of your files, simply redeploy your app using firebase deploy as before and make sure to clear your browser cache to ensure you get the new version of the files when you next load the page. If you have the developer tools open you can actually force this under the network tab whilst you are testing things to make it easier by selecting the "disable cache" checkbox near the top of this tab:

Recap
In this code lab we:
- Defined and trained a custom TensorFlow.js model entirely from scratch to predict house prices.
- Signed up, configured, and installed Firebase + Firebase CLI tooling on your development machine.
- Deployed and launched a working website that loads our trained model from step 1 and uses it in a real world web application that can be accessed by anyone, anywhere in the world, at scale.
What's next?
Now that you have a working base to start from, what creative ideas can you come up with to extend this machine learning model deployment boilerplate?
We would love to see you use this with your own data. Think about the industry or area in which you live or work. How could you train on such data to make predictions that could be of use to you (or others) in the future? Real estate is not the only example here, and we encourage you to apply this to your own challenges too. Happy hacking!
Remember to tag us in anything you create using #MadeWithTFJS (click this link for inspiration of what others have made) for a chance to be featured on social media or even showcased at future TensorFlow events! We would love to see what you make and of course reach out to the author of this codelab if any feedback or questions.
More TensorFlow.js codelabs to go deeper
- Write a neural network from scratch in TensorFlow.js
- Audio recognition using transfer learning in TensorFlow.js
- Custom image classification using transfer learning in TensorFlow.js
