
1. 简介

TensorFlow 是一个多用途机器学习框架。TensorFlow 有很多用途,例如跨云端集群训练大型模型,以及在手机等嵌入式系统本地运行模型。
此 Codelab 使用 TensorFlow Lite 在 iOS 设备上运行图片识别模型。
学习内容
- 如何使用 TFLite 转换器优化您的模型。
- 如何使用 TFLite 解释器在预制的 iOS 应用中运行此测试。
构建内容
一个简单的相机应用,该应用会运行 TensorFlow 图像识别程序来识别花卉。
前提条件
如果您要在自己的硬件上完成此 Codelab,请确保安装了以下软件:
- Xcode 10 或更高版本
- CocoaPods 1.8.0 或更高版本
许可:可随意使用
2. 使用 Colab 训练花卉识别器
此 Codelab 将使用 Colaboratory 和 Xcode。
打开 Colab,它使用 TensorFlow Lite Model Maker 训练分类器,以使用迁移学习识别花卉,并导出 TFLite 模型以便在移动应用中使用。
3. 设置工作目录
克隆 Git 代码库
以下命令将克隆包含此 Codelab 所需文件的 Git 代码库:
git clone https://github.com/tensorflow/examples.git
现在,使用 cd 进入您刚刚创建的克隆的 Xcode 项目根目录。您将在此基础上完成此 Codelab 的其余部分:
cd examples/lite/examples/image_classification/ios
4. 设置 iOS 应用
安装依赖项
使用 CocoaPods 安装 iOS 应用的依赖项(包括 TensorFlow Lite)。安装命令完成后,打开 ImageClassification.xcworkspace 以在 Xcode 中打开项目。
pod install --repo-update
open ImageClassification.xcworkspace
5. 试运行应用
要使用相机,应用必须在真实设备上运行,因为 iOS 模拟器无法访问 Mac 的相机。要在 iOS 设备上构建应用,您必须加入 Apple Developer Program 或能够使用他人为您配置的设备。
如果您想在模拟器中运行此 Codelab,则需要在模拟器本身中将 Safari 中的图片复制并粘贴到粘贴板中。以下是在模拟器中处理图片的步骤:
- 针对您选择的模拟器目标构建应用。
- 在 iOS 模拟器中,按 Cmd + Shift + H 可将应用最小化。
- 点按主屏幕底部的 Safari,然后搜索图片。
- 在 Google 图片搜索结果中,点按相应结果并长按相应图片。在弹出的对话框中,选择“复制”。
- 返回 TFL Classify 应用。复制的图片应与推理结果一起自动显示。如果没有,请确保您复制的是图片数据本身,而不是图片的网址。
测试 build 并安装应用
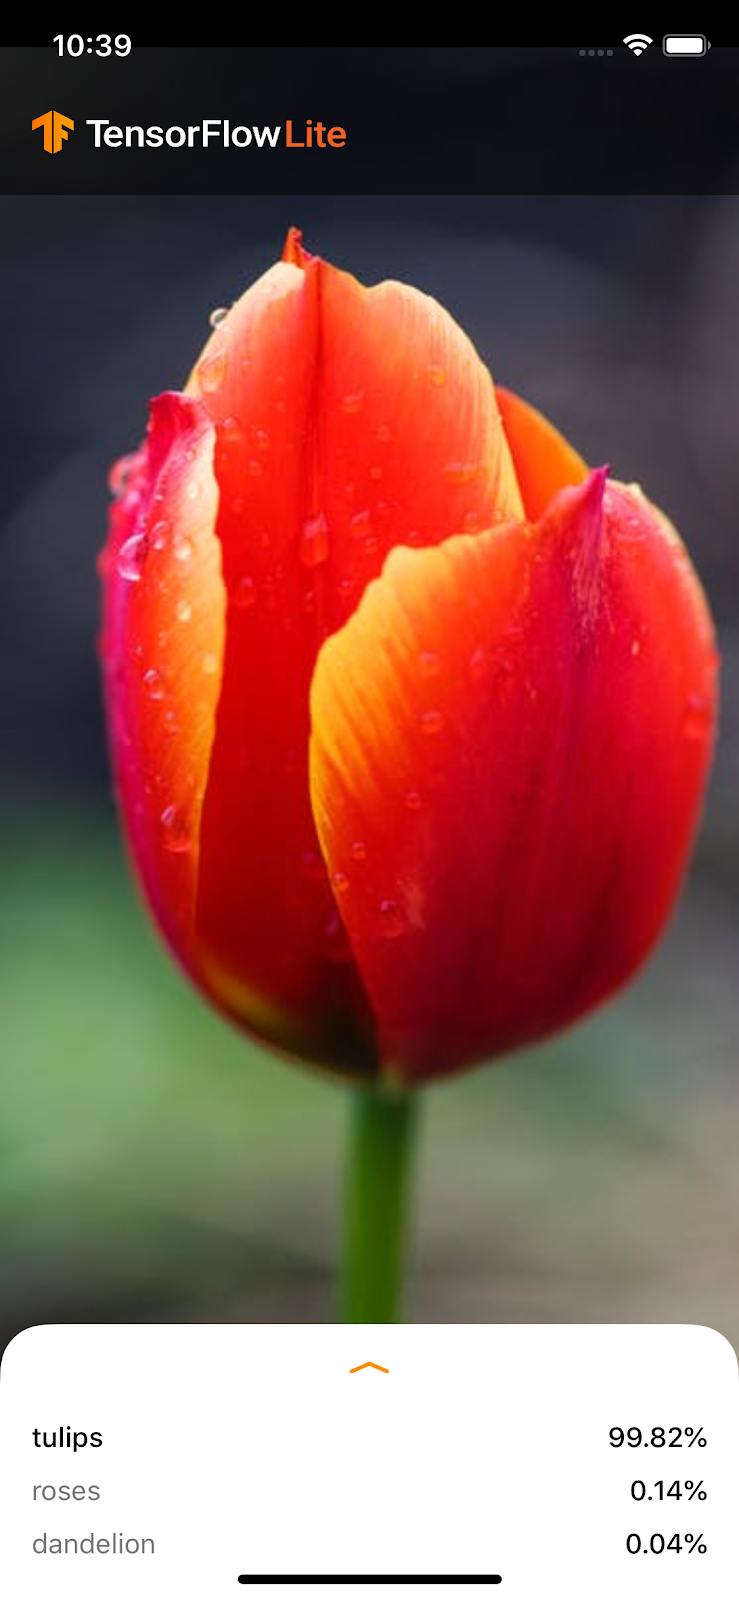
在对应用进行任何更改之前,我们先运行与代码库一起提供的版本。从左上角的下拉菜单中选择您的 iOS 设备:
然后按 Cmd+R 或按 Xcode 中的“Play”(播放) 按钮,将该应用构建到您的设备。应用安装至您的设备后,应该就会自动启动。
此版本的应用使用基于 1000 个 ImageNet 类别进行预训练的标准 MobileNet。代码应如下所示:
6. 运行自定义应用
默认应用设置使用标准 MobileNet 将图片归为 1000 个 ImageNet 类别中的一个。
现在,我们来修改应用,以便应用将重新训练的模型用于 Colab 中训练的自定义图片类别。
7. 转换应用以运行模型
将模型文件添加到项目中
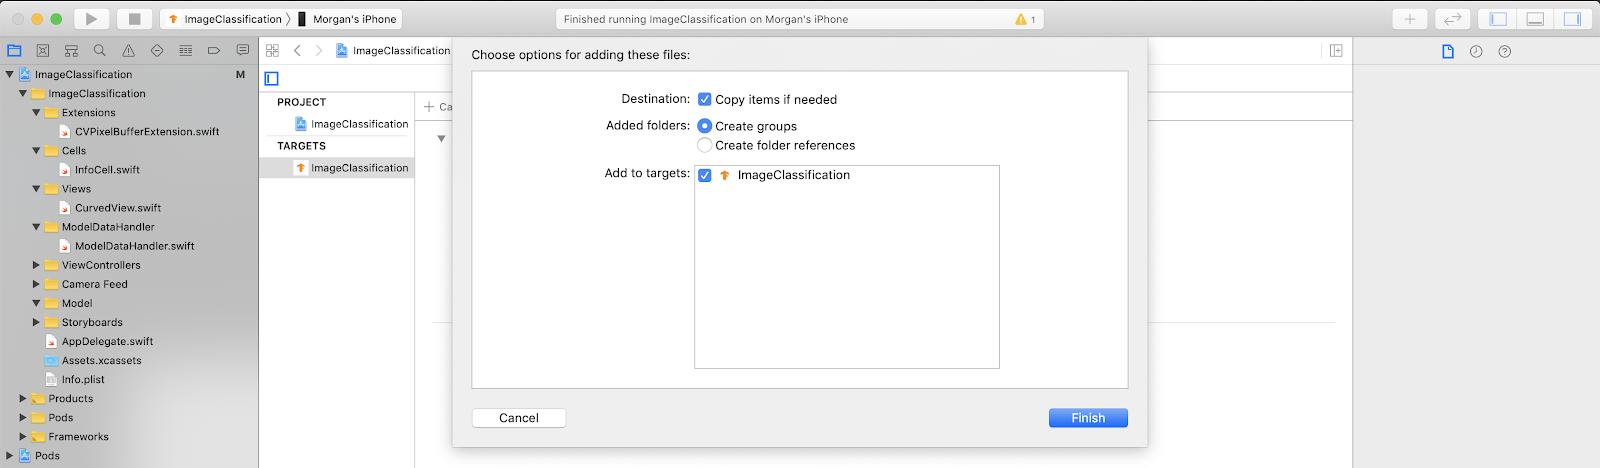
项目的模型资源位于 Xcode 项目导航器的 ImageClassification > Model 中。如需替换它们,请先删除 Model 组中的两个现有文件。出现提示时,选择“移到废纸篓”:

然后,将您从 Colab 下载的 model.tflite 和 labels.txt 文件拖动到“模型”组中。出现提示时,请确保同时选中 Copy items if needed 和 Add to targets。
修改应用的代码
为了让应用正常运行,我们需要更新模型加载逻辑的路径,使其指向我们添加的新模型。
打开 ModelDataHandler.swift(Xcode 导航器路径:ImageClassification -> ModelDataHandler -> ModelDataHandler.swift),将 line 36 更改为
// before
static let modelInfo: FileInfo = (name: "mobilenet_quant_v1_224", extension: "tflite")

// after
static let modelInfo: FileInfo = (name: "model", extension: "tflite")
请务必保存所有更改。
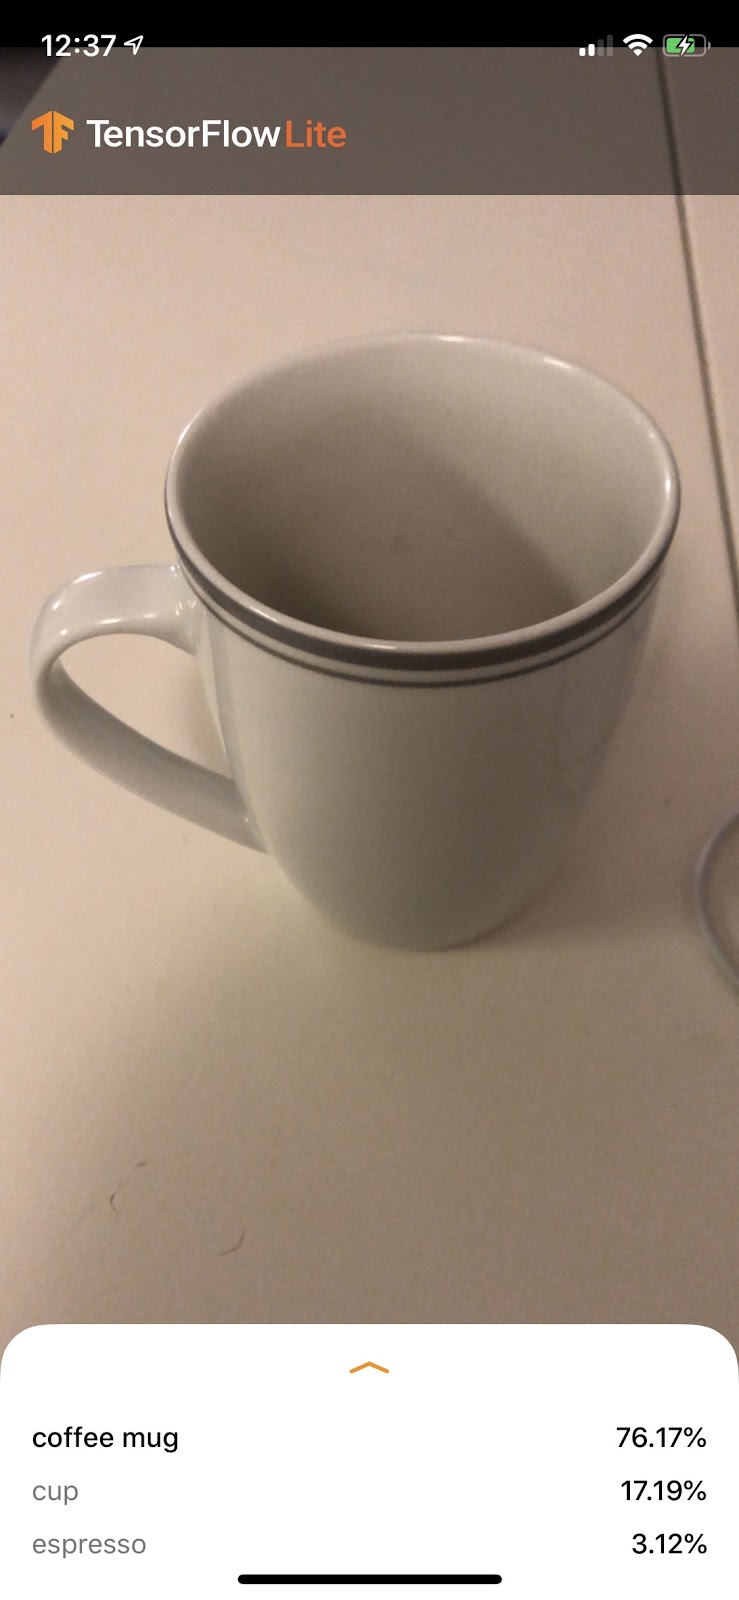
8. 运行自定义应用
按 Cmd+B 或按 Xcode 中的 Play 按钮,在您的设备上构建应用程序。应用启动后,显示的内容应如下所示:
您可以同时按住电源按钮和音量调高按钮来截屏。
现在试着在网上搜索花卉,将相机对准计算机屏幕,看看这些照片分类是否正确。
或者让朋友帮忙拍张照片,看看您是哪类 TensorFlower 

 !
!
9. 它是如何运作的?
现在,您已经运行了该应用,下面我们来看看特定于 TensorFlow Lite 的代码。
TensorFlowLiteSwift
此应用通过 CocoaPods 使用 TensorFlowLite Swift 库。Swift 库是 TFLite C API 的瘦封装容器,而 TFLite C API 本身是 TFLite C++ 库的封装容器。
模块的 Podfile 文件中的以下行会将最新版本的 Pod 全局 CocoaPods 规范代码库提取到项目中。
target 'ImageClassification' do
  use_frameworks!

  # Pods for ImageClassification
   pod 'TensorFlowLiteSwift'
end
使用 TensorFlow Lite Swift API
与 TensorFlow Lite 交互的代码全部包含在 ModelDataHandler.swift 中。
设置
涉及的第一个块是 ModelDataHandler 的初始化程序:
/// A failable initializer for `ModelDataHandler`. A new instance is created if the model and
/// labels files are successfully loaded from the app's main bundle. Default `threadCount` is 1.
init?(modelFileInfo: FileInfo, labelsFileInfo: FileInfo, threadCount: Int = 1) {
  let modelFilename = modelFileInfo.name

  // Construct the path to the model file.
  guard let modelPath = Bundle.main.path(
    forResource: modelFilename,
    ofType: modelFileInfo.extension
  ) else {
    print("Failed to load the model file with name: \(modelFilename).")
    return nil
  }

  // Specify the options for the `Interpreter`.
  self.threadCount = threadCount
  var options = InterpreterOptions()
  options.threadCount = threadCount
  do {
    // Create the `Interpreter`.
    interpreter = try Interpreter(modelPath: modelPath, options: options)
    // Allocate memory for the model's input `Tensor`s.
    try interpreter.allocateTensors()
  } catch let error {
    print("Failed to create the interpreter with error: \(error.localizedDescription)")
    return nil
  }
  // Load the classes listed in the labels file.
  loadLabels(fileInfo: labelsFileInfo)
}
以下几行代码应该更详细地加以讨论。
以下行会创建 TFLite 解释器:
interpreter = try Interpreter(modelPath: modelPath, options: options)
解释器负责通过 TensorFlow 图传递原始数据输入。我们将模型在磁盘上的路径传递给该解释器,然后该解释器将其加载为 FlatBufferModel。
最后一行用于加载标签列表:
loadLabels(fileInfo: labelsFileInfo)
上述操作只是将文本文件中的字符串加载到内存中。
运行模型
涉及的第二个代码块是 runModel 方法。它接受 CVPixelBuffer 作为输入,运行解释器并返回要在应用中输出的文本。
try interpreter.copy(rgbData, toInputAt: 0)
// ...
try interpreter.invoke()
// ...
outputTensor = try interpreter.output(at: 0)
10. 后续步骤
如需了解详情,请参阅以下链接:
- 如需详细了解 TFLite,请参阅 tensorflow.org 上的文档和源代码库。
- 尝试一些其他 TFLite 预训练模型,包括语音启动指令检测器和设备版智能回复。
- 通过我们的使用入门文档详细了解 TensorFlow。