
1. Giới thiệu
Flutter là SDK ứng dụng di động của Google để tạo ra trải nghiệm gốc chất lượng cao trên iOS và Android trong thời gian kỷ lục.
Với trình bổ trợ Google Maps Flutter, bạn có thể thêm bản đồ dựa trên dữ liệu của Google Maps vào ứng dụng của mình. Trình bổ trợ này tự động xử lý quyền truy cập vào các máy chủ Google Maps, màn hình bản đồ và phản hồi các cử chỉ của người dùng, chẳng hạn như thao tác nhấp và kéo. Bạn cũng có thể thêm điểm đánh dấu vào bản đồ. Các đối tượng này cung cấp thêm thông tin về vị trí trên bản đồ và cho phép người dùng tương tác với bản đồ.
Sản phẩm bạn sẽ tạo ra
Trong lớp học lập trình này, bạn sẽ tạo một ứng dụng di động có Google Maps bằng cách sử dụng Flutter SDK. Ứng dụng này sẽ:
|
|
Flutter là gì?
Flutter có 3 chức năng cốt lõi.
- Phát triển nhanh chóng: Xây dựng các ứng dụng Android và iOS trong vài mili giây bằng tính năng Tải lại nóng có trạng thái.
- Biểu cảm và linh hoạt: Nhanh chóng phát hành các tính năng, tập trung vào trải nghiệm gốc của người dùng cuối.
- Hiệu suất gốc trên cả iOS và Android: Các tiện ích của Flutter kết hợp tất cả điểm khác biệt quan trọng giữa các nền tảng (chẳng hạn như thao tác cuộn, điều hướng, biểu tượng và phông chữ) để mang lại hiệu suất gốc hoàn toàn.
Google Maps có:
- Phạm vi phủ sóng 99% trên toàn thế giới: Xây dựng bằng dữ liệu đáng tin cậy và toàn diện cho hơn 200 quốc gia và lãnh thổ.
- 25 triệu lượt cập nhật mỗi ngày: Tin tưởng vào thông tin vị trí chính xác theo thời gian thực.
- 1 tỷ số người dùng hoạt động hằng tháng: Tự tin mở rộng quy mô nhờ cơ sở hạ tầng của Google Maps.
Trong lớp học lập trình này, bạn sẽ được hướng dẫn cách tạo trải nghiệm Google Maps trong một ứng dụng Flutter cho cả iOS và Android.
Kiến thức bạn sẽ học được
- Cách tạo một ứng dụng Flutter mới.
- Cách định cấu hình trình bổ trợ Google Maps cho Flutter.
- Cách thêm điểm đánh dấu vào bản đồ bằng dữ liệu vị trí từ một dịch vụ web.
Lớp học lập trình này tập trung vào việc thêm bản đồ Google vào một ứng dụng Flutter. Các khái niệm và khối mã không liên quan được tinh chỉnh và cung cấp cho bạn, chỉ cần sao chép và dán.
Bạn muốn học được điều gì qua lớp học lập trình này?
2. Thiết lập môi trường Flutter
Bạn cần có 2 phần mềm để hoàn thành bài thực hành này: Flutter SDK và một trình chỉnh sửa. Lớp học lập trình này giả định rằng bạn dùng Android Studio, nhưng bạn có thể sử dụng trình chỉnh sửa mà mình muốn.
Bạn có thể chạy lớp học lập trình này bằng bất kỳ thiết bị nào sau đây:
- Một thiết bị thực (Android hoặc iOS) được kết nối với máy tính và được đặt ở chế độ nhà phát triển.
- Trình mô phỏng iOS. (Bạn phải cài đặt các công cụ Xcode.)
- Trình mô phỏng Android. (Bạn phải thiết lập trong Android Studio.)
3. Bắt đầu
Làm quen với Flutter
Cách dễ nhất để bắt đầu với Flutter là sử dụng công cụ dòng lệnh Flutter để tạo tất cả mã cần thiết cho trải nghiệm bắt đầu đơn giản.
$ flutter create google_maps_in_flutter --platforms android,ios,web
Creating project google_maps_in_flutter...
Resolving dependencies in `google_maps_in_flutter`...
Downloading packages...
Got dependencies in `google_maps_in_flutter`.
Wrote 81 files.

All done!
You can find general documentation for Flutter at: https://docs.flutter.dev/
Detailed API documentation is available at: https://api.flutter.dev/
If you prefer video documentation, consider: https://www.youtube.com/c/flutterdev

In order to run your application, type:

  $ cd google_maps_in_flutter
  $ flutter run

Your application code is in google_maps_in_flutter/lib/main.dart.
Thêm trình bổ trợ Google Maps Flutter làm phần phụ thuộc
Bạn có thể dễ dàng thêm các chức năng khác vào ứng dụng Flutter bằng cách sử dụng các gói Pub. Trong lớp học lập trình này, bạn sẽ giới thiệu trình bổ trợ Google Maps Flutter bằng cách chạy lệnh sau từ thư mục dự án.
$ cd google_maps_in_flutter
$ flutter pub add google_maps_flutter
Resolving dependencies...
Downloading packages...
+ csslib 1.0.0
+ flutter_plugin_android_lifecycle 2.0.19
+ flutter_web_plugins 0.0.0 from sdk flutter
+ google_maps 7.1.0
+ google_maps_flutter 2.6.1
+ google_maps_flutter_android 2.8.0
+ google_maps_flutter_ios 2.6.0
+ google_maps_flutter_platform_interface 2.6.0
+ google_maps_flutter_web 0.5.7
+ html 0.15.4
+ js 0.6.7 (0.7.1 available)
+ js_wrapping 0.7.4
  leak_tracker 10.0.4 (10.0.5 available)
  leak_tracker_flutter_testing 3.0.3 (3.0.5 available)
  material_color_utilities 0.8.0 (0.11.1 available)
  meta 1.12.0 (1.14.0 available)
+ plugin_platform_interface 2.1.8
+ sanitize_html 2.1.0
+ stream_transform 2.1.0
  test_api 0.7.0 (0.7.1 available)
+ web 0.5.1
Changed 16 dependencies!
6 packages have newer versions incompatible with dependency constraints.
Try `flutter pub outdated` for more information.
Định cấu hình platform iOS
Để sử dụng phiên bản mới nhất của Google Maps SDK trên iOS, bạn cần có phiên bản tối thiểu của nền tảng là iOS 14. Sửa đổi đầu tệp cấu hình ios/Podfile như sau.
ios/Podfile
# Google Maps SDK requires platform version 14
# https://developers.google.com/maps/flutter-package/config#ios
platform :ios, '14.0'


# CocoaPods analytics sends network stats synchronously affecting flutter build latency.
ENV['COCOAPODS_DISABLE_STATS'] = 'true'
Định cấu hình minSDK Android
Để sử dụng Google Maps SDK trên Android, bạn cần đặt minSdk thành 21. Sửa đổi tệp cấu hình android/app/build.gradle như sau.
android/app/build.gradle
android {
    defaultConfig {
        // TODO: Specify your own unique Application ID (https://developer.android.com/studio/build/application-id.html).
        applicationId = "com.example.google_maps_in_flutter"
        // Minimum Android version for Google Maps SDK
        // https://developers.google.com/maps/flutter-package/config#android
        minSdk = 21
        targetSdk = flutter.targetSdkVersion
        versionCode = flutterVersionCode.toInteger()
        versionName = flutterVersionName
    }

}
4. Thêm Google Maps vào ứng dụng
Vấn đề nằm ở khoá API
Để sử dụng Google Maps trong ứng dụng Flutter, bạn cần định cấu hình một dự án API bằng Google Maps Platform, theo hướng dẫn Maps SDK cho Android, SDK bản đồ dành cho iOS và Sử dụng khoá API của Maps JavaScript API. Sau khi có khoá API, hãy thực hiện các bước sau để định cấu hình cả ứng dụng Android và iOS.
Thêm khoá API cho ứng dụng Android
Để thêm khoá API vào ứng dụng Android, hãy chỉnh sửa tệp AndroidManifest.xml trong android/app/src/main. Thêm một mục meta-data duy nhất chứa khoá API đã tạo ở bước trước vào bên trong nút application.
android/app/src/main/AndroidManifest.xml
<manifest xmlns:android="http://schemas.android.com/apk/res/android">
    <application
        android:label="google_maps_in_flutter"
        android:name="${applicationName}"
        android:icon="@mipmap/ic_launcher">

        <!-- TODO: Add your Google Maps API key here -->
        <meta-data android:name="com.google.android.geo.API_KEY"
               android:value="YOUR-KEY-HERE"/>

        <activity
            android:name=".MainActivity"
            android:exported="true"
            android:launchMode="singleTop"
            android:taskAffinity=""
            android:theme="@style/LaunchTheme"
            android:configChanges="orientation|keyboardHidden|keyboard|screenSize|smallestScreenSize|locale|layoutDirection|fontScale|screenLayout|density|uiMode"
            android:hardwareAccelerated="true"
            android:windowSoftInputMode="adjustResize">
            <!-- Specifies an Android theme to apply to this Activity as soon as
                 the Android process has started. This theme is visible to the user
                 while the Flutter UI initializes. After that, this theme continues
                 to determine the Window background behind the Flutter UI. -->
            <meta-data
              android:name="io.flutter.embedding.android.NormalTheme"
              android:resource="@style/NormalTheme"
              />
            <intent-filter>
                <action android:name="android.intent.action.MAIN"/>
                <category android:name="android.intent.category.LAUNCHER"/>
            </intent-filter>
        </activity>
        <!-- Don't delete the meta-data below.
             This is used by the Flutter tool to generate GeneratedPluginRegistrant.java -->
        <meta-data
            android:name="flutterEmbedding"
            android:value="2" />
    </application>
    <!-- Required to query activities that can process text, see:
         https://developer.android.com/training/package-visibility and
         https://developer.android.com/reference/android/content/Intent#ACTION_PROCESS_TEXT.

         In particular, this is used by the Flutter engine in io.flutter.plugin.text.ProcessTextPlugin. -->
    <queries>
        <intent>
            <action android:name="android.intent.action.PROCESS_TEXT"/>
            <data android:mimeType="text/plain"/>
        </intent>
    </queries>
</manifest>
Thêm khoá API cho ứng dụng iOS
Để thêm khoá API vào ứng dụng iOS, hãy chỉnh sửa tệp AppDelegate.swift trong ios/Runner. Không giống như Android, việc thêm khoá API trên iOS đòi hỏi bạn phải thay đổi mã nguồn của ứng dụng Runner. AppDelegate là singleton cốt lõi nằm trong quy trình khởi chạy ứng dụng.
Thực hiện 2 thay đổi đối với tệp này. Trước tiên, hãy thêm một câu lệnh #import để kéo các tiêu đề Google Maps, sau đó gọi phương thức provideAPIKey() của singleton GMSServices. Khoá API này cho phép Google Maps phân phát đúng các ô bản đồ.
ios/Runner/AppDelegate.swift
import Flutter
import UIKit
import GoogleMaps                                          // Add this import

@UIApplicationMain
@objc class AppDelegate: FlutterAppDelegate {
  override func application(
    _ application: UIApplication,
    didFinishLaunchingWithOptions launchOptions: [UIApplication.LaunchOptionsKey: Any]?
  ) -> Bool {
    GeneratedPluginRegistrant.register(with: self)

    // TODO: Add your Google Maps API key
    GMSServices.provideAPIKey("YOUR-API-KEY")               // Add this line

    return super.application(application, didFinishLaunchingWithOptions: launchOptions)
  }
}
Thêm khoá API cho ứng dụng Web
Để thêm khoá API vào ứng dụng Web, hãy chỉnh sửa tệp index.html trong web. Thêm một tham chiếu đến tập lệnh Maps JavaScript trong phần đầu, bằng khoá API của bạn.
web/index.html
<!DOCTYPE html>
<html>
<head>
  <!--
    If you are serving your web app in a path other than the root, change the
    href value below to reflect the base path you are serving from.

    The path provided below has to start and end with a slash "/" in order for
    it to work correctly.

    For more details:
    * https://developer.mozilla.org/en-US/docs/Web/HTML/Element/base

    This is a placeholder for base href that will be replaced by the value of
    the `--base-href` argument provided to `flutter build`.
  -->
  <base href="$FLUTTER_BASE_HREF">

  <meta charset="UTF-8">
  <meta content="IE=Edge" http-equiv="X-UA-Compatible">
  <meta name="description" content="A new Flutter project.">

  <!-- iOS meta tags & icons -->
  <meta name="apple-mobile-web-app-capable" content="yes">
  <meta name="apple-mobile-web-app-status-bar-style" content="black">
  <meta name="apple-mobile-web-app-title" content="google_maps_in_flutter">
  <link rel="apple-touch-icon" href="icons/Icon-192.png">

  <!-- Favicon -->
  <link rel="icon" type="image/png" href="favicon.png"/>

  <!-- Add your Google Maps API key here -->
  <script src="https://maps.googleapis.com/maps/api/js?key=YOUR-KEY-HERE"></script>

  <title>google_maps_in_flutter</title>
  <link rel="manifest" href="manifest.json">
</head>
<body>
  <script src="flutter_bootstrap.js" async></script>
</body>
</html>
Đưa bản đồ lên màn hình
Bây giờ là lúc để đưa bản đồ lên màn hình. Thay thế nội dung của lib/main.dart bằng nội dung sau.
lib/main.dart
import 'package:flutter/material.dart';
import 'package:google_maps_flutter/google_maps_flutter.dart';

void main() {
  runApp(const MyApp());
}

class MyApp extends StatefulWidget {
  const MyApp({super.key});

  @override
  State<MyApp> createState() => _MyAppState();
}

class _MyAppState extends State<MyApp> {
  late GoogleMapController mapController;

  final LatLng _center = const LatLng(45.521563, -122.677433);

  void _onMapCreated(GoogleMapController controller) {
    mapController = controller;
  }

  @override
  Widget build(BuildContext context) {
    return MaterialApp(
      theme: ThemeData(
        useMaterial3: true,
        colorSchemeSeed: Colors.green[700],
      ),
      home: Scaffold(
        appBar: AppBar(
          title: const Text('Maps Sample App'),
          elevation: 2,
        ),
        body: GoogleMap(
          onMapCreated: _onMapCreated,
          initialCameraPosition: CameraPosition(
            target: _center,
            zoom: 11.0,
          ),
        ),
      ),
    );
  }
}
Chạy ứng dụng
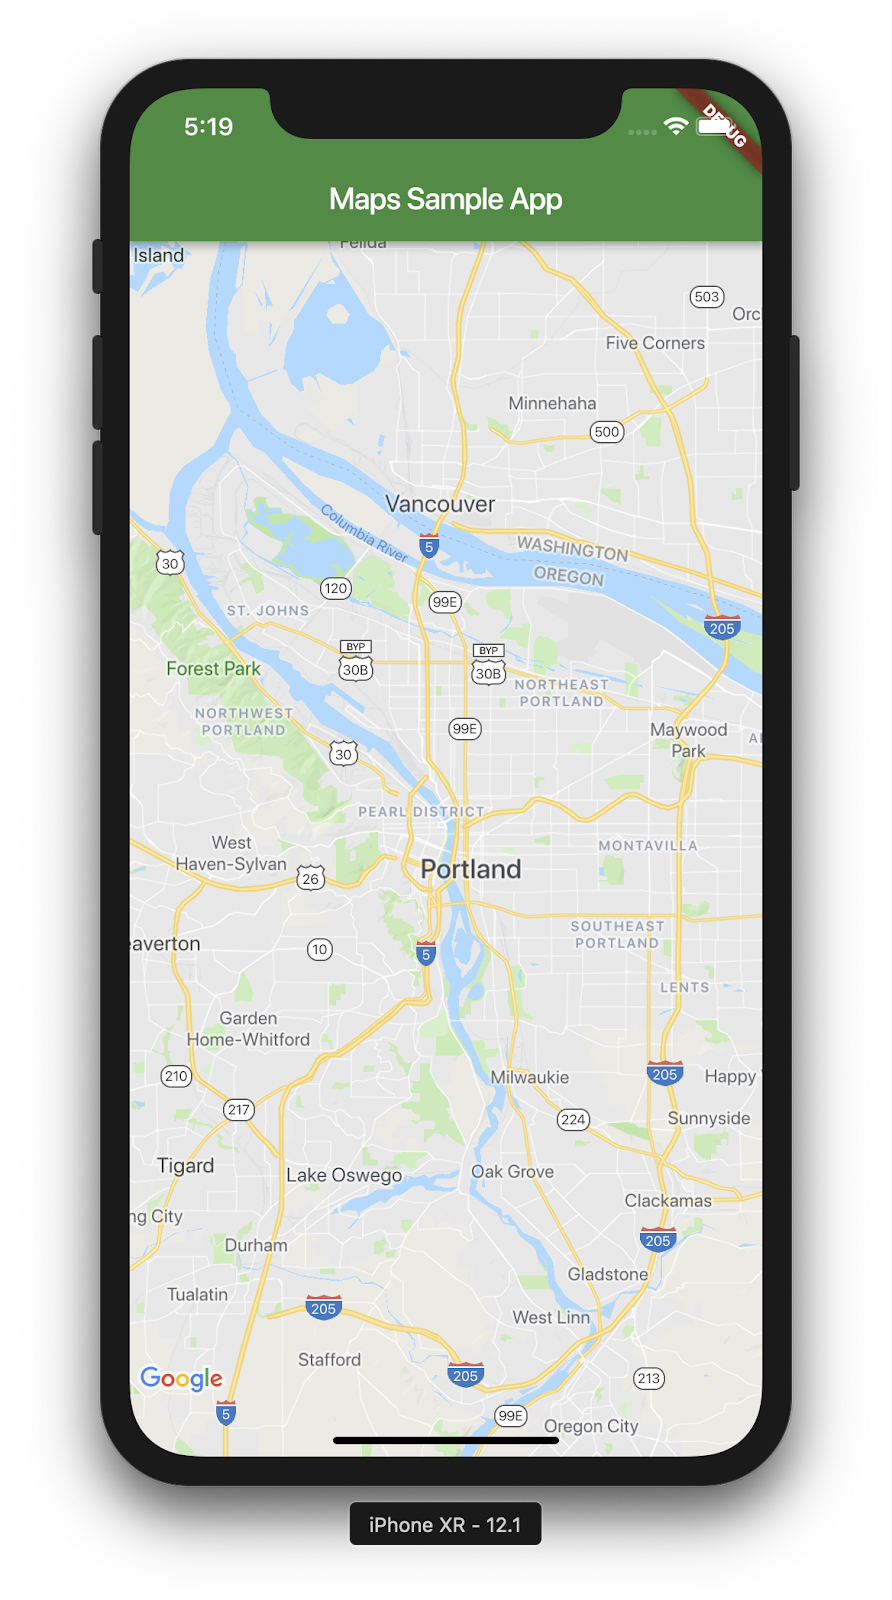
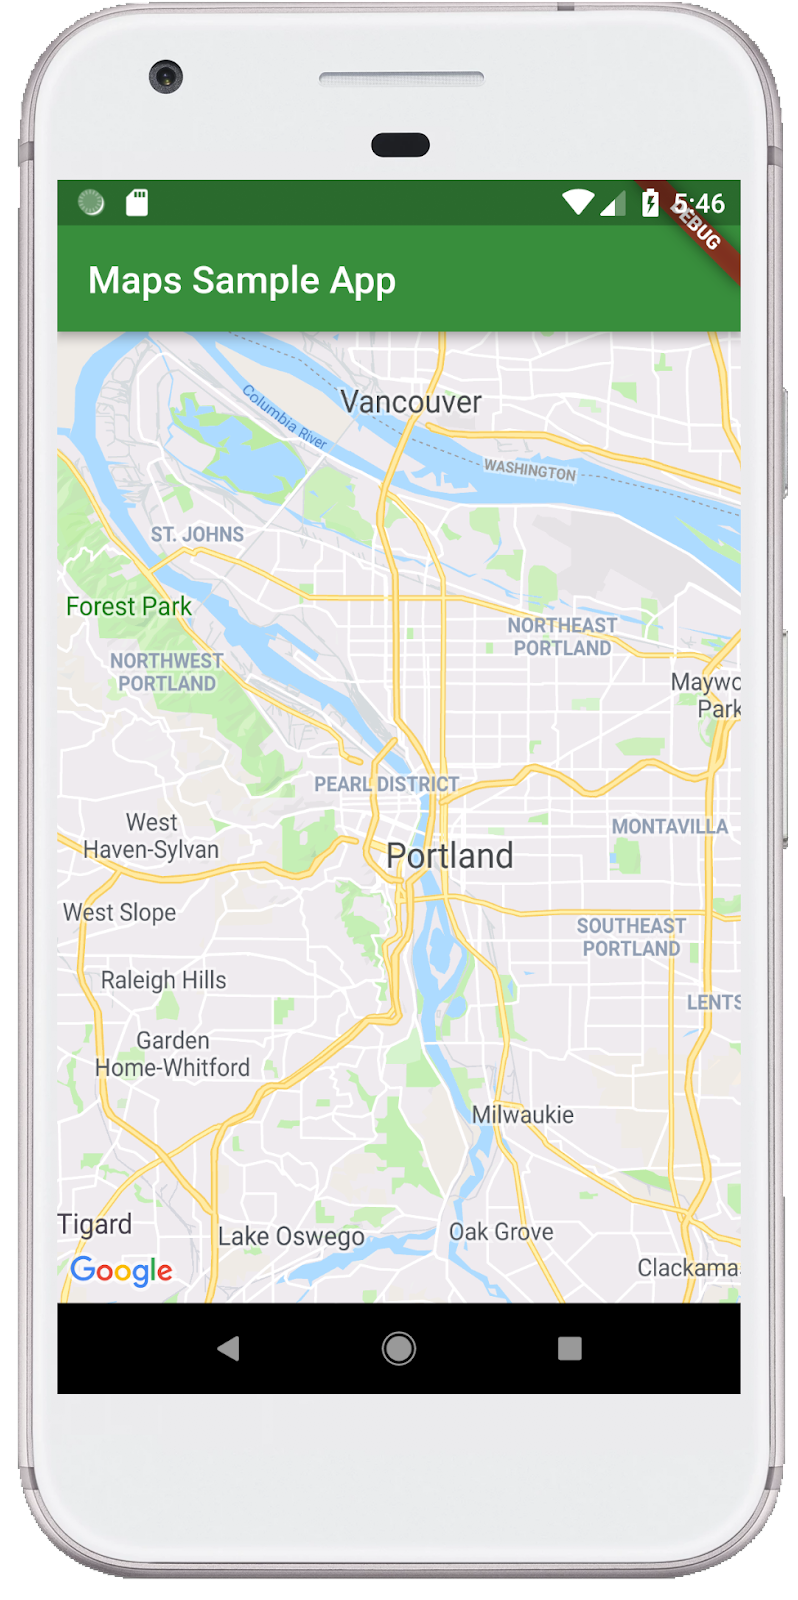
Chạy ứng dụng Flutter trên iOS hoặc Android để xem một khung hiển thị bản đồ duy nhất, tập trung vào Portland. Ngoài ra, hãy chạy trình mô phỏng Android hoặc trình mô phỏng iOS. Bạn có thể sửa đổi tâm bản đồ để thể hiện quê hương của mình hoặc một nơi nào đó quan trọng đối với bạn.
$ flutter run
|
|
5. Đưa Google lên bản đồ
Google có nhiều văn phòng trên khắp thế giới, từ Bắc Mỹ, Mỹ La-tinh, Châu Âu, Châu Á – Thái Bình Dương cho đến Châu Phi và Trung Đông. Điểm hay của những bản đồ này là chúng có một điểm cuối API dễ sử dụng để cung cấp thông tin về vị trí văn phòng ở định dạng JSON. Trong bước này, bạn sẽ đặt các vị trí văn phòng này trên bản đồ. Trong bước này, bạn sẽ dùng tính năng tạo mã để phân tích cú pháp JSON.
Thêm 3 phần phụ thuộc Flutter mới vào dự án như sau. Thêm gói http để dễ dàng thực hiện các yêu cầu HTTP, json_serializable và json_annotation để khai báo cấu trúc đối tượng nhằm biểu thị tài liệu JSON, thêm build_runner để hỗ trợ tạo mã.
$ flutter pub add http json_annotation json_serializable dev:build_runner
Resolving dependencies...
Downloading packages...
+ _fe_analyzer_shared 67.0.0 (68.0.0 available)
+ analyzer 6.4.1 (6.5.0 available)
+ args 2.5.0
+ build 2.4.1
+ build_config 1.1.1
+ build_daemon 4.0.1
+ build_resolvers 2.4.2
+ build_runner 2.4.9
+ build_runner_core 7.3.0
+ built_collection 5.1.1
+ built_value 8.9.2
+ checked_yaml 2.0.3
+ code_builder 4.10.0
+ convert 3.1.1
+ crypto 3.0.3
+ dart_style 2.3.6
+ file 7.0.0
+ fixnum 1.1.0
+ frontend_server_client 4.0.0
+ glob 2.1.2
+ graphs 2.3.1
+ http 1.2.1
+ http_multi_server 3.2.1
+ http_parser 4.0.2
+ io 1.0.4
  js 0.6.7 (0.7.1 available)
+ json_annotation 4.9.0
+ json_serializable 6.8.0
  leak_tracker 10.0.4 (10.0.5 available)
  leak_tracker_flutter_testing 3.0.3 (3.0.5 available)
+ logging 1.2.0
  material_color_utilities 0.8.0 (0.11.1 available)
  meta 1.12.0 (1.14.0 available)
+ mime 1.0.5
+ package_config 2.1.0
+ pool 1.5.1
+ pub_semver 2.1.4
+ pubspec_parse 1.2.3
+ shelf 1.4.1
+ shelf_web_socket 1.0.4
+ source_gen 1.5.0
+ source_helper 1.3.4
  test_api 0.7.0 (0.7.1 available)
+ timing 1.0.1
+ typed_data 1.3.2
+ watcher 1.1.0
+ web_socket_channel 2.4.5
+ yaml 3.1.2
Changed 42 dependencies!
8 packages have newer versions incompatible with dependency constraints.
Try `flutter pub outdated` for more information.
Phân tích cú pháp JSON bằng tính năng tạo mã
Có thể bạn đã nhận thấy rằng dữ liệu JSON được trả về từ điểm cuối API có cấu trúc thông thường. Sẽ rất hữu ích nếu bạn tạo mã để chuyển đổi dữ liệu đó thành các đối tượng mà bạn có thể dùng trong mã.
Trong thư mục lib/src, hãy tạo một tệp locations.dart và mô tả cấu trúc của dữ liệu JSON được trả về như sau:
lib/src/locations.dart
import 'dart:convert';

import 'package:flutter/foundation.dart';
import 'package:flutter/services.dart' show rootBundle;
import 'package:http/http.dart' as http;
import 'package:json_annotation/json_annotation.dart';

part 'locations.g.dart';

@JsonSerializable()
class LatLng {
  LatLng({
    required this.lat,
    required this.lng,
  });

  factory LatLng.fromJson(Map<String, dynamic> json) => _$LatLngFromJson(json);
  Map<String, dynamic> toJson() => _$LatLngToJson(this);

  final double lat;
  final double lng;
}

@JsonSerializable()
class Region {
  Region({
    required this.coords,
    required this.id,
    required this.name,
    required this.zoom,
  });

  factory Region.fromJson(Map<String, dynamic> json) => _$RegionFromJson(json);
  Map<String, dynamic> toJson() => _$RegionToJson(this);

  final LatLng coords;
  final String id;
  final String name;
  final double zoom;
}

@JsonSerializable()
class Office {
  Office({
    required this.address,
    required this.id,
    required this.image,
    required this.lat,
    required this.lng,
    required this.name,
    required this.phone,
    required this.region,
  });

  factory Office.fromJson(Map<String, dynamic> json) => _$OfficeFromJson(json);
  Map<String, dynamic> toJson() => _$OfficeToJson(this);

  final String address;
  final String id;
  final String image;
  final double lat;
  final double lng;
  final String name;
  final String phone;
  final String region;
}

@JsonSerializable()
class Locations {
  Locations({
    required this.offices,
    required this.regions,
  });

  factory Locations.fromJson(Map<String, dynamic> json) =>
      _$LocationsFromJson(json);
  Map<String, dynamic> toJson() => _$LocationsToJson(this);

  final List<Office> offices;
  final List<Region> regions;
}

Future<Locations> getGoogleOffices() async {
  const googleLocationsURL = 'https://about.google/static/data/locations.json';

  // Retrieve the locations of Google offices
  try {
    final response = await http.get(Uri.parse(googleLocationsURL));
    if (response.statusCode == 200) {
      return Locations.fromJson(
          json.decode(response.body) as Map<String, dynamic>);
    }
  } catch (e) {
    if (kDebugMode) {
      print(e);
    }
  }

  // Fallback for when the above HTTP request fails.
  return Locations.fromJson(
    json.decode(
      await rootBundle.loadString('assets/locations.json'),
    ) as Map<String, dynamic>,
  );
}
Sau khi bạn thêm mã này, IDE (nếu bạn đang sử dụng) sẽ hiển thị một số đường gạch chân màu đỏ, vì mã này tham chiếu đến một tệp ngang hàng không tồn tại, locations.g.dart. Tệp được tạo này chuyển đổi giữa các cấu trúc JSON không có kiểu và các đối tượng được đặt tên. Tạo tệp này bằng cách chạy build_runner như sau:
$ dart run build_runner build --delete-conflicting-outputs
[INFO] Generating build script...
[INFO] Generating build script completed, took 357ms

[INFO] Creating build script snapshot......
[INFO] Creating build script snapshot... completed, took 10.5s

[INFO] There was output on stdout while compiling the build script snapshot, run with `--verbose` to see it (you will need to run a `clean` first to re-snapshot).

[INFO] Initializing inputs
[INFO] Building new asset graph...
[INFO] Building new asset graph completed, took 646ms

[INFO] Checking for unexpected pre-existing outputs....
[INFO] Deleting 1 declared outputs which already existed on disk.
[INFO] Checking for unexpected pre-existing outputs. completed, took 3ms

[INFO] Running build...
[INFO] Generating SDK summary...
[INFO] 3.4s elapsed, 0/3 actions completed.
[INFO] Generating SDK summary completed, took 3.4s

[INFO] 4.7s elapsed, 2/3 actions completed.
[INFO] Running build completed, took 4.7s

[INFO] Caching finalized dependency graph...
[INFO] Caching finalized dependency graph completed, took 36ms

[INFO] Succeeded after 4.8s with 2 outputs (7 actions)
Bây giờ, mã của bạn sẽ phân tích lại một cách rõ ràng. Tiếp theo, chúng ta nên thêm tệp locations.json dự phòng được dùng trong hàm getGoogleOffices. Một trong những lý do đưa hàm dự phòng này vào là do dữ liệu tĩnh được tải trong hàm này được phân phát mà không có tiêu đề CORS, do đó sẽ không tải được trong trình duyệt web. Các ứng dụng Flutter dành cho Android và iOS không cần tiêu đề CORS, nhưng quyền truy cập dữ liệu di động có thể không ổn định ngay cả trong điều kiện tốt nhất.
Chuyển đến https://about.google/static/data/locations.json trong trình duyệt rồi lưu nội dung vào thư mục tài sản. Ngoài ra, bạn có thể dùng dòng lệnh như sau.
$ mkdir assets
$ cd assets
$ curl -o locations.json https://about.google/static/data/locations.json
  % Total    % Received % Xferd  Average Speed   Time    Time     Time  Current
                                 Dload  Upload   Total   Spent    Left  Speed
100 30348  100 30348    0     0  75492      0 --:--:-- --:--:-- --:--:-- 75492
Sau khi tải tệp thành phần xuống, hãy thêm tệp đó vào phần flutter của tệp pubspec.yaml.
pubspec.yaml
flutter:
  uses-material-design: true

  assets:
    - assets/locations.json
Sửa đổi tệp main.dart để yêu cầu dữ liệu bản đồ, sau đó dùng thông tin được trả về để thêm văn phòng vào bản đồ:
lib/main.dart
import 'package:flutter/material.dart';
import 'package:google_maps_flutter/google_maps_flutter.dart';
import 'src/locations.dart' as locations;

void main() {
  runApp(const MyApp());
}

class MyApp extends StatefulWidget {
  const MyApp({super.key});

  @override
  State<MyApp> createState() => _MyAppState();
}

class _MyAppState extends State<MyApp> {
  final Map<String, Marker> _markers = {};
  Future<void> _onMapCreated(GoogleMapController controller) async {
    final googleOffices = await locations.getGoogleOffices();
    setState(() {
      _markers.clear();
      for (final office in googleOffices.offices) {
        final marker = Marker(
          markerId: MarkerId(office.name),
          position: LatLng(office.lat, office.lng),
          infoWindow: InfoWindow(
            title: office.name,
            snippet: office.address,
          ),
        );
        _markers[office.name] = marker;
      }
    });
  }

  @override
  Widget build(BuildContext context) {
    return MaterialApp(
      theme: ThemeData(
        useMaterial3: true,
        colorSchemeSeed: Colors.green[700],
      ),
      home: Scaffold(
        appBar: AppBar(
          title: const Text('Google Office Locations'),
          elevation: 2,
        ),
        body: GoogleMap(
          onMapCreated: _onMapCreated,
          initialCameraPosition: const CameraPosition(
            target: LatLng(0, 0),
            zoom: 2,
          ),
          markers: _markers.values.toSet(),
        ),
      ),
    );
  }
}
Mã này thực hiện một số thao tác:
- Trong
_onMapCreated, phương thức này sử dụng mã phân tích cú pháp JSON từ bước trước,awaitcho đến khi được tải. Sau đó, nó sử dụng dữ liệu được trả về để tạoMarkerbên trong một lệnh gọi lạisetState(). Sau khi ứng dụng nhận được các điểm đánh dấu mới, setState sẽ gắn cờ Flutter để vẽ lại màn hình, khiến các vị trí văn phòng xuất hiện. - Các điểm đánh dấu được lưu trữ trong một
Mapđược liên kết với tiện íchGoogleMap. Thao tác này sẽ liên kết các điểm đánh dấu với đúng bản đồ. Tất nhiên, bạn có thể có nhiều bản đồ và hiển thị các điểm đánh dấu khác nhau trong mỗi bản đồ.

Sau đây là ảnh chụp màn hình về những gì bạn đã hoàn thành. Có nhiều điểm bổ sung thú vị có thể được thực hiện tại thời điểm này. Ví dụ: bạn có thể thêm một khung hiển thị danh sách các văn phòng di chuyển và thu phóng bản đồ khi người dùng nhấp vào một văn phòng, nhưng như người ta vẫn nói, bài tập này dành cho người đọc!
6. Các bước tiếp theo
Xin chúc mừng!
Bạn đã hoàn thành lớp học lập trình và xây dựng một ứng dụng Flutter có Google Maps! Bạn cũng đã tương tác với một Dịch vụ web JSON.
Các bước tiếp theo khác
Lớp học lập trình này đã tạo ra một trải nghiệm để trực quan hoá một số điểm trên bản đồ. Có một số ứng dụng di động dựa trên khả năng này để đáp ứng nhiều nhu cầu khác nhau của người dùng. Ngoài ra, còn có những tài nguyên khác có thể giúp bạn tìm hiểu thêm về vấn đề này:
- Tạo ứng dụng di động bằng Flutter và Google Maps (một buổi nói chuyện tại Cloud Next ‘19)
- Gói
google_maps_webservicecủa Hadrien Lejard giúp bạn sử dụng Dịch vụ web của Google Maps (chẳng hạn như Directions API, Distance Matrix API và Places API) một cách dễ dàng. - Nếu bạn muốn xem các lựa chọn khác để sử dụng API thông qua JSON REST, hãy xem bài đăng của Andrew Brogdon trên Medium để biết nhiều lựa chọn về cách sử dụng API REST JSON.