
关于此 Codelab
1. 简介
Google Chat 应用会将您的服务和资源直接导入 Google Chat 中,让用户无需离开对话窗口即可获取信息并快速采取行动。
在此 Codelab 中,您将学习如何使用 Node.js 和 Cloud Functions 构建和部署投票应用。
学习内容
- 使用 Cloud Shell
- 部署到 Cloud Functions
- 使用斜杠命令和对话框获取用户输入
- 创建互动式卡片
2. 设置和要求
创建一个 Google Cloud 项目,然后启用 Chat 应用要使用的 API 和服务
前提条件
要开发 Google Chat 应用,您需要有权访问 Google Chat 的 Google Workspace 帐号。如果您还没有 Google Workspace 帐号,请先创建一个帐号并登录,然后再继续学习此 Codelab。
自定进度的环境设置
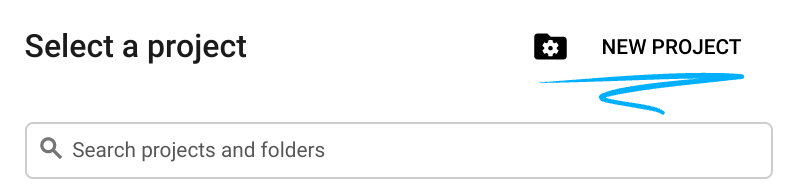
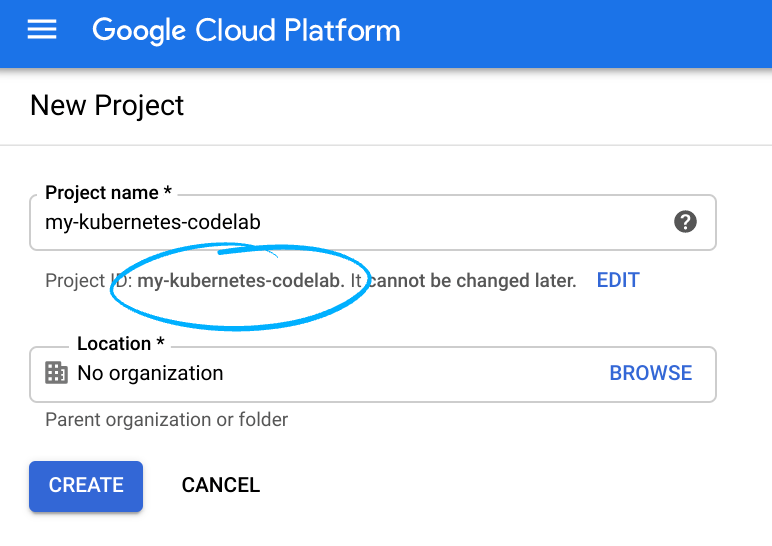
- 打开 Google Cloud Console 并创建一个项目。
请记住,项目 ID,它在所有 Google Cloud 项目中都是唯一名称(很抱歉,上述名称已被占用,您无法使用!)。它稍后将在此 Codelab 中被称为PROJECT_ID。

- 接下来,为了使用 Google Cloud 资源,请在 Cloud Console 中启用结算功能。
此 Codelab 的运行费用应该不会太多。请务必按照此 Codelab 末尾的“清理”部分中的说明操作,了解如何关闭资源,以免产生超出本教程费用的情况。Google Cloud 的新用户有资格参与 $300USD 免费试用计划。
Google Cloud Shell
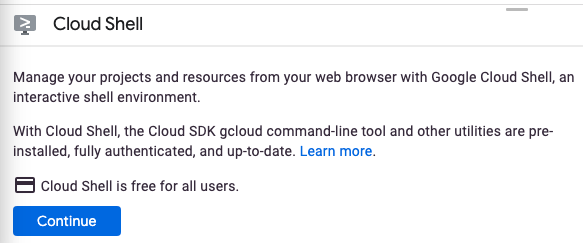
虽然 Google Cloud 可以从笔记本电脑远程操作,但在此 Codelab 中,我们将使用 Google Cloud Shell,这是一种在 Google Cloud 中运行的命令行环境。
激活 Cloud Shell
- 在 Cloud Console 中,点击激活 Cloud Shell
。
首次打开 Cloud Shell 时,系统会显示一条描述性的欢迎消息。如果您看到欢迎辞,请点击继续。欢迎消息不会再显示。以下是欢迎消息:
预配和连接到 Cloud Shell 只需片刻。连接后,您会看到 Cloud Shell 终端:
此虚拟机加载了您需要的所有开发工具。它提供了一个持久的 5GB 主目录,并且在 Google Cloud 中运行,大大增强了网络性能和身份验证。此 Codelab 中的所有工作均可通过浏览器或 Chromebook 完成。连接到 Cloud Shell 后,您应该会看到自己已通过身份验证,并且相关项目已设置为您的项目 ID。 - 在 Cloud Shell 中运行以下命令以确认您已通过身份验证:
gcloud auth list
命令输出Credentialed Accounts ACTIVE ACCOUNT * <my_account>@<my_domain.com>
$ gcloud config set account <ACCOUNT>


- 确认您已选择正确的项目。在 Cloud Shell 中,运行以下命令:
gcloud config list project
[core]
project = <PROJECT_ID>
gcloud config set project <PROJECT_ID>
Updated property [core/project].
完成此 Codelab 后,您将使用命令行操作和修改文件。如需修改文件,您可以点击 Cloud Shell 工具栏右侧的打开编辑器,以使用 Cloud Shell 的内置代码编辑器 Cloud Shell Editor。Cloud Shell 中还提供了 Vim 和 Emacs 等热门编辑器。
3. 启用 Cloud Functions、Cloud Build 和 Google Chat API
在 Cloud Shell 中,启用以下 API 和服务:
gcloud services enable \
  cloudfunctions \
  cloudbuild.googleapis.com \
  chat.googleapis.com
此操作可能需要一些时间才能完成。
完成后,系统会显示类似下面的成功消息:
Operation "operations/acf.cc11852d-40af-47ad-9d59-477a12847c9e" finished successfully.
4. 创建初始 Chat 应用
初始化项目
首先,您将创建和部署简单的“Hello world”应用。聊天应用是响应 https 请求并使用 JSON 载荷进行响应的网络服务。对于此应用,您将使用 Node.js 和 Cloud Functions。
在 Cloud Shell 中,新建名为 poll-app 的目录并导航到该目录:
mkdir ~/poll-app
cd ~/poll-app
此 Codelab 的所有剩余工作以及您要创建的文件都将位于此目录中。
初始化 Node.js 项目:
npm init
NPM 会询问有关项目配置的多个问题,例如名称和版本。对于每个问题,请按 ENTER 接受默认值。默认入口点是一个名为 index.js 的文件,我们将在下面创建该文件。
创建 Chat 应用后端
开始创建应用的时候到了。创建名为 index.js 且包含以下内容的文件:
/**
 * App entry point.
 */
exports.app = async (req, res) => {
  if (!(req.method === 'POST' && req.body)) {
      res.status(400).send('')
  }
  const event = req.body;
  let reply = {};
  if (event.type === 'MESSAGE') {
    reply = {
        text: `Hello ${event.user.displayName}`
    };
  }
  res.json(reply)
}
应用不会执行太多操作,但没关系。您稍后将添加更多功能。
部署应用
要部署“Hello world”应用,您需要部署 Cloud Functions 函数,在 Google Cloud Console 中配置 Chat 应用,然后向该应用发送测试消息以验证部署。
部署 Cloud Functions 函数
如需部署“Hello world”应用的 Cloud Functions 函数,请输入以下命令:
gcloud functions deploy app --trigger-http --security-level=secure-always --allow-unauthenticated --runtime nodejs14
完成后,输出应如下所示:
availableMemoryMb: 256
buildId: 993b2ca9-2719-40af-86e4-42c8e4563a4b
buildName: projects/595241540133/locations/us-central1/builds/993b2ca9-2719-40af-86e4-42c8e4563a4b
entryPoint: app
httpsTrigger:
  securityLevel: SECURE_ALWAYS
  url: https://us-central1-poll-app-codelab.cloudfunctions.net/app
ingressSettings: ALLOW_ALL
labels:
  deployment-tool: cli-gcloud
name: projects/poll-app-codelab/locations/us-central1/functions/app
runtime: nodejs14
serviceAccountEmail: poll-app-codelab@appspot.gserviceaccount.com
sourceUploadUrl: https://storage.googleapis.com/gcf-upload-us-central1-66a01777-67f0-46d7-a941-079c24414822/94057943-2b7c-4b4c-9a21-bb3acffc84c6.zip
status: ACTIVE
timeout: 60s
updateTime: '2021-09-17T19:30:33.694Z'
versionId: '1'
请记下 httpsTrigger.url 属性中已部署函数的网址。您将在接下来的步骤中使用此变量。
配置应用
要配置应用,请转到Chat 配置页面(API 和服务>数字面板>Hangouts Chat API >配置)。
- 在应用名称中,输入“PollCodelab”。
- 在头像网址中输入
https://raw.githubusercontent.com/google/material-design-icons/master/png/social/poll/materialicons/24dp/2x/baseline_poll_black_24dp.png。 - 在 Description 中,输入“Poll app for codelab”。
- 在功能部分,选择应用可以直接发送消息和应用可由多位用户在聊天室中工作。
- 在连接设置下,选择应用网址,然后粘贴 Cloud Functions 函数的网址(上一部分中的
httpsTrigger.url属性)。 - 在权限下方,选择您网域中的特定用户和群组,然后输入您的电子邮件地址。
- 点击保存。
该应用现在可以发送消息了。
测试应用
在继续操作之前,请将应用添加到 Google Chat 聊天室,以检查该应用是否正常运行。
- 转到 Google Chat。
- 在“聊天”旁边,依次点击 + > 查找应用。
- 在搜索中输入“PollCodelab”。
- 点击聊天。
- 要向应用发送消息,请输入“Hello”,然后按 Enter 键。
应用应该以简短的问候消息进行响应。
现在已经有了基本的框架,是时候将其变成更实用的东西了!
5. 构建投票功能
应用运作方式简要概览
该应用由两个主要部分组成:
- 一个斜杠命令,显示用于配置意见调查的对话框。
- 用于投票和查看结果的互动式卡片。
该应用还需要某种状态来存储投票配置和结果。这可以使用 Firestore 或任何数据库来完成,也可以将状态存储在应用消息中。由于此应用旨在供团队快速开展非正式投票活动,因此将状态存储在应用消息中非常适合此用例。
应用的数据模型(以 TypeScript 表示)如下:
interface Poll {
  /* Question/topic of poll */
  topic: string;
  /** User that submitted the poll */
  author: {
    /** Unique resource name of user */
    name: string;
    /** Display name */
    displayName: string;
  };
  /** Available choices to present to users */
  choices: string[];
  /** Map of user ids to the index of their selected choice */
  votes: { [key: string]: number };
}
除了主题或问题和选项列表之外,状态还包括作者 ID、姓名以及记录的投票。为防止用户多次投票,投票会存储为用户 ID 到他们所选索引的索引的映射。
当然,有许多不同的方法,但这提供了一个在空间内快速轮询的良好起点。
实现轮询配置命令
要允许用户发起和配置投票活动,请设置用于打开对话框的斜杠命令。此过程包含多个步骤:
- 注册用于发起投票的斜杠命令。
- 创建用于设置投票活动的对话框。
- 让应用识别并处理斜杠命令。
- 创建互动式卡片,方便在投票活动中进行投票。
- 实现可让应用运行投票的代码。
- 重新部署 Cloud Functions 函数。
注册斜杠命令
要注册斜杠命令,请返回控制台中的 Chat 配置页面(API 和服务 > 信息中心 > Hangouts Chat API) > 配置)。
- 在斜杠命令下,点击添加斜杠命令。
- 在名称中,输入“/poll”
- 在命令 ID 中,输入“1”
- 在说明中,输入“发起投票”。
- 选择打开对话框。
- 点击完成。
- 点击保存。
应用现在可以识别 /poll 命令,并打开一个对话框。接下来,我们来配置该对话框。
以对话框的形式创建配置表单
斜杠命令用于打开一个对话框来配置投票主题和可能的选项。新建一个名为 config-form.js 的文件,其中包含以下内容:
/** Upper bounds on number of choices to present. */
const MAX_NUM_OF_OPTIONS = 5;

/**
 * Build widget with instructions on how to use form.
 *
 * @returns {object} card widget
 */
function helpText() {
  return {
    textParagraph: {
      text: 'Enter the poll topic and up to 5 choices in the poll. Blank options will be omitted.',
    },
  };
}

/**
 * Build the text input for a choice.
 *
 * @param {number} index - Index to identify the choice
 * @param {string|undefined} value - Initial value to render (optional)
 * @returns {object} card widget
 */
function optionInput(index, value) {
  return {
    textInput: {
      label: `Option ${index + 1}`,
      type: 'SINGLE_LINE',
      name: `option${index}`,
      value: value || '',
    },
  };
}

/**
 * Build the text input for the poll topic.
 *
 * @param {string|undefined} topic - Initial value to render (optional)
 * @returns {object} card widget
 */
function topicInput(topic) {
  return {
    textInput: {
      label: 'Topic',
      type: 'MULTIPLE_LINE',
      name: 'topic',
      value: topic || '',
    },
  };
}

/**
 * Build the buttons/actions for the form.
 *
 * @returns {object} card widget
 */
function buttons() {
  return {
    buttonList: {
      buttons: [
        {
          text: 'Submit',
          onClick: {
            action: {
              function: 'start_poll',
            },
          },
        },
      ],
    },
  };
}

/**
 * Build the configuration form.
 *
 * @param {object} options - Initial state to render with form
 * @param {string|undefined} options.topic - Topic of poll (optional)
 * @param {string[]|undefined} options.choices - Text of choices to display to users (optional)
 * @returns {object} card
 */
function buildConfigurationForm(options) {
  const widgets = [];
  widgets.push(helpText());
  widgets.push(topicInput(options.topic));
  for (let i = 0; i < MAX_NUM_OF_OPTIONS; ++i) {
    const choice = options?.choices?.[i];
    widgets.push(optionInput(i, choice));
  }
  widgets.push(buttons());

  // Assemble the card
  return {
    sections: [
      {
        widgets,
      },
    ],
  };
}

exports.MAX_NUM_OF_OPTIONS = MAX_NUM_OF_OPTIONS;
exports.buildConfigurationForm = buildConfigurationForm;
此代码会生成一个对话框表单,供用户设置意见调查。它还导出一个问题可以拥有的选项数上限的常量。最好将界面标记构建为无状态函数,并将任何状态作为参数传入。这有助于重复使用,之后此卡片将在不同的上下文中呈现。
此实现还将卡片分解为更小的单元或组件。虽然并非强制性要求,但该技术是一种最佳做法,因为它在构建复杂接口时往往更易于阅读和维护。
要查看其构建的完整 JSON 的示例,请在卡片构建工具中查看。
处理斜杠命令
斜杠命令在发送到应用后显示为 MESSAGE 事件。更新 index.js 以通过 MESSAGE 事件检查是否存在斜杠命令,并使用对话框进行响应。将 index.js 替换为以下内容:
const { buildConfigurationForm, MAX_NUM_OF_OPTIONS } = require('./config-form');

/**
 * App entry point.
 */
exports.app = async (req, res) => {
  if (!(req.method === 'POST' && req.body)) {
      res.status(400).send('')
  }
  const event = req.body;
  let reply = {};
  // Dispatch slash and action events
  if (event.type === 'MESSAGE') {
    const message = event.message;
    if (message.slashCommand?.commandId === '1') {
      reply = showConfigurationForm(event);
    }
  } else if (event.type === 'CARD_CLICKED') {
    if (event.action?.actionMethodName === 'start_poll') {
      reply = await startPoll(event);
    }
  }
  res.json(reply);
}

/**
 * Handles the slash command to display the config form.
 *
 * @param {object} event - chat event
 * @returns {object} Response to send back to Chat
 */
function showConfigurationForm(event) {
  // Seed the topic with any text after the slash command
  const topic = event.message?.argumentText?.trim();
  const dialog = buildConfigurationForm({
    topic,
    choices: [],
  });
  return {
    actionResponse: {
      type: 'DIALOG',
      dialogAction: {
        dialog: {
          body: dialog,
        },
      },
    },
  };
}

/**
 * Handle the custom start_poll action.
 *
 * @param {object} event - chat event
 * @returns {object} Response to send back to Chat
 */
function startPoll(event) {
  // Not fully implemented yet -- just close the dialog
  return {
    actionResponse: {
      type: 'DIALOG',
      dialogAction: {
        actionStatus: {
          statusCode: 'OK',
          userFacingMessage: 'Poll started.',
        },
      },
    },
  }
}
应用现在会在调用 /poll 命令时显示对话框。通过从 Cloud Shell 中重复使用 Cloud Functions 函数来测试交互。
gcloud functions deploy app --trigger-http --security-level=secure-always
部署 Cloud Functions 函数后,使用 /poll 命令向应用发送消息,以测试斜杠命令和对话框。对话框会发送一个包含自定义操作 start_poll 的 CARD_CLICKED 事件。该事件会在更新后的入口点中进行处理,并在其中调用 startPoll 方法。目前,已对 startPoll 方法进行存根以仅关闭对话框。在下一部分中,您将实现投票功能,并将所有部分关联在一起。
实现投票卡片
如需实现应用的投票部分,请首先定义一个互动式卡片,为用户提供投票选项。
实现投票界面
创建一个名为 vote-card.js 的文件,其中包含以下内容:
/**
 * Creates a small progress bar to show percent of votes for an option. Since
 * width is limited, the percentage is scaled to 20 steps (5% increments).
 *
 * @param {number} voteCount - Number of votes for this option
 * @param {number} totalVotes - Total votes cast in the poll
 * @returns {string} Text snippet with bar and vote totals
 */
function progressBarText(voteCount, totalVotes) {
  if (voteCount === 0 || totalVotes === 0) {
    return '';
  }

  // For progress bar, calculate share of votes and scale it
  const percentage = (voteCount * 100) / totalVotes;
  const progress = Math.round((percentage / 100) * 20);
  return '▀'.repeat(progress);
}

/**
 * Builds a line in the card for a single choice, including
 * the current totals and voting action.
 *
 * @param {number} index - Index to identify the choice
 * @param {string|undefined} value - Text of the choice
 * @param {number} voteCount - Current number of votes cast for this item
 * @param {number} totalVotes - Total votes cast in poll
 * @param {string} state - Serialized state to send in events
 * @returns {object} card widget
 */
function choice(index, text, voteCount, totalVotes, state) {
  const progressBar = progressBarText(voteCount, totalVotes);
  return {
    keyValue: {
      bottomLabel: `${progressBar} ${voteCount}`,
      content: text,
      button: {
        textButton: {
          text: 'vote',
          onClick: {
            action: {
              actionMethodName: 'vote',
              parameters: [
                {
                  key: 'state',
                  value: state,
                },
                {
                  key: 'index',
                  value: index.toString(10),
                },
              ],
            },
          },
        },
      },
    },
  };
}

/**
 * Builds the card header including the question and author details.
 *
 * @param {string} topic - Topic of the poll
 * @param {string} author - Display name of user that created the poll
 * @returns {object} card widget
 */
function header(topic, author) {
  return {
    title: topic,
    subtitle: `Posted by ${author}`,
    imageUrl:
      'https://raw.githubusercontent.com/google/material-design-icons/master/png/social/poll/materialicons/24dp/2x/baseline_poll_black_24dp.png',
    imageStyle: 'AVATAR',
  };
}

/**
 * Builds the configuration form.
 *
 * @param {object} poll - Current state of poll
 * @param {object} poll.author - User that submitted the poll
 * @param {string} poll.topic - Topic of poll
 * @param {string[]} poll.choices - Text of choices to display to users
 * @param {object} poll.votes - Map of cast votes keyed by user ids
 * @returns {object} card
 */
function buildVoteCard(poll) {
  const widgets = [];
  const state = JSON.stringify(poll);
  const totalVotes = Object.keys(poll.votes).length;

  for (let i = 0; i < poll.choices.length; ++i) {
    // Count votes for this choice
    const votes = Object.values(poll.votes).reduce((sum, vote) => {
      if (vote === i) {
        return sum + 1;
      }
      return sum;
    }, 0);
    widgets.push(choice(i, poll.choices[i], votes, totalVotes, state));
  }

  return {
    header: header(poll.topic, poll.author.displayName),
    sections: [
      {
        widgets,
      },
    ],
  };
}

exports.buildVoteCard = buildVoteCard;
实现方式与对话框类似,但互动卡片的标记与对话框略有不同。和以前一样,您可以在卡片制作工具中查看生成的 JSON 示例。
实现投票操作
投票卡片包含一个选项。该选择的索引和投票的序列化状态会附加到该按钮。应用收到包含操作 vote 的 CARD_CLICKED,以及作为参数附加到按钮上的所有数据。
使用以下代码更新 index.js:
const { buildConfigurationForm, MAX_NUM_OF_OPTIONS } = require('./config-form');
const { buildVoteCard } = require('./vote-card');

/**
 * App entry point.
 */
exports.app = async (req, res) => {
  if (!(req.method === 'POST' && req.body)) {
      res.status(400).send('')
  }
  const event = req.body;
  let reply = {};
  // Dispatch slash and action events
  if (event.type === 'MESSAGE') {
    const message = event.message;
    if (message.slashCommand?.commandId === '1') {
      reply = showConfigurationForm(event);
    }
  } else if (event.type === 'CARD_CLICKED') {
    if (event.action?.actionMethodName === 'start_poll') {
      reply = await startPoll(event);
    } else if (event.action?.actionMethodName === 'vote') {
        reply = recordVote(event);
    }
  }
  res.json(reply);
}

/**
 * Handles the slash command to display the config form.
 *
 * @param {object} event - chat event
 * @returns {object} Response to send back to Chat
 */
function showConfigurationForm(event) {
  // Seed the topic with any text after the slash command
  const topic = event.message?.argumentText?.trim();
  const dialog = buildConfigurationForm({
    topic,
    choices: [],
  });
  return {
    actionResponse: {
      type: 'DIALOG',
      dialogAction: {
        dialog: {
          body: dialog,
        },
      },
    },
  };
}

/**
 * Handle the custom start_poll action.
 *
 * @param {object} event - chat event
 * @returns {object} Response to send back to Chat
 */
function startPoll(event) {
  // Not fully implemented yet -- just close the dialog
  return {
    actionResponse: {
      type: 'DIALOG',
      dialogAction: {
        actionStatus: {
          statusCode: 'OK',
          userFacingMessage: 'Poll started.',
        },
      },
    },
  }
}

/**
 * Handle the custom vote action. Updates the state to record
 * the user's vote then rerenders the card.
 *
 * @param {object} event - chat event
 * @returns {object} Response to send back to Chat
 */
function recordVote(event) {
  const parameters = event.common?.parameters;

  const choice = parseInt(parameters['index']);
  const userId = event.user.name;
  const state = JSON.parse(parameters['state']);

  // Add or update the user's selected option
  state.votes[userId] = choice;

  const card = buildVoteCard(state);
  return {
    thread: event.message.thread,
    actionResponse: {
      type: 'UPDATE_MESSAGE',
    },
    cards: [card],
  }
}
recordVote 方法会解析存储的状态并使用用户的投票进行更新,然后重新渲染卡片。每次更新时,投票结果都会进行序列化,并随卡片一起存储。
连接各组件
应用即将完成。随着斜杠命令和投票的实施,唯一剩下的工作就是完成 startPoll 方法。
不过,有个问题。
提交投票配置后,该应用需要执行两项操作:
- 关闭对话框。
- 使用投票卡片在聊天室中发布新消息。
很遗憾,HTTP 请求的直接回复只能执行一项请求,并且这必须是第一个请求。 要发布投票卡,应用必须使用 Chat API 异步创建新消息。
添加客户端库
运行以下命令以更新应用的依赖项,以包含 Node.js 版 Google API 客户端。
npm install --save googleapis
发起投票
将 index.js 更新为以下最终版本:
const { buildConfigurationForm, MAX_NUM_OF_OPTIONS } = require('./config-form');
const { buildVoteCard } = require('./vote-card');
const {google} = require('googleapis');

/**
 * App entry point.
 */
exports.app = async (req, res) => {
  if (!(req.method === 'POST' && req.body)) {
      res.status(400).send('')
  }
  const event = req.body;
  let reply = {};
  // Dispatch slash and action events
  if (event.type === 'MESSAGE') {
    const message = event.message;
    if (message.slashCommand?.commandId === '1') {
      reply = showConfigurationForm(event);
    }
  } else if (event.type === 'CARD_CLICKED') {
    if (event.action?.actionMethodName === 'start_poll') {
      reply = await startPoll(event);
    } else if (event.action?.actionMethodName === 'vote') {
        reply = recordVote(event);
    }
  }
  res.json(reply);
}

/**
 * Handles the slash command to display the config form.
 *
 * @param {object} event - chat event
 * @returns {object} Response to send back to Chat
 */
function showConfigurationForm(event) {
  // Seed the topic with any text after the slash command
  const topic = event.message?.argumentText?.trim();
  const dialog = buildConfigurationForm({
    topic,
    choices: [],
  });
  return {
    actionResponse: {
      type: 'DIALOG',
      dialogAction: {
        dialog: {
          body: dialog,
        },
      },
    },
  };
}

/**
 * Handle the custom start_poll action.
 *
 * @param {object} event - chat event
 * @returns {object} Response to send back to Chat
 */
async function startPoll(event) {
  // Get the form values
  const formValues = event.common?.formInputs;
  const topic = formValues?.['topic']?.stringInputs.value[0]?.trim();
  const choices = [];
  for (let i = 0; i < MAX_NUM_OF_OPTIONS; ++i) {
    const choice = formValues?.[`option${i}`]?.stringInputs.value[0]?.trim();
    if (choice) {
      choices.push(choice);
    }
  }

  if (!topic || choices.length === 0) {
    // Incomplete form submitted, rerender
    const dialog = buildConfigurationForm({
      topic,
      choices,
    });
    return {
      actionResponse: {
        type: 'DIALOG',
        dialogAction: {
          dialog: {
            body: dialog,
          },
        },
      },
    };
  }

  // Valid configuration, build the voting card to display
  // in the space
  const pollCard = buildVoteCard({
    topic: topic,
    author: event.user,
    choices: choices,
    votes: {},
  });
  const message = {
    cards: [pollCard],
  };
  const request = {
    parent: event.space.name,
    requestBody: message,
  };
  // Use default credentials (service account)
  const credentials = new google.auth.GoogleAuth({
    scopes: ['https://www.googleapis.com/auth/chat.bot'],
  });
  const chatApi = google.chat({
    version: 'v1',
    auth: credentials,
  });
  await chatApi.spaces.messages.create(request);

  // Close dialog
  return {
    actionResponse: {
      type: 'DIALOG',
      dialogAction: {
        actionStatus: {
          statusCode: 'OK',
          userFacingMessage: 'Poll started.',
        },
      },
    },
  };
}

/**
 * Handle the custom vote action. Updates the state to record
 * the user's vote then rerenders the card.
 *
 * @param {object} event - chat event
 * @returns {object} Response to send back to Chat
 */
function recordVote(event) {
  const parameters = event.common?.parameters;

  const choice = parseInt(parameters['index']);
  const userId = event.user.name;
  const state = JSON.parse(parameters['state']);

  // Add or update the user's selected option
  state.votes[userId] = choice;

  const card = buildVoteCard(state);
  return {
    thread: event.message.thread,
    actionResponse: {
      type: 'UPDATE_MESSAGE',
    },
    cards: [card],
  }
}
重新部署函数:
gcloud functions deploy app --trigger-http --security-level=secure-always
您现在应该能够完整使用该应用。尝试调用 /poll 命令可以提供问题和多个选项。提交后,系统会显示投票卡片。
投票,看看会发生什么。
当然,投票活动并不完全有用,所以请邀请一些朋友或同事试一试吧!
6. 恭喜
恭喜!您已成功使用 Cloud Functions 构建和部署 Google Chat 应用。尽管此 Codelab 介绍了构建应用的许多核心概念,但还有很多需要探索。请参阅下面的资源,并记得清理您的项目以避免产生额外费用。
其他活动
如果您想更深入地探索 Chat 平台和此应用,可以尝试执行以下操作:
- 如果用 @ 提及该应用,会发生什么情况?请尝试更新应用以改善行为。
- 在卡片中,对投票空间中的投票状态进行序列化可以处理较小的空间,但有限制。请尝试切换到更好的选项。
- 如果作者想修改投票活动或不再接受新投票,该怎么办?您将如何实现这些功能?
- 应用端点尚不安全。请尝试添加一些验证,以确保请求来自 Google Chat。
以上只是改进应用的一些不同方式。尽情发挥您的想象力吧!
清理
为避免系统因本教程中使用的资源向您的 Google Cloud Platform 帐号收取费用,请执行以下操作:
- 在 Cloud Console 中,转到管理资源页面。点击左上角的 菜单
 > IAM 和管理 > 管理资源。
- 在项目列表中,选择您的项目,然后点击删除。
- 在对话框中输入项目 ID,然后点击关停以删除项目。
了解详情
如需详细了解如何开发 Chat 应用,请参阅:
如需详细了解如何在 Google Cloud Console 中进行开发,请参阅: