
1. ก่อนเริ่มต้น
Flutter ช่วยให้นักพัฒนาแอปสร้างอินเทอร์เฟซผู้ใช้ใหม่ได้อย่างรวดเร็วโดยใช้การโหลดซ้ำด่วนและ UI แบบประกาศ อย่างไรก็ตาม บางครั้งคุณอาจต้องเพิ่มการโต้ตอบเพิ่มเติมลงในอินเทอร์เฟซ การแตะเหล่านี้อาจรวดเร็วเพียงแค่การเคลื่อนไหวปุ่มเมื่อคลิก หรืออาจเป็นการใช้เชเดอร์ที่บิดเบือนอินเทอร์เฟซผู้ใช้โดยใช้พลังของ GPU
ในโค้ดแล็บนี้ คุณจะได้สร้างแอป Flutter ที่ใช้พลังของภาพเคลื่อนไหว Shader และฟิลด์อนุภาคเพื่อสร้างอินเทอร์เฟซผู้ใช้ที่ชวนให้นึกถึงภาพยนตร์และรายการทีวีแนวไซไฟที่เราทุกคนชอบดูเมื่อไม่ได้เขียนโค้ด
สิ่งที่คุณจะสร้าง
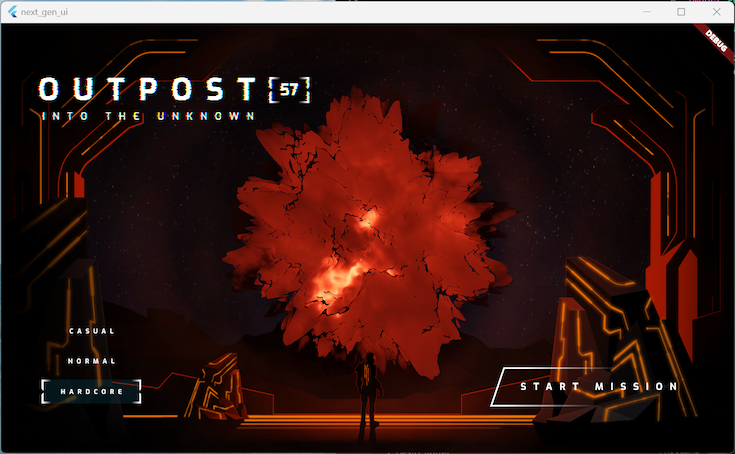
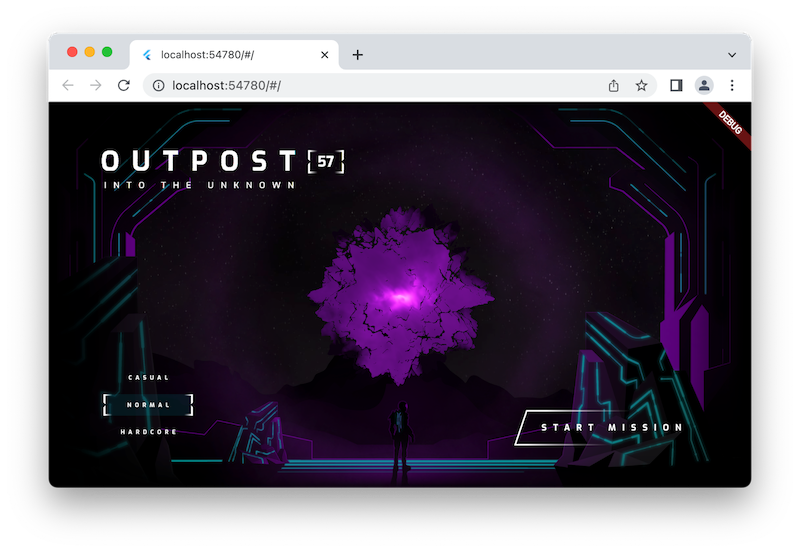
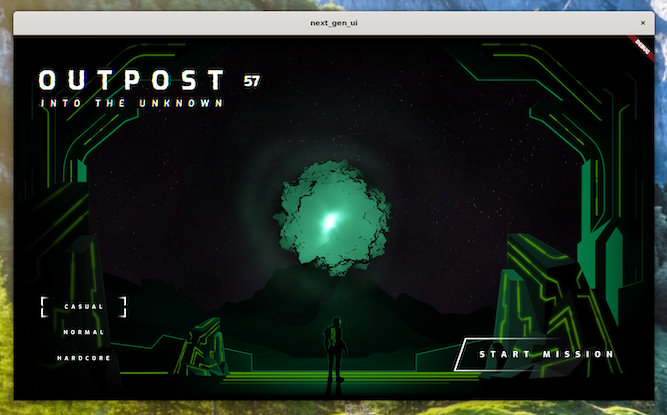
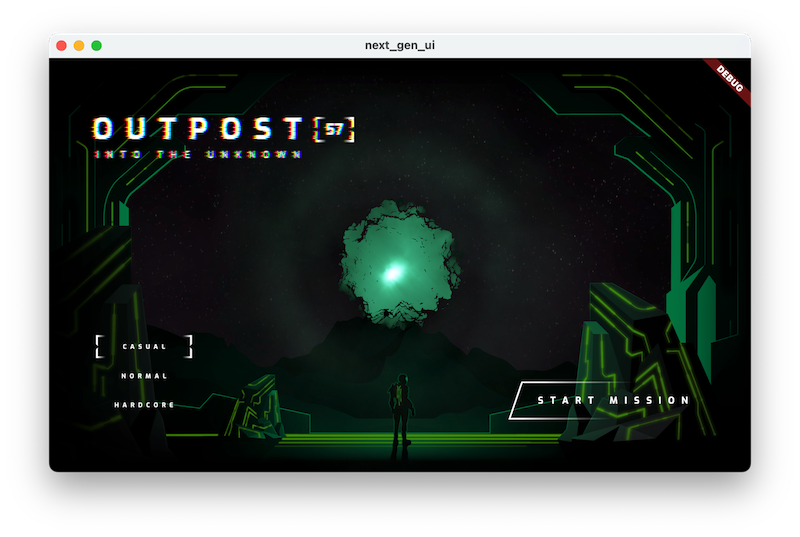
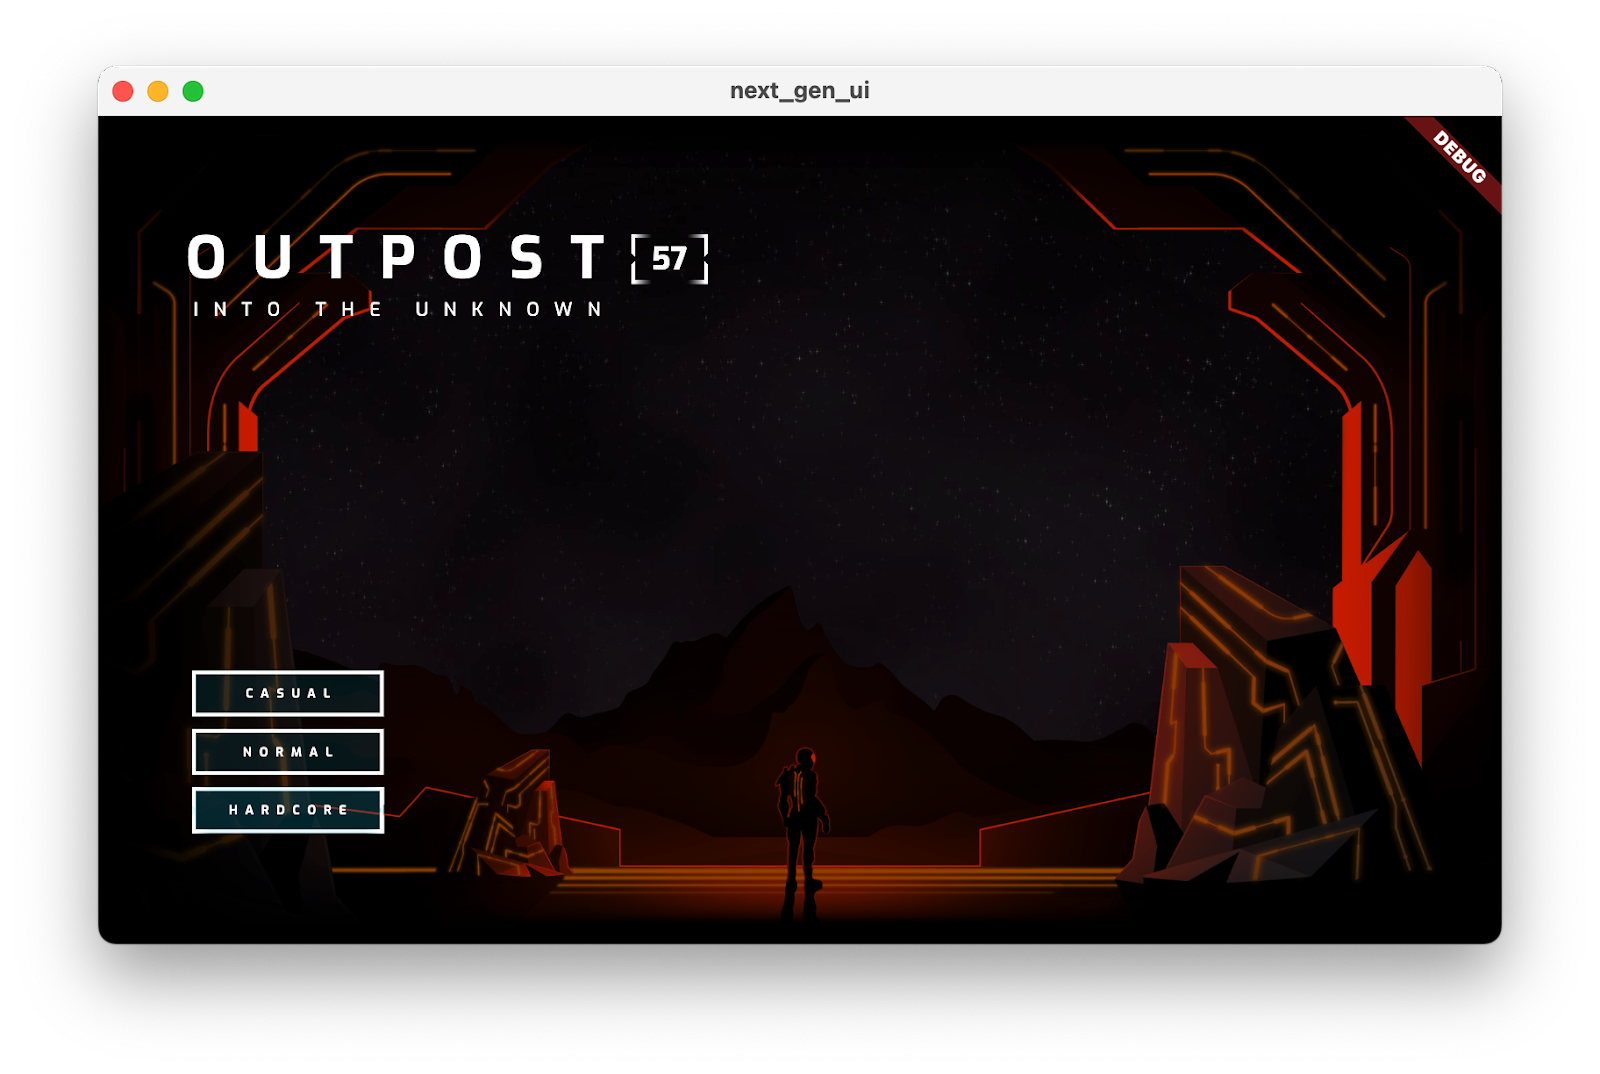
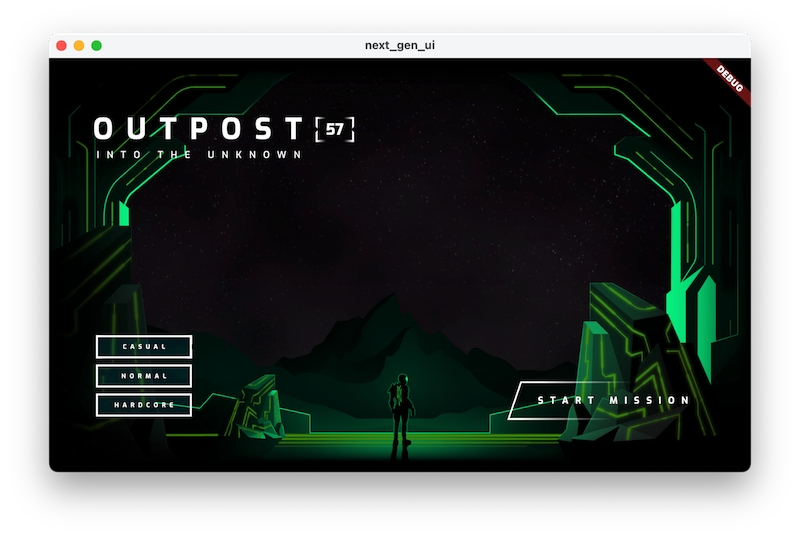
คุณจะสร้างหน้าเมนูเริ่มต้นสำหรับเกมธีมไซไฟหลังวันสิ้นโลก มีชื่อที่มี Fragment Shader ที่สุ่มตัวอย่างข้อความเพื่อสร้างภาพเคลื่อนไหว มีเมนูความยากที่เปลี่ยนธีมสีของหน้าเว็บพร้อมภาพเคลื่อนไหวมากมาย และมีลูกกลมเคลื่อนไหวที่วาดด้วย Fragment Shader ที่ 2 หากยังไม่พอ ในตอนท้ายของ Codelab คุณจะได้เพิ่มเอฟเฟกต์อนุภาคเล็กๆ เพื่อให้หน้าเว็บดูเคลื่อนไหวและน่าสนใจ
ภาพหน้าจอต่อไปนี้แสดงแอปที่คุณจะสร้างในระบบปฏิบัติการเดสก์ท็อปที่รองรับ 3 ระบบ ได้แก่ Windows, Linux และ macOS เราจึงมีเวอร์ชันเว็บเบราว์เซอร์ (ซึ่งรองรับด้วย) เพื่อให้ข้อมูลครบถ้วน ภาพเคลื่อนไหวและ Fragment Shader ทุกที่
|
|
|
|
ข้อกำหนดเบื้องต้น
- ความรู้พื้นฐานเกี่ยวกับการพัฒนา Flutter ด้วย Dart ตามที่อธิบายไว้ใน Codelab แอป Flutter แรกของคุณ
สิ่งที่คุณจะได้เรียนรู้
- วิธีใช้
flutter_animateเพื่อสร้างภาพเคลื่อนไหวที่สื่ออารมณ์ชัดเจน - วิธีใช้การรองรับ Fragment Shader ของ Flutter บนเดสก์ท็อปและเว็บ
- วิธีเพิ่มภาพเคลื่อนไหวของอนุภาคไปยังแอปด้วย
particle_field
สิ่งที่คุณต้องมี
- Flutter SDK
- การตั้งค่า VS Code สำหรับ Flutter และ Dart
- ตั้งค่าการรองรับเดสก์ท็อปสำหรับ Flutter สำหรับ Windows, Linux หรือ macOS
- การตั้งค่าการรองรับเว็บสำหรับ Flutter
2. เริ่มต้นใช้งาน
ดาวน์โหลดโค้ดเริ่มต้น
- ไปที่ที่เก็บ GitHub นี้
- คลิกโค้ด > ดาวน์โหลด ZIP เพื่อดาวน์โหลดโค้ดทั้งหมดสำหรับ Codelab นี้
- แตกไฟล์ ZIP ที่ดาวน์โหลดเพื่อคลายแพ็ก
codelabs-mainโฟลเดอร์รูท คุณต้องการเพียงแค่ไดเรกทอรีย่อยnext-gen-ui/ซึ่งมีโฟลเดอร์step_01ถึงstep_06ซึ่งมีซอร์สโค้ดที่คุณจะใช้ต่อยอดในแต่ละขั้นตอนของโค้ดแล็บนี้
ดาวน์โหลดทรัพยากร Dependency ของโปรเจ็กต์
- ใน VS Code ให้คลิกไฟล์ > เปิดโฟลเดอร์ > codelabs-main > next-gen-uis > step_01 เพื่อเปิดโปรเจ็กต์เริ่มต้น
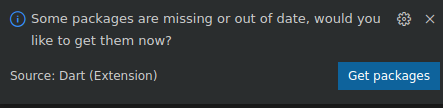
- หากเห็นกล่องโต้ตอบ VS Code ที่แจ้งให้คุณดาวน์โหลดแพ็กเกจที่จำเป็นสำหรับแอปเริ่มต้น ให้คลิกรับแพ็กเกจ
- หากไม่เห็นกล่องโต้ตอบ VS Code ที่แจ้งให้คุณดาวน์โหลดแพ็กเกจที่จำเป็นสำหรับแอปเริ่มต้น ให้เปิดเทอร์มินัล แล้วไปที่โฟลเดอร์
step_01และเรียกใช้คำสั่งflutter pub get
เรียกใช้แอปเริ่มต้น
- ใน VS Code ให้เลือกระบบปฏิบัติการบนเดสก์ท็อปที่คุณใช้ หรือ Chrome หากต้องการทดสอบแอปในเว็บเบราว์เซอร์
ตัวอย่างเช่น สิ่งที่คุณเห็นเมื่อใช้ macOS เป็นเป้าหมายการติดตั้งใช้งานมีดังนี้

สิ่งที่คุณเห็นเมื่อใช้ Chrome เป็นเป้าหมายการติดตั้งใช้งานมีดังนี้

- เปิดไฟล์
lib/main.dartแล้วคลิก เริ่มการแก้ไขข้อบกพร่อง แอปจะเปิดขึ้นในระบบปฏิบัติการเดสก์ท็อปหรือในเบราว์เซอร์ Chrome
สำรวจแอปเริ่มต้น
ในแอปเริ่มต้น ให้สังเกตสิ่งต่อไปนี้
- UI พร้อมให้คุณสร้างแล้ว
- ไดเรกทอรี
assetsมีชิ้นงานอาร์ตและ Fragment Shader 2 รายการที่คุณจะใช้ pubspec.yamlไฟล์ระบุเนื้อหาและคอลเล็กชันของแพ็กเกจ Pub ที่คุณจะใช้แล้ว- ไดเรกทอรี
libมีไฟล์main.dartที่จำเป็น ไฟล์assets.dartที่แสดงเส้นทางของชิ้นงานศิลปะและ Fragment Shader และไฟล์styles.dartที่แสดง TextStyles และสีที่คุณจะใช้ - ไดเรกทอรี
libยังมีไดเรกทอรีcommonซึ่งมีเครื่องมือที่มีประโยชน์ไม่กี่อย่างที่คุณจะใช้ใน Codelab นี้ และไดเรกทอรีorb_shaderซึ่งมีWidgetที่จะใช้เพื่อแสดงลูกแก้วด้วย Vertex Shader
สิ่งที่คุณจะเห็นเมื่อเริ่มใช้แอปมีดังนี้

3. วาดภาพฉาก
ในขั้นตอนนี้ คุณจะวางชิ้นงานพื้นหลังทั้งหมดบนหน้าจอเป็นเลเยอร์ คาดว่าฉากจะดูเป็นสีเดียวแปลกๆ ในตอนแรก แต่คุณจะเพิ่มสีลงในฉากได้ในตอนท้ายของขั้นตอนนี้
เพิ่มชิ้นงานลงในฉาก
- สร้างไดเรกทอรี
title_screenในไดเรกทอรีlibแล้วเพิ่มไฟล์title_screen.dartเพิ่มเนื้อหาต่อไปนี้ลงในไฟล์
lib/title_screen/title_screen.dart
import 'package:flutter/material.dart';

import '../assets.dart';

class TitleScreen extends StatelessWidget {
  const TitleScreen({super.key});

  @override
  Widget build(BuildContext context) {
    return Scaffold(
      backgroundColor: Colors.black,
      body: Center(
        child: Stack(
          children: [
            /// Bg-Base
            Image.asset(AssetPaths.titleBgBase),

            /// Bg-Receive
            Image.asset(AssetPaths.titleBgReceive),

            /// Mg-Base
            Image.asset(AssetPaths.titleMgBase),

            /// Mg-Receive
            Image.asset(AssetPaths.titleMgReceive),

            /// Mg-Emit
            Image.asset(AssetPaths.titleMgEmit),

            /// Fg-Rocks
            Image.asset(AssetPaths.titleFgBase),

            /// Fg-Receive
            Image.asset(AssetPaths.titleFgReceive),

            /// Fg-Emit
            Image.asset(AssetPaths.titleFgEmit),
          ],
        ),
      ),
    );
  }
}
วิดเจ็ตนี้มีฉากที่มีชิ้นงานซ้อนกันเป็นเลเยอร์ เลเยอร์พื้นหลัง พื้นกลาง และพื้นหน้าจะแสดงแทนด้วยกลุ่มรูปภาพ 2 หรือ 3 รูป รูปภาพเหล่านี้จะสว่างขึ้นด้วยสีต่างๆ เพื่อบันทึกการเคลื่อนที่ของแสงผ่านฉาก
- เพิ่มเนื้อหาต่อไปนี้ในไฟล์
main.dart
lib/main.dart
import 'dart:io' show Platform;

import 'package:flutter/foundation.dart' show kIsWeb;
import 'package:flutter/material.dart';
import 'package:window_size/window_size.dart';
                                                          // Remove 'styles.dart' import
import 'title_screen/title_screen.dart';                  // Add this import


void main() {
  if (!kIsWeb && (Platform.isWindows || Platform.isLinux || Platform.isMacOS)) {
    WidgetsFlutterBinding.ensureInitialized();
    setWindowMinSize(const Size(800, 500));
  }
  runApp(const NextGenApp());
}

class NextGenApp extends StatelessWidget {
  const NextGenApp({super.key});

  @override
  Widget build(BuildContext context) {
    return MaterialApp(
      themeMode: ThemeMode.dark,
      darkTheme: ThemeData(brightness: Brightness.dark),
      home: const TitleScreen(),                          // Replace with this widget
    );
  }
}
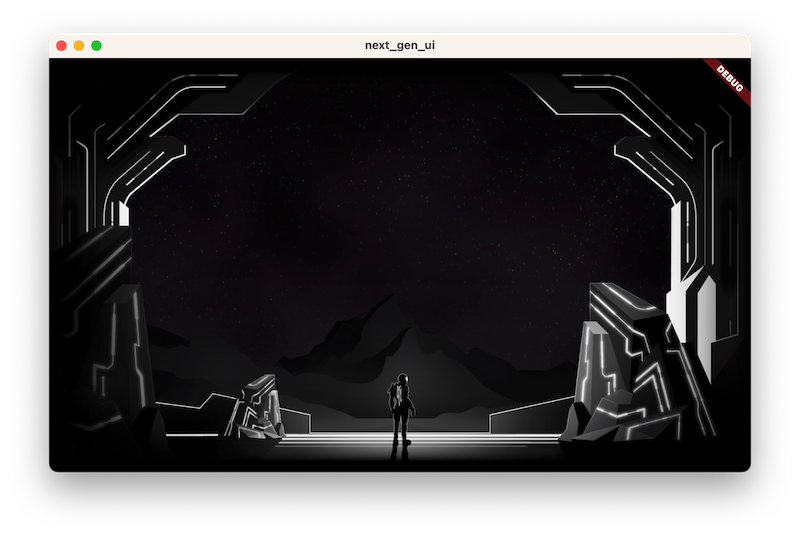
ซึ่งจะแทนที่ UI ของแอปด้วยฉากขาวดำที่ชิ้นงานศิลปะสร้างขึ้น จากนั้นให้ระบายสีแต่ละเลเยอร์
เพิ่มยูทิลิตีการระบายสีรูปภาพ
เพิ่มยูทิลิตีการระบายสีรูปภาพโดยเพิ่มเนื้อหาต่อไปนี้ลงในไฟล์ title_screen.dart
lib/title_screen/title_screen.dart
import 'package:flutter/material.dart';

import '../assets.dart';

class TitleScreen extends StatelessWidget {
  const TitleScreen({super.key});

  @override
  Widget build(BuildContext context) {
    return Scaffold(
      backgroundColor: Colors.black,
      body: Center(
        child: Stack(
          children: [
            /// Bg-Base
            Image.asset(AssetPaths.titleBgBase),

            /// Bg-Receive
            Image.asset(AssetPaths.titleBgReceive),

            /// Mg-Base
            Image.asset(AssetPaths.titleMgBase),

            /// Mg-Receive
            Image.asset(AssetPaths.titleMgReceive),

            /// Mg-Emit
            Image.asset(AssetPaths.titleMgEmit),

            /// Fg-Rocks
            Image.asset(AssetPaths.titleFgBase),

            /// Fg-Receive
            Image.asset(AssetPaths.titleFgReceive),

            /// Fg-Emit
            Image.asset(AssetPaths.titleFgEmit),
          ],
        ),
      ),
    );
  }
}

class _LitImage extends StatelessWidget {                 // Add from here...
  const _LitImage({
    required this.color,
    required this.imgSrc,
    required this.lightAmt,
  });
  final Color color;
  final String imgSrc;
  final double lightAmt;

  @override
  Widget build(BuildContext context) {
    final hsl = HSLColor.fromColor(color);
    return Image.asset(
      imgSrc,
      color: hsl.withLightness(hsl.lightness * lightAmt).toColor(),
      colorBlendMode: BlendMode.modulate,
    );
  }
}                                                         // to here.
_LitImageวิดเจ็ตยูทิลิตีนี้จะเปลี่ยนสีชิ้นงานศิลปะแต่ละชิ้น โดยขึ้นอยู่กับว่าชิ้นงานนั้นปล่อยหรือรับแสง ซึ่งอาจทำให้เกิดคำเตือนจาก Linter เนื่องจากคุณยังไม่ได้ใช้วิดเจ็ตใหม่นี้
ทาสี
ระบายสีโดยแก้ไขไฟล์ title_screen.dart ดังนี้
lib/title_screen/title_screen.dart
import 'package:flutter/material.dart';

import '../assets.dart';
import '../styles.dart';                                  // Add this import

class TitleScreen extends StatelessWidget {
  const TitleScreen({super.key});

  final _finalReceiveLightAmt = 0.7;                      // Add this attribute
  final _finalEmitLightAmt = 0.5;                         // And this attribute

  @override
  Widget build(BuildContext context) {
    final orbColor = AppColors.orbColors[0];              // Add this final variable
    final emitColor = AppColors.emitColors[0];            // And this one

    return Scaffold(
      backgroundColor: Colors.black,
      body: Center(
        child: Stack(
          children: [
            /// Bg-Base
            Image.asset(AssetPaths.titleBgBase),

            /// Bg-Receive
            _LitImage(                                    // Modify from here...
              color: orbColor,
              imgSrc: AssetPaths.titleBgReceive,
              lightAmt: _finalReceiveLightAmt,
            ),                                            // to here.

            /// Mg-Base
            _LitImage(                                    // Modify from here...
              imgSrc: AssetPaths.titleMgBase,
              color: orbColor,
              lightAmt: _finalReceiveLightAmt,
            ),                                            // to here.

            /// Mg-Receive
            _LitImage(                                    // Modify from here...
              imgSrc: AssetPaths.titleMgReceive,
              color: orbColor,
              lightAmt: _finalReceiveLightAmt,
            ),                                            // to here.

            /// Mg-Emit
            _LitImage(                                    // Modify from here...
              imgSrc: AssetPaths.titleMgEmit,
              color: emitColor,
              lightAmt: _finalEmitLightAmt,
            ),                                            // to here.

            /// Fg-Rocks
            Image.asset(AssetPaths.titleFgBase),

            /// Fg-Receive
            _LitImage(                                    // Modify from here...
              imgSrc: AssetPaths.titleFgReceive,
              color: orbColor,
              lightAmt: _finalReceiveLightAmt,
            ),                                            // to here.

            /// Fg-Emit
            _LitImage(                                    // Modify from here...
              imgSrc: AssetPaths.titleFgEmit,
              color: emitColor,
              lightAmt: _finalEmitLightAmt,
            ),                                            // to here.
          ],
        ),
      ),
    );
  }
}

class _LitImage extends StatelessWidget {
  const _LitImage({
    required this.color,
    required this.imgSrc,
    required this.lightAmt,
  });
  final Color color;
  final String imgSrc;
  final double lightAmt;

  @override
  Widget build(BuildContext context) {
    final hsl = HSLColor.fromColor(color);
    return Image.asset(
      imgSrc,
      color: hsl.withLightness(hsl.lightness * lightAmt).toColor(),
      colorBlendMode: BlendMode.modulate,
    );
  }
}
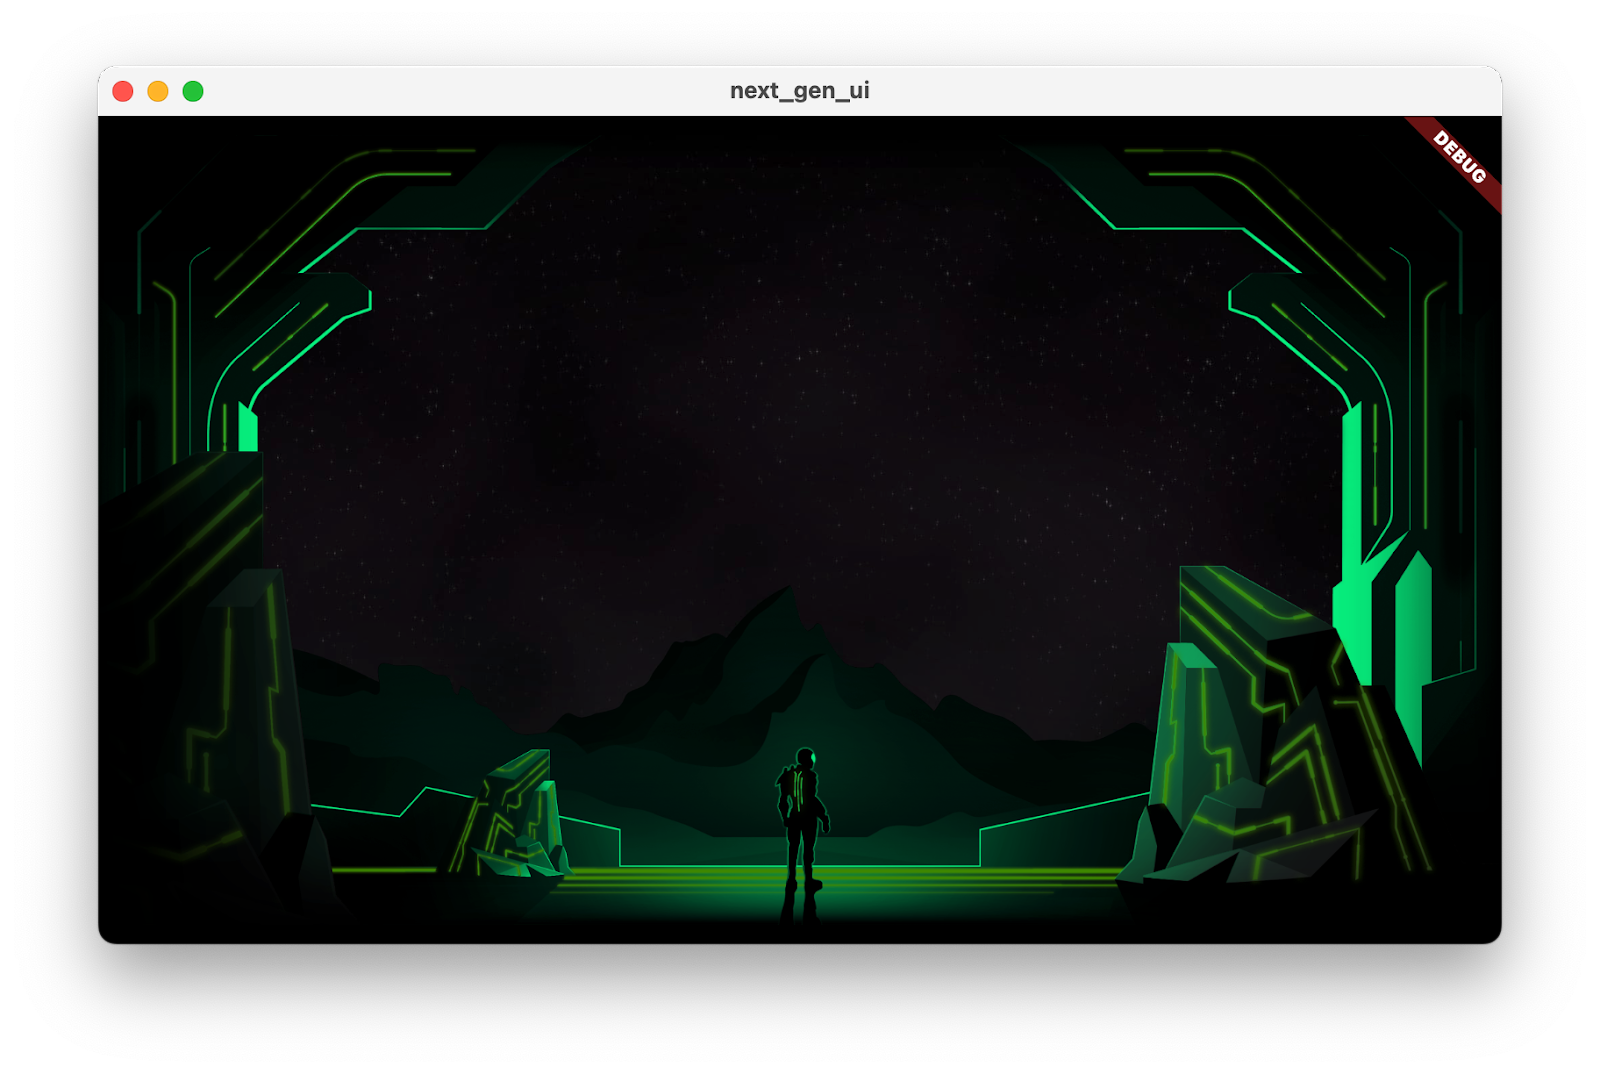
นี่คือแอปอีกครั้ง แต่คราวนี้ชิ้นงานศิลปะเป็นสีเขียว
4. เพิ่ม UI
ในขั้นตอนนี้ คุณจะวางอินเทอร์เฟซผู้ใช้เหนือฉากที่สร้างขึ้นในขั้นตอนก่อนหน้า ซึ่งรวมถึงชื่อ ปุ่มเลือกระดับความยาก และปุ่มเริ่มที่สำคัญ
เพิ่มชื่อ
- สร้างไฟล์
title_screen_ui.dartภายในไดเรกทอรีlib/title_screenแล้วเพิ่มเนื้อหาต่อไปนี้ลงในไฟล์
lib/title_screen/title_screen_ui.dart
import 'package:extra_alignments/extra_alignments.dart';
import 'package:flutter/material.dart';
import 'package:gap/gap.dart';

import '../assets.dart';
import '../common/ui_scaler.dart';
import '../styles.dart';

class TitleScreenUi extends StatelessWidget {
  const TitleScreenUi({
    super.key,
  });
  @override
  Widget build(BuildContext context) {
    return const Padding(
      padding: EdgeInsets.symmetric(vertical: 40, horizontal: 50),
      child: Stack(
        children: [
          /// Title Text
          TopLeft(
            child: UiScaler(
              alignment: Alignment.topLeft,
              child: _TitleText(),
            ),
          ),
        ],
      ),
    );
  }
}

class _TitleText extends StatelessWidget {
  const _TitleText();

  @override
  Widget build(BuildContext context) {
    return Column(
      mainAxisSize: MainAxisSize.min,
      crossAxisAlignment: CrossAxisAlignment.start,
      children: [
        const Gap(20),
        Row(
          mainAxisSize: MainAxisSize.min,
          children: [
            Transform.translate(
              offset: Offset(-(TextStyles.h1.letterSpacing! * .5), 0),
              child: Text('OUTPOST', style: TextStyles.h1),
            ),
            Image.asset(AssetPaths.titleSelectedLeft, height: 65),
            Text('57', style: TextStyles.h2),
            Image.asset(AssetPaths.titleSelectedRight, height: 65),
          ],
        ),
        Text('INTO THE UNKNOWN', style: TextStyles.h3),
      ],
    );
  }
}
วิดเจ็ตนี้มีชื่อและปุ่มทั้งหมดที่ประกอบกันเป็นอินเทอร์เฟซผู้ใช้ของแอปนี้
- อัปเดตไฟล์
lib/title_screen/title_screen.dartดังนี้
lib/title_screen/title_screen.dart
import 'package:flutter/material.dart';

import '../assets.dart';
import '../styles.dart';
import 'title_screen_ui.dart';                            // Add this import

class TitleScreen extends StatelessWidget {
  const TitleScreen({super.key});

  final _finalReceiveLightAmt = 0.7;
  final _finalEmitLightAmt = 0.5;

  @override
  Widget build(BuildContext context) {
    final orbColor = AppColors.orbColors[0];
    final emitColor = AppColors.emitColors[0];

    return Scaffold(
      backgroundColor: Colors.black,
      body: Center(
        child: Stack(
          children: [
            /// Bg-Base
            Image.asset(AssetPaths.titleBgBase),

            /// Bg-Receive
            _LitImage(
              color: orbColor,
              imgSrc: AssetPaths.titleBgReceive,
              lightAmt: _finalReceiveLightAmt,
            ),

            /// Mg-Base
            _LitImage(
              imgSrc: AssetPaths.titleMgBase,
              color: orbColor,
              lightAmt: _finalReceiveLightAmt,
            ),

            /// Mg-Receive
            _LitImage(
              imgSrc: AssetPaths.titleMgReceive,
              color: orbColor,
              lightAmt: _finalReceiveLightAmt,
            ),

            /// Mg-Emit
            _LitImage(
              imgSrc: AssetPaths.titleMgEmit,
              color: emitColor,
              lightAmt: _finalEmitLightAmt,
            ),

            /// Fg-Rocks
            Image.asset(AssetPaths.titleFgBase),

            /// Fg-Receive
            _LitImage(
              imgSrc: AssetPaths.titleFgReceive,
              color: orbColor,
              lightAmt: _finalReceiveLightAmt,
            ),

            /// Fg-Emit
            _LitImage(
              imgSrc: AssetPaths.titleFgEmit,
              color: emitColor,
              lightAmt: _finalEmitLightAmt,
            ),

            /// UI
            const Positioned.fill(                        // Add from here...
              child: TitleScreenUi(),
            ),                                            // to here.
          ],
        ),
      ),
    );
  }
}

class _LitImage extends StatelessWidget {
  const _LitImage({
    required this.color,
    required this.imgSrc,
    required this.lightAmt,
  });
  final Color color;
  final String imgSrc;
  final double lightAmt;

  @override
  Widget build(BuildContext context) {
    final hsl = HSLColor.fromColor(color);
    return Image.asset(
      imgSrc,
      color: hsl.withLightness(hsl.lightness * lightAmt).toColor(),
      colorBlendMode: BlendMode.modulate,
    );
  }
}
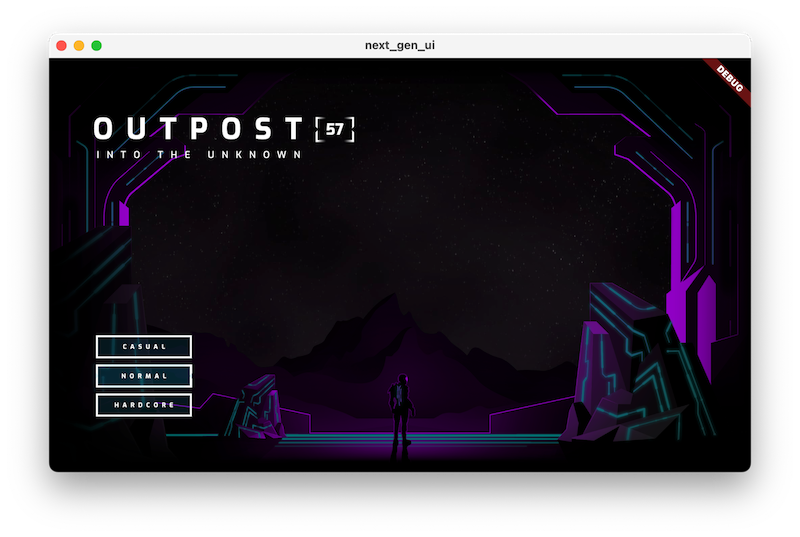
การเรียกใช้โค้ดนี้จะแสดงชื่อ ซึ่งเป็นจุดเริ่มต้นของอินเทอร์เฟซผู้ใช้
![แอป Codelab ที่ทำงานโดยมีชื่อว่า "Outpost [57] Into the unknown"](https://codelabs.developers.google.cn/static/codelabs/flutter-next-gen-uis/img/ed313b0bbcc38b66.png?authuser=0&hl=th)
เพิ่มปุ่มความยาก
- อัปเดต
title_screen_ui.dartโดยเพิ่มการนำเข้าใหม่สำหรับแพ็กเกจfocusable_control_builderดังนี้
lib/title_screen/title_screen_ui.dart
import 'package:extra_alignments/extra_alignments.dart';
import 'package:flutter/material.dart';
import 'package:focusable_control_builder/focusable_control_builder.dart'; // Add import
import 'package:gap/gap.dart';

import '../assets.dart';
import '../common/ui_scaler.dart';
import '../styles.dart';
- เพิ่มข้อมูลต่อไปนี้ลงใน
TitleScreenUiวิดเจ็ต
lib/title_screen/title_screen_ui.dart
class TitleScreenUi extends StatelessWidget {
  const TitleScreenUi({
    super.key,
    required this.difficulty,                            // Edit from here...
    required this.onDifficultyPressed,
    required this.onDifficultyFocused,
  });

  final int difficulty;
  final void Function(int difficulty) onDifficultyPressed;
  final void Function(int? difficulty) onDifficultyFocused; // to here.

  @override
  Widget build(BuildContext context) {
    return Padding(                                      // Move this const...
      padding: const EdgeInsets.symmetric(vertical: 40, horizontal: 50), // to here.
      child: Stack(
        children: [
          /// Title Text
          const TopLeft(                                 // Add a const here, as well
            child: UiScaler(
              alignment: Alignment.topLeft,
              child: _TitleText(),
            ),
          ),

          /// Difficulty Btns
          BottomLeft(                                    // Add from here...
            child: UiScaler(
              alignment: Alignment.bottomLeft,
              child: _DifficultyBtns(
                difficulty: difficulty,
                onDifficultyPressed: onDifficultyPressed,
                onDifficultyFocused: onDifficultyFocused,
              ),
            ),
          ),                                             // to here.
        ],
      ),
    );
  }
}
- เพิ่มวิดเจ็ต 2 รายการต่อไปนี้เพื่อใช้ปุ่มความยาก
lib/title_screen/title_screen_ui.dart
class _DifficultyBtns extends StatelessWidget {
  const _DifficultyBtns({
    required this.difficulty,
    required this.onDifficultyPressed,
    required this.onDifficultyFocused,
  });

  final int difficulty;
  final void Function(int difficulty) onDifficultyPressed;
  final void Function(int? difficulty) onDifficultyFocused;

  @override
  Widget build(BuildContext context) {
    return Column(
      mainAxisSize: MainAxisSize.min,
      children: [
        _DifficultyBtn(
          label: 'Casual',
          selected: difficulty == 0,
          onPressed: () => onDifficultyPressed(0),
          onHover: (over) => onDifficultyFocused(over ? 0 : null),
        ),
        _DifficultyBtn(
          label: 'Normal',
          selected: difficulty == 1,
          onPressed: () => onDifficultyPressed(1),
          onHover: (over) => onDifficultyFocused(over ? 1 : null),
        ),
        _DifficultyBtn(
          label: 'Hardcore',
          selected: difficulty == 2,
          onPressed: () => onDifficultyPressed(2),
          onHover: (over) => onDifficultyFocused(over ? 2 : null),
        ),
        const Gap(20),
      ],
    );
  }
}

class _DifficultyBtn extends StatelessWidget {
  const _DifficultyBtn({
    required this.selected,
    required this.onPressed,
    required this.onHover,
    required this.label,
  });
  final String label;
  final bool selected;
  final VoidCallback onPressed;
  final void Function(bool hasFocus) onHover;

  @override
  Widget build(BuildContext context) {
    return FocusableControlBuilder(
      onPressed: onPressed,
      onHoverChanged: (_, state) => onHover.call(state.isHovered),
      builder: (_, state) {
        return Padding(
          padding: const EdgeInsets.all(8.0),
          child: SizedBox(
            width: 250,
            height: 60,
            child: Stack(
              children: [
                /// Bg with fill and outline
                Container(
                  decoration: BoxDecoration(
                    color: const Color(0xFF00D1FF).withOpacity(.1),
                    border: Border.all(color: Colors.white, width: 5),
                  ),
                ),

                if (state.isHovered || state.isFocused) ...[
                  Container(
                    decoration: BoxDecoration(
                      color: const Color(0xFF00D1FF).withOpacity(.1),
                    ),
                  ),
                ],

                /// cross-hairs (selected state)
                if (selected) ...[
                  CenterLeft(
                    child: Image.asset(AssetPaths.titleSelectedLeft),
                  ),
                  CenterRight(
                    child: Image.asset(AssetPaths.titleSelectedRight),
                  ),
                ],

                /// Label
                Center(
                  child: Text(label.toUpperCase(), style: TextStyles.btn),
                ),
              ],
            ),
          ),
        );
      },
    );
  }
}
- แปลงวิดเจ็ต
TitleScreenจากแบบไม่มีสถานะเป็นแบบมีสถานะ และเพิ่มสถานะเพื่อเปิดใช้การเปลี่ยนรูปแบบสีตามความยาก
lib/title_screen/title_screen.dart
import 'package:flutter/material.dart';

import '../assets.dart';
import '../styles.dart';
import 'title_screen_ui.dart';

class TitleScreen extends StatefulWidget {
  const TitleScreen({super.key});

  @override
  State<TitleScreen> createState() => _TitleScreenState();
}

class _TitleScreenState extends State<TitleScreen> {
  Color get _emitColor =>
      AppColors.emitColors[_difficultyOverride ?? _difficulty];
  Color get _orbColor =>
      AppColors.orbColors[_difficultyOverride ?? _difficulty];

  /// Currently selected difficulty
  int _difficulty = 0;

  /// Currently focused difficulty (if any)
  int? _difficultyOverride;

  void _handleDifficultyPressed(int value) {
    setState(() => _difficulty = value);
  }

  void _handleDifficultyFocused(int? value) {
    setState(() => _difficultyOverride = value);
  }

  final _finalReceiveLightAmt = 0.7;
  final _finalEmitLightAmt = 0.5;

  @override
  Widget build(BuildContext context) {
    return Scaffold(
      backgroundColor: Colors.black,
      body: Center(
        child: Stack(
          children: [
            /// Bg-Base
            Image.asset(AssetPaths.titleBgBase),

            /// Bg-Receive
            _LitImage(
              color: _orbColor,
              imgSrc: AssetPaths.titleBgReceive,
              lightAmt: _finalReceiveLightAmt,
            ),

            /// Mg-Base
            _LitImage(
              imgSrc: AssetPaths.titleMgBase,
              color: _orbColor,
              lightAmt: _finalReceiveLightAmt,
            ),

            /// Mg-Receive
            _LitImage(
              imgSrc: AssetPaths.titleMgReceive,
              color: _orbColor,
              lightAmt: _finalReceiveLightAmt,
            ),

            /// Mg-Emit
            _LitImage(
              imgSrc: AssetPaths.titleMgEmit,
              color: _emitColor,
              lightAmt: _finalEmitLightAmt,
            ),

            /// Fg-Rocks
            Image.asset(AssetPaths.titleFgBase),

            /// Fg-Receive
            _LitImage(
              imgSrc: AssetPaths.titleFgReceive,
              color: _orbColor,
              lightAmt: _finalReceiveLightAmt,
            ),

            /// Fg-Emit
            _LitImage(
              imgSrc: AssetPaths.titleFgEmit,
              color: _emitColor,
              lightAmt: _finalEmitLightAmt,
            ),

            /// UI
            Positioned.fill(
              child: TitleScreenUi(
                difficulty: _difficulty,
                onDifficultyFocused: _handleDifficultyFocused,
                onDifficultyPressed: _handleDifficultyPressed,
              ),
            ),
          ],
        ),
      ),
    );
  }
}

class _LitImage extends StatelessWidget {
  const _LitImage({
    required this.color,
    required this.imgSrc,
    required this.lightAmt,
  });
  final Color color;
  final String imgSrc;
  final double lightAmt;

  @override
  Widget build(BuildContext context) {
    final hsl = HSLColor.fromColor(color);
    return Image.asset(
      imgSrc,
      color: hsl.withLightness(hsl.lightness * lightAmt).toColor(),
      colorBlendMode: BlendMode.modulate,
    );
  }
}
ต่อไปนี้คือ UI ที่การตั้งค่าความยาก 2 แบบ โปรดสังเกตว่าสีความยากที่ใช้เป็นมาสก์กับรูปภาพระดับสีเทาจะสร้างเอฟเฟกต์สะท้อนที่สมจริง
|
|
เพิ่มปุ่มเริ่ม
- อัปเดตไฟล์
title_screen_ui.dartเพิ่มข้อมูลต่อไปนี้ลงในTitleScreenUiวิดเจ็ต
lib/title_screen/title_screen_ui.dart
class TitleScreenUi extends StatelessWidget {
  const TitleScreenUi({
    super.key,
    required this.difficulty,
    required this.onDifficultyPressed,
    required this.onDifficultyFocused,
  });

  final int difficulty;
  final void Function(int difficulty) onDifficultyPressed;
  final void Function(int? difficulty) onDifficultyFocused;

  @override
  Widget build(BuildContext context) {
    return Padding(
      padding: const EdgeInsets.symmetric(vertical: 40, horizontal: 50),
      child: Stack(
        children: [
          /// Title Text
          const TopLeft(
            child: UiScaler(
              alignment: Alignment.topLeft,
              child: _TitleText(),
            ),
          ),

          /// Difficulty Btns
          BottomLeft(
            child: UiScaler(
              alignment: Alignment.bottomLeft,
              child: _DifficultyBtns(
                difficulty: difficulty,
                onDifficultyPressed: onDifficultyPressed,
                onDifficultyFocused: onDifficultyFocused,
              ),
            ),
          ),

          /// StartBtn
          BottomRight(                                    // Add from here...
            child: UiScaler(
              alignment: Alignment.bottomRight,
              child: Padding(
                padding: const EdgeInsets.only(bottom: 20, right: 40),
                child: _StartBtn(onPressed: () {}),
              ),
            ),
          ),                                              // to here.
        ],
      ),
    );
  }
}
- เพิ่มวิดเจ็ตต่อไปนี้เพื่อใช้ปุ่มเริ่ม
lib/title_screen/title_screen_ui.dart
class _StartBtn extends StatefulWidget {
  const _StartBtn({required this.onPressed});
  final VoidCallback onPressed;

  @override
  State<_StartBtn> createState() => _StartBtnState();
}

class _StartBtnState extends State<_StartBtn> {
  AnimationController? _btnAnim;
  bool _wasHovered = false;

  @override
  Widget build(BuildContext context) {
    return FocusableControlBuilder(
      cursor: SystemMouseCursors.click,
      onPressed: widget.onPressed,
      builder: (_, state) {
        if ((state.isHovered || state.isFocused) &&
            !_wasHovered &&
            _btnAnim?.status != AnimationStatus.forward) {
          _btnAnim?.forward(from: 0);
        }
        _wasHovered = (state.isHovered || state.isFocused);
        return SizedBox(
          width: 520,
          height: 100,
          child: Stack(
            children: [
              Positioned.fill(child: Image.asset(AssetPaths.titleStartBtn)),
              if (state.isHovered || state.isFocused) ...[
                Positioned.fill(
                    child: Image.asset(AssetPaths.titleStartBtnHover)),
              ],
              Center(
                child: Row(
                  mainAxisAlignment: MainAxisAlignment.end,
                  children: [
                    Text('START MISSION',
                        style: TextStyles.btn
                            .copyWith(fontSize: 24, letterSpacing: 18)),
                  ],
                ),
              ),
            ],
          ),
        );
      },
    );
  }
}
และนี่คือแอปที่ทำงานพร้อมปุ่มทั้งหมด
5. เพิ่มภาพเคลื่อนไหว
ในขั้นตอนนี้ คุณจะสร้างภาพเคลื่อนไหวให้กับอินเทอร์เฟซผู้ใช้และการเปลี่ยนสีสำหรับชิ้นงานศิลปะ
ค่อยๆ แสดงชื่อ
ในขั้นตอนนี้ คุณจะใช้วิธีต่างๆ เพื่อเคลื่อนไหวแอป Flutter โดยวิธีหนึ่งคือการใช้ flutter_animate ภาพเคลื่อนไหวที่ขับเคลื่อนโดยแพ็กเกจนี้จะเล่นซ้ำโดยอัตโนมัติทุกครั้งที่คุณ Hot Reload แอปเพื่อเร่งการวนซ้ำในการพัฒนา
- แก้ไขโค้ดใน
lib/main.dartดังนี้
lib/main.dart
import 'dart:io' show Platform;

import 'package:flutter/foundation.dart' show kIsWeb;
import 'package:flutter/material.dart';
import 'package:flutter_animate/flutter_animate.dart';   // Add this import
import 'package:window_size/window_size.dart';

import 'title_screen/title_screen.dart';

void main() {
  if (!kIsWeb && (Platform.isWindows || Platform.isLinux || Platform.isMacOS)) {
    WidgetsFlutterBinding.ensureInitialized();
    setWindowMinSize(const Size(800, 500));
  }
  Animate.restartOnHotReload = true;                     // Add this line
  runApp(const NextGenApp());
}

class NextGenApp extends StatelessWidget {
  const NextGenApp({super.key});

  @override
  Widget build(BuildContext context) {
    return MaterialApp(
      themeMode: ThemeMode.dark,
      darkTheme: ThemeData(brightness: Brightness.dark),
      home: const TitleScreen(),
    );
  }
}
- หากต้องการใช้ประโยชน์จากแพ็กเกจ
flutter_animateคุณต้องนำเข้าแพ็กเกจ เพิ่มการนำเข้าในlib/title_screen/title_screen_ui.dartดังนี้
lib/title_screen/title_screen_ui.dart
import 'package:extra_alignments/extra_alignments.dart';
import 'package:flutter/material.dart';
import 'package:flutter_animate/flutter_animate.dart';   // Add this import
import 'package:focusable_control_builder/focusable_control_builder.dart';
import 'package:gap/gap.dart';

import '../assets.dart';
import '../common/ui_scaler.dart';
import '../styles.dart';

class TitleScreenUi extends StatelessWidget {
- เพิ่มภาพเคลื่อนไหวลงในชื่อโดยแก้ไข
_TitleTextวิดเจ็ต ดังนี้
lib/title_screen/title_screen_ui.dart
class _TitleText extends StatelessWidget {
  const _TitleText();

  @override
  Widget build(BuildContext context) {
    return Column(
      mainAxisSize: MainAxisSize.min,
      crossAxisAlignment: CrossAxisAlignment.start,
      children: [
        const Gap(20),
        Row(
          mainAxisSize: MainAxisSize.min,
          children: [
            Transform.translate(
              offset: Offset(-(TextStyles.h1.letterSpacing! * .5), 0),
              child: Text('OUTPOST', style: TextStyles.h1),
            ),
            Image.asset(AssetPaths.titleSelectedLeft, height: 65),
            Text('57', style: TextStyles.h2),
            Image.asset(AssetPaths.titleSelectedRight, height: 65),
          ],                                             // Edit from here...
        ).animate().fadeIn(delay: .8.seconds, duration: .7.seconds),
        Text('INTO THE UNKNOWN', style: TextStyles.h3)
            .animate()
            .fadeIn(delay: 1.seconds, duration: .7.seconds),
      ],                                                 // to here.
    );
  }
}
- กดโหลดซ้ำเพื่อดูชื่อค่อยๆ ปรากฏขึ้น
ปุ่มความยากจะค่อยๆ ปรากฏขึ้น
- เพิ่มภาพเคลื่อนไหวให้ปุ่มความยากในตอนแรกโดยแก้ไข
_DifficultyBtnsวิดเจ็ต ดังนี้
lib/title_screen/title_screen_ui.dart
class _DifficultyBtns extends StatelessWidget {
  const _DifficultyBtns({
    required this.difficulty,
    required this.onDifficultyPressed,
    required this.onDifficultyFocused,
  });

  final int difficulty;
  final void Function(int difficulty) onDifficultyPressed;
  final void Function(int? difficulty) onDifficultyFocused;

  @override
  Widget build(BuildContext context) {
    return Column(
      mainAxisSize: MainAxisSize.min,
      children: [
        _DifficultyBtn(
          label: 'Casual',
          selected: difficulty == 0,
          onPressed: () => onDifficultyPressed(0),
          onHover: (over) => onDifficultyFocused(over ? 0 : null),
        )                                                // Add from here...
            .animate()
            .fadeIn(delay: 1.3.seconds, duration: .35.seconds)
            .slide(begin: const Offset(0, .2)),          // to here
        _DifficultyBtn(
          label: 'Normal',
          selected: difficulty == 1,
          onPressed: () => onDifficultyPressed(1),
          onHover: (over) => onDifficultyFocused(over ? 1 : null),
        )                                                // Add from here...
            .animate()
            .fadeIn(delay: 1.5.seconds, duration: .35.seconds)
            .slide(begin: const Offset(0, .2)),          // to here
        _DifficultyBtn(
          label: 'Hardcore',
          selected: difficulty == 2,
          onPressed: () => onDifficultyPressed(2),
          onHover: (over) => onDifficultyFocused(over ? 2 : null),
        )                                                // Add from here...
            .animate()
            .fadeIn(delay: 1.7.seconds, duration: .35.seconds)
            .slide(begin: const Offset(0, .2)),          // to here
        const Gap(20),
      ],
    );
  }
}
- กดโหลดซ้ำเพื่อดูปุ่มความยากที่ปรากฏตามลำดับพร้อมกับการเลื่อนขึ้นเล็กน้อยเป็นโบนัส
ปุ่มเริ่มค่อยๆ ปรากฏ
- เพิ่มภาพเคลื่อนไหวให้กับปุ่มเริ่มโดยแก้ไข
_StartBtnStateคลาสสถานะ ดังนี้
lib/title_screen/title_screen_ui.dart
class _StartBtnState extends State<_StartBtn> {
  AnimationController? _btnAnim;
  bool _wasHovered = false;

  @override
  Widget build(BuildContext context) {
    return FocusableControlBuilder(
      cursor: SystemMouseCursors.click,
      onPressed: widget.onPressed,
      builder: (_, state) {
        if ((state.isHovered || state.isFocused) &&
            !_wasHovered &&
            _btnAnim?.status != AnimationStatus.forward) {
          _btnAnim?.forward(from: 0);
        }
        _wasHovered = (state.isHovered || state.isFocused);
        return SizedBox(
          width: 520,
          height: 100,
          child: Stack(
            children: [
              Positioned.fill(child: Image.asset(AssetPaths.titleStartBtn)),
              if (state.isHovered || state.isFocused) ...[
                Positioned.fill(
                    child: Image.asset(AssetPaths.titleStartBtnHover)),
              ],
              Center(
                child: Row(
                  mainAxisAlignment: MainAxisAlignment.end,
                  children: [
                    Text('START MISSION',
                        style: TextStyles.btn
                            .copyWith(fontSize: 24, letterSpacing: 18)),
                  ],
                ),
              ),
            ],
          )                                              // Edit from here...
              .animate(autoPlay: false, onInit: (c) => _btnAnim = c)
              .shimmer(duration: .7.seconds, color: Colors.black),
        )
            .animate()
            .fadeIn(delay: 2.3.seconds)
            .slide(begin: const Offset(0, .2));
      },                                                 // to here.
    );
  }
}
- กดโหลดซ้ำเพื่อดูปุ่มความยากที่ปรากฏตามลำดับพร้อมกับการเลื่อนขึ้นเล็กน้อยเป็นโบนัส
สร้างภาพเคลื่อนไหวของเอฟเฟกต์การวางเมาส์เหนือระดับความยาก
เพิ่มภาพเคลื่อนไหวให้กับสถานะการวางเมาส์ของปุ่มความยากโดยการแก้ไขคลาสสถานะ _DifficultyBtn ดังนี้
lib/title_screen/title_screen_ui.dart
class _DifficultyBtn extends StatelessWidget {
  const _DifficultyBtn({
    required this.selected,
    required this.onPressed,
    required this.onHover,
    required this.label,
  });
  final String label;
  final bool selected;
  final VoidCallback onPressed;
  final void Function(bool hasFocus) onHover;

  @override
  Widget build(BuildContext context) {
    return FocusableControlBuilder(
      onPressed: onPressed,
      onHoverChanged: (_, state) => onHover.call(state.isHovered),
      builder: (_, state) {
        return Padding(
          padding: const EdgeInsets.all(8.0),
          child: SizedBox(
            width: 250,
            height: 60,
            child: Stack(
              children: [
                /// Bg with fill and outline
                AnimatedOpacity(                         // Edit from here
                  opacity: (!selected && (state.isHovered || state.isFocused))
                      ? 1
                      : 0,
                  duration: .3.seconds,
                  child: Container(
                    decoration: BoxDecoration(
                      color: const Color(0xFF00D1FF).withOpacity(.1),
                      border: Border.all(color: Colors.white, width: 5),
                    ),
                  ),
                ),                                       // to here.

                if (state.isHovered || state.isFocused) ...[
                  Container(
                    decoration: BoxDecoration(
                      color: const Color(0xFF00D1FF).withOpacity(.1),
                    ),
                  ),
                ],

                /// cross-hairs (selected state)
                if (selected) ...[
                  CenterLeft(
                    child: Image.asset(AssetPaths.titleSelectedLeft),
                  ),
                  CenterRight(
                    child: Image.asset(AssetPaths.titleSelectedRight),
                  ),
                ],

                /// Label
                Center(
                  child: Text(label.toUpperCase(), style: TextStyles.btn),
                ),
              ],
            ),
          ),
        );
      },
    );
  }
}
ตอนนี้ปุ่มความยากจะแสดง BoxDecoration เมื่อวางเมาส์เหนือปุ่มที่ยังไม่ได้เลือก
เปลี่ยนสีแบบเคลื่อนไหว
- การเปลี่ยนสีพื้นหลังเกิดขึ้นทันทีและรุนแรง การเคลื่อนไหวรูปภาพที่สว่างระหว่างรูปแบบสีจะดีกว่า วิธีเพิ่ม
flutter_animateลงในlib/title_screen/title_screen.dart
lib/title_screen/title_screen.dart
import 'package:flutter/material.dart';
import 'package:flutter_animate/flutter_animate.dart';    // Add this import

import '../assets.dart';
import '../styles.dart';
import 'title_screen_ui.dart';

class TitleScreen extends StatefulWidget {
- วิธีเพิ่มวิดเจ็ต
_AnimatedColorsในlib/title_screen/title_screen.dart
lib/title_screen/title_screen.dart
class _AnimatedColors extends StatelessWidget {
  const _AnimatedColors({
    required this.emitColor,
    required this.orbColor,
    required this.builder,
  });

  final Color emitColor;
  final Color orbColor;

  final Widget Function(BuildContext context, Color orbColor, Color emitColor)
      builder;

  @override
  Widget build(BuildContext context) {
    final duration = .5.seconds;
    return TweenAnimationBuilder(
      tween: ColorTween(begin: emitColor, end: emitColor),
      duration: duration,
      builder: (_, emitColor, __) {
        return TweenAnimationBuilder(
          tween: ColorTween(begin: orbColor, end: orbColor),
          duration: duration,
          builder: (context, orbColor, __) {
            return builder(context, orbColor!, emitColor!);
          },
        );
      },
    );
  }
}
- ใช้วิดเจ็ตที่คุณเพิ่งสร้างเพื่อเคลื่อนไหวสีของรูปภาพที่สว่างโดยการอัปเดต
buildเมธอดใน_TitleScreenStateดังนี้
lib/title_screen/title_screen.dart
class _TitleScreenState extends State<TitleScreen> {
  Color get _emitColor =>
      AppColors.emitColors[_difficultyOverride ?? _difficulty];
  Color get _orbColor =>
      AppColors.orbColors[_difficultyOverride ?? _difficulty];

  /// Selected difficulty
  int _difficulty = 0;

  /// Focused difficulty (if any)
  int? _difficultyOverride;

  void _handleDifficultyPressed(int value) {
    setState(() => _difficulty = value);
  }

  void _handleDifficultyFocused(int? value) {
    setState(() => _difficultyOverride = value);
  }

  final _finalReceiveLightAmt = 0.7;
  final _finalEmitLightAmt = 0.5;

  @override
  Widget build(BuildContext context) {
    return Scaffold(
      backgroundColor: Colors.black,
      body: Center(
        child: _AnimatedColors(                           // Edit from here...
          orbColor: _orbColor,
          emitColor: _emitColor,
          builder: (_, orbColor, emitColor) {
            return Stack(
              children: [
                /// Bg-Base
                Image.asset(AssetPaths.titleBgBase),

                /// Bg-Receive
                _LitImage(
                  color: orbColor,
                  imgSrc: AssetPaths.titleBgReceive,
                  lightAmt: _finalReceiveLightAmt,
                ),

                /// Mg-Base
                _LitImage(
                  imgSrc: AssetPaths.titleMgBase,
                  color: orbColor,
                  lightAmt: _finalReceiveLightAmt,
                ),

                /// Mg-Receive
                _LitImage(
                  imgSrc: AssetPaths.titleMgReceive,
                  color: orbColor,
                  lightAmt: _finalReceiveLightAmt,
                ),

                /// Mg-Emit
                _LitImage(
                  imgSrc: AssetPaths.titleMgEmit,
                  color: emitColor,
                  lightAmt: _finalEmitLightAmt,
                ),

                /// Fg-Rocks
                Image.asset(AssetPaths.titleFgBase),

                /// Fg-Receive
                _LitImage(
                  imgSrc: AssetPaths.titleFgReceive,
                  color: orbColor,
                  lightAmt: _finalReceiveLightAmt,
                ),

                /// Fg-Emit
                _LitImage(
                  imgSrc: AssetPaths.titleFgEmit,
                  color: emitColor,
                  lightAmt: _finalEmitLightAmt,
                ),

                /// UI
                Positioned.fill(
                  child: TitleScreenUi(
                    difficulty: _difficulty,
                    onDifficultyFocused: _handleDifficultyFocused,
                    onDifficultyPressed: _handleDifficultyPressed,
                  ),
                ),
              ],
            ).animate().fadeIn(duration: 1.seconds, delay: .3.seconds);
          },
        ),                                                // to here.
      ),
    );
  }
}
การแก้ไขขั้นสุดท้ายนี้ทำให้คุณเพิ่มภาพเคลื่อนไหวให้กับทุกองค์ประกอบบนหน้าจอ และทำให้วิดีโอสวยงามขึ้นมาก
6. เพิ่ม Fragment Shader
ในขั้นตอนนี้ คุณจะเพิ่ม Fragment Shader ลงในแอป ก่อนอื่นให้ใช้ Shader เพื่อแก้ไขชื่อเพื่อให้ดูเป็นโลกดิสโทเปียมากขึ้น จากนั้นเพิ่มเชเดอร์ที่ 2 เพื่อสร้างลูกแก้วซึ่งทำหน้าที่เป็นจุดโฟกัสตรงกลางของหน้า
การบิดเบือนชื่อด้วย Fragment Shader
การเปลี่ยนแปลงนี้จะเปิดตัวแพ็กเกจ provider ซึ่งช่วยให้ส่งต่อ Shader ที่คอมไพล์แล้วลงในแผนผังวิดเจ็ตได้ หากสนใจดูวิธีโหลด Shader โปรดดูการติดตั้งใช้งานใน lib/assets.dart
- แก้ไขโค้ดใน
lib/main.dartดังนี้
lib/main.dart
import 'dart:io' show Platform;

import 'package:flutter/foundation.dart' show kIsWeb;
import 'package:flutter/material.dart';
import 'package:flutter_animate/flutter_animate.dart';
import 'package:provider/provider.dart';                 // Add this import
import 'package:window_size/window_size.dart';

import 'assets.dart';                                    // Add this import
import 'title_screen/title_screen.dart';

void main() {
  if (!kIsWeb && (Platform.isWindows || Platform.isLinux || Platform.isMacOS)) {
    WidgetsFlutterBinding.ensureInitialized();
    setWindowMinSize(const Size(800, 500));
  }
  Animate.restartOnHotReload = true;
  runApp(                                                // Edit from here...
    FutureProvider<FragmentPrograms?>(
      create: (context) => loadFragmentPrograms(),
      initialData: null,
      child: const NextGenApp(),
    ),
  );                                                     // to here.
}

class NextGenApp extends StatelessWidget {
  const NextGenApp({super.key});

  @override
  Widget build(BuildContext context) {
    return MaterialApp(
      themeMode: ThemeMode.dark,
      darkTheme: ThemeData(brightness: Brightness.dark),
      home: const TitleScreen(),
    );
  }
}
- หากต้องการใช้ประโยชน์จากแพ็กเกจ
providerและยูทิลิตี Shader ที่รวมอยู่ในstep_01คุณต้องนำเข้าแพ็กเกจและยูทิลิตีเหล่านั้น เพิ่มการนำเข้าใหม่ในlib/title_screen/title_screen_ui.dartโดยทำดังนี้
lib/title_screen/title_screen_ui.dart
import 'package:extra_alignments/extra_alignments.dart';
import 'package:flutter/material.dart';
import 'package:flutter_animate/flutter_animate.dart';
import 'package:focusable_control_builder/focusable_control_builder.dart';
import 'package:gap/gap.dart';
import 'package:provider/provider.dart';                 // Add this import

import '../assets.dart';
import '../common/shader_effect.dart';                   // And this import
import '../common/ticking_builder.dart';                 // And this import
import '../common/ui_scaler.dart';
import '../styles.dart';

class TitleScreenUi extends StatelessWidget {
- บิดเบือนชื่อด้วย Shader โดยการแก้ไขวิดเจ็ต
_TitleTextดังนี้
lib/title_screen/title_screen_ui.dart
class _TitleText extends StatelessWidget {
  const _TitleText();

  @override
  Widget build(BuildContext context) {
    Widget content = Column(                             // Modify this line
      mainAxisSize: MainAxisSize.min,
      crossAxisAlignment: CrossAxisAlignment.start,
      children: [
        const Gap(20),
        Row(
          mainAxisSize: MainAxisSize.min,
          children: [
            Transform.translate(
              offset: Offset(-(TextStyles.h1.letterSpacing! * .5), 0),
              child: Text('OUTPOST', style: TextStyles.h1),
            ),
            Image.asset(AssetPaths.titleSelectedLeft, height: 65),
            Text('57', style: TextStyles.h2),
            Image.asset(AssetPaths.titleSelectedRight, height: 65),
          ],
        ).animate().fadeIn(delay: .8.seconds, duration: .7.seconds),
        Text('INTO THE UNKNOWN', style: TextStyles.h3)
            .animate()
            .fadeIn(delay: 1.seconds, duration: .7.seconds),
      ],
    );
    return Consumer<FragmentPrograms?>(                  // Add from here...
      builder: (context, fragmentPrograms, _) {
        if (fragmentPrograms == null) return content;
        return TickingBuilder(
          builder: (context, time) {
            return AnimatedSampler(
              (image, size, canvas) {
                const double overdrawPx = 30;
                final shader = fragmentPrograms.ui.fragmentShader();
                shader
                  ..setFloat(0, size.width)
                  ..setFloat(1, size.height)
                  ..setFloat(2, time)
                  ..setImageSampler(0, image);
                Rect rect = Rect.fromLTWH(-overdrawPx, -overdrawPx,
                    size.width + overdrawPx, size.height + overdrawPx);
                canvas.drawRect(rect, Paint()..shader = shader);
              },
              child: content,
            );
          },
        );
      },
    );                                                   // to here.
  }
}
คุณจะเห็นชื่อบิดเบี้ยวอย่างที่คาดหวังในอนาคตที่มืดมิด
เพิ่มลูกแก้ว
จากนั้นเพิ่มลูกแก้วที่กึ่งกลางหน้าต่าง คุณต้องเพิ่มonPressedการเรียกกลับไปยังปุ่มเริ่ม
- ใน
lib/title_screen/title_screen_ui.dartให้แก้ไขTitleScreenUiดังนี้
lib/title_screen/title_screen_ui.dart
class TitleScreenUi extends StatelessWidget {
  const TitleScreenUi({
    super.key,
    required this.difficulty,
    required this.onDifficultyPressed,
    required this.onDifficultyFocused,
    required this.onStartPressed,                         // Add this argument
  });

  final int difficulty;
  final void Function(int difficulty) onDifficultyPressed;
  final void Function(int? difficulty) onDifficultyFocused;
  final VoidCallback onStartPressed;                      // Add this attribute

  @override
  Widget build(BuildContext context) {
    return Padding(
      padding: const EdgeInsets.symmetric(vertical: 40, horizontal: 50),
      child: Stack(
        children: [
          /// Title Text
          const TopLeft(
            child: UiScaler(
              alignment: Alignment.topLeft,
              child: _TitleText(),
            ),
          ),

          /// Difficulty Btns
          BottomLeft(
            child: UiScaler(
              alignment: Alignment.bottomLeft,
              child: _DifficultyBtns(
                difficulty: difficulty,
                onDifficultyPressed: onDifficultyPressed,
                onDifficultyFocused: onDifficultyFocused,
              ),
            ),
          ),

          /// StartBtn
          BottomRight(
            child: UiScaler(
              alignment: Alignment.bottomRight,
              child: Padding(
                padding: const EdgeInsets.only(bottom: 20, right: 40),
                child: _StartBtn(onPressed: onStartPressed),  // Edit this line
              ),
            ),
          ),
        ],
      ),
    );
  }
}
ตอนนี้คุณได้แก้ไขปุ่มเริ่มด้วยการเรียกกลับแล้ว คุณจะต้องทำการแก้ไขจำนวนมากในไฟล์ lib/title_screen/title_screen.dart
- แก้ไขการนำเข้าดังนี้
lib/title_screen/title_screen.dart
import 'dart:math';                                       // Add this import
import 'dart:ui';                                         // And this import

import 'package:flutter/material.dart';
import 'package:flutter/services.dart';                   // Add this import
import 'package:flutter_animate/flutter_animate.dart';

import '../assets.dart';
import '../orb_shader/orb_shader_config.dart';            // And this import
import '../orb_shader/orb_shader_widget.dart';            // And this import too
import '../styles.dart';
import 'title_screen_ui.dart';

class TitleScreen extends StatefulWidget {
- แก้ไข
_TitleScreenStateให้ตรงกับรายการต่อไปนี้ แทบทุกส่วนของชั้นเรียนมีการปรับเปลี่ยนในบางลักษณะ
lib/title_screen/title_screen.dart
class _TitleScreenState extends State<TitleScreen>
    with SingleTickerProviderStateMixin {
  final _orbKey = GlobalKey<OrbShaderWidgetState>();

  /// Editable Settings
  /// 0-1, receive lighting strength
  final _minReceiveLightAmt = .35;
  final _maxReceiveLightAmt = .7;

  /// 0-1, emit lighting strength
  final _minEmitLightAmt = .5;
  final _maxEmitLightAmt = 1;

  /// Internal
  var _mousePos = Offset.zero;

  Color get _emitColor =>
      AppColors.emitColors[_difficultyOverride ?? _difficulty];
  Color get _orbColor =>
      AppColors.orbColors[_difficultyOverride ?? _difficulty];

  /// Selected difficulty
  int _difficulty = 0;

  /// Focused difficulty (if any)
  int? _difficultyOverride;
  double _orbEnergy = 0;
  double _minOrbEnergy = 0;

  double get _finalReceiveLightAmt {
    final light =
        lerpDouble(_minReceiveLightAmt, _maxReceiveLightAmt, _orbEnergy) ?? 0;
    return light + _pulseEffect.value * .05 * _orbEnergy;
  }

  double get _finalEmitLightAmt {
    return lerpDouble(_minEmitLightAmt, _maxEmitLightAmt, _orbEnergy) ?? 0;
  }

  late final _pulseEffect = AnimationController(
    vsync: this,
    duration: _getRndPulseDuration(),
    lowerBound: -1,
    upperBound: 1,
  );

  Duration _getRndPulseDuration() => 100.ms + 200.ms * Random().nextDouble();

  double _getMinEnergyForDifficulty(int difficulty) => switch (difficulty) {
        1 => 0.3,
        2 => 0.6,
        _ => 0,
      };


  @override
  void initState() {
    super.initState();
    _pulseEffect.forward();
    _pulseEffect.addListener(_handlePulseEffectUpdate);
  }

  void _handlePulseEffectUpdate() {
    if (_pulseEffect.status == AnimationStatus.completed) {
      _pulseEffect.reverse();
      _pulseEffect.duration = _getRndPulseDuration();
    } else if (_pulseEffect.status == AnimationStatus.dismissed) {
      _pulseEffect.duration = _getRndPulseDuration();
      _pulseEffect.forward();
    }
  }

  void _handleDifficultyPressed(int value) {
    setState(() => _difficulty = value);
    _bumpMinEnergy();
  }

  Future<void> _bumpMinEnergy([double amount = 0.1]) async {
    setState(() {
      _minOrbEnergy = _getMinEnergyForDifficulty(_difficulty) + amount;
    });
    await Future<void>.delayed(.2.seconds);
    setState(() {
      _minOrbEnergy = _getMinEnergyForDifficulty(_difficulty);
    });
  }

  void _handleStartPressed() => _bumpMinEnergy(0.3);

  void _handleDifficultyFocused(int? value) {
    setState(() {
      _difficultyOverride = value;
      if (value == null) {
        _minOrbEnergy = _getMinEnergyForDifficulty(_difficulty);
      } else {
        _minOrbEnergy = _getMinEnergyForDifficulty(value);
      }
    });
  }

  /// Update mouse position so the orbWidget can use it, doing it here prevents
  /// btns from blocking the mouse-move events in the widget itself.
  void _handleMouseMove(PointerHoverEvent e) {
    setState(() {
      _mousePos = e.localPosition;
    });
  }

  @override
  Widget build(BuildContext context) {
    return Scaffold(
      backgroundColor: Colors.black,
      body: Center(
        child: MouseRegion(
          onHover: _handleMouseMove,
          child: _AnimatedColors(
            orbColor: _orbColor,
            emitColor: _emitColor,
            builder: (_, orbColor, emitColor) {
              return Stack(
                children: [
                  /// Bg-Base
                  Image.asset(AssetPaths.titleBgBase),

                  /// Bg-Receive
                  _LitImage(
                    color: orbColor,
                    imgSrc: AssetPaths.titleBgReceive,
                    pulseEffect: _pulseEffect,
                    lightAmt: _finalReceiveLightAmt,
                  ),

                  /// Orb
                  Positioned.fill(
                    child: Stack(
                      children: [
                        // Orb
                        OrbShaderWidget(
                          key: _orbKey,
                          mousePos: _mousePos,
                          minEnergy: _minOrbEnergy,
                          config: OrbShaderConfig(
                            ambientLightColor: orbColor,
                            materialColor: orbColor,
                            lightColor: orbColor,
                          ),
                          onUpdate: (energy) => setState(() {
                            _orbEnergy = energy;
                          }),
                        ),
                      ],
                    ),
                  ),

                  /// Mg-Base
                  _LitImage(
                    imgSrc: AssetPaths.titleMgBase,
                    color: orbColor,
                    pulseEffect: _pulseEffect,
                    lightAmt: _finalReceiveLightAmt,
                  ),

                  /// Mg-Receive
                  _LitImage(
                    imgSrc: AssetPaths.titleMgReceive,
                    color: orbColor,
                    pulseEffect: _pulseEffect,
                    lightAmt: _finalReceiveLightAmt,
                  ),

                  /// Mg-Emit
                  _LitImage(
                    imgSrc: AssetPaths.titleMgEmit,
                    color: emitColor,
                    pulseEffect: _pulseEffect,
                    lightAmt: _finalEmitLightAmt,
                  ),

                  /// Fg-Rocks
                  Image.asset(AssetPaths.titleFgBase),

                  /// Fg-Receive
                  _LitImage(
                    imgSrc: AssetPaths.titleFgReceive,
                    color: orbColor,
                    pulseEffect: _pulseEffect,
                    lightAmt: _finalReceiveLightAmt,
                  ),

                  /// Fg-Emit
                  _LitImage(
                    imgSrc: AssetPaths.titleFgEmit,
                    color: emitColor,
                    pulseEffect: _pulseEffect,
                    lightAmt: _finalEmitLightAmt,
                  ),

                  /// UI
                  Positioned.fill(
                    child: TitleScreenUi(
                      difficulty: _difficulty,
                      onDifficultyFocused: _handleDifficultyFocused,
                      onDifficultyPressed: _handleDifficultyPressed,
                      onStartPressed: _handleStartPressed,
                    ),
                  ),
                ],
              ).animate().fadeIn(duration: 1.seconds, delay: .3.seconds);
            },
          ),
        ),
      ),
    );
  }
}
- แก้ไข
_LitImageดังนี้
lib/title_screen/title_screen.dart
class _LitImage extends StatelessWidget {
  const _LitImage({
    required this.color,
    required this.imgSrc,
    required this.pulseEffect,                            // Add this parameter
    required this.lightAmt,
  });
  final Color color;
  final String imgSrc;
  final AnimationController pulseEffect;                  // Add this attribute
  final double lightAmt;

  @override
  Widget build(BuildContext context) {
    final hsl = HSLColor.fromColor(color);
    return ListenableBuilder(                             // Edit from here...
      listenable: pulseEffect,
      builder: (context, child) {
        return Image.asset(
          imgSrc,
          color: hsl.withLightness(hsl.lightness * lightAmt).toColor(),
          colorBlendMode: BlendMode.modulate,
        );
      },
    );                                                    // to here.
  }
}
นี่คือผลลัพธ์ของการเพิ่มนี้
7. เพิ่มภาพเคลื่อนไหวของอนุภาค
ในขั้นตอนนี้ คุณจะเพิ่มภาพเคลื่อนไหวของอนุภาคเพื่อสร้างการเคลื่อนไหวแบบพัลส์ที่ละเอียดอ่อนให้กับแอป
เพิ่มอนุภาคทุกที่
- สร้างไฟล์
lib/title_screen/particle_overlay.dartใหม่ แล้วเพิ่มโค้ดต่อไปนี้
lib/title_screen/particle_overlay.dart
import 'dart:math';

import 'package:flutter/material.dart';
import 'package:particle_field/particle_field.dart';
import 'package:rnd/rnd.dart';

class ParticleOverlay extends StatelessWidget {
  const ParticleOverlay({super.key, required this.color, required this.energy});

  final Color color;
  final double energy;

  @override
  Widget build(BuildContext context) {
    return ParticleField(
      spriteSheet: SpriteSheet(
        image: const AssetImage('assets/images/particle-wave.png'),
      ),
      // blend the image's alpha with the specified color:
      blendMode: BlendMode.dstIn,

      // this runs every tick:
      onTick: (controller, _, size) {
        List<Particle> particles = controller.particles;

        // add a new particle with random angle, distance & velocity:
        double a = rnd(pi * 2);
        double dist = rnd(1, 4) * 35 + 150 * energy;
        double vel = rnd(1, 2) * (1 + energy * 1.8);
        particles.add(Particle(
          // how many ticks this particle will live:
          lifespan: rnd(1, 2) * 20 + energy * 15,
          // starting distance from center:
          x: cos(a) * dist,
          y: sin(a) * dist,
          // starting velocity:
          vx: cos(a) * vel,
          vy: sin(a) * vel,
          // other starting values:
          rotation: a,
          scale: rnd(1, 2) * 0.6 + energy * 0.5,
        ));

        // update all of the particles:
        for (int i = particles.length - 1; i >= 0; i--) {
          Particle p = particles[i];
          if (p.lifespan <= 0) {
            // particle is expired, remove it:
            particles.removeAt(i);
            continue;
          }
          p.update(
            scale: p.scale * 1.025,
            vx: p.vx * 1.025,
            vy: p.vy * 1.025,
            color: color.withOpacity(p.lifespan * 0.001 + 0.01),
            lifespan: p.lifespan - 1,
          );
        }
      },
    );
  }
}
- แก้ไขการนำเข้าสำหรับ
lib/title_screen/title_screen.dartดังนี้
lib/title_screen/title_screen.dart
import 'dart:math';
import 'dart:ui';

import 'package:flutter/material.dart';
import 'package:flutter/services.dart';
import 'package:flutter_animate/flutter_animate.dart';

import '../assets.dart';
import '../orb_shader/orb_shader_config.dart';
import '../orb_shader/orb_shader_widget.dart';
import '../styles.dart';
import 'particle_overlay.dart';                          // Add this import
import 'title_screen_ui.dart';

class TitleScreen extends StatefulWidget {
- เพิ่ม
ParticleOverlayลงใน UI โดยแก้ไขเมธอดbuildของ_TitleScreenStateดังนี้
lib/title_screen/title_screen.dart
@override
Widget build(BuildContext context) {
  return Scaffold(
    backgroundColor: Colors.black,
    body: Center(
      child: MouseRegion(
        onHover: _handleMouseMove,
        child: _AnimatedColors(
          orbColor: _orbColor,
          emitColor: _emitColor,
          builder: (_, orbColor, emitColor) {
            return Stack(
              children: [
                /// Bg-Base
                Image.asset(AssetPaths.titleBgBase),

                /// Bg-Receive
                _LitImage(
                  color: orbColor,
                  imgSrc: AssetPaths.titleBgReceive,
                  pulseEffect: _pulseEffect,
                  lightAmt: _finalReceiveLightAmt,
                ),

                /// Orb
                Positioned.fill(
                  child: Stack(
                    children: [
                      // Orb
                      OrbShaderWidget(
                        key: _orbKey,
                        mousePos: _mousePos,
                        minEnergy: _minOrbEnergy,
                        config: OrbShaderConfig(
                          ambientLightColor: orbColor,
                          materialColor: orbColor,
                          lightColor: orbColor,
                        ),
                        onUpdate: (energy) => setState(() {
                          _orbEnergy = energy;
                        }),
                      ),
                    ],
                  ),
                ),

                /// Mg-Base
                _LitImage(
                  imgSrc: AssetPaths.titleMgBase,
                  color: orbColor,
                  pulseEffect: _pulseEffect,
                  lightAmt: _finalReceiveLightAmt,
                ),

                /// Mg-Receive
                _LitImage(
                  imgSrc: AssetPaths.titleMgReceive,
                  color: orbColor,
                  pulseEffect: _pulseEffect,
                  lightAmt: _finalReceiveLightAmt,
                ),

                /// Mg-Emit
                _LitImage(
                  imgSrc: AssetPaths.titleMgEmit,
                  color: emitColor,
                  pulseEffect: _pulseEffect,
                  lightAmt: _finalEmitLightAmt,
                ),

                /// Particle Field
                Positioned.fill(                          // Add from here...
                  child: IgnorePointer(
                    child: ParticleOverlay(
                      color: orbColor,
                      energy: _orbEnergy,
                    ),
                  ),
                ),                                        // to here.

                /// Fg-Rocks
                Image.asset(AssetPaths.titleFgBase),

                /// Fg-Receive
                _LitImage(
                  imgSrc: AssetPaths.titleFgReceive,
                  color: orbColor,
                  pulseEffect: _pulseEffect,
                  lightAmt: _finalReceiveLightAmt,
                ),

                /// Fg-Emit
                _LitImage(
                  imgSrc: AssetPaths.titleFgEmit,
                  color: emitColor,
                  pulseEffect: _pulseEffect,
                  lightAmt: _finalEmitLightAmt,
                ),

                /// UI
                Positioned.fill(
                  child: TitleScreenUi(
                    difficulty: _difficulty,
                    onDifficultyFocused: _handleDifficultyFocused,
                    onDifficultyPressed: _handleDifficultyPressed,
                    onStartPressed: _handleStartPressed,
                  ),
                ),
              ],
            ).animate().fadeIn(duration: 1.seconds, delay: .3.seconds);
          },
        ),
      ),
    ),
  );
}
ผลลัพธ์สุดท้ายประกอบด้วยภาพเคลื่อนไหว, Fragment Shader และเอฟเฟกต์อนุภาคในหลายแพลตฟอร์ม
เพิ่มอนุภาคได้ทุกที่แม้แต่บนเว็บ
โค้ดในปัจจุบันมีปัญหาเล็กน้อย เมื่อ Flutter ทำงานบนเว็บ จะมีเครื่องมือการแสดงผล 2 แบบที่ใช้แทนกันได้ ได้แก่ เครื่องมือ CanvasKit ซึ่งใช้โดยค่าเริ่มต้นในเบราว์เซอร์ระดับเดสก์ท็อป และเครื่องมือแสดงผล HTML DOM ซึ่งใช้โดยค่าเริ่มต้นสำหรับอุปกรณ์เคลื่อนที่ ปัญหาคือตัวแสดงผล DOM ของ HTML ไม่รองรับ Fragment Shader
วิธีแก้ไขคือการสร้างสำหรับเว็บโดยใช้ตัวแสดงผล CanvasKit เท่านั้น โดยให้เพิ่มแฟล็กไปยังคำสั่งบิลด์ดังนี้
$ flutter build web --web-renderer canvaskit
Font asset "MaterialIcons-Regular.otf" was tree-shaken, reducing it from 1645184 to 7692 bytes (99.5% reduction). Tree-shaking can be disabled by providing the --no-tree-shake-icons flag
when building your app.
Font asset "CupertinoIcons.ttf" was tree-shaken, reducing it from 257628 to 1172 bytes (99.5% reduction). Tree-shaking can be disabled by providing the --no-tree-shake-icons flag when
building your app.
Compiling lib/main.dart for the Web...                             15.6s
✓ Built build/web
นี่คือผลงานทั้งหมดของคุณ ซึ่งแสดงในเบราว์เซอร์ Chrome ในครั้งนี้
8. ขอแสดงความยินดี
คุณสร้างหน้าจออินโทรของเกมที่มีฟีเจอร์ครบถ้วนพร้อมภาพเคลื่อนไหว Fragment Shader และภาพเคลื่อนไหวของอนุภาคได้แล้ว ตอนนี้คุณสามารถใช้เทคนิคเหล่านี้ได้ในทุกแพลตฟอร์มที่ Flutter รองรับ
ดูข้อมูลเพิ่มเติม
- ดูแพ็กเกจ
flutter_animate - อ่านเอกสารประกอบการรองรับ Fragment Shader ใน Flutter
- The Book of Shaders โดย Patricio Gonzalez Vivo และ Jen Lowe
- Shader toy ซึ่งเป็นพื้นที่ทดลองเชดเดอร์แบบทำงานร่วมกัน
- simple_shader โปรเจ็กต์ตัวอย่าง Flutter Fragment Shader