
1. Прежде чем начать
Flutter отлично подходит для быстрого итеративного создания новых пользовательских интерфейсов, используя сочетание горячей перезагрузки и декларативного пользовательского интерфейса. Однако иногда возникает необходимость добавить в интерфейс дополнительную интерактивность. Эти изменения могут быть как быстрыми, например, анимация нажатия кнопки, так и впечатляющими, например, шейдер, который деформирует пользовательский интерфейс, используя мощь графического процессора.
В этой лабораторной работе вы создадите приложение Flutter, которое использует возможности анимации, шейдеров и полей частиц для создания пользовательского интерфейса, напоминающего научно-фантастические фильмы и телешоу, которые мы все любим смотреть, когда не пишем код.
Что вы построите
Вы создадите начальную страницу меню для постапокалиптической научно-фантастической игры. Есть заголовок с фрагментным шейдером, который выбирает текст для его визуальной анимации, меню сложности, которое меняет цветовую тему страницы с изобилием анимации, а также анимированный шар, нарисованный с помощью второго фрагментного шейдера. Если этого недостаточно, в конце кодовой лаборатории вы добавите эффект тонких частиц, чтобы придать странице движение и интерес.
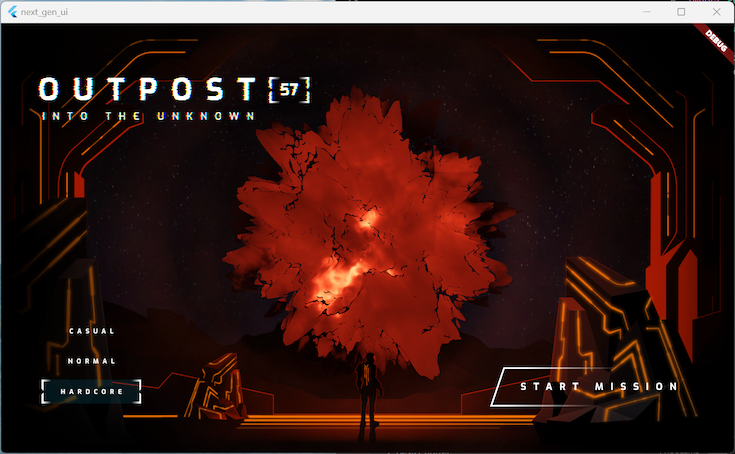
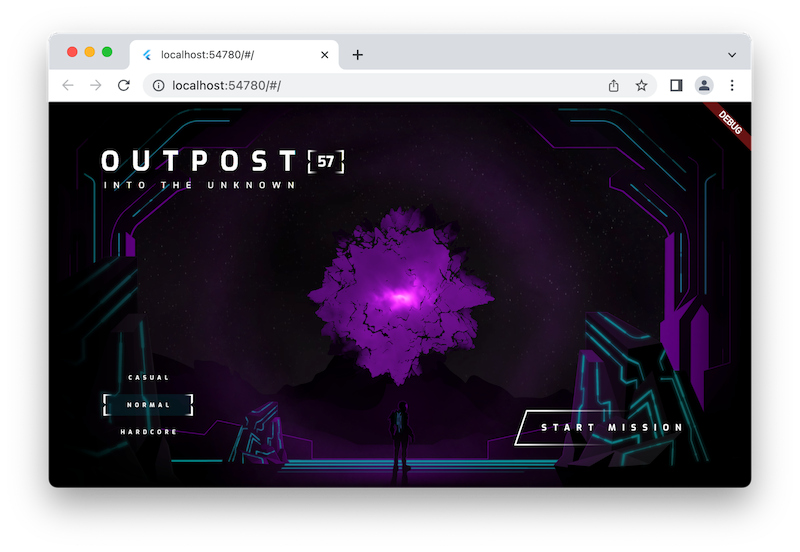
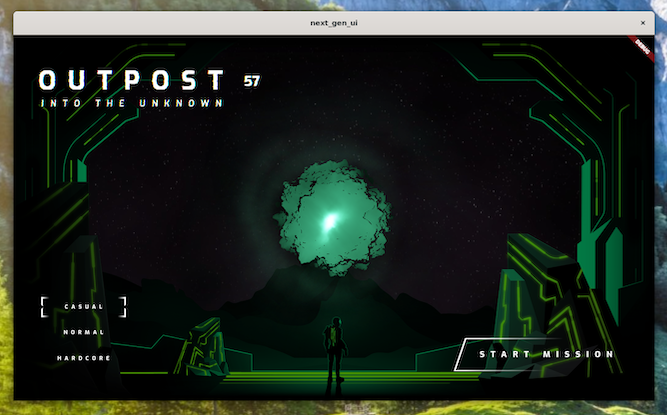
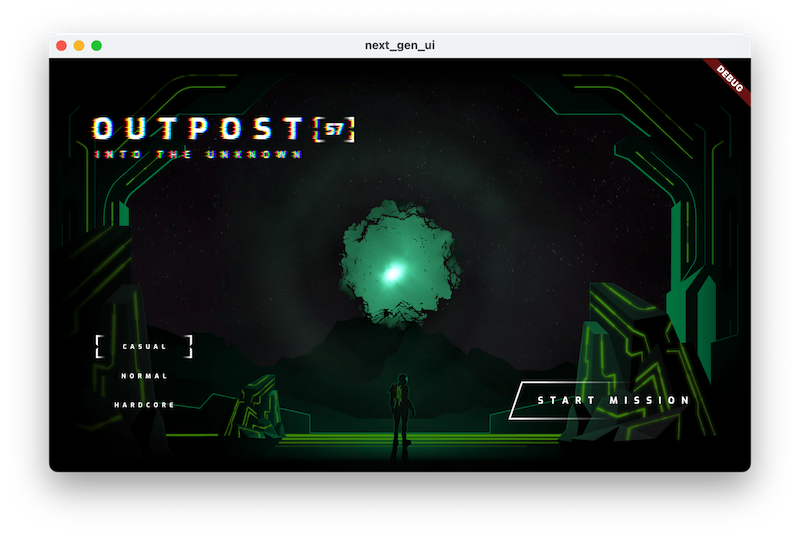
На следующих снимках экрана показано приложение, которое вы будете разрабатывать в трёх поддерживаемых операционных системах для настольных компьютеров: Windows, Linux и macOS. Для полноты картины представлена версия для веб-браузера (также поддерживается). Анимации и фрагментные шейдеры повсюду!
|
|
|
|
Предпосылки
- Базовые знания по разработке Flutter с использованием Dart, изложенные в лабораторной работе «Ваше первое приложение Flutter»
Чему вы научитесь
- Как использовать
flutter_animateдля создания выразительной анимации - Как использовать поддержку фрагментных шейдеров Flutter на настольных компьютерах и в Интернете
- Как добавить анимацию частиц в ваше приложение с помощью
particle_field
Что вам понадобится
- Flutter SDK
- Настройка VS Code для Flutter и Dart
- Настройка поддержки настольных компьютеров для Flutter для Windows, Linux или macOS
- Настройка веб-поддержки для Flutter
2. Начните
Загрузите стартовый код
- Перейдите в этот репозиторий GitHub .
- Нажмите Код > Загрузить zip , чтобы загрузить весь код для этой лабораторной работы.
- Извлеките скачанный zip-архив, чтобы распаковать корневую папку
codelabs-main. Вам понадобится только подкаталогnext-gen-ui/, содержащий папкиstep_01–step_06с исходным кодом, на основе которого вы будете выполнять каждый шаг этой практической работы.
Загрузите зависимости проекта
- В VS Code нажмите Файл > Открыть папку > codelabs-main > next-gen-uis > step_01, чтобы открыть стартовый проект.
- Если вы видите диалоговое окно VS Code, предлагающее загрузить необходимые пакеты для начального приложения, нажмите Получить пакеты .
- Если вы не видите диалоговое окно VS Code, предлагающее загрузить требуемые пакеты для начального приложения, откройте терминал, перейдите в папку
step_01и выполните командуflutter pub get.
Запустите стартовое приложение
- В VS Code выберите либо используемую вами настольную операционную систему, либо Chrome, если вы хотите протестировать свое приложение в веб-браузере.
Например, вот что вы видите, если используете macOS в качестве цели развертывания:

Вот что вы увидите, если используете Chrome в качестве цели развертывания:

- Откройте файл
lib/main.dartи нажмите Начать отладку . Приложение запускается в вашей операционной системе или в браузере Chrome.
Изучите стартовое приложение
В стартовом приложении обратите внимание на следующее:
- Пользовательский интерфейс готов к созданию.
- В каталоге
assetsнаходятся графические ресурсы и два фрагментных шейдера, которые вы будете использовать. - Файл
pubspec.yamlуже содержит список ресурсов и набор пакетов pub, которые вы будете использовать. - Каталог
libсодержит обязательный файлmain.dart, файлassets.dart, в котором указан путь к графическим ресурсам и шейдерам фрагментов, а также файлstyles.dart, в котором указан список стилей текста и цветов, которые вы будете использовать. - Каталог
libтакже содержитcommonкаталог, в котором находится несколько полезных утилит, которые вы будете использовать в этой лабораторной работе, и каталогorb_shader, содержащийWidget, который будет использоваться для отображения сферы с помощью вершинного шейдера.
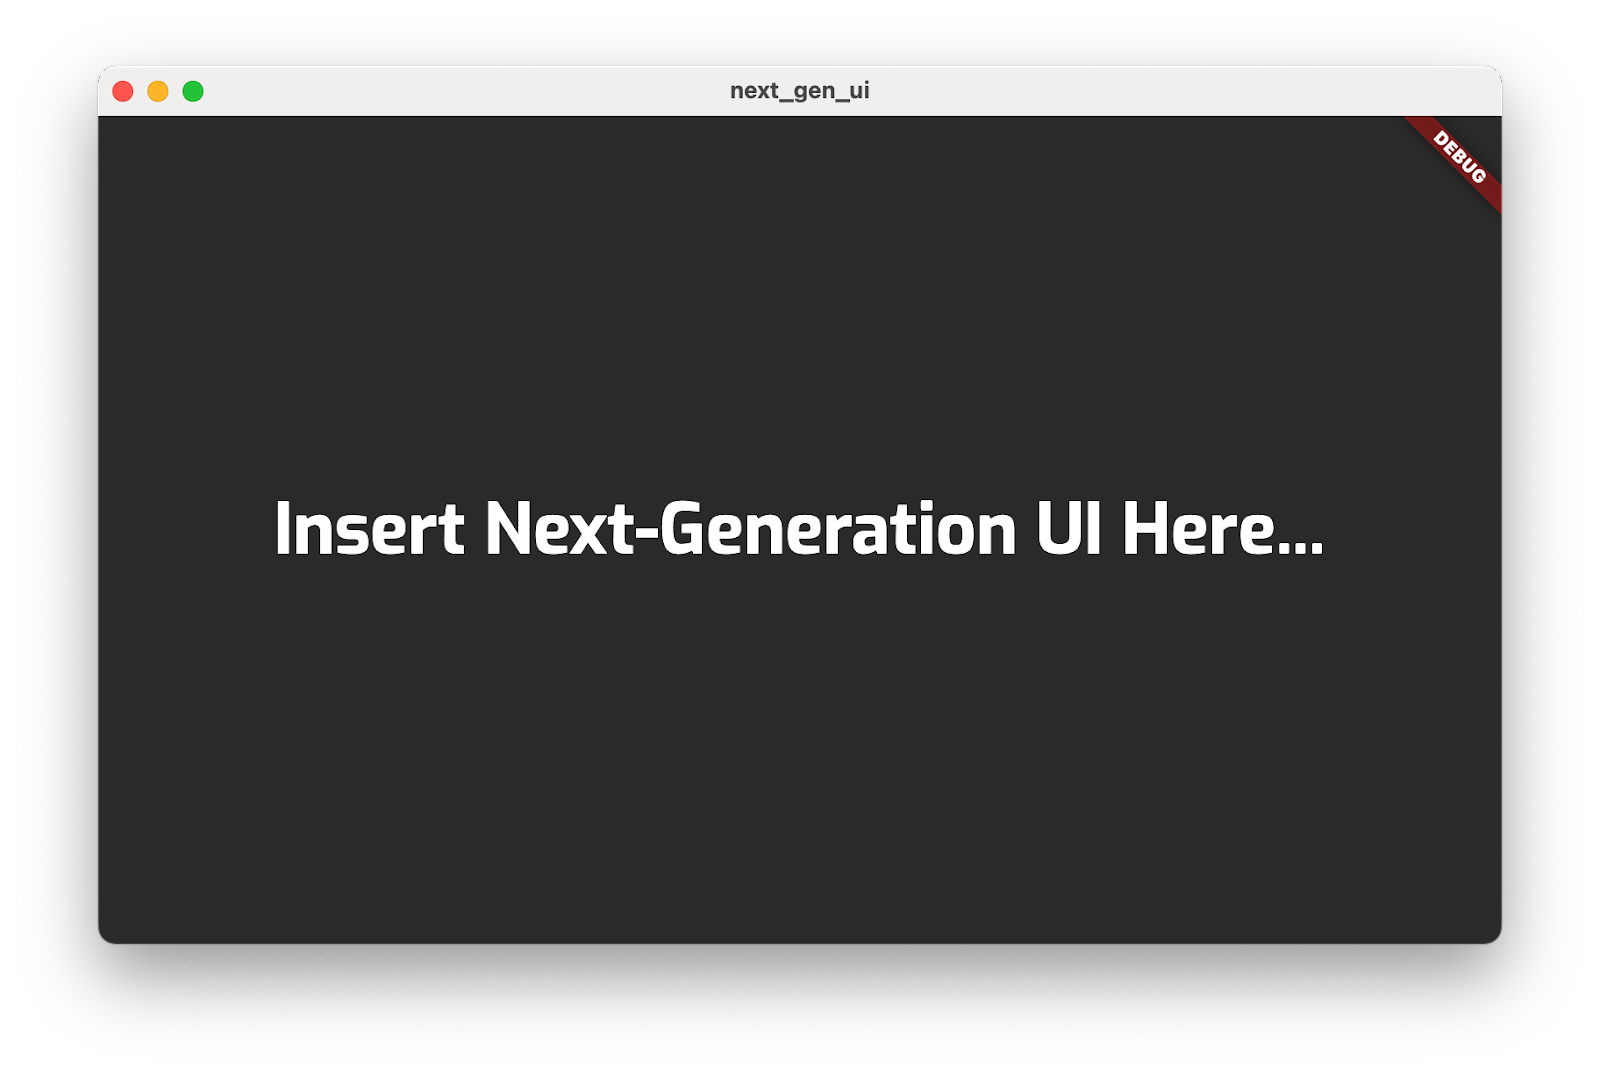
Вот что вы увидите после запуска приложения.
3. Нарисуйте сцену
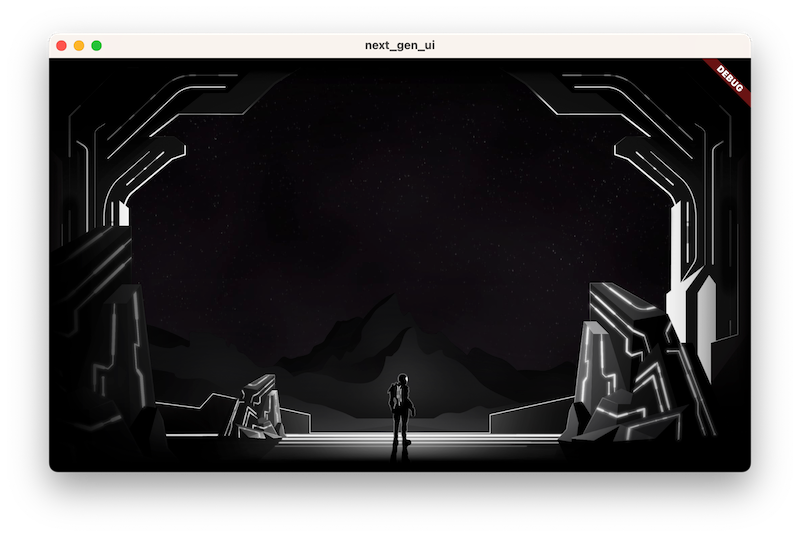
На этом этапе вы размещаете все фоновые объекты на экране слоями. Поначалу изображение может выглядеть странно монохромным, но в конце этого этапа вы добавите цвета.
Добавить активы на сцену
- Создайте каталог
title_screenв каталогеlibи добавьте файлtitle_screen.dart. Добавьте в файл следующее содержимое:
lib/title_screen/title_screen.dart
import 'package:flutter/material.dart';

import '../assets.dart';

class TitleScreen extends StatelessWidget {
  const TitleScreen({super.key});

  @override
  Widget build(BuildContext context) {
    return Scaffold(
      backgroundColor: Colors.black,
      body: Center(
        child: Stack(
          children: [
            /// Bg-Base
            Image.asset(AssetPaths.titleBgBase),

            /// Bg-Receive
            Image.asset(AssetPaths.titleBgReceive),

            /// Mg-Base
            Image.asset(AssetPaths.titleMgBase),

            /// Mg-Receive
            Image.asset(AssetPaths.titleMgReceive),

            /// Mg-Emit
            Image.asset(AssetPaths.titleMgEmit),

            /// Fg-Rocks
            Image.asset(AssetPaths.titleFgBase),

            /// Fg-Receive
            Image.asset(AssetPaths.titleFgReceive),

            /// Fg-Emit
            Image.asset(AssetPaths.titleFgEmit),
          ],
        ),
      ),
    );
  }
}
Этот виджет содержит сцену с объектами, размещёнными по слоям. Каждый из слоёв фона, среднего и переднего планов представлен группой из двух или трёх изображений. Эти изображения будут подсвечены разными цветами, чтобы передать движение света в сцене.
- В файл
main.dartдобавьте следующее содержимое:
lib/main.dart
import 'dart:io' show Platform;

import 'package:flutter/foundation.dart' show kIsWeb;
import 'package:flutter/material.dart';
import 'package:window_size/window_size.dart';
                                                          // Remove 'styles.dart' import
import 'title_screen/title_screen.dart';                  // Add this import


void main() {
  if (!kIsWeb && (Platform.isWindows || Platform.isLinux || Platform.isMacOS)) {
    WidgetsFlutterBinding.ensureInitialized();
    setWindowMinSize(const Size(800, 500));
  }
  runApp(const NextGenApp());
}

class NextGenApp extends StatelessWidget {
  const NextGenApp({super.key});

  @override
  Widget build(BuildContext context) {
    return MaterialApp(
      themeMode: ThemeMode.dark,
      darkTheme: ThemeData(brightness: Brightness.dark),
      home: const TitleScreen(),                          // Replace with this widget
    );
  }
}
Это заменяет пользовательский интерфейс приложения монохромной сценой, созданной с помощью графических ресурсов. Затем вы раскрашиваете каждый слой.
Добавить утилиту для раскрашивания изображений
Добавьте утилиту раскраски изображений, добавив следующее содержимое в файл title_screen.dart :
lib/title_screen/title_screen.dart
import 'package:flutter/material.dart';

import '../assets.dart';

class TitleScreen extends StatelessWidget {
  const TitleScreen({super.key});

  @override
  Widget build(BuildContext context) {
    return Scaffold(
      backgroundColor: Colors.black,
      body: Center(
        child: Stack(
          children: [
            /// Bg-Base
            Image.asset(AssetPaths.titleBgBase),

            /// Bg-Receive
            Image.asset(AssetPaths.titleBgReceive),

            /// Mg-Base
            Image.asset(AssetPaths.titleMgBase),

            /// Mg-Receive
            Image.asset(AssetPaths.titleMgReceive),

            /// Mg-Emit
            Image.asset(AssetPaths.titleMgEmit),

            /// Fg-Rocks
            Image.asset(AssetPaths.titleFgBase),

            /// Fg-Receive
            Image.asset(AssetPaths.titleFgReceive),

            /// Fg-Emit
            Image.asset(AssetPaths.titleFgEmit),
          ],
        ),
      ),
    );
  }
}

class _LitImage extends StatelessWidget {                 // Add from here...
  const _LitImage({
    required this.color,
    required this.imgSrc,
    required this.lightAmt,
  });
  final Color color;
  final String imgSrc;
  final double lightAmt;

  @override
  Widget build(BuildContext context) {
    final hsl = HSLColor.fromColor(color);
    return Image.asset(
      imgSrc,
      color: hsl.withLightness(hsl.lightness * lightAmt).toColor(),
      colorBlendMode: BlendMode.modulate,
    );
  }
}                                                         // to here.
Этот служебный виджет _LitImage перекрашивает каждый графический объект в зависимости от того, излучают ли они свет или поглощают его. Это может вызвать предупреждение линтера, поскольку вы ещё не используете этот новый виджет.
Краска в цвете
Раскрасьте его в цвет, изменив файл title_screen.dart следующим образом:
lib/title_screen/title_screen.dart
import 'package:flutter/material.dart';

import '../assets.dart';
import '../styles.dart';                                  // Add this import

class TitleScreen extends StatelessWidget {
  const TitleScreen({super.key});

  final _finalReceiveLightAmt = 0.7;                      // Add this attribute
  final _finalEmitLightAmt = 0.5;                         // And this attribute

  @override
  Widget build(BuildContext context) {
    final orbColor = AppColors.orbColors[0];              // Add this final variable
    final emitColor = AppColors.emitColors[0];            // And this one

    return Scaffold(
      backgroundColor: Colors.black,
      body: Center(
        child: Stack(
          children: [
            /// Bg-Base
            Image.asset(AssetPaths.titleBgBase),

            /// Bg-Receive
            _LitImage(                                    // Modify from here...
              color: orbColor,
              imgSrc: AssetPaths.titleBgReceive,
              lightAmt: _finalReceiveLightAmt,
            ),                                            // to here.

            /// Mg-Base
            _LitImage(                                    // Modify from here...
              imgSrc: AssetPaths.titleMgBase,
              color: orbColor,
              lightAmt: _finalReceiveLightAmt,
            ),                                            // to here.

            /// Mg-Receive
            _LitImage(                                    // Modify from here...
              imgSrc: AssetPaths.titleMgReceive,
              color: orbColor,
              lightAmt: _finalReceiveLightAmt,
            ),                                            // to here.

            /// Mg-Emit
            _LitImage(                                    // Modify from here...
              imgSrc: AssetPaths.titleMgEmit,
              color: emitColor,
              lightAmt: _finalEmitLightAmt,
            ),                                            // to here.

            /// Fg-Rocks
            Image.asset(AssetPaths.titleFgBase),

            /// Fg-Receive
            _LitImage(                                    // Modify from here...
              imgSrc: AssetPaths.titleFgReceive,
              color: orbColor,
              lightAmt: _finalReceiveLightAmt,
            ),                                            // to here.

            /// Fg-Emit
            _LitImage(                                    // Modify from here...
              imgSrc: AssetPaths.titleFgEmit,
              color: emitColor,
              lightAmt: _finalEmitLightAmt,
            ),                                            // to here.
          ],
        ),
      ),
    );
  }
}

class _LitImage extends StatelessWidget {
  const _LitImage({
    required this.color,
    required this.imgSrc,
    required this.lightAmt,
  });
  final Color color;
  final String imgSrc;
  final double lightAmt;

  @override
  Widget build(BuildContext context) {
    final hsl = HSLColor.fromColor(color);
    return Image.asset(
      imgSrc,
      color: hsl.withLightness(hsl.lightness * lightAmt).toColor(),
      colorBlendMode: BlendMode.modulate,
    );
  }
}
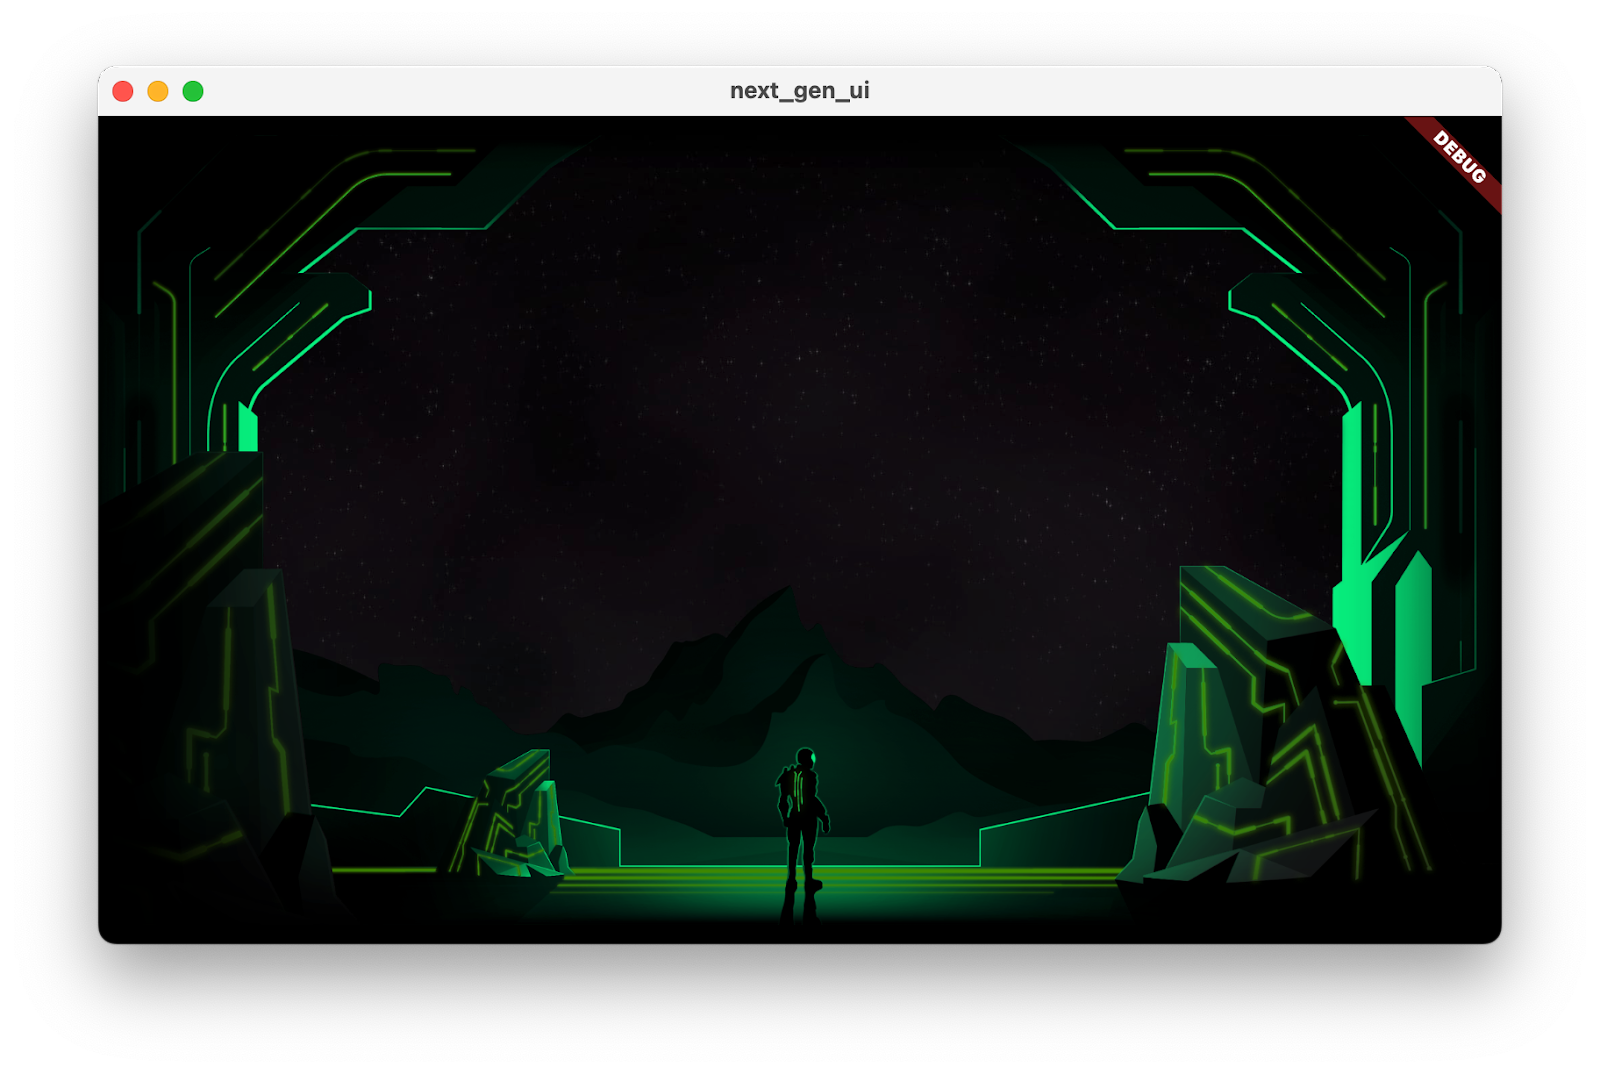
Вот приложение еще раз, на этот раз с графическими объектами, окрашенными в зеленый цвет.
4. Добавьте пользовательский интерфейс
На этом этапе вы размещаете пользовательский интерфейс поверх сцены, созданной на предыдущем этапе. Он включает в себя название, кнопки выбора уровня сложности и крайне важную кнопку «Старт» .
Добавить заголовок
- Создайте файл
title_screen_ui.dartвнутри каталогаlib/title_screenи добавьте в файл следующее содержимое:
lib/title_screen/title_screen_ui.dart
import 'package:extra_alignments/extra_alignments.dart';
import 'package:flutter/material.dart';
import 'package:gap/gap.dart';

import '../assets.dart';
import '../common/ui_scaler.dart';
import '../styles.dart';

class TitleScreenUi extends StatelessWidget {
  const TitleScreenUi({
    super.key,
  });
  @override
  Widget build(BuildContext context) {
    return const Padding(
      padding: EdgeInsets.symmetric(vertical: 40, horizontal: 50),
      child: Stack(
        children: [
          /// Title Text
          TopLeft(
            child: UiScaler(
              alignment: Alignment.topLeft,
              child: _TitleText(),
            ),
          ),
        ],
      ),
    );
  }
}

class _TitleText extends StatelessWidget {
  const _TitleText();

  @override
  Widget build(BuildContext context) {
    return Column(
      mainAxisSize: MainAxisSize.min,
      crossAxisAlignment: CrossAxisAlignment.start,
      children: [
        const Gap(20),
        Row(
          mainAxisSize: MainAxisSize.min,
          children: [
            Transform.translate(
              offset: Offset(-(TextStyles.h1.letterSpacing! * .5), 0),
              child: Text('OUTPOST', style: TextStyles.h1),
            ),
            Image.asset(AssetPaths.titleSelectedLeft, height: 65),
            Text('57', style: TextStyles.h2),
            Image.asset(AssetPaths.titleSelectedRight, height: 65),
          ],
        ),
        Text('INTO THE UNKNOWN', style: TextStyles.h3),
      ],
    );
  }
}
Этот виджет содержит заголовок и все кнопки, составляющие пользовательский интерфейс этого приложения.
- Обновите файл
lib/title_screen/title_screen.dartследующим образом:
lib/title_screen/title_screen.dart
import 'package:flutter/material.dart';

import '../assets.dart';
import '../styles.dart';
import 'title_screen_ui.dart';                            // Add this import

class TitleScreen extends StatelessWidget {
  const TitleScreen({super.key});

  final _finalReceiveLightAmt = 0.7;
  final _finalEmitLightAmt = 0.5;

  @override
  Widget build(BuildContext context) {
    final orbColor = AppColors.orbColors[0];
    final emitColor = AppColors.emitColors[0];

    return Scaffold(
      backgroundColor: Colors.black,
      body: Center(
        child: Stack(
          children: [
            /// Bg-Base
            Image.asset(AssetPaths.titleBgBase),

            /// Bg-Receive
            _LitImage(
              color: orbColor,
              imgSrc: AssetPaths.titleBgReceive,
              lightAmt: _finalReceiveLightAmt,
            ),

            /// Mg-Base
            _LitImage(
              imgSrc: AssetPaths.titleMgBase,
              color: orbColor,
              lightAmt: _finalReceiveLightAmt,
            ),

            /// Mg-Receive
            _LitImage(
              imgSrc: AssetPaths.titleMgReceive,
              color: orbColor,
              lightAmt: _finalReceiveLightAmt,
            ),

            /// Mg-Emit
            _LitImage(
              imgSrc: AssetPaths.titleMgEmit,
              color: emitColor,
              lightAmt: _finalEmitLightAmt,
            ),

            /// Fg-Rocks
            Image.asset(AssetPaths.titleFgBase),

            /// Fg-Receive
            _LitImage(
              imgSrc: AssetPaths.titleFgReceive,
              color: orbColor,
              lightAmt: _finalReceiveLightAmt,
            ),

            /// Fg-Emit
            _LitImage(
              imgSrc: AssetPaths.titleFgEmit,
              color: emitColor,
              lightAmt: _finalEmitLightAmt,
            ),

            /// UI
            const Positioned.fill(                        // Add from here...
              child: TitleScreenUi(),
            ),                                            // to here.
          ],
        ),
      ),
    );
  }
}

class _LitImage extends StatelessWidget {
  const _LitImage({
    required this.color,
    required this.imgSrc,
    required this.lightAmt,
  });
  final Color color;
  final String imgSrc;
  final double lightAmt;

  @override
  Widget build(BuildContext context) {
    final hsl = HSLColor.fromColor(color);
    return Image.asset(
      imgSrc,
      color: hsl.withLightness(hsl.lightness * lightAmt).toColor(),
      colorBlendMode: BlendMode.modulate,
    );
  }
}
Запуск этого кода показывает заголовок, который является началом пользовательского интерфейса.
![Приложение Codelab, работающее под заголовком «Outpost [57] Into the unknown»](https://codelabs.developers.google.cn/static/codelabs/flutter-next-gen-uis/img/ed313b0bbcc38b66.png?authuser=0&hl=ru)
Добавьте кнопки сложности
- Обновите
title_screen_ui.dart, добавив новый импорт для пакетаfocusable_control_builder:
lib/title_screen/title_screen_ui.dart
import 'package:extra_alignments/extra_alignments.dart';
import 'package:flutter/material.dart';
import 'package:focusable_control_builder/focusable_control_builder.dart'; // Add import
import 'package:gap/gap.dart';

import '../assets.dart';
import '../common/ui_scaler.dart';
import '../styles.dart';
- В виджет
TitleScreenUiдобавьте следующее:
lib/title_screen/title_screen_ui.dart
class TitleScreenUi extends StatelessWidget {
  const TitleScreenUi({
    super.key,
    required this.difficulty,                            // Edit from here...
    required this.onDifficultyPressed,
    required this.onDifficultyFocused,
  });

  final int difficulty;
  final void Function(int difficulty) onDifficultyPressed;
  final void Function(int? difficulty) onDifficultyFocused; // to here.

  @override
  Widget build(BuildContext context) {
    return Padding(                                      // Move this const...
      padding: const EdgeInsets.symmetric(vertical: 40, horizontal: 50), // to here.
      child: Stack(
        children: [
          /// Title Text
          const TopLeft(                                 // Add a const here, as well
            child: UiScaler(
              alignment: Alignment.topLeft,
              child: _TitleText(),
            ),
          ),

          /// Difficulty Btns
          BottomLeft(                                    // Add from here...
            child: UiScaler(
              alignment: Alignment.bottomLeft,
              child: _DifficultyBtns(
                difficulty: difficulty,
                onDifficultyPressed: onDifficultyPressed,
                onDifficultyFocused: onDifficultyFocused,
              ),
            ),
          ),                                             // to here.
        ],
      ),
    );
  }
}
- Добавьте следующие два виджета для реализации кнопок сложности:
lib/title_screen/title_screen_ui.dart
class _DifficultyBtns extends StatelessWidget {
  const _DifficultyBtns({
    required this.difficulty,
    required this.onDifficultyPressed,
    required this.onDifficultyFocused,
  });

  final int difficulty;
  final void Function(int difficulty) onDifficultyPressed;
  final void Function(int? difficulty) onDifficultyFocused;

  @override
  Widget build(BuildContext context) {
    return Column(
      mainAxisSize: MainAxisSize.min,
      children: [
        _DifficultyBtn(
          label: 'Casual',
          selected: difficulty == 0,
          onPressed: () => onDifficultyPressed(0),
          onHover: (over) => onDifficultyFocused(over ? 0 : null),
        ),
        _DifficultyBtn(
          label: 'Normal',
          selected: difficulty == 1,
          onPressed: () => onDifficultyPressed(1),
          onHover: (over) => onDifficultyFocused(over ? 1 : null),
        ),
        _DifficultyBtn(
          label: 'Hardcore',
          selected: difficulty == 2,
          onPressed: () => onDifficultyPressed(2),
          onHover: (over) => onDifficultyFocused(over ? 2 : null),
        ),
        const Gap(20),
      ],
    );
  }
}

class _DifficultyBtn extends StatelessWidget {
  const _DifficultyBtn({
    required this.selected,
    required this.onPressed,
    required this.onHover,
    required this.label,
  });
  final String label;
  final bool selected;
  final VoidCallback onPressed;
  final void Function(bool hasFocus) onHover;

  @override
  Widget build(BuildContext context) {
    return FocusableControlBuilder(
      onPressed: onPressed,
      onHoverChanged: (_, state) => onHover.call(state.isHovered),
      builder: (_, state) {
        return Padding(
          padding: const EdgeInsets.all(8.0),
          child: SizedBox(
            width: 250,
            height: 60,
            child: Stack(
              children: [
                /// Bg with fill and outline
                Container(
                  decoration: BoxDecoration(
                    color: const Color(0xFF00D1FF).withOpacity(.1),
                    border: Border.all(color: Colors.white, width: 5),
                  ),
                ),

                if (state.isHovered || state.isFocused) ...[
                  Container(
                    decoration: BoxDecoration(
                      color: const Color(0xFF00D1FF).withOpacity(.1),
                    ),
                  ),
                ],

                /// cross-hairs (selected state)
                if (selected) ...[
                  CenterLeft(
                    child: Image.asset(AssetPaths.titleSelectedLeft),
                  ),
                  CenterRight(
                    child: Image.asset(AssetPaths.titleSelectedRight),
                  ),
                ],

                /// Label
                Center(
                  child: Text(label.toUpperCase(), style: TextStyles.btn),
                ),
              ],
            ),
          ),
        );
      },
    );
  }
}
- Преобразуйте виджет
TitleScreenиз бессостоянного в с сохранением состояния и добавьте состояние, чтобы включить изменение цветовой схемы в зависимости от сложности:
lib/title_screen/title_screen.dart
import 'package:flutter/material.dart';

import '../assets.dart';
import '../styles.dart';
import 'title_screen_ui.dart';

class TitleScreen extends StatefulWidget {
  const TitleScreen({super.key});

  @override
  State<TitleScreen> createState() => _TitleScreenState();
}

class _TitleScreenState extends State<TitleScreen> {
  Color get _emitColor =>
      AppColors.emitColors[_difficultyOverride ?? _difficulty];
  Color get _orbColor =>
      AppColors.orbColors[_difficultyOverride ?? _difficulty];

  /// Currently selected difficulty
  int _difficulty = 0;

  /// Currently focused difficulty (if any)
  int? _difficultyOverride;

  void _handleDifficultyPressed(int value) {
    setState(() => _difficulty = value);
  }

  void _handleDifficultyFocused(int? value) {
    setState(() => _difficultyOverride = value);
  }

  final _finalReceiveLightAmt = 0.7;
  final _finalEmitLightAmt = 0.5;

  @override
  Widget build(BuildContext context) {
    return Scaffold(
      backgroundColor: Colors.black,
      body: Center(
        child: Stack(
          children: [
            /// Bg-Base
            Image.asset(AssetPaths.titleBgBase),

            /// Bg-Receive
            _LitImage(
              color: _orbColor,
              imgSrc: AssetPaths.titleBgReceive,
              lightAmt: _finalReceiveLightAmt,
            ),

            /// Mg-Base
            _LitImage(
              imgSrc: AssetPaths.titleMgBase,
              color: _orbColor,
              lightAmt: _finalReceiveLightAmt,
            ),

            /// Mg-Receive
            _LitImage(
              imgSrc: AssetPaths.titleMgReceive,
              color: _orbColor,
              lightAmt: _finalReceiveLightAmt,
            ),

            /// Mg-Emit
            _LitImage(
              imgSrc: AssetPaths.titleMgEmit,
              color: _emitColor,
              lightAmt: _finalEmitLightAmt,
            ),

            /// Fg-Rocks
            Image.asset(AssetPaths.titleFgBase),

            /// Fg-Receive
            _LitImage(
              imgSrc: AssetPaths.titleFgReceive,
              color: _orbColor,
              lightAmt: _finalReceiveLightAmt,
            ),

            /// Fg-Emit
            _LitImage(
              imgSrc: AssetPaths.titleFgEmit,
              color: _emitColor,
              lightAmt: _finalEmitLightAmt,
            ),

            /// UI
            Positioned.fill(
              child: TitleScreenUi(
                difficulty: _difficulty,
                onDifficultyFocused: _handleDifficultyFocused,
                onDifficultyPressed: _handleDifficultyPressed,
              ),
            ),
          ],
        ),
      ),
    );
  }
}

class _LitImage extends StatelessWidget {
  const _LitImage({
    required this.color,
    required this.imgSrc,
    required this.lightAmt,
  });
  final Color color;
  final String imgSrc;
  final double lightAmt;

  @override
  Widget build(BuildContext context) {
    final hsl = HSLColor.fromColor(color);
    return Image.asset(
      imgSrc,
      color: hsl.withLightness(hsl.lightness * lightAmt).toColor(),
      colorBlendMode: BlendMode.modulate,
    );
  }
}
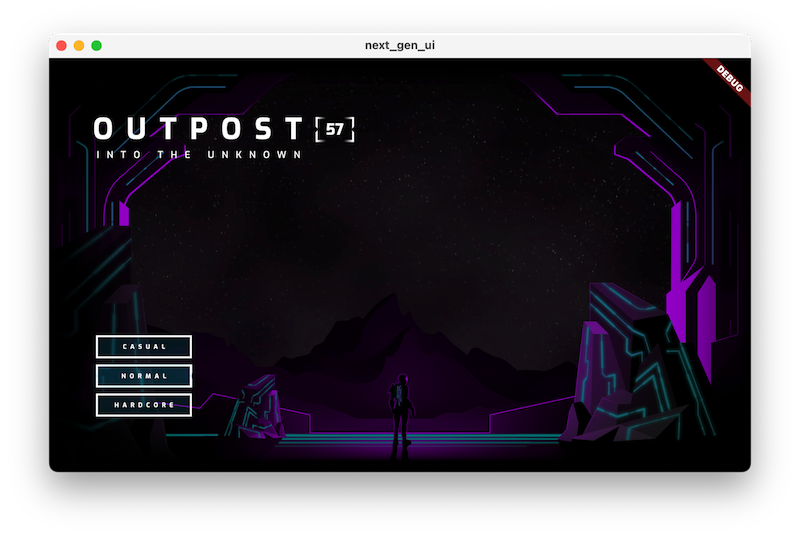
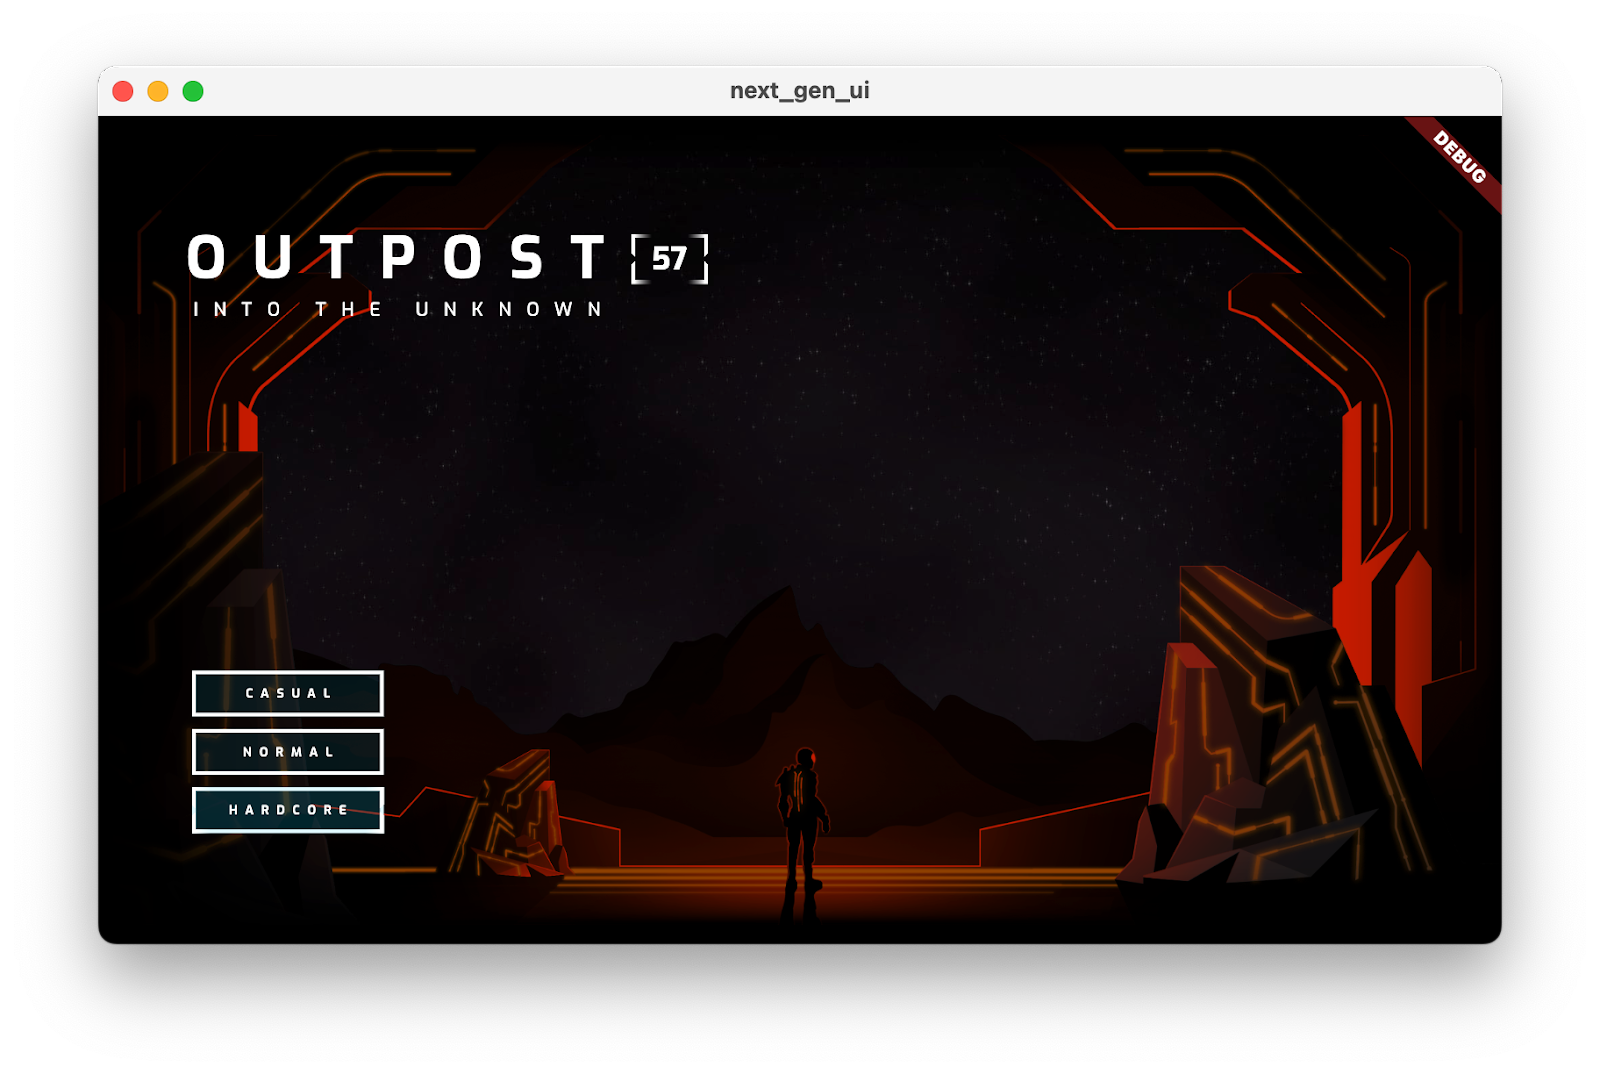
Вот интерфейс на двух разных уровнях сложности. Обратите внимание, что цвета уровня сложности, применяемые в качестве масок к изображениям в оттенках серого, создают реалистичный эффект отражения!
|
|
Добавить кнопку «Пуск»
- Обновите файл
title_screen_ui.dart. В виджетTitleScreenUiдобавьте следующее:
lib/title_screen/title_screen_ui.dart
class TitleScreenUi extends StatelessWidget {
  const TitleScreenUi({
    super.key,
    required this.difficulty,
    required this.onDifficultyPressed,
    required this.onDifficultyFocused,
  });

  final int difficulty;
  final void Function(int difficulty) onDifficultyPressed;
  final void Function(int? difficulty) onDifficultyFocused;

  @override
  Widget build(BuildContext context) {
    return Padding(
      padding: const EdgeInsets.symmetric(vertical: 40, horizontal: 50),
      child: Stack(
        children: [
          /// Title Text
          const TopLeft(
            child: UiScaler(
              alignment: Alignment.topLeft,
              child: _TitleText(),
            ),
          ),

          /// Difficulty Btns
          BottomLeft(
            child: UiScaler(
              alignment: Alignment.bottomLeft,
              child: _DifficultyBtns(
                difficulty: difficulty,
                onDifficultyPressed: onDifficultyPressed,
                onDifficultyFocused: onDifficultyFocused,
              ),
            ),
          ),

          /// StartBtn
          BottomRight(                                    // Add from here...
            child: UiScaler(
              alignment: Alignment.bottomRight,
              child: Padding(
                padding: const EdgeInsets.only(bottom: 20, right: 40),
                child: _StartBtn(onPressed: () {}),
              ),
            ),
          ),                                              // to here.
        ],
      ),
    );
  }
}
- Добавьте следующий виджет для реализации кнопки «Пуск»:
lib/title_screen/title_screen_ui.dart
class _StartBtn extends StatefulWidget {
  const _StartBtn({required this.onPressed});
  final VoidCallback onPressed;

  @override
  State<_StartBtn> createState() => _StartBtnState();
}

class _StartBtnState extends State<_StartBtn> {
  AnimationController? _btnAnim;
  bool _wasHovered = false;

  @override
  Widget build(BuildContext context) {
    return FocusableControlBuilder(
      cursor: SystemMouseCursors.click,
      onPressed: widget.onPressed,
      builder: (_, state) {
        if ((state.isHovered || state.isFocused) &&
            !_wasHovered &&
            _btnAnim?.status != AnimationStatus.forward) {
          _btnAnim?.forward(from: 0);
        }
        _wasHovered = (state.isHovered || state.isFocused);
        return SizedBox(
          width: 520,
          height: 100,
          child: Stack(
            children: [
              Positioned.fill(child: Image.asset(AssetPaths.titleStartBtn)),
              if (state.isHovered || state.isFocused) ...[
                Positioned.fill(
                    child: Image.asset(AssetPaths.titleStartBtnHover)),
              ],
              Center(
                child: Row(
                  mainAxisAlignment: MainAxisAlignment.end,
                  children: [
                    Text('START MISSION',
                        style: TextStyles.btn
                            .copyWith(fontSize: 24, letterSpacing: 18)),
                  ],
                ),
              ),
            ],
          ),
        );
      },
    );
  }
}
А вот приложение работает с полным набором кнопок.
5. Добавить анимацию
На этом этапе вы анимируете пользовательский интерфейс и цветовые переходы для графических ресурсов.
Плавный переход в заголовок
На этом этапе мы используем несколько подходов для анимации приложения Flutter. Один из них — flutter_animate . Анимации, реализованные в этом пакете, могут автоматически воспроизводиться при каждой горячей перезагрузке приложения, что ускоряет итерации разработки.
- Измените код в
lib/main.dartследующим образом:
lib/main.dart
import 'dart:io' show Platform;

import 'package:flutter/foundation.dart' show kIsWeb;
import 'package:flutter/material.dart';
import 'package:flutter_animate/flutter_animate.dart';   // Add this import
import 'package:window_size/window_size.dart';

import 'title_screen/title_screen.dart';

void main() {
  if (!kIsWeb && (Platform.isWindows || Platform.isLinux || Platform.isMacOS)) {
    WidgetsFlutterBinding.ensureInitialized();
    setWindowMinSize(const Size(800, 500));
  }
  Animate.restartOnHotReload = true;                     // Add this line
  runApp(const NextGenApp());
}

class NextGenApp extends StatelessWidget {
  const NextGenApp({super.key});

  @override
  Widget build(BuildContext context) {
    return MaterialApp(
      themeMode: ThemeMode.dark,
      darkTheme: ThemeData(brightness: Brightness.dark),
      home: const TitleScreen(),
    );
  }
}
- Чтобы воспользоваться пакетом
flutter_animate, необходимо импортировать его. Добавьте импорт вlib/title_screen/title_screen_ui.dartследующим образом:
lib/title_screen/title_screen_ui.dart
import 'package:extra_alignments/extra_alignments.dart';
import 'package:flutter/material.dart';
import 'package:flutter_animate/flutter_animate.dart';   // Add this import
import 'package:focusable_control_builder/focusable_control_builder.dart';
import 'package:gap/gap.dart';

import '../assets.dart';
import '../common/ui_scaler.dart';
import '../styles.dart';

class TitleScreenUi extends StatelessWidget {
- Добавьте анимацию к заголовку, отредактировав виджет
_TitleTextследующим образом:
lib/title_screen/title_screen_ui.dart
class _TitleText extends StatelessWidget {
  const _TitleText();

  @override
  Widget build(BuildContext context) {
    return Column(
      mainAxisSize: MainAxisSize.min,
      crossAxisAlignment: CrossAxisAlignment.start,
      children: [
        const Gap(20),
        Row(
          mainAxisSize: MainAxisSize.min,
          children: [
            Transform.translate(
              offset: Offset(-(TextStyles.h1.letterSpacing! * .5), 0),
              child: Text('OUTPOST', style: TextStyles.h1),
            ),
            Image.asset(AssetPaths.titleSelectedLeft, height: 65),
            Text('57', style: TextStyles.h2),
            Image.asset(AssetPaths.titleSelectedRight, height: 65),
          ],                                             // Edit from here...
        ).animate().fadeIn(delay: .8.seconds, duration: .7.seconds),
        Text('INTO THE UNKNOWN', style: TextStyles.h3)
            .animate()
            .fadeIn(delay: 1.seconds, duration: .7.seconds),
      ],                                                 // to here.
    );
  }
}
- Нажмите «Перезагрузить» , чтобы увидеть постепенное появление заголовка.
Плавное увеличение сложности кнопок
- Добавьте анимацию к первоначальному виду кнопок сложности, отредактировав виджет
_DifficultyBtnsследующим образом:
lib/title_screen/title_screen_ui.dart
class _DifficultyBtns extends StatelessWidget {
  const _DifficultyBtns({
    required this.difficulty,
    required this.onDifficultyPressed,
    required this.onDifficultyFocused,
  });

  final int difficulty;
  final void Function(int difficulty) onDifficultyPressed;
  final void Function(int? difficulty) onDifficultyFocused;

  @override
  Widget build(BuildContext context) {
    return Column(
      mainAxisSize: MainAxisSize.min,
      children: [
        _DifficultyBtn(
          label: 'Casual',
          selected: difficulty == 0,
          onPressed: () => onDifficultyPressed(0),
          onHover: (over) => onDifficultyFocused(over ? 0 : null),
        )                                                // Add from here...
            .animate()
            .fadeIn(delay: 1.3.seconds, duration: .35.seconds)
            .slide(begin: const Offset(0, .2)),          // to here
        _DifficultyBtn(
          label: 'Normal',
          selected: difficulty == 1,
          onPressed: () => onDifficultyPressed(1),
          onHover: (over) => onDifficultyFocused(over ? 1 : null),
        )                                                // Add from here...
            .animate()
            .fadeIn(delay: 1.5.seconds, duration: .35.seconds)
            .slide(begin: const Offset(0, .2)),          // to here
        _DifficultyBtn(
          label: 'Hardcore',
          selected: difficulty == 2,
          onPressed: () => onDifficultyPressed(2),
          onHover: (over) => onDifficultyFocused(over ? 2 : null),
        )                                                // Add from here...
            .animate()
            .fadeIn(delay: 1.7.seconds, duration: .35.seconds)
            .slide(begin: const Offset(0, .2)),          // to here
        const Gap(20),
      ],
    );
  }
}
- Нажмите «Перезагрузить» , чтобы увидеть кнопки уровня сложности, расположенные по порядку, а также небольшой сдвиг вверх в качестве бонуса.
Плавное появление кнопки «Пуск»
- Добавьте анимацию к кнопке «Пуск», отредактировав класс состояния
_StartBtnStateследующим образом:
lib/title_screen/title_screen_ui.dart
class _StartBtnState extends State<_StartBtn> {
  AnimationController? _btnAnim;
  bool _wasHovered = false;

  @override
  Widget build(BuildContext context) {
    return FocusableControlBuilder(
      cursor: SystemMouseCursors.click,
      onPressed: widget.onPressed,
      builder: (_, state) {
        if ((state.isHovered || state.isFocused) &&
            !_wasHovered &&
            _btnAnim?.status != AnimationStatus.forward) {
          _btnAnim?.forward(from: 0);
        }
        _wasHovered = (state.isHovered || state.isFocused);
        return SizedBox(
          width: 520,
          height: 100,
          child: Stack(
            children: [
              Positioned.fill(child: Image.asset(AssetPaths.titleStartBtn)),
              if (state.isHovered || state.isFocused) ...[
                Positioned.fill(
                    child: Image.asset(AssetPaths.titleStartBtnHover)),
              ],
              Center(
                child: Row(
                  mainAxisAlignment: MainAxisAlignment.end,
                  children: [
                    Text('START MISSION',
                        style: TextStyles.btn
                            .copyWith(fontSize: 24, letterSpacing: 18)),
                  ],
                ),
              ),
            ],
          )                                              // Edit from here...
              .animate(autoPlay: false, onInit: (c) => _btnAnim = c)
              .shimmer(duration: .7.seconds, color: Colors.black),
        )
            .animate()
            .fadeIn(delay: 2.3.seconds)
            .slide(begin: const Offset(0, .2));
      },                                                 // to here.
    );
  }
}
- Нажмите «Перезагрузить» , чтобы увидеть кнопки уровня сложности, расположенные по порядку, а также небольшой сдвиг вверх в качестве бонуса.
Анимировать эффект наведения указателя сложности
Добавьте анимацию к состоянию наведения кнопок сложности, отредактировав класс состояния _DifficultyBtn следующим образом:
lib/title_screen/title_screen_ui.dart
class _DifficultyBtn extends StatelessWidget {
  const _DifficultyBtn({
    required this.selected,
    required this.onPressed,
    required this.onHover,
    required this.label,
  });
  final String label;
  final bool selected;
  final VoidCallback onPressed;
  final void Function(bool hasFocus) onHover;

  @override
  Widget build(BuildContext context) {
    return FocusableControlBuilder(
      onPressed: onPressed,
      onHoverChanged: (_, state) => onHover.call(state.isHovered),
      builder: (_, state) {
        return Padding(
          padding: const EdgeInsets.all(8.0),
          child: SizedBox(
            width: 250,
            height: 60,
            child: Stack(
              children: [
                /// Bg with fill and outline
                AnimatedOpacity(                         // Edit from here
                  opacity: (!selected && (state.isHovered || state.isFocused))
                      ? 1
                      : 0,
                  duration: .3.seconds,
                  child: Container(
                    decoration: BoxDecoration(
                      color: const Color(0xFF00D1FF).withOpacity(.1),
                      border: Border.all(color: Colors.white, width: 5),
                    ),
                  ),
                ),                                       // to here.

                if (state.isHovered || state.isFocused) ...[
                  Container(
                    decoration: BoxDecoration(
                      color: const Color(0xFF00D1FF).withOpacity(.1),
                    ),
                  ),
                ],

                /// cross-hairs (selected state)
                if (selected) ...[
                  CenterLeft(
                    child: Image.asset(AssetPaths.titleSelectedLeft),
                  ),
                  CenterRight(
                    child: Image.asset(AssetPaths.titleSelectedRight),
                  ),
                ],

                /// Label
                Center(
                  child: Text(label.toUpperCase(), style: TextStyles.btn),
                ),
              ],
            ),
          ),
        );
      },
    );
  }
}
Кнопки сложности теперь отображают BoxDecoration при наведении курсора мыши на кнопку, которая не была выбрана.
Анимируйте изменение цвета
- Изменение цвета фона происходит мгновенно и резко. Лучше анимировать подсвеченные изображения при смене цветовых схем. Добавьте
flutter_animateвlib/title_screen/title_screen.dart:
lib/title_screen/title_screen.dart
import 'package:flutter/material.dart';
import 'package:flutter_animate/flutter_animate.dart';    // Add this import

import '../assets.dart';
import '../styles.dart';
import 'title_screen_ui.dart';

class TitleScreen extends StatefulWidget {
- Добавьте виджет
_AnimatedColorsвlib/title_screen/title_screen.dart:
lib/title_screen/title_screen.dart
class _AnimatedColors extends StatelessWidget {
  const _AnimatedColors({
    required this.emitColor,
    required this.orbColor,
    required this.builder,
  });

  final Color emitColor;
  final Color orbColor;

  final Widget Function(BuildContext context, Color orbColor, Color emitColor)
      builder;

  @override
  Widget build(BuildContext context) {
    final duration = .5.seconds;
    return TweenAnimationBuilder(
      tween: ColorTween(begin: emitColor, end: emitColor),
      duration: duration,
      builder: (_, emitColor, __) {
        return TweenAnimationBuilder(
          tween: ColorTween(begin: orbColor, end: orbColor),
          duration: duration,
          builder: (context, orbColor, __) {
            return builder(context, orbColor!, emitColor!);
          },
        );
      },
    );
  }
}
- Используйте только что созданный вами виджет для анимации цветов подсвеченных изображений, обновив метод
buildв_TitleScreenStateследующим образом:
lib/title_screen/title_screen.dart
class _TitleScreenState extends State<TitleScreen> {
  Color get _emitColor =>
      AppColors.emitColors[_difficultyOverride ?? _difficulty];
  Color get _orbColor =>
      AppColors.orbColors[_difficultyOverride ?? _difficulty];

  /// Selected difficulty
  int _difficulty = 0;

  /// Focused difficulty (if any)
  int? _difficultyOverride;

  void _handleDifficultyPressed(int value) {
    setState(() => _difficulty = value);
  }

  void _handleDifficultyFocused(int? value) {
    setState(() => _difficultyOverride = value);
  }

  final _finalReceiveLightAmt = 0.7;
  final _finalEmitLightAmt = 0.5;

  @override
  Widget build(BuildContext context) {
    return Scaffold(
      backgroundColor: Colors.black,
      body: Center(
        child: _AnimatedColors(                           // Edit from here...
          orbColor: _orbColor,
          emitColor: _emitColor,
          builder: (_, orbColor, emitColor) {
            return Stack(
              children: [
                /// Bg-Base
                Image.asset(AssetPaths.titleBgBase),

                /// Bg-Receive
                _LitImage(
                  color: orbColor,
                  imgSrc: AssetPaths.titleBgReceive,
                  lightAmt: _finalReceiveLightAmt,
                ),

                /// Mg-Base
                _LitImage(
                  imgSrc: AssetPaths.titleMgBase,
                  color: orbColor,
                  lightAmt: _finalReceiveLightAmt,
                ),

                /// Mg-Receive
                _LitImage(
                  imgSrc: AssetPaths.titleMgReceive,
                  color: orbColor,
                  lightAmt: _finalReceiveLightAmt,
                ),

                /// Mg-Emit
                _LitImage(
                  imgSrc: AssetPaths.titleMgEmit,
                  color: emitColor,
                  lightAmt: _finalEmitLightAmt,
                ),

                /// Fg-Rocks
                Image.asset(AssetPaths.titleFgBase),

                /// Fg-Receive
                _LitImage(
                  imgSrc: AssetPaths.titleFgReceive,
                  color: orbColor,
                  lightAmt: _finalReceiveLightAmt,
                ),

                /// Fg-Emit
                _LitImage(
                  imgSrc: AssetPaths.titleFgEmit,
                  color: emitColor,
                  lightAmt: _finalEmitLightAmt,
                ),

                /// UI
                Positioned.fill(
                  child: TitleScreenUi(
                    difficulty: _difficulty,
                    onDifficultyFocused: _handleDifficultyFocused,
                    onDifficultyPressed: _handleDifficultyPressed,
                  ),
                ),
              ],
            ).animate().fadeIn(duration: 1.seconds, delay: .3.seconds);
          },
        ),                                                // to here.
      ),
    );
  }
}
В этом последнем редактировании вы добавили анимацию к каждому элементу на экране, и теперь все выглядит намного лучше!
6. Добавьте фрагментные шейдеры
На этом этапе вы добавляете в приложение фрагментные шейдеры. Сначала вы используете шейдер для изменения заголовка, чтобы придать ему более антиутопический вид. Затем вы добавляете второй шейдер для создания сферы, которая станет центральной точкой страницы.
Искажение заголовка с помощью фрагментного шейдера
Это изменение добавляет пакет- provider , который позволяет передавать скомпилированные шейдеры вниз по дереву виджетов. Если вам интересно, как загружаются шейдеры, ознакомьтесь с реализацией в lib/assets.dart .
- Измените код в
lib/main.dartследующим образом:
lib/main.dart
import 'dart:io' show Platform;

import 'package:flutter/foundation.dart' show kIsWeb;
import 'package:flutter/material.dart';
import 'package:flutter_animate/flutter_animate.dart';
import 'package:provider/provider.dart';                 // Add this import
import 'package:window_size/window_size.dart';

import 'assets.dart';                                    // Add this import
import 'title_screen/title_screen.dart';

void main() {
  if (!kIsWeb && (Platform.isWindows || Platform.isLinux || Platform.isMacOS)) {
    WidgetsFlutterBinding.ensureInitialized();
    setWindowMinSize(const Size(800, 500));
  }
  Animate.restartOnHotReload = true;
  runApp(                                                // Edit from here...
    FutureProvider<FragmentPrograms?>(
      create: (context) => loadFragmentPrograms(),
      initialData: null,
      child: const NextGenApp(),
    ),
  );                                                     // to here.
}

class NextGenApp extends StatelessWidget {
  const NextGenApp({super.key});

  @override
  Widget build(BuildContext context) {
    return MaterialApp(
      themeMode: ThemeMode.dark,
      darkTheme: ThemeData(brightness: Brightness.dark),
      home: const TitleScreen(),
    );
  }
}
- Чтобы воспользоваться пакетом
providerи утилитами шейдеров, включенными вstep_01, необходимо их импортировать. Добавьте новые импорты вlib/title_screen/title_screen_ui.dartследующим образом:
lib/title_screen/title_screen_ui.dart
import 'package:extra_alignments/extra_alignments.dart';
import 'package:flutter/material.dart';
import 'package:flutter_animate/flutter_animate.dart';
import 'package:focusable_control_builder/focusable_control_builder.dart';
import 'package:gap/gap.dart';
import 'package:provider/provider.dart';                 // Add this import

import '../assets.dart';
import '../common/shader_effect.dart';                   // And this import
import '../common/ticking_builder.dart';                 // And this import
import '../common/ui_scaler.dart';
import '../styles.dart';

class TitleScreenUi extends StatelessWidget {
- Исказите заголовок с помощью шейдера, отредактировав виджет
_TitleText, как показано ниже:
lib/title_screen/title_screen_ui.dart
class _TitleText extends StatelessWidget {
  const _TitleText();

  @override
  Widget build(BuildContext context) {
    Widget content = Column(                             // Modify this line
      mainAxisSize: MainAxisSize.min,
      crossAxisAlignment: CrossAxisAlignment.start,
      children: [
        const Gap(20),
        Row(
          mainAxisSize: MainAxisSize.min,
          children: [
            Transform.translate(
              offset: Offset(-(TextStyles.h1.letterSpacing! * .5), 0),
              child: Text('OUTPOST', style: TextStyles.h1),
            ),
            Image.asset(AssetPaths.titleSelectedLeft, height: 65),
            Text('57', style: TextStyles.h2),
            Image.asset(AssetPaths.titleSelectedRight, height: 65),
          ],
        ).animate().fadeIn(delay: .8.seconds, duration: .7.seconds),
        Text('INTO THE UNKNOWN', style: TextStyles.h3)
            .animate()
            .fadeIn(delay: 1.seconds, duration: .7.seconds),
      ],
    );
    return Consumer<FragmentPrograms?>(                  // Add from here...
      builder: (context, fragmentPrograms, _) {
        if (fragmentPrograms == null) return content;
        return TickingBuilder(
          builder: (context, time) {
            return AnimatedSampler(
              (image, size, canvas) {
                const double overdrawPx = 30;
                final shader = fragmentPrograms.ui.fragmentShader();
                shader
                  ..setFloat(0, size.width)
                  ..setFloat(1, size.height)
                  ..setFloat(2, time)
                  ..setImageSampler(0, image);
                Rect rect = Rect.fromLTWH(-overdrawPx, -overdrawPx,
                    size.width + overdrawPx, size.height + overdrawPx);
                canvas.drawRect(rect, Paint()..shader = shader);
              },
              child: content,
            );
          },
        );
      },
    );                                                   // to here.
  }
}
Вы должны увидеть искажение названия — как и следовало ожидать от антиутопического будущего.
Добавьте шар
Теперь добавьте сферу в центр окна. Вам нужно добавить функцию обратного вызова onPressed к кнопке «Пуск».
- В
lib/title_screen/title_screen_ui.dartизменитеTitleScreenUiследующим образом:
lib/title_screen/title_screen_ui.dart
class TitleScreenUi extends StatelessWidget {
  const TitleScreenUi({
    super.key,
    required this.difficulty,
    required this.onDifficultyPressed,
    required this.onDifficultyFocused,
    required this.onStartPressed,                         // Add this argument
  });

  final int difficulty;
  final void Function(int difficulty) onDifficultyPressed;
  final void Function(int? difficulty) onDifficultyFocused;
  final VoidCallback onStartPressed;                      // Add this attribute

  @override
  Widget build(BuildContext context) {
    return Padding(
      padding: const EdgeInsets.symmetric(vertical: 40, horizontal: 50),
      child: Stack(
        children: [
          /// Title Text
          const TopLeft(
            child: UiScaler(
              alignment: Alignment.topLeft,
              child: _TitleText(),
            ),
          ),

          /// Difficulty Btns
          BottomLeft(
            child: UiScaler(
              alignment: Alignment.bottomLeft,
              child: _DifficultyBtns(
                difficulty: difficulty,
                onDifficultyPressed: onDifficultyPressed,
                onDifficultyFocused: onDifficultyFocused,
              ),
            ),
          ),

          /// StartBtn
          BottomRight(
            child: UiScaler(
              alignment: Alignment.bottomRight,
              child: Padding(
                padding: const EdgeInsets.only(bottom: 20, right: 40),
                child: _StartBtn(onPressed: onStartPressed),  // Edit this line
              ),
            ),
          ),
        ],
      ),
    );
  }
}
Теперь, когда вы модифицировали кнопку «Пуск» с помощью обратного вызова, вам нужно внести существенные изменения в файл lib/title_screen/title_screen.dart .
- Измените импорт следующим образом:
lib/title_screen/title_screen.dart
import 'dart:math';                                       // Add this import
import 'dart:ui';                                         // And this import

import 'package:flutter/material.dart';
import 'package:flutter/services.dart';                   // Add this import
import 'package:flutter_animate/flutter_animate.dart';

import '../assets.dart';
import '../orb_shader/orb_shader_config.dart';            // And this import
import '../orb_shader/orb_shader_widget.dart';            // And this import too
import '../styles.dart';
import 'title_screen_ui.dart';

class TitleScreen extends StatefulWidget {
- Измените
_TitleScreenState, чтобы он соответствовал следующему. Практически каждая часть класса изменяется тем или иным образом.
lib/title_screen/title_screen.dart
class _TitleScreenState extends State<TitleScreen>
    with SingleTickerProviderStateMixin {
  final _orbKey = GlobalKey<OrbShaderWidgetState>();

  /// Editable Settings
  /// 0-1, receive lighting strength
  final _minReceiveLightAmt = .35;
  final _maxReceiveLightAmt = .7;

  /// 0-1, emit lighting strength
  final _minEmitLightAmt = .5;
  final _maxEmitLightAmt = 1;

  /// Internal
  var _mousePos = Offset.zero;

  Color get _emitColor =>
      AppColors.emitColors[_difficultyOverride ?? _difficulty];
  Color get _orbColor =>
      AppColors.orbColors[_difficultyOverride ?? _difficulty];

  /// Selected difficulty
  int _difficulty = 0;

  /// Focused difficulty (if any)
  int? _difficultyOverride;
  double _orbEnergy = 0;
  double _minOrbEnergy = 0;

  double get _finalReceiveLightAmt {
    final light =
        lerpDouble(_minReceiveLightAmt, _maxReceiveLightAmt, _orbEnergy) ?? 0;
    return light + _pulseEffect.value * .05 * _orbEnergy;
  }

  double get _finalEmitLightAmt {
    return lerpDouble(_minEmitLightAmt, _maxEmitLightAmt, _orbEnergy) ?? 0;
  }

  late final _pulseEffect = AnimationController(
    vsync: this,
    duration: _getRndPulseDuration(),
    lowerBound: -1,
    upperBound: 1,
  );

  Duration _getRndPulseDuration() => 100.ms + 200.ms * Random().nextDouble();

  double _getMinEnergyForDifficulty(int difficulty) => switch (difficulty) {
        1 => 0.3,
        2 => 0.6,
        _ => 0,
      };


  @override
  void initState() {
    super.initState();
    _pulseEffect.forward();
    _pulseEffect.addListener(_handlePulseEffectUpdate);
  }

  void _handlePulseEffectUpdate() {
    if (_pulseEffect.status == AnimationStatus.completed) {
      _pulseEffect.reverse();
      _pulseEffect.duration = _getRndPulseDuration();
    } else if (_pulseEffect.status == AnimationStatus.dismissed) {
      _pulseEffect.duration = _getRndPulseDuration();
      _pulseEffect.forward();
    }
  }

  void _handleDifficultyPressed(int value) {
    setState(() => _difficulty = value);
    _bumpMinEnergy();
  }

  Future<void> _bumpMinEnergy([double amount = 0.1]) async {
    setState(() {
      _minOrbEnergy = _getMinEnergyForDifficulty(_difficulty) + amount;
    });
    await Future<void>.delayed(.2.seconds);
    setState(() {
      _minOrbEnergy = _getMinEnergyForDifficulty(_difficulty);
    });
  }

  void _handleStartPressed() => _bumpMinEnergy(0.3);

  void _handleDifficultyFocused(int? value) {
    setState(() {
      _difficultyOverride = value;
      if (value == null) {
        _minOrbEnergy = _getMinEnergyForDifficulty(_difficulty);
      } else {
        _minOrbEnergy = _getMinEnergyForDifficulty(value);
      }
    });
  }

  /// Update mouse position so the orbWidget can use it, doing it here prevents
  /// btns from blocking the mouse-move events in the widget itself.
  void _handleMouseMove(PointerHoverEvent e) {
    setState(() {
      _mousePos = e.localPosition;
    });
  }

  @override
  Widget build(BuildContext context) {
    return Scaffold(
      backgroundColor: Colors.black,
      body: Center(
        child: MouseRegion(
          onHover: _handleMouseMove,
          child: _AnimatedColors(
            orbColor: _orbColor,
            emitColor: _emitColor,
            builder: (_, orbColor, emitColor) {
              return Stack(
                children: [
                  /// Bg-Base
                  Image.asset(AssetPaths.titleBgBase),

                  /// Bg-Receive
                  _LitImage(
                    color: orbColor,
                    imgSrc: AssetPaths.titleBgReceive,
                    pulseEffect: _pulseEffect,
                    lightAmt: _finalReceiveLightAmt,
                  ),

                  /// Orb
                  Positioned.fill(
                    child: Stack(
                      children: [
                        // Orb
                        OrbShaderWidget(
                          key: _orbKey,
                          mousePos: _mousePos,
                          minEnergy: _minOrbEnergy,
                          config: OrbShaderConfig(
                            ambientLightColor: orbColor,
                            materialColor: orbColor,
                            lightColor: orbColor,
                          ),
                          onUpdate: (energy) => setState(() {
                            _orbEnergy = energy;
                          }),
                        ),
                      ],
                    ),
                  ),

                  /// Mg-Base
                  _LitImage(
                    imgSrc: AssetPaths.titleMgBase,
                    color: orbColor,
                    pulseEffect: _pulseEffect,
                    lightAmt: _finalReceiveLightAmt,
                  ),

                  /// Mg-Receive
                  _LitImage(
                    imgSrc: AssetPaths.titleMgReceive,
                    color: orbColor,
                    pulseEffect: _pulseEffect,
                    lightAmt: _finalReceiveLightAmt,
                  ),

                  /// Mg-Emit
                  _LitImage(
                    imgSrc: AssetPaths.titleMgEmit,
                    color: emitColor,
                    pulseEffect: _pulseEffect,
                    lightAmt: _finalEmitLightAmt,
                  ),

                  /// Fg-Rocks
                  Image.asset(AssetPaths.titleFgBase),

                  /// Fg-Receive
                  _LitImage(
                    imgSrc: AssetPaths.titleFgReceive,
                    color: orbColor,
                    pulseEffect: _pulseEffect,
                    lightAmt: _finalReceiveLightAmt,
                  ),

                  /// Fg-Emit
                  _LitImage(
                    imgSrc: AssetPaths.titleFgEmit,
                    color: emitColor,
                    pulseEffect: _pulseEffect,
                    lightAmt: _finalEmitLightAmt,
                  ),

                  /// UI
                  Positioned.fill(
                    child: TitleScreenUi(
                      difficulty: _difficulty,
                      onDifficultyFocused: _handleDifficultyFocused,
                      onDifficultyPressed: _handleDifficultyPressed,
                      onStartPressed: _handleStartPressed,
                    ),
                  ),
                ],
              ).animate().fadeIn(duration: 1.seconds, delay: .3.seconds);
            },
          ),
        ),
      ),
    );
  }
}
- Измените
_LitImageследующим образом:
lib/title_screen/title_screen.dart
class _LitImage extends StatelessWidget {
  const _LitImage({
    required this.color,
    required this.imgSrc,
    required this.pulseEffect,                            // Add this parameter
    required this.lightAmt,
  });
  final Color color;
  final String imgSrc;
  final AnimationController pulseEffect;                  // Add this attribute
  final double lightAmt;

  @override
  Widget build(BuildContext context) {
    final hsl = HSLColor.fromColor(color);
    return ListenableBuilder(                             // Edit from here...
      listenable: pulseEffect,
      builder: (context, child) {
        return Image.asset(
          imgSrc,
          color: hsl.withLightness(hsl.lightness * lightAmt).toColor(),
          colorBlendMode: BlendMode.modulate,
        );
      },
    );                                                    // to here.
  }
}
Это результат этого дополнения.
7. Добавьте анимацию частиц
На этом этапе вы добавляете анимацию частиц, чтобы создать в приложении едва уловимое пульсирующее движение.
Добавьте частицы повсюду
- Создайте новый файл
lib/title_screen/particle_overlay.dart, а затем добавьте следующий код:
lib/title_screen/particle_overlay.dart
import 'dart:math';

import 'package:flutter/material.dart';
import 'package:particle_field/particle_field.dart';
import 'package:rnd/rnd.dart';

class ParticleOverlay extends StatelessWidget {
  const ParticleOverlay({super.key, required this.color, required this.energy});

  final Color color;
  final double energy;

  @override
  Widget build(BuildContext context) {
    return ParticleField(
      spriteSheet: SpriteSheet(
        image: const AssetImage('assets/images/particle-wave.png'),
      ),
      // blend the image's alpha with the specified color:
      blendMode: BlendMode.dstIn,

      // this runs every tick:
      onTick: (controller, _, size) {
        List<Particle> particles = controller.particles;

        // add a new particle with random angle, distance & velocity:
        double a = rnd(pi * 2);
        double dist = rnd(1, 4) * 35 + 150 * energy;
        double vel = rnd(1, 2) * (1 + energy * 1.8);
        particles.add(Particle(
          // how many ticks this particle will live:
          lifespan: rnd(1, 2) * 20 + energy * 15,
          // starting distance from center:
          x: cos(a) * dist,
          y: sin(a) * dist,
          // starting velocity:
          vx: cos(a) * vel,
          vy: sin(a) * vel,
          // other starting values:
          rotation: a,
          scale: rnd(1, 2) * 0.6 + energy * 0.5,
        ));

        // update all of the particles:
        for (int i = particles.length - 1; i >= 0; i--) {
          Particle p = particles[i];
          if (p.lifespan <= 0) {
            // particle is expired, remove it:
            particles.removeAt(i);
            continue;
          }
          p.update(
            scale: p.scale * 1.025,
            vx: p.vx * 1.025,
            vy: p.vy * 1.025,
            color: color.withOpacity(p.lifespan * 0.001 + 0.01),
            lifespan: p.lifespan - 1,
          );
        }
      },
    );
  }
}
- Измените импорт для
lib/title_screen/title_screen.dartследующим образом:
lib/title_screen/title_screen.dart
import 'dart:math';
import 'dart:ui';

import 'package:flutter/material.dart';
import 'package:flutter/services.dart';
import 'package:flutter_animate/flutter_animate.dart';

import '../assets.dart';
import '../orb_shader/orb_shader_config.dart';
import '../orb_shader/orb_shader_widget.dart';
import '../styles.dart';
import 'particle_overlay.dart';                          // Add this import
import 'title_screen_ui.dart';

class TitleScreen extends StatefulWidget {
- Добавьте
ParticleOverlayв пользовательский интерфейс, изменив методbuild_TitleScreenStateследующим образом:
lib/title_screen/title_screen.dart
@override
Widget build(BuildContext context) {
  return Scaffold(
    backgroundColor: Colors.black,
    body: Center(
      child: MouseRegion(
        onHover: _handleMouseMove,
        child: _AnimatedColors(
          orbColor: _orbColor,
          emitColor: _emitColor,
          builder: (_, orbColor, emitColor) {
            return Stack(
              children: [
                /// Bg-Base
                Image.asset(AssetPaths.titleBgBase),

                /// Bg-Receive
                _LitImage(
                  color: orbColor,
                  imgSrc: AssetPaths.titleBgReceive,
                  pulseEffect: _pulseEffect,
                  lightAmt: _finalReceiveLightAmt,
                ),

                /// Orb
                Positioned.fill(
                  child: Stack(
                    children: [
                      // Orb
                      OrbShaderWidget(
                        key: _orbKey,
                        mousePos: _mousePos,
                        minEnergy: _minOrbEnergy,
                        config: OrbShaderConfig(
                          ambientLightColor: orbColor,
                          materialColor: orbColor,
                          lightColor: orbColor,
                        ),
                        onUpdate: (energy) => setState(() {
                          _orbEnergy = energy;
                        }),
                      ),
                    ],
                  ),
                ),

                /// Mg-Base
                _LitImage(
                  imgSrc: AssetPaths.titleMgBase,
                  color: orbColor,
                  pulseEffect: _pulseEffect,
                  lightAmt: _finalReceiveLightAmt,
                ),

                /// Mg-Receive
                _LitImage(
                  imgSrc: AssetPaths.titleMgReceive,
                  color: orbColor,
                  pulseEffect: _pulseEffect,
                  lightAmt: _finalReceiveLightAmt,
                ),

                /// Mg-Emit
                _LitImage(
                  imgSrc: AssetPaths.titleMgEmit,
                  color: emitColor,
                  pulseEffect: _pulseEffect,
                  lightAmt: _finalEmitLightAmt,
                ),

                /// Particle Field
                Positioned.fill(                          // Add from here...
                  child: IgnorePointer(
                    child: ParticleOverlay(
                      color: orbColor,
                      energy: _orbEnergy,
                    ),
                  ),
                ),                                        // to here.

                /// Fg-Rocks
                Image.asset(AssetPaths.titleFgBase),

                /// Fg-Receive
                _LitImage(
                  imgSrc: AssetPaths.titleFgReceive,
                  color: orbColor,
                  pulseEffect: _pulseEffect,
                  lightAmt: _finalReceiveLightAmt,
                ),

                /// Fg-Emit
                _LitImage(
                  imgSrc: AssetPaths.titleFgEmit,
                  color: emitColor,
                  pulseEffect: _pulseEffect,
                  lightAmt: _finalEmitLightAmt,
                ),

                /// UI
                Positioned.fill(
                  child: TitleScreenUi(
                    difficulty: _difficulty,
                    onDifficultyFocused: _handleDifficultyFocused,
                    onDifficultyPressed: _handleDifficultyPressed,
                    onStartPressed: _handleStartPressed,
                  ),
                ),
              ],
            ).animate().fadeIn(duration: 1.seconds, delay: .3.seconds);
          },
        ),
      ),
    ),
  );
}
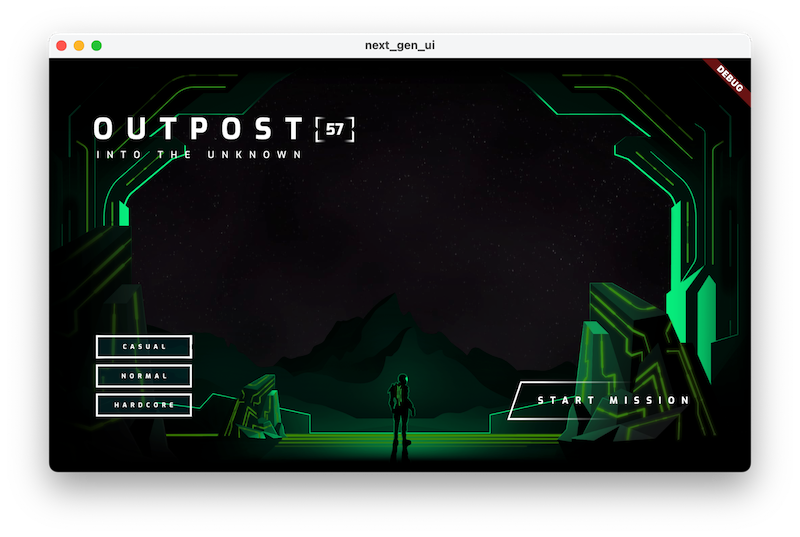
Конечный результат включает анимацию, фрагментные шейдеры и эффекты частиц — на нескольких платформах!
Добавляйте частицы везде — даже в паутину
В текущем коде есть одна небольшая проблема. При работе Flutter в вебе можно использовать два альтернативных движка рендеринга: движок CanvasKit, который используется по умолчанию в браузерах для настольных компьютеров, и HTML DOM-рендерер, который используется по умолчанию на мобильных устройствах. Проблема в том, что HTML DOM-рендерер не поддерживает фрагментные шейдеры.
Решение — сборка для веба с использованием только рендерера CanvasKit. Для этого добавьте флаг к команде сборки следующим образом:
$ flutter build web --web-renderer canvaskit
Font asset "MaterialIcons-Regular.otf" was tree-shaken, reducing it from 1645184 to 7692 bytes (99.5% reduction). Tree-shaking can be disabled by providing the --no-tree-shake-icons flag
when building your app.
Font asset "CupertinoIcons.ttf" was tree-shaken, reducing it from 257628 to 1172 bytes (99.5% reduction). Tree-shaking can be disabled by providing the --no-tree-shake-icons flag when
building your app.
Compiling lib/main.dart for the Web...                             15.6s
✓ Built build/web
Вот результат вашей тяжелой работы, на этот раз отображенный в браузере Chrome.
8. Поздравления
Вы создали полноценный игровой вступительный экран с анимацией, фрагментными шейдерами и анимацией частиц! Теперь вы можете использовать эти технологии на всех платформах, поддерживаемых Flutter.
Узнать больше
- Ознакомьтесь с пакетом
flutter_animate - Ознакомьтесь с документацией по поддержке фрагментных шейдеров Flutter.
- Книга шейдеров Патрисио Гонсалеса Виво и Джен Лоу
- Shader toy — совместная игровая площадка для шейдеров
- simple_shader , пример проекта фрагментных шейдеров Flutter