
1. परिचय
Flame, Flutter पर आधारित 2D गेम इंजन है. इस कोडलैब में, आपको 1970 के दशक के क्लासिक वीडियो गेम, स्टीव वॉज़्निक के Breakout से प्रेरित एक गेम बनाना होगा. बैट, बॉल, और ईंटें बनाने के लिए, आपको Flame के कॉम्पोनेंट का इस्तेमाल करना होगा. बल्ले के मूवमेंट को ऐनिमेट करने के लिए, Flame के इफ़ेक्ट का इस्तेमाल किया जाएगा. साथ ही, Flutter के स्टेटस मैनेजमेंट सिस्टम के साथ Flame को इंटिग्रेट करने का तरीका भी देखा जाएगा.
पूरा होने के बाद, आपका गेम इस ऐनिमेटेड GIF की तरह दिखेगा. हालांकि, यह थोड़ा धीमा होगा.

आपको क्या सीखने को मिलेगा
GameWidgetसे शुरू होने वाले, Flame के काम करने के बुनियादी तरीके.- गेम लूप का इस्तेमाल करने का तरीका.
- Flame के
Componentकैसे काम करते हैं. ये Flutter केWidgetसे मिलते-जुलते हैं. - कॉलिज़न को मैनेज करने का तरीका.
Componentको ऐनिमेट करने के लिए,Effectका इस्तेमाल करने का तरीका.- Flame गेम के ऊपर Flutter
Widgetको ओवरले करने का तरीका. - Flutter के स्टेट मैनेजमेंट के साथ Flame को इंटिग्रेट करने का तरीका.
आपको क्या बनाना है
इस कोडलैब में, आपको Flutter और Flame का इस्तेमाल करके 2D गेम बनाना है. गेम पूरा होने के बाद, यह इन शर्तों के मुताबिक होना चाहिए:
- Flutter के साथ काम करने वाले सभी छह प्लैटफ़ॉर्म पर काम करना: Android, iOS, Linux, macOS, Windows, और वेब
- Flame के गेम लूप का इस्तेमाल करके, कम से कम 60 फ़्रेम प्रति सेकंड (एफ़पीएस) बनाए रखें.
- 80 के दशक के आर्केड गेमिंग का अनुभव फिर से पाने के लिए,
google_fontsपैकेज औरflutter_animateजैसी Flutter की सुविधाओं का इस्तेमाल करें.
2. Flutter एनवायरमेंट सेट अप करना
संपादक
इस कोडलैब को आसान बनाने के लिए, यह माना गया है कि Visual Studio Code (VS Code) आपका डेवलपमेंट एनवायरमेंट है. VS Code का इस्तेमाल बिना किसी शुल्क के किया जा सकता है. यह सभी मुख्य प्लैटफ़ॉर्म पर काम करता है. हम इस कोडलैब के लिए VS Code का इस्तेमाल करते हैं, क्योंकि निर्देशों में डिफ़ॉल्ट रूप से VS Code के शॉर्टकट इस्तेमाल किए जाते हैं. टास्क आसान हो जाते हैं: "X करने के लिए, अपने एडिटर में सही कार्रवाई करें" के बजाय, "X करने के लिए, इस बटन पर क्लिक करें" या "इस बटन को दबाएं".
अपनी पसंद के किसी भी एडिटर का इस्तेमाल किया जा सकता है: Android Studio, अन्य IntelliJ IDE, Emacs, Vim या Notepad++. ये सभी Flutter के साथ काम करते हैं.

डेवलपमेंट का टारगेट चुनना
Flutter की मदद से, एक से ज़्यादा प्लैटफ़ॉर्म के लिए ऐप्लिकेशन बनाए जा सकते हैं. आपका ऐप्लिकेशन इनमें से किसी भी ऑपरेटिंग सिस्टम पर चल सकता है:
- iOS
- Android
- Windows
- macOS
- Linux
- वेब
आम तौर पर, डेवलपमेंट के टारगेट के तौर पर एक ऑपरेटिंग सिस्टम चुना जाता है. यह वह ऑपरेटिंग सिस्टम है जिस पर ऐप्लिकेशन को डेवलप करने के दौरान चलाया जाता है.

उदाहरण के लिए: मान लें कि आपने Flutter ऐप्लिकेशन डेवलप करने के लिए, Windows लैपटॉप का इस्तेमाल किया है. इसके बाद, आपने डेवलपमेंट के टारगेट के तौर पर Android को चुना है. अपने ऐप्लिकेशन की झलक देखने के लिए, किसी Android डिवाइस को यूएसबी केबल की मदद से अपने Windows लैपटॉप से कनेक्ट करें. इसके बाद, डेवलप किया जा रहा आपका ऐप्लिकेशन, कनेक्ट किए गए Android डिवाइस या Android एमुलेटर पर चलेगा. डेवलपमेंट के टारगेट के तौर पर Windows को चुना जा सकता था. इससे, आपका डेवलप किया जा रहा ऐप्लिकेशन, एडिटर के साथ-साथ Windows ऐप्लिकेशन के तौर पर भी चलता है.
हो सकता है कि आप डेवलपमेंट के टारगेट के तौर पर वेब को चुनें. हालांकि, डेवलपमेंट के दौरान इसका एक नुकसान है: आपको Flutter की स्टेटफ़ुल हॉट रीलोड सुविधा नहीं मिलती. फ़िलहाल, Flutter में वेब ऐप्लिकेशन को हॉट-रिलोड नहीं किया जा सकता.
जारी रखने से पहले कोई विकल्प चुनें. बाद में, अपने ऐप्लिकेशन को दूसरे ऑपरेटिंग सिस्टम पर कभी भी चलाया जा सकता है. डेवलपमेंट का टारगेट चुनने से, अगला चरण आसान हो जाता है.
Flutter इंस्टॉल करना
Flutter SDK टूल इंस्टॉल करने के सबसे अप-टू-डेट निर्देश, docs.flutter.dev पर देखे जा सकते हैं.
Flutter की वेबसाइट पर दिए गए निर्देशों में, SDK टूल और डेवलपमेंट टारगेट से जुड़े टूल और एडिटर प्लग इन को इंस्टॉल करने के बारे में बताया गया है. इस कोडलैब के लिए, यह सॉफ़्टवेयर इंस्टॉल करें:
- Flutter SDK टूल
- Flutter प्लग इन वाला Visual Studio Code
- आपके चुने गए डेवलपमेंट टारगेट के लिए कंपाइलर सॉफ़्टवेयर. (Windows को टारगेट करने के लिए, आपके पास Visual Studio होना चाहिए. वहीं, macOS या iOS को टारगेट करने के लिए, आपके पास Xcode होना चाहिए)
अगले सेक्शन में, आपको अपना पहला Flutter प्रोजेक्ट बनाना होगा.
अगर आपको किसी समस्या को हल करने में मदद चाहिए, तो StackOverflow पर मौजूद इन सवालों और जवाबों से आपको मदद मिल सकती है.
अक्सर पूछे जाने वाले सवाल
- मुझे Flutter SDK टूल का पाथ कैसे मिलेगा?
- अगर Flutter कमांड नहीं मिलता है, तो मुझे क्या करना चाहिए?
- मैं "स्टार्टअप लॉक को रिलीज़ करने के लिए, किसी दूसरे फ़्लटर कमांड का इंतज़ार कर रहा हूं" समस्या को कैसे ठीक करूं?
- मैं Flutter को कैसे बताऊं कि मेरा Android SDK इंस्टॉलेशन कहां है?
flutter doctor --android-licensesको चलाते समय, Java से जुड़ी गड़बड़ी को कैसे ठीक करें?- Android
sdkmanagerटूल न मिलने की समस्या को कैसे हल करें? - मैं "
cmdline-toolsकॉम्पोनेंट मौजूद नहीं है" गड़बड़ी को कैसे ठीक करूं? - मैं Apple Silicon (M1) पर CocoaPods को कैसे चलाऊं?
- मैं VS Code में, सेव करने पर अपने-आप फ़ॉर्मैट होने की सुविधा को कैसे बंद करूं?
3. प्रोजेक्ट बनाना
अपना पहला Flutter प्रोजेक्ट बनाना
इसके लिए, VS Code खोलें और अपनी चुनी गई डायरेक्ट्री में Flutter ऐप्लिकेशन टेंप्लेट बनाएं.
- Visual Studio Code खोलें.
- कमांड पैलेट (
F1याCtrl+Shift+PयाShift+Cmd+P) खोलें. इसके बाद, "flutter new" टाइप करें. यह विकल्प दिखने पर, Flutter: नया प्रोजेक्ट कमांड चुनें.

- ऐप्लिकेशन खाली करें को चुनें. वह डायरेक्ट्री चुनें जिसमें आपको अपना प्रोजेक्ट बनाना है. यह ऐसी कोई डायरेक्ट्री होनी चाहिए जिसके लिए खास अनुमतियां न ज़रूरी हों या जिसके पाथ में कोई स्पेस न हो. उदाहरण के लिए, आपकी होम डायरेक्ट्री या
C:\src\.

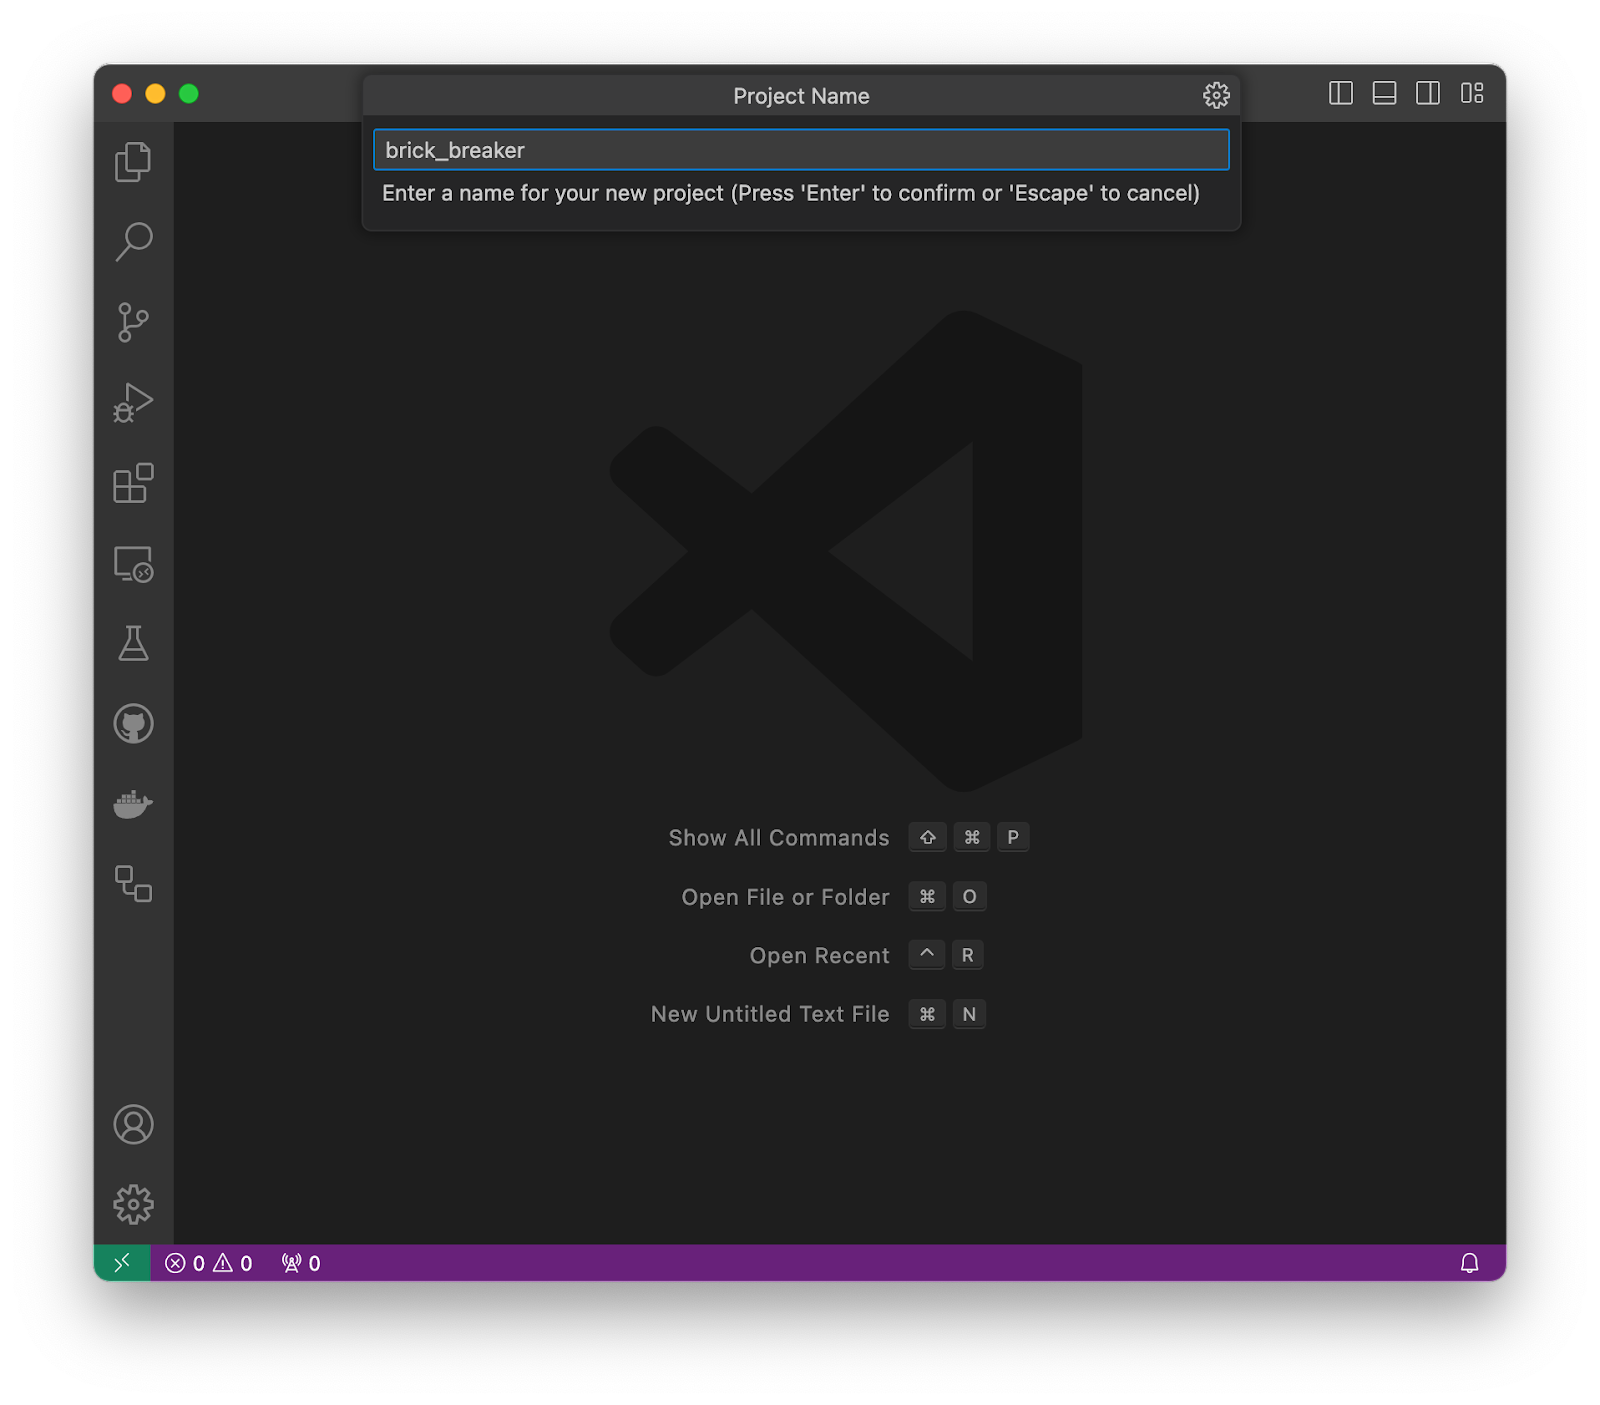
- अपने प्रोजेक्ट को
brick_breakerनाम दें. इस कोडलैब के बाकी हिस्से में, यह माना गया है कि आपने अपने ऐप्लिकेशन का नामbrick_breakerरखा है.
Flutter अब आपका प्रोजेक्ट फ़ोल्डर बनाता है और VS Code उसे खोलता है. अब आपको ऐप्लिकेशन के बुनियादी स्कैफ़ोल्ड की मदद से, दो फ़ाइलों के कॉन्टेंट को ओवरराइट करना होगा.
शुरुआती ऐप्लिकेशन को कॉपी करके चिपकाना
इससे, आपके ऐप्लिकेशन में इस कोडलैब में दिया गया उदाहरण कोड जुड़ जाता है.
- VS Code के बाएं पैनल में, एक्सप्लोरर पर क्लिक करें और
pubspec.yamlफ़ाइल खोलें.

- इस फ़ाइल के कॉन्टेंट को इनके साथ बदलें:
pubspec.yaml
name: brick_breaker
description: "Re-implementing Woz's Breakout"
publish_to: 'none'
version: 0.1.0

environment:
  sdk: ^3.8.0

dependencies:
  flutter:
    sdk: flutter
  flame: ^1.28.1
  flutter_animate: ^4.5.2
  google_fonts: ^6.2.1

dev_dependencies:
  flutter_test:
    sdk: flutter
  flutter_lints: ^5.0.0

flutter:
  uses-material-design: true
pubspec.yaml फ़ाइल में आपके ऐप्लिकेशन के बारे में बुनियादी जानकारी होती है. जैसे, उसका मौजूदा वर्शन, उसकी डिपेंडेंसी, और वे एसेट जिनके साथ उसे शिप किया जाएगा.
lib/डायरेक्ट्री मेंmain.dartफ़ाइल खोलें.

- इस फ़ाइल के कॉन्टेंट को इनके साथ बदलें:
lib/main.dart
import 'package:flame/game.dart';
import 'package:flutter/material.dart';

void main() {
  final game = FlameGame();
  runApp(GameWidget(game: game));
}
- यह पक्का करने के लिए कि सब कुछ ठीक से काम कर रहा है, यह कोड चलाएं. आपको एक नई विंडो दिखेगी, जिसमें सिर्फ़ काला बैकग्राउंड होगा. दुनिया का सबसे खराब वीडियो गेम अब 60fps पर रेंडर हो रहा है!

4. गेम बनाना
गेम का साइज़ तय करना
दो डाइमेंशन (2D) में खेले जाने वाले गेम के लिए, प्लेसमेंट की जगह की ज़रूरत होती है. आपको खास डाइमेंशन का एक क्षेत्र बनाना होगा. इसके बाद, इन डाइमेंशन का इस्तेमाल करके गेम के अन्य पहलुओं का साइज़ तय करना होगा.
गेमिंग प्लैटफ़ॉर्म में निर्देशांक डालने के कई तरीके हैं. एक समझौते के मुताबिक, स्क्रीन के बीच में मौजूद ऑरिजिन (0,0)से, स्क्रीन के बीच से दिशा को मेज़र किया जा सकता है. साथ ही, पॉज़िटिव वैल्यू, आइटम को x-ऐक्सिस के साथ दाईं ओर और y-ऐक्सिस के साथ ऊपर ले जाती हैं. यह स्टैंडर्ड, इन दिनों ज़्यादातर मौजूदा गेम पर लागू होता है. खास तौर पर, उन गेम पर लागू होता है जिनमें तीन डाइमेंशन होते हैं.
ओरिजनल Breakout गेम बनाते समय, ऑरिजिन को सबसे ऊपर बाएं कोने में सेट किया गया था. x की पॉज़िटिव दिशा वही रही, लेकिन y को फ़्लिप कर दिया गया. x की पॉज़िटिव दिशा दाईं ओर और y की दिशा नीचे थी. इस गेम में, ऑरिजिन को सबसे ऊपर बाएं कोने में सेट किया गया है, ताकि गेम में उस समय की भावनाएं बनी रहें.
lib/src नाम की नई डायरेक्ट्री में, config.dart नाम की फ़ाइल बनाएं. इस फ़ाइल में, अगले चरणों में ज़्यादा कॉन्स्टेंट जोड़े जाएंगे.
lib/src/config.dart
const gameWidth = 820.0;
const gameHeight = 1600.0;
इस गेम का साइज़ 820 पिक्सल चौड़ा और 1600 पिक्सल ऊंचा होगा. गेम का क्षेत्र, उस विंडो में फ़िट होने के लिए स्केल होता है जिसमें उसे दिखाया जाता है. हालांकि, स्क्रीन में जोड़े गए सभी कॉम्पोनेंट इस ऊंचाई और चौड़ाई के मुताबिक होते हैं.
PlayArea बनाना
Breakout गेम में, गेंद खेलने की जगह की दीवारों से उछलती है. कॉलिज़न की सुविधा इस्तेमाल करने के लिए, आपको पहले PlayArea कॉम्पोनेंट की ज़रूरत होगी.
lib/src/componentsनाम की नई डायरेक्ट्री में,play_area.dartनाम की फ़ाइल बनाएं.- इस फ़ाइल में ये चीज़ें जोड़ें.
lib/src/components/play_area.dart
import 'dart:async';

import 'package:flame/components.dart';
import 'package:flutter/material.dart';

import '../brick_breaker.dart';

class PlayArea extends RectangleComponent with HasGameReference<BrickBreaker> {
  PlayArea() : super(paint: Paint()..color = const Color(0xfff2e8cf));

  @override
  FutureOr<void> onLoad() async {
    super.onLoad();
    size = Vector2(game.width, game.height);
  }
}
Flutter में Widget होते हैं, जबकि Flame में Component होते हैं. Flutter ऐप्लिकेशन में विजेट के ट्री बनाए जाते हैं, जबकि Flame गेम में कॉम्पोनेंट के ट्री बनाए जाते हैं.
यही फ़्लटर और फ़्लेम के बीच का दिलचस्प अंतर है. Flutter का विजेट ट्री, कुछ समय के लिए दिखने वाला ब्यौरा होता है. इसे, लगातार बदलने वाली और बदलाव की जा सकने वाली RenderObject लेयर को अपडेट करने के लिए बनाया गया है. Flame के कॉम्पोनेंट, लगातार मौजूद रहते हैं और इनमें बदलाव किया जा सकता है. ऐसा इसलिए किया जाता है, ताकि डेवलपर इन कॉम्पोनेंट का इस्तेमाल सिम्युलेशन सिस्टम के हिस्से के तौर पर कर सके.
Flame के कॉम्पोनेंट, गेम के मेकेनिक्स को दिखाने के लिए ऑप्टिमाइज़ किए गए हैं. यह कोडलैब, अगले चरण में दिखाए गए गेम लूप से शुरू होगा.
- कॉम्पोनेंट को व्यवस्थित करने के लिए, इस प्रोजेक्ट में सभी कॉम्पोनेंट वाली फ़ाइल जोड़ें.
lib/src/componentsमेंcomponents.dartफ़ाइल बनाएं और नीचे दिया गया कॉन्टेंट जोड़ें.
lib/src/components/components.dart
export 'play_area.dart';
export डायरेक्टिव, import डायरेक्टिव की भूमिका के उलट काम करता है. इससे यह पता चलता है कि किसी दूसरी फ़ाइल में इंपोर्ट करने पर, यह फ़ाइल कौनसी सुविधाएं दिखाती है. नीचे दिए गए चरणों में नए कॉम्पोनेंट जोड़ने पर, इस फ़ाइल में ज़्यादा एंट्री होंगी.
Flame गेम बनाना
पिछले चरण में दिखने वाले लाल रंग के स्क्विगल हटाने के लिए, Flame के FlameGame के लिए नया सबक्लास बनाएं.
lib/srcमेंbrick_breaker.dartनाम की फ़ाइल बनाएं और नीचे दिया गया कोड जोड़ें.
lib/src/brick_breaker.dart
import 'dart:async';

import 'package:flame/components.dart';
import 'package:flame/game.dart';

import 'components/components.dart';
import 'config.dart';

class BrickBreaker extends FlameGame {
  BrickBreaker()
    : super(
        camera: CameraComponent.withFixedResolution(
          width: gameWidth,
          height: gameHeight,
        ),
      );

  double get width => size.x;
  double get height => size.y;

  @override
  FutureOr<void> onLoad() async {
    super.onLoad();

    camera.viewfinder.anchor = Anchor.topLeft;

    world.add(PlayArea());
  }
}
यह फ़ाइल, गेम की कार्रवाइयों को मैनेज करती है. गेम इंस्टेंस बनाने के दौरान, यह कोड गेम को तय रिज़ॉल्यूशन रेंडरिंग का इस्तेमाल करने के लिए कॉन्फ़िगर करता है. गेम को स्क्रीन के साइज़ के हिसाब से बदला जाता है, ताकि वह स्क्रीन को पूरी तरह से भर सके. साथ ही, ज़रूरत के हिसाब से लेटरबॉक्सिंग जोड़ी जाती है.
गेम की चौड़ाई और ऊंचाई को एक्सपोज़ किया जाता है, ताकि PlayArea जैसे चाइल्ड कॉम्पोनेंट अपने-आप सही साइज़ पर सेट हो सकें.
onLoad ओवरराइड किए गए तरीके में, आपका कोड दो कार्रवाइयां करता है.
- व्यूफ़ाइंडर के लिए, सबसे ऊपर बाईं ओर को ऐंकर के तौर पर कॉन्फ़िगर करता है. डिफ़ॉल्ट रूप से,
viewfinder(0,0)के लिए, एरिया के बीच में मौजूद बिंदु का इस्तेमाल ऐंकर के तौर पर करता है. PlayAreaकोworldमें जोड़ता है. 'विश्व' से गेम की दुनिया का पता चलता है. यहCameraComponentके व्यू ट्रांसफ़ॉर्मेशन की मदद से, अपने सभी चाइल्ड व्यू को प्रोजेक्ट करता है.
गेम को स्क्रीन पर दिखाना
इस चरण में किए गए सभी बदलाव देखने के लिए, अपनी lib/main.dart फ़ाइल में नीचे दिए गए बदलाव करें.
lib/main.dart
import 'package:flame/game.dart';
import 'package:flutter/material.dart';

import 'src/brick_breaker.dart';                                // Add this import

void main() {
  final game = BrickBreaker();                                  // Modify this line
  runApp(GameWidget(game: game));
}
ये बदलाव करने के बाद, गेम को रीस्टार्ट करें. गेम, इस इमेज में दिखने वाले गेम जैसा होना चाहिए.

अगले चरण में, आपको दुनिया में एक गेंद जोड़नी होगी और उसे चलाना होगा!
5. गेंद दिखाना
बॉल कॉम्पोनेंट बनाना
स्क्रीन पर चलती हुई गेंद डालने के लिए, एक और कॉम्पोनेंट बनाना होता है और उसे गेम वर्ल्ड में जोड़ना होता है.
lib/src/config.dartफ़ाइल के कॉन्टेंट में इस तरह बदलाव करें.
lib/src/config.dart
const gameWidth = 820.0;
const gameHeight = 1600.0;
const ballRadius = gameWidth * 0.02;                            // Add this constant
नाम वाली कॉन्स्टेंट को व्युत्पन्न वैल्यू के तौर पर तय करने का डिज़ाइन पैटर्न, इस कोडलैब में कई बार दिखेगा. इससे, टॉप लेवल gameWidth और gameHeight में बदलाव करके यह पता लगाया जा सकता है कि नतीजों के हिसाब से गेम का लुक और स्टाइल कैसे बदलता है.
lib/src/componentsमेंball.dartनाम की फ़ाइल मेंBallकॉम्पोनेंट बनाएं.
lib/src/components/ball.dart
import 'package:flame/components.dart';
import 'package:flutter/material.dart';

class Ball extends CircleComponent {
  Ball({
    required this.velocity,
    required super.position,
    required double radius,
  }) : super(
         radius: radius,
         anchor: Anchor.center,
         paint: Paint()
           ..color = const Color(0xff1e6091)
           ..style = PaintingStyle.fill,
       );

  final Vector2 velocity;

  @override
  void update(double dt) {
    super.update(dt);
    position += velocity * dt;
  }
}
आपने पहले RectangleComponent का इस्तेमाल करके PlayArea तय किया था. इसलिए, यह माना जा सकता है कि ज़्यादा आकार मौजूद हैं. CircleComponent, RectangleComponent की तरह ही PositionedComponent से लिया गया है, ताकि आप स्क्रीन पर बॉल को पोज़िशन कर सकें. सबसे अहम बात यह है कि इसकी जगह को अपडेट किया जा सकता है.
इस कॉम्पोनेंट में, velocity या समय के साथ पोज़िशन में बदलाव के कॉन्सेप्ट के बारे में बताया गया है. वेलोसिटी एक Vector2 ऑब्जेक्ट है, क्योंकि वेलोसिटी, स्पीड और दिशा, दोनों होती है. पोज़िशन अपडेट करने के लिए, update तरीके को बदलें. गेम इंजन हर फ़्रेम के लिए इस तरीके का इस्तेमाल करता है. dt, पिछले फ़्रेम और इस फ़्रेम के बीच की अवधि है. इससे आपको अलग-अलग फ़्रेम रेट (60hz या 120hz) या ज़्यादा कंप्यूटेशन की वजह से लंबे फ़्रेम जैसे फ़ैक्टर के हिसाब से बदलाव करने में मदद मिलती है.
position += velocity * dt अपडेट पर खास ध्यान दें. इस तरह, समय के साथ गति के अलग-अलग सिम्युलेशन को अपडेट किया जा सकता है.
- कॉम्पोनेंट की सूची में
Ballकॉम्पोनेंट को शामिल करने के लिए,lib/src/components/components.dartफ़ाइल में इस तरह बदलाव करें.
lib/src/components/components.dart
export 'ball.dart';                           // Add this export
export 'play_area.dart';
दुनिया में गेंद जोड़ना
आपके पास एक बॉल है. इसे दुनिया में कहीं भी रखें और प्ले एरिया में घुमाने के लिए सेट अप करें.
lib/src/brick_breaker.dart फ़ाइल में इस तरह बदलाव करें.
lib/src/brick_breaker.dart
import 'dart:async';
import 'dart:math' as math;                                     // Add this import

import 'package:flame/components.dart';
import 'package:flame/game.dart';

import 'components/components.dart';
import 'config.dart';

class BrickBreaker extends FlameGame {
  BrickBreaker()
    : super(
        camera: CameraComponent.withFixedResolution(
          width: gameWidth,
          height: gameHeight,
        ),
      );

  final rand = math.Random();                                   // Add this variable
  double get width => size.x;
  double get height => size.y;

  @override
  FutureOr<void> onLoad() async {
    super.onLoad();

    camera.viewfinder.anchor = Anchor.topLeft;

    world.add(PlayArea());

    world.add(
      Ball(                                                     // Add from here...
        radius: ballRadius,
        position: size / 2,
        velocity: Vector2(
          (rand.nextDouble() - 0.5) * width,
          height * 0.2,
        ).normalized()..scale(height / 4),
      ),
    );

    debugMode = true;                                           // To here.
  }
}
इस बदलाव से, world में Ball कॉम्पोनेंट जुड़ जाता है. गेम के बीच में बॉल का position सेट करने के लिए, कोड पहले गेम के साइज़ को आधा कर देता है. ऐसा इसलिए होता है, क्योंकि Vector2 को स्केलर वैल्यू के हिसाब से स्केल करने के लिए, Vector2 में ऑपरेटर ओवरलोड (* और /) होते हैं.
गेंद के velocity को सेट करने में ज़्यादा मुश्किल होती है. इसका मकसद, बॉल को स्क्रीन पर किसी भी दिशा में और सही स्पीड से नीचे की ओर ले जाना है. normalized तरीके को कॉल करने पर, ओरिजनल Vector2 की ही दिशा में सेट किया गया Vector2 ऑब्जेक्ट बनता है. हालांकि, इसकी दूरी 1 पर स्केल की जाती है. इससे बॉल की स्पीड एक जैसी रहती है, भले ही वह किसी भी दिशा में जाए. इसके बाद, गेंद की रफ़्तार को गेम की ऊंचाई के 1/4 हिस्से तक बढ़ा दिया जाता है.
इन अलग-अलग वैल्यू को सही करने के लिए, कुछ बदलाव करने पड़ते हैं. इसे इंडस्ट्री में 'प्लेटेस्टिंग' भी कहा जाता है.
आखिरी लाइन, डीबगिंग डिसप्ले को चालू करती है. इससे डिसप्ले में ज़्यादा जानकारी जुड़ जाती है, ताकि डीबग करने में मदद मिल सके.
अब गेम चलाने पर, आपको यह डिसप्ले दिखेगा.

PlayArea कॉम्पोनेंट और Ball कॉम्पोनेंट, दोनों में डीबग करने से जुड़ी जानकारी होती है. हालांकि, बैकग्राउंड मैट, PlayArea के नंबर को काट देते हैं. आपको हर चीज़ की डीबगिंग जानकारी इसलिए दिख रही है, क्योंकि आपने पूरे कॉम्पोनेंट ट्री के लिए debugMode चालू किया है. अगर आपके लिए सिर्फ़ चुनिंदा कॉम्पोनेंट के लिए डीबगिंग चालू करना ज़्यादा फ़ायदेमंद है, तो ऐसा भी किया जा सकता है.
गेम को कुछ बार रीस्टार्ट करने पर, आपको लग सकता है कि गेंद दीवारों से ठीक से नहीं टकरती. यह इफ़ेक्ट पाने के लिए, आपको टक्कर का पता लगाने की सुविधा जोड़नी होगी. यह सुविधा अगले चरण में जोड़ी जाएगी.
6. बाउंस करना
टक्कर का पता लगाने की सुविधा जोड़ना
टक्कर का पता लगाने की सुविधा से, आपके गेम में एक ऐसा व्यवहार जुड़ जाता है जिससे यह पता चलता है कि दो ऑब्जेक्ट आपस में कब टकराए.
गेम में टक्कर का पता लगाने की सुविधा जोड़ने के लिए, BrickBreaker गेम में HasCollisionDetection मिक्सिन जोड़ें, जैसा कि नीचे दिए गए कोड में दिखाया गया है.
lib/src/brick_breaker.dart
import 'dart:async';
import 'dart:math' as math;

import 'package:flame/components.dart';
import 'package:flame/game.dart';

import 'components/components.dart';
import 'config.dart';

class BrickBreaker extends FlameGame with HasCollisionDetection { // Modify this line
  BrickBreaker()
    : super(
        camera: CameraComponent.withFixedResolution(
          width: gameWidth,
          height: gameHeight,
        ),
      );

  final rand = math.Random();
  double get width => size.x;
  double get height => size.y;

  @override
  FutureOr<void> onLoad() async {
    super.onLoad();

    camera.viewfinder.anchor = Anchor.topLeft;

    world.add(PlayArea());

    world.add(
      Ball(
        radius: ballRadius,
        position: size / 2,
        velocity: Vector2(
          (rand.nextDouble() - 0.5) * width,
          height * 0.2,
        ).normalized()..scale(height / 4),
      ),
    );

    debugMode = true;
  }
}
यह कॉम्पोनेंट के हिटबॉक्स को ट्रैक करता है और हर गेम टिक पर, कॉललिज़न कॉलबैक को ट्रिगर करता है.
गेम के हिटबॉक्स को पॉप्युलेट करने के लिए, PlayArea कॉम्पोनेंट में नीचे दिखाए गए तरीके से बदलाव करें.
lib/src/components/play_area.dart
import 'dart:async';

import 'package:flame/collisions.dart';                         // Add this import
import 'package:flame/components.dart';
import 'package:flutter/material.dart';

import '../brick_breaker.dart';

class PlayArea extends RectangleComponent with HasGameReference<BrickBreaker> {
  PlayArea()
    : super(
        paint: Paint()..color = const Color(0xfff2e8cf),
        children: [RectangleHitbox()],                          // Add this parameter
      );

  @override
  FutureOr<void> onLoad() async {
    super.onLoad();
    size = Vector2(game.width, game.height);
  }
}
RectangleComponent के चाइल्ड कॉम्पोनेंट के तौर पर RectangleHitbox कॉम्पोनेंट जोड़ने पर, पैरंट कॉम्पोनेंट के साइज़ से मेल खाने वाला हिट बॉक्स बनेगा. यह हिट बॉक्स, टक्कर का पता लगाने के लिए बनाया जाएगा. RectangleHitbox के लिए एक फ़ैक्ट्री कन्स्ट्रक्टर है, जिसे relative कहा जाता है. इसका इस्तेमाल तब किया जाता है, जब आपको पैरंट कॉम्पोनेंट से छोटा या बड़ा हिटबॉक्स चाहिए.
गेंद को बाउंस करना
अब तक, गेमप्ले में कोई बदलाव नहीं हुआ है. Ball कॉम्पोनेंट में बदलाव करने के बाद, यह बदल जाता है. PlayArea से टकराने पर, गेंद के व्यवहार में बदलाव करना होगा.
Ball कॉम्पोनेंट में इस तरह बदलाव करें.
lib/src/components/ball.dart
import 'package:flame/collisions.dart';                         // Add this import
import 'package:flame/components.dart';
import 'package:flutter/material.dart';

import '../brick_breaker.dart';                                 // And this import
import 'play_area.dart';                                        // And this one too

class Ball extends CircleComponent
    with CollisionCallbacks, HasGameReference<BrickBreaker> {   // Add these mixins
  Ball({
    required this.velocity,
    required super.position,
    required double radius,
  }) : super(
         radius: radius,
         anchor: Anchor.center,
         paint: Paint()
           ..color = const Color(0xff1e6091)
           ..style = PaintingStyle.fill,
         children: [CircleHitbox()],                            // Add this parameter
       );

  final Vector2 velocity;

  @override
  void update(double dt) {
    super.update(dt);
    position += velocity * dt;
  }

  @override                                                     // Add from here...
  void onCollisionStart(
    Set<Vector2> intersectionPoints,
    PositionComponent other,
  ) {
    super.onCollisionStart(intersectionPoints, other);
    if (other is PlayArea) {
      if (intersectionPoints.first.y <= 0) {
        velocity.y = -velocity.y;
      } else if (intersectionPoints.first.x <= 0) {
        velocity.x = -velocity.x;
      } else if (intersectionPoints.first.x >= game.width) {
        velocity.x = -velocity.x;
      } else if (intersectionPoints.first.y >= game.height) {
        removeFromParent();
      }
    } else {
      debugPrint('collision with $other');
    }
  }                                                             // To here.
}
इस उदाहरण में, onCollisionStart कॉलबैक जोड़ने के साथ एक बड़ा बदलाव किया गया है. पिछले उदाहरण में BrickBreaker में जोड़ा गया, टक्कर का पता लगाने वाला सिस्टम, इस कॉलबैक को कॉल करता है.
सबसे पहले, कोड यह जांच करता है कि Ball, PlayArea से टकराया है या नहीं. फ़िलहाल, ऐसा लगता है कि यह सुविधा ज़रूरी नहीं है, क्योंकि गेम की दुनिया में कोई दूसरा कॉम्पोनेंट नहीं है. अगले चरण में, जब आप दुनिया में एक बैट जोड़ेंगे, तो यह बदल जाएगा. इसके बाद, यह else शर्त भी जोड़ता है, ताकि जब गेंद बल्ले के अलावा किसी और चीज़ से टकराए, तो उसे मैनेज किया जा सके. अगर आप चाहें, तो बचे हुए लॉजिक को लागू करने के लिए एक रिमाइंडर.
जब गेंद सबसे नीचे की दीवार से टकरती है, तो वह खेलने की जगह से गायब हो जाती है. हालांकि, वह गेंद अब भी दिखती रहती है. इस आर्टफ़ैक्ट को अगले चरण में, Flame के इफ़ेक्ट की मदद से मैनेज किया जा सकता है.
अब आपने गेम की दीवारों से गेंद को टकराने की सुविधा जोड़ दी है. अब खिलाड़ी को गेंद को मारने के लिए बल्ला देना ज़रूरी है...
7. गेंद को बल्ले से मारना
बैट बनाना
गेम में गेंद को खेल में बनाए रखने के लिए बैट जोड़ने के लिए,
lib/src/config.dartफ़ाइल में कुछ कॉन्स्टेंट इस तरह डालें.
lib/src/config.dart
const gameWidth = 820.0;
const gameHeight = 1600.0;
const ballRadius = gameWidth * 0.02;
const batWidth = gameWidth * 0.2;                               // Add from here...
const batHeight = ballRadius * 2;
const batStep = gameWidth * 0.05;                               // To here.
batHeight और batWidth कॉन्स्टेंट के बारे में अपने-आप जानकारी मिल जाती है. वहीं दूसरी ओर, batStep कॉन्स्टेंट के बारे में थोड़ी जानकारी देना ज़रूरी है. इस गेम में गेंद से इंटरैक्ट करने के लिए, प्लेयर माउस या उंगली से बल्ले को खींच सकता है. यह प्लैटफ़ॉर्म के हिसाब से होता है. इसके अलावा, कीबोर्ड का इस्तेमाल भी किया जा सकता है. batStep कॉन्स्टेंट से यह तय होता है कि बाईं या दाईं ऐरो बटन दबाने पर, बैट कितनी दूर तक जाएगा.
Batकॉम्पोनेंट क्लास को इस तरह से तय करें.
lib/src/components/bat.dart
import 'package:flame/collisions.dart';
import 'package:flame/components.dart';
import 'package:flame/effects.dart';
import 'package:flame/events.dart';
import 'package:flutter/material.dart';

import '../brick_breaker.dart';

class Bat extends PositionComponent
    with DragCallbacks, HasGameReference<BrickBreaker> {
  Bat({
    required this.cornerRadius,
    required super.position,
    required super.size,
  }) : super(anchor: Anchor.center, children: [RectangleHitbox()]);

  final Radius cornerRadius;

  final _paint = Paint()
    ..color = const Color(0xff1e6091)
    ..style = PaintingStyle.fill;

  @override
  void render(Canvas canvas) {
    super.render(canvas);
    canvas.drawRRect(
      RRect.fromRectAndRadius(Offset.zero & size.toSize(), cornerRadius),
      _paint,
    );
  }

  @override
  void onDragUpdate(DragUpdateEvent event) {
    super.onDragUpdate(event);
    position.x = (position.x + event.localDelta.x).clamp(0, game.width);
  }

  void moveBy(double dx) {
    add(
      MoveToEffect(
        Vector2((position.x + dx).clamp(0, game.width), position.y),
        EffectController(duration: 0.1),
      ),
    );
  }
}
इस कॉम्पोनेंट में कुछ नई सुविधाएं जोड़ी गई हैं.
पहला, Bat कॉम्पोनेंट PositionComponent है, न कि RectangleComponent या CircleComponent. इसका मतलब है कि इस कोड को स्क्रीन पर Bat रेंडर करना होगा. ऐसा करने के लिए, यह render कॉलबैक को बदल देता है.
canvas.drawRRect (राउंड किए गए रेक्टैंगल बनाएं) कॉल को ध्यान से देखने पर, आपके मन में यह सवाल आ सकता है कि "रेक्टैंगल कहां है?" Offset.zero & size.toSize(), dart:ui Offset क्लास पर operator & ओवरलोड का फ़ायदा उठाता है, जो Rect बनाता है. शुरुआत में, शॉर्टहैंड आपको भ्रमित कर सकता है. हालांकि, आपको इसे Flutter और Flame के लोअर लेवल के कोड में अक्सर दिखेगा.
दूसरा, इस Bat कॉम्पोनेंट को प्लैटफ़ॉर्म के हिसाब से, फ़िंगर या माउस का इस्तेमाल करके खींचा और छोड़ा जा सकता है. इस सुविधा को लागू करने के लिए, DragCallbacks मिक्सिन जोड़ें और onDragUpdate इवेंट को बदलें.
आखिर में, Bat कॉम्पोनेंट को कीबोर्ड कंट्रोल का जवाब देना होगा. moveBy फ़ंक्शन की मदद से, दूसरे कोड से इस बैट को कुछ वर्चुअल पिक्सल तक बाईं या दाईं ओर ले जाने के लिए कहा जा सकता है. इस फ़ंक्शन की मदद से, Flame गेम इंजन की एक नई सुविधा का इस्तेमाल किया जा सकता है: Effects. इस कॉम्पोनेंट के चाइल्ड के तौर पर MoveToEffect ऑब्जेक्ट जोड़ने पर, खिलाड़ी को बल्ले को ऐनिमेशन के साथ नई जगह पर जाते हुए दिखता है. Flame में अलग-अलग तरह के इफ़ेक्ट लागू करने के लिए, Effect का एक कलेक्शन उपलब्ध है.
इफ़ेक्ट के कन्स्ट्रक्टर आर्ग्युमेंट में, game गटर का रेफ़रंस शामिल होता है. इसलिए, इस क्लास में HasGameReference मिक्सिन शामिल करें. यह मिक्सिन, कॉम्पोनेंट ट्री में सबसे ऊपर मौजूद BrickBreaker इंस्टेंस को ऐक्सेस करने के लिए, इस कॉम्पोनेंट में टाइप-सेफ़ game ऐक्सेसर जोड़ता है.
BatकोBrickBreakerके लिए उपलब्ध कराने के लिए,lib/src/components/components.dartफ़ाइल को इस तरह अपडेट करें.
lib/src/components/components.dart
export 'ball.dart';
export 'bat.dart';                                              // Add this export
export 'play_area.dart';
दुनिया में बैट जोड़ना
गेम वर्ल्ड में Bat कॉम्पोनेंट जोड़ने के लिए, BrickBreaker को इस तरह अपडेट करें.
lib/src/brick_breaker.dart
import 'dart:async';
import 'dart:math' as math;

import 'package:flame/components.dart';
import 'package:flame/events.dart';                             // Add this import
import 'package:flame/game.dart';
import 'package:flutter/material.dart';                         // And this import
import 'package:flutter/services.dart';                         // And this

import 'components/components.dart';
import 'config.dart';

class BrickBreaker extends FlameGame
    with HasCollisionDetection, KeyboardEvents {                // Modify this line
  BrickBreaker()
    : super(
        camera: CameraComponent.withFixedResolution(
          width: gameWidth,
          height: gameHeight,
        ),
      );

  final rand = math.Random();
  double get width => size.x;
  double get height => size.y;

  @override
  FutureOr<void> onLoad() async {
    super.onLoad();

    camera.viewfinder.anchor = Anchor.topLeft;

    world.add(PlayArea());

    world.add(
      Ball(
        radius: ballRadius,
        position: size / 2,
        velocity: Vector2(
          (rand.nextDouble() - 0.5) * width,
          height * 0.2,
        ).normalized()..scale(height / 4),
      ),
    );

    world.add(                                                  // Add from here...
      Bat(
        size: Vector2(batWidth, batHeight),
        cornerRadius: const Radius.circular(ballRadius / 2),
        position: Vector2(width / 2, height * 0.95),
      ),
    );                                                          // To here.

    debugMode = true;
  }

  @override                                                     // Add from here...
  KeyEventResult onKeyEvent(
    KeyEvent event,
    Set<LogicalKeyboardKey> keysPressed,
  ) {
    super.onKeyEvent(event, keysPressed);
    switch (event.logicalKey) {
      case LogicalKeyboardKey.arrowLeft:
        world.children.query<Bat>().first.moveBy(-batStep);
      case LogicalKeyboardKey.arrowRight:
        world.children.query<Bat>().first.moveBy(batStep);
    }
    return KeyEventResult.handled;
  }                                                             // To here.
}
KeyboardEvents मिक्सिन और बदले गए onKeyEvent तरीके को जोड़ने से, कीबोर्ड इनपुट को मैनेज किया जाता है. बैट को सही चरण की संख्या तक ले जाने के लिए, पहले जोड़ा गया कोड याद करें.
जोड़े गए कोड का बाकी हिस्सा, गेम की दुनिया में बैट को सही जगह और सही अनुपात में जोड़ता है. इस फ़ाइल में सभी सेटिंग मौजूद होने से, गेम के सही अनुभव के लिए बैट और बॉल के साइज़ में आसानी से बदलाव किया जा सकता है.
इस स्थिति में गेम खेलने पर, आपको पता चलता है कि गेंद को रोकने के लिए बैट को हिलाया जा सकता है. हालांकि, आपको Ball के टकराव का पता लगाने वाले कोड में छोड़ी गई डीबग लॉगिंग के अलावा कोई जवाब नहीं मिलता.
अब इसे ठीक करने का समय आ गया है. Ball कॉम्पोनेंट में इस तरह बदलाव करें.
lib/src/components/ball.dart
import 'package:flame/collisions.dart';
import 'package:flame/components.dart';
import 'package:flame/effects.dart';                           // Add this import
import 'package:flutter/material.dart';

import '../brick_breaker.dart';
import 'bat.dart';                                             // And this import
import 'play_area.dart';

class Ball extends CircleComponent
    with CollisionCallbacks, HasGameReference<BrickBreaker> {
  Ball({
    required this.velocity,
    required super.position,
    required double radius,
  }) : super(
         radius: radius,
         anchor: Anchor.center,
         paint: Paint()
           ..color = const Color(0xff1e6091)
           ..style = PaintingStyle.fill,
         children: [CircleHitbox()],
       );

  final Vector2 velocity;

  @override
  void update(double dt) {
    super.update(dt);
    position += velocity * dt;
  }

  @override
  void onCollisionStart(
    Set<Vector2> intersectionPoints,
    PositionComponent other,
  ) {
    super.onCollisionStart(intersectionPoints, other);
    if (other is PlayArea) {
      if (intersectionPoints.first.y <= 0) {
        velocity.y = -velocity.y;
      } else if (intersectionPoints.first.x <= 0) {
        velocity.x = -velocity.x;
      } else if (intersectionPoints.first.x >= game.width) {
        velocity.x = -velocity.x;
      } else if (intersectionPoints.first.y >= game.height) {
        add(RemoveEffect(delay: 0.35));                         // Modify from here...
      }
    } else if (other is Bat) {
      velocity.y = -velocity.y;
      velocity.x =
          velocity.x +
          (position.x - other.position.x) / other.size.x * game.width * 0.3;
    } else {                                                    // To here.
      debugPrint('collision with $other');
    }
  }
}
कोड में किए गए इन बदलावों से, दो अलग-अलग समस्याएं हल होती हैं.
सबसे पहले, यह गेंद के स्क्रीन पर सबसे नीचे पहुंचते ही, गेंद के अचानक से गायब होने की समस्या को ठीक करता है. इस समस्या को ठीक करने के लिए, removeFromParent कॉल को RemoveEffect से बदलें. RemoveEffect, गेंद को गेम वर्ल्ड से हटा देता है. ऐसा तब होता है, जब गेंद दिखने वाले प्लेसमेंट से बाहर निकल जाती है.
दूसरा, इन बदलावों से बल्ले और गेंद के बीच होने वाली टक्कर को ठीक किया गया है. यह हैंडल करने वाला कोड, खिलाड़ी के पक्ष में काम करता है. जब तक खिलाड़ी बल्ले से गेंद को छूता है, तब तक गेंद स्क्रीन पर सबसे ऊपर दिखती है. अगर आपको लगता है कि यह गेमिंग अनुभव ज़्यादा आसान है और आपको ज़्यादा असली अनुभव चाहिए, तो गेमिंग अनुभव को अपने हिसाब से बनाने के लिए, इस हैंडल करने के तरीके में बदलाव करें.
velocity अपडेट की जटिलता को बताना ज़रूरी है. यह सिर्फ़ वेलोसिटी के y कॉम्पोनेंट को उलट नहीं करता, जैसा कि दीवार से टकराने के लिए किया गया था. यह x कॉम्पोनेंट को भी इस तरह अपडेट करता है कि यह बैट और गेंद के संपर्क के समय की सापेक्ष स्थिति पर निर्भर करता है. इससे खिलाड़ी को इस बात पर ज़्यादा कंट्रोल मिलता है कि गेंद क्या करेगी. हालांकि, गेंद के व्यवहार के बारे में खिलाड़ी को गेम खेलने के दौरान ही पता चलता है.
अब आपके पास गेंद को हिट करने के लिए बैट है. अब कुछ ईंटें भी मिल जाएं, ताकि गेंद से उन्हें तोड़ा जा सके!
8. दीवार को तोड़ना
ब्रिक बनाना
गेम में ब्रिक जोड़ने के लिए,
lib/src/config.dartफ़ाइल में कुछ कॉन्स्टेंट इस तरह डालें.
lib/src/config.dart
import 'package:flutter/material.dart';                         // Add this import

const brickColors = [                                           // Add this const
  Color(0xfff94144),
  Color(0xfff3722c),
  Color(0xfff8961e),
  Color(0xfff9844a),
  Color(0xfff9c74f),
  Color(0xff90be6d),
  Color(0xff43aa8b),
  Color(0xff4d908e),
  Color(0xff277da1),
  Color(0xff577590),
];

const gameWidth = 820.0;
const gameHeight = 1600.0;
const ballRadius = gameWidth * 0.02;
const batWidth = gameWidth * 0.2;
const batHeight = ballRadius * 2;
const batStep = gameWidth * 0.05;
const brickGutter = gameWidth * 0.015;                          // Add from here...
final brickWidth =
    (gameWidth - (brickGutter * (brickColors.length + 1))) / brickColors.length;
const brickHeight = gameHeight * 0.03;
const difficultyModifier = 1.03;                                // To here.
Brickकॉम्पोनेंट को इस तरह डालें.
lib/src/components/brick.dart
import 'package:flame/collisions.dart';
import 'package:flame/components.dart';
import 'package:flutter/material.dart';

import '../brick_breaker.dart';
import '../config.dart';
import 'ball.dart';
import 'bat.dart';

class Brick extends RectangleComponent
    with CollisionCallbacks, HasGameReference<BrickBreaker> {
  Brick({required super.position, required Color color})
    : super(
        size: Vector2(brickWidth, brickHeight),
        anchor: Anchor.center,
        paint: Paint()
          ..color = color
          ..style = PaintingStyle.fill,
        children: [RectangleHitbox()],
      );

  @override
  void onCollisionStart(
    Set<Vector2> intersectionPoints,
    PositionComponent other,
  ) {
    super.onCollisionStart(intersectionPoints, other);
    removeFromParent();

    if (game.world.children.query<Brick>().length == 1) {
      game.world.removeAll(game.world.children.query<Ball>());
      game.world.removeAll(game.world.children.query<Bat>());
    }
  }
}
अब तक, आपको इस कोड के ज़्यादातर हिस्सों के बारे में पता चल गया होगा. यह कोड, कॉम्पोनेंट ट्री में सबसे ऊपर मौजूद BrickBreaker गेम के लिए, टाइप-सेफ़ रेफ़रंस और टक्कर का पता लगाने की सुविधा, दोनों के साथ RectangleComponent का इस्तेमाल करता है.
इस कोड में सबसे अहम नया कॉन्सेप्ट यह है कि खिलाड़ी जीतने की शर्त को कैसे पूरा करता है. जीतने की शर्त की जांच, दुनिया में ब्रिक की संख्या की जांच करती है और यह पुष्टि करती है कि सिर्फ़ एक ब्रिक बची है. यह थोड़ा भ्रमित करने वाला हो सकता है, क्योंकि पिछली लाइन इस ब्रिक को उसके पैरंट से हटा देती है.
ध्यान रखें कि कॉम्पोनेंट हटाने का निर्देश, सूची में शामिल किया गया निर्देश होता है. यह कोड चलने के बाद, ब्रिक को हटा देता है. हालांकि, यह गेम वर्ल्ड के अगले टिक से पहले हट जाता है.
Brick कॉम्पोनेंट को BrickBreaker के लिए ऐक्सेस करने लायक बनाने के लिए, lib/src/components/components.dart में यह तरीका अपनाकर बदलाव करें.
lib/src/components/components.dart
export 'ball.dart';
export 'bat.dart';
export 'brick.dart';                                            // Add this export
export 'play_area.dart';
वर्ल्ड में ब्रिक जोड़ना
Ball कॉम्पोनेंट को इस तरह अपडेट करें.
lib/src/components/ball.dart
import 'package:flame/collisions.dart';
import 'package:flame/components.dart';
import 'package:flame/effects.dart';
import 'package:flutter/material.dart';

import '../brick_breaker.dart';
import 'bat.dart';
import 'brick.dart';                                            // Add this import
import 'play_area.dart';

class Ball extends CircleComponent
    with CollisionCallbacks, HasGameReference<BrickBreaker> {
  Ball({
    required this.velocity,
    required super.position,
    required double radius,
    required this.difficultyModifier,                           // Add this parameter
  }) : super(
         radius: radius,
         anchor: Anchor.center,
         paint: Paint()
           ..color = const Color(0xff1e6091)
           ..style = PaintingStyle.fill,
         children: [CircleHitbox()],
       );

  final Vector2 velocity;
  final double difficultyModifier;                              // Add this member

  @override
  void update(double dt) {
    super.update(dt);
    position += velocity * dt;
  }

  @override
  void onCollisionStart(
    Set<Vector2> intersectionPoints,
    PositionComponent other,
  ) {
    super.onCollisionStart(intersectionPoints, other);
    if (other is PlayArea) {
      if (intersectionPoints.first.y <= 0) {
        velocity.y = -velocity.y;
      } else if (intersectionPoints.first.x <= 0) {
        velocity.x = -velocity.x;
      } else if (intersectionPoints.first.x >= game.width) {
        velocity.x = -velocity.x;
      } else if (intersectionPoints.first.y >= game.height) {
        add(RemoveEffect(delay: 0.35));
      }
    } else if (other is Bat) {
      velocity.y = -velocity.y;
      velocity.x =
          velocity.x +
          (position.x - other.position.x) / other.size.x * game.width * 0.3;
    } else if (other is Brick) {                                // Modify from here...
      if (position.y < other.position.y - other.size.y / 2) {
        velocity.y = -velocity.y;
      } else if (position.y > other.position.y + other.size.y / 2) {
        velocity.y = -velocity.y;
      } else if (position.x < other.position.x) {
        velocity.x = -velocity.x;
      } else if (position.x > other.position.x) {
        velocity.x = -velocity.x;
      }
      velocity.setFrom(velocity * difficultyModifier);          // To here.
    }
  }
}
इसमें एक नया फ़ीचर जोड़ा गया है. यह एक कठिनाई मॉडिफ़ायर है, जो हर ईंट से टकराने के बाद बॉल की स्पीड बढ़ाता है. इस पैरामीटर को गेम में आज़माकर, यह पता लगाया जा सकता है कि आपके गेम के लिए कठिनाई का कौनसा लेवल सही है.
BrickBreaker गेम में इस तरह बदलाव करें.
lib/src/brick_breaker.dart
import 'dart:async';
import 'dart:math' as math;

import 'package:flame/components.dart';
import 'package:flame/events.dart';
import 'package:flame/game.dart';
import 'package:flutter/material.dart';
import 'package:flutter/services.dart';

import 'components/components.dart';
import 'config.dart';

class BrickBreaker extends FlameGame
    with HasCollisionDetection, KeyboardEvents {
  BrickBreaker()
    : super(
        camera: CameraComponent.withFixedResolution(
          width: gameWidth,
          height: gameHeight,
        ),
      );

  final rand = math.Random();
  double get width => size.x;
  double get height => size.y;

  @override
  FutureOr<void> onLoad() async {
    super.onLoad();

    camera.viewfinder.anchor = Anchor.topLeft;

    world.add(PlayArea());

    world.add(
      Ball(
        difficultyModifier: difficultyModifier,                 // Add this argument
        radius: ballRadius,
        position: size / 2,
        velocity: Vector2(
          (rand.nextDouble() - 0.5) * width,
          height * 0.2,
        ).normalized()..scale(height / 4),
      ),
    );

    world.add(
      Bat(
        size: Vector2(batWidth, batHeight),
        cornerRadius: const Radius.circular(ballRadius / 2),
        position: Vector2(width / 2, height * 0.95),
      ),
    );

    await world.addAll([                                        // Add from here...
      for (var i = 0; i < brickColors.length; i++)
        for (var j = 1; j <= 5; j++)
          Brick(
            position: Vector2(
              (i + 0.5) * brickWidth + (i + 1) * brickGutter,
              (j + 2.0) * brickHeight + j * brickGutter,
            ),
            color: brickColors[i],
          ),
    ]);                                                         // To here.

    debugMode = true;
  }

  @override
  KeyEventResult onKeyEvent(
    KeyEvent event,
    Set<LogicalKeyboardKey> keysPressed,
  ) {
    super.onKeyEvent(event, keysPressed);
    switch (event.logicalKey) {
      case LogicalKeyboardKey.arrowLeft:
        world.children.query<Bat>().first.moveBy(-batStep);
      case LogicalKeyboardKey.arrowRight:
        world.children.query<Bat>().first.moveBy(batStep);
    }
    return KeyEventResult.handled;
  }
}
अगर गेम को मौजूदा तौर पर चलाया जाता है, तो यह गेम के सभी मुख्य मैकेनिक दिखाता है. डीबगिंग बंद करके, इसे पूरा मान लिया जा सकता है. हालांकि, ऐसा करने पर आपको कुछ कमी महसूस होगी.

वेलकम स्क्रीन, गेम खत्म होने की स्क्रीन, और स्कोर की जानकारी देने वाली स्क्रीन के बारे में क्या सोचें? Flutter, गेम में ये सुविधाएं जोड़ सकता है. अब आपको इन सुविधाओं पर ध्यान देना होगा.
9. गेम जीतना
वीडियो चलाने की स्थितियां जोड़ना
इस चरण में, आपको Flutter रैपर में Flame गेम को जोड़ना होगा. इसके बाद, वेलकम, गेम खत्म होने, और जीतने की स्क्रीन के लिए Flutter ओवरले जोड़ने होंगे.
सबसे पहले, गेम और कॉम्पोनेंट फ़ाइलों में बदलाव करके, गेम की स्थिति लागू की जाती है. इससे यह पता चलता है कि ओवरले दिखाना है या नहीं. अगर दिखाना है, तो कौनसा ओवरले दिखाना है.
BrickBreakerगेम में इस तरह बदलाव करें.
lib/src/brick_breaker.dart
import 'dart:async';
import 'dart:math' as math;

import 'package:flame/components.dart';
import 'package:flame/events.dart';
import 'package:flame/game.dart';
import 'package:flutter/material.dart';
import 'package:flutter/services.dart';

import 'components/components.dart';
import 'config.dart';

enum PlayState { welcome, playing, gameOver, won }              // Add this enumeration

class BrickBreaker extends FlameGame
    with HasCollisionDetection, KeyboardEvents, TapDetector {   // Modify this line
  BrickBreaker()
    : super(
        camera: CameraComponent.withFixedResolution(
          width: gameWidth,
          height: gameHeight,
        ),
      );

  final rand = math.Random();
  double get width => size.x;
  double get height => size.y;

  late PlayState _playState;                                    // Add from here...
  PlayState get playState => _playState;
  set playState(PlayState playState) {
    _playState = playState;
    switch (playState) {
      case PlayState.welcome:
      case PlayState.gameOver:
      case PlayState.won:
        overlays.add(playState.name);
      case PlayState.playing:
        overlays.remove(PlayState.welcome.name);
        overlays.remove(PlayState.gameOver.name);
        overlays.remove(PlayState.won.name);
    }
  }                                                             // To here.

  @override
  FutureOr<void> onLoad() async {
    super.onLoad();

    camera.viewfinder.anchor = Anchor.topLeft;

    world.add(PlayArea());

    playState = PlayState.welcome;                              // Add from here...
  }

  void startGame() {
    if (playState == PlayState.playing) return;

    world.removeAll(world.children.query<Ball>());
    world.removeAll(world.children.query<Bat>());
    world.removeAll(world.children.query<Brick>());

    playState = PlayState.playing;                              // To here.

    world.add(
      Ball(
        difficultyModifier: difficultyModifier,
        radius: ballRadius,
        position: size / 2,
        velocity: Vector2(
          (rand.nextDouble() - 0.5) * width,
          height * 0.2,
        ).normalized()..scale(height / 4),
      ),
    );

    world.add(
      Bat(
        size: Vector2(batWidth, batHeight),
        cornerRadius: const Radius.circular(ballRadius / 2),
        position: Vector2(width / 2, height * 0.95),
      ),
    );

    world.addAll([                                              // Drop the await
      for (var i = 0; i < brickColors.length; i++)
        for (var j = 1; j <= 5; j++)
          Brick(
            position: Vector2(
              (i + 0.5) * brickWidth + (i + 1) * brickGutter,
              (j + 2.0) * brickHeight + j * brickGutter,
            ),
            color: brickColors[i],
          ),
    ]);
  }                                                             // Drop the debugMode

  @override                                                     // Add from here...
  void onTap() {
    super.onTap();
    startGame();
  }                                                             // To here.

  @override
  KeyEventResult onKeyEvent(
    KeyEvent event,
    Set<LogicalKeyboardKey> keysPressed,
  ) {
    super.onKeyEvent(event, keysPressed);
    switch (event.logicalKey) {
      case LogicalKeyboardKey.arrowLeft:
        world.children.query<Bat>().first.moveBy(-batStep);
      case LogicalKeyboardKey.arrowRight:
        world.children.query<Bat>().first.moveBy(batStep);
      case LogicalKeyboardKey.space:                            // Add from here...
      case LogicalKeyboardKey.enter:
        startGame();                                            // To here.
    }
    return KeyEventResult.handled;
  }

  @override
  Color backgroundColor() => const Color(0xfff2e8cf);          // Add this override
}
यह कोड, BrickBreaker गेम में काफ़ी बदलाव करता है. playState एनोटेशन जोड़ने में काफ़ी मेहनत लगती है. इससे यह पता चलता है कि गेम में प्लेयर किस स्थिति में है. जैसे, गेम में शामिल होना, गेम खेलना, गेम में हारना या जीतना. फ़ाइल में सबसे ऊपर, एनोटेशन तय किया जाता है. इसके बाद, इसे मैच करने वाले गेट्टर और सेटर के साथ छिपी हुई स्थिति के तौर पर इंस्टैंशिएट किया जाता है. जब गेम के अलग-अलग हिस्सों में गेम की स्थिति में बदलाव होता है, तो ये गेट्टर और सेटर ओवरले में बदलाव करने की सुविधा देते हैं.
इसके बाद, onLoad कोड को onLoad और नए startGame तरीके में बांटें. इस बदलाव से पहले, गेम को रीस्टार्ट करके ही नया गेम शुरू किया जा सकता था. इन नए बदलावों के बाद, खिलाड़ी अब बिना किसी ज़रूरी शर्त के नया गेम शुरू कर सकता है.
खिलाड़ी को नया गेम शुरू करने की अनुमति देने के लिए, आपने गेम के लिए दो नए हैंडलर कॉन्फ़िगर किए हैं. आपने टैप हैंडलर जोड़ा है और कीबोर्ड हैंडलर को बड़ा किया है, ताकि उपयोगकर्ता कई तरीकों से नया गेम शुरू कर सके. गेम की स्थिति को मॉडल करने के बाद, कॉम्पोनेंट को अपडेट करना सही रहेगा. इससे, खिलाड़ी के जीतने या हारने पर, गेम की स्थिति में बदलाव ट्रिगर हो सकेगा.
Ballकॉम्पोनेंट में इस तरह बदलाव करें.
lib/src/components/ball.dart
import 'package:flame/collisions.dart';
import 'package:flame/components.dart';
import 'package:flame/effects.dart';
import 'package:flutter/material.dart';

import '../brick_breaker.dart';
import 'bat.dart';
import 'brick.dart';
import 'play_area.dart';

class Ball extends CircleComponent
    with CollisionCallbacks, HasGameReference<BrickBreaker> {
  Ball({
    required this.velocity,
    required super.position,
    required double radius,
    required this.difficultyModifier,
  }) : super(
         radius: radius,
         anchor: Anchor.center,
         paint: Paint()
           ..color = const Color(0xff1e6091)
           ..style = PaintingStyle.fill,
         children: [CircleHitbox()],
       );

  final Vector2 velocity;
  final double difficultyModifier;

  @override
  void update(double dt) {
    super.update(dt);
    position += velocity * dt;
  }

  @override
  void onCollisionStart(
    Set<Vector2> intersectionPoints,
    PositionComponent other,
  ) {
    super.onCollisionStart(intersectionPoints, other);
    if (other is PlayArea) {
      if (intersectionPoints.first.y <= 0) {
        velocity.y = -velocity.y;
      } else if (intersectionPoints.first.x <= 0) {
        velocity.x = -velocity.x;
      } else if (intersectionPoints.first.x >= game.width) {
        velocity.x = -velocity.x;
      } else if (intersectionPoints.first.y >= game.height) {
        add(
          RemoveEffect(
            delay: 0.35,
            onComplete: () {                                    // Modify from here
              game.playState = PlayState.gameOver;
            },
          ),
        );                                                      // To here.
      }
    } else if (other is Bat) {
      velocity.y = -velocity.y;
      velocity.x =
          velocity.x +
          (position.x - other.position.x) / other.size.x * game.width * 0.3;
    } else if (other is Brick) {
      if (position.y < other.position.y - other.size.y / 2) {
        velocity.y = -velocity.y;
      } else if (position.y > other.position.y + other.size.y / 2) {
        velocity.y = -velocity.y;
      } else if (position.x < other.position.x) {
        velocity.x = -velocity.x;
      } else if (position.x > other.position.x) {
        velocity.x = -velocity.x;
      }
      velocity.setFrom(velocity * difficultyModifier);
    }
  }
}
इस छोटे से बदलाव से, RemoveEffect में onComplete कॉलबैक जुड़ जाता है. इससे gameOver चलाने की स्थिति ट्रिगर होती है. अगर खिलाड़ी गेंद को स्क्रीन के सबसे नीचे जाने देता है, तो यह सही लगेगा.
Brickकॉम्पोनेंट में इस तरह बदलाव करें.
lib/src/components/brick.dart
impimport 'package:flame/collisions.dart';
import 'package:flame/components.dart';
import 'package:flutter/material.dart';

import '../brick_breaker.dart';
import '../config.dart';
import 'ball.dart';
import 'bat.dart';

class Brick extends RectangleComponent
    with CollisionCallbacks, HasGameReference<BrickBreaker> {
  Brick({required super.position, required Color color})
    : super(
        size: Vector2(brickWidth, brickHeight),
        anchor: Anchor.center,
        paint: Paint()
          ..color = color
          ..style = PaintingStyle.fill,
        children: [RectangleHitbox()],
      );

  @override
  void onCollisionStart(
    Set<Vector2> intersectionPoints,
    PositionComponent other,
  ) {
    super.onCollisionStart(intersectionPoints, other);
    removeFromParent();

    if (game.world.children.query<Brick>().length == 1) {
      game.playState = PlayState.won;                          // Add this line
      game.world.removeAll(game.world.children.query<Ball>());
      game.world.removeAll(game.world.children.query<Bat>());
    }
  }
}
दूसरी ओर, अगर खिलाड़ी सभी ईंटों को तोड़ देता है, तो उसे "गेम जीता" स्क्रीन दिखती है. बहुत बढ़िया खेला खिलाड़ी!
Flutter रैपर जोड़ना
गेम को एम्बेड करने और गेम की स्थिति दिखाने वाले ओवरले जोड़ने के लिए, Flutter शेल जोड़ें.
lib/srcमें जाकर,widgetsडायरेक्ट्री बनाएं.- कोई
game_app.dartफ़ाइल जोड़ें और उसमें यह कॉन्टेंट डालें.
lib/src/widgets/game_app.dart
import 'package:flame/game.dart';
import 'package:flutter/material.dart';
import 'package:google_fonts/google_fonts.dart';

import '../brick_breaker.dart';
import '../config.dart';

class GameApp extends StatelessWidget {
  const GameApp({super.key});

  @override
  Widget build(BuildContext context) {
    return MaterialApp(
      debugShowCheckedModeBanner: false,
      theme: ThemeData(
        textTheme: GoogleFonts.pressStart2pTextTheme().apply(
          bodyColor: const Color(0xff184e77),
          displayColor: const Color(0xff184e77),
        ),
      ),
      home: Scaffold(
        body: Container(
          decoration: const BoxDecoration(
            gradient: LinearGradient(
              begin: Alignment.topCenter,
              end: Alignment.bottomCenter,
              colors: [Color(0xffa9d6e5), Color(0xfff2e8cf)],
            ),
          ),
          child: SafeArea(
            child: Padding(
              padding: const EdgeInsets.all(16),
              child: Center(
                child: FittedBox(
                  child: SizedBox(
                    width: gameWidth,
                    height: gameHeight,
                    child: GameWidget.controlled(
                      gameFactory: BrickBreaker.new,
                      overlayBuilderMap: {
                        PlayState.welcome.name: (context, game) => Center(
                          child: Text(
                            'TAP TO PLAY',
                            style: Theme.of(context).textTheme.headlineLarge,
                          ),
                        ),
                        PlayState.gameOver.name: (context, game) => Center(
                          child: Text(
                            'G A M E   O V E R',
                            style: Theme.of(context).textTheme.headlineLarge,
                          ),
                        ),
                        PlayState.won.name: (context, game) => Center(
                          child: Text(
                            'Y O U   W O N ! ! !',
                            style: Theme.of(context).textTheme.headlineLarge,
                          ),
                        ),
                      },
                    ),
                  ),
                ),
              ),
            ),
          ),
        ),
      ),
    );
  }
}
इस फ़ाइल में मौजूद ज़्यादातर कॉन्टेंट, स्टैंडर्ड Flutter विजेट ट्री बिल्ड का पालन करता है. Flame के खास हिस्सों में, BrickBreaker गेम इंस्टेंस को बनाने और मैनेज करने के लिए GameWidget.controlled का इस्तेमाल करना और GameWidget के लिए नया overlayBuilderMap आर्ग्युमेंट शामिल है.
इस overlayBuilderMap की कुंजियां, उन ओवरले के साथ अलाइन होनी चाहिए जिन्हें BrickBreaker में playState सेटर ने जोड़ा या हटाया है. अगर इस मैप में मौजूद ओवरले को सेट करने की कोशिश की जाती है, तो सभी लोग नाखुश हो जाते हैं.
- स्क्रीन पर यह नई सुविधा पाने के लिए,
lib/main.dartफ़ाइल को नीचे दिए गए कॉन्टेंट से बदलें.
lib/main.dart
import 'package:flutter/material.dart';

import 'src/widgets/game_app.dart';

void main() {
  runApp(const GameApp());
}
अगर इस कोड को iOS, Linux, Windows या वेब पर चलाया जाता है, तो गेम में ज़रूरी आउटपुट दिखता है. अगर macOS या Android को टारगेट किया जाता है, तो google_fonts को दिखाने के लिए आपको एक और बदलाव करना होगा.
फ़ॉन्ट का ऐक्सेस चालू करना
Android के लिए इंटरनेट की अनुमति जोड़ना
Android के लिए, आपको इंटरनेट की अनुमति जोड़नी होगी. अपने AndroidManifest.xml में इस तरह बदलाव करें.
android/app/src/main/AndroidManifest.xml
<manifest xmlns:android="http://schemas.android.com/apk/res/android">
    <!-- Add the following line -->
    <uses-permission android:name="android.permission.INTERNET" />
    <application
        android:label="brick_breaker"
        android:name="${applicationName}"
        android:icon="@mipmap/ic_launcher">
        <activity
            android:name=".MainActivity"
            android:exported="true"
            android:launchMode="singleTop"
            android:taskAffinity=""
            android:theme="@style/LaunchTheme"
            android:configChanges="orientation|keyboardHidden|keyboard|screenSize|smallestScreenSize|locale|layoutDirection|fontScale|screenLayout|density|uiMode"
            android:hardwareAccelerated="true"
            android:windowSoftInputMode="adjustResize">
            <!-- Specifies an Android theme to apply to this Activity as soon as
                 the Android process has started. This theme is visible to the user
                 while the Flutter UI initializes. After that, this theme continues
                 to determine the Window background behind the Flutter UI. -->
            <meta-data
              android:name="io.flutter.embedding.android.NormalTheme"
              android:resource="@style/NormalTheme"
              />
            <intent-filter>
                <action android:name="android.intent.action.MAIN"/>
                <category android:name="android.intent.category.LAUNCHER"/>
            </intent-filter>
        </activity>
        <!-- Don't delete the meta-data below.
             This is used by the Flutter tool to generate GeneratedPluginRegistrant.java -->
        <meta-data
            android:name="flutterEmbedding"
            android:value="2" />
    </application>
    <!-- Required to query activities that can process text, see:
         https://developer.android.com/training/package-visibility and
         https://developer.android.com/reference/android/content/Intent#ACTION_PROCESS_TEXT.

         In particular, this is used by the Flutter engine in io.flutter.plugin.text.ProcessTextPlugin. -->
    <queries>
        <intent>
            <action android:name="android.intent.action.PROCESS_TEXT"/>
            <data android:mimeType="text/plain"/>
        </intent>
    </queries>
</manifest>
macOS के लिए एनटाइटलमेंट फ़ाइलों में बदलाव करना
macOS के लिए, आपके पास बदलाव करने के लिए दो फ़ाइलें हैं.
- नीचे दिए गए कोड से मैच करने के लिए,
DebugProfile.entitlementsफ़ाइल में बदलाव करें.
macos/Runner/DebugProfile.entitlements
<?xml version="1.0" encoding="UTF-8"?>
<!DOCTYPE plist PUBLIC "-//Apple//DTD PLIST 1.0//EN" "http://www.apple.com/DTDs/PropertyList-1.0.dtd">
<plist version="1.0">
<dict>
        <key>com.apple.security.app-sandbox</key>
        <true/>
        <key>com.apple.security.cs.allow-jit</key>
        <true/>
        <key>com.apple.security.network.server</key>
        <true/>
        <!-- Add from here... -->
        <key>com.apple.security.network.client</key>
        <true/>
        <!-- to here. -->
</dict>
</plist>
- नीचे दिए गए कोड से मैच करने के लिए,
Release.entitlementsफ़ाइल में बदलाव करें
macos/Runner/Release.entitlements
<?xml version="1.0" encoding="UTF-8"?>
<!DOCTYPE plist PUBLIC "-//Apple//DTD PLIST 1.0//EN" "http://www.apple.com/DTDs/PropertyList-1.0.dtd">
<plist version="1.0">
<dict>
        <key>com.apple.security.app-sandbox</key>
        <true/>
        <!-- Add from here... -->
        <key>com.apple.security.network.client</key>
        <true/>
        <!-- to here. -->
</dict>
</plist>
इस गेम को बिना किसी बदलाव के चलाने पर, सभी प्लैटफ़ॉर्म पर वेलकम स्क्रीन और गेम खत्म होने या जीतने की स्क्रीन दिखनी चाहिए. हो सकता है कि वे स्क्रीन थोड़ी आसान हों और उन पर स्कोर दिखना अच्छा हो. तो, अगले चरण में क्या किया जाएगा, यह जानने के लिए आगे पढ़ें!
10. स्कोर रखना
गेम में स्कोर जोड़ना
इस चरण में, गेम का स्कोर आस-पास के Flutter कॉन्टेक्स्ट में दिखाया जाता है. इस चरण में, Flame गेम की स्थिति को Flutter के स्टेटस मैनेजमेंट को दिखाया जाता है. इससे, गेम कोड में हर बार स्कोर अपडेट करने की सुविधा मिलती है, जब भी खिलाड़ी कोई ईंट तोड़ता है.
BrickBreakerगेम में इस तरह बदलाव करें.
lib/src/brick_breaker.dart
import 'dart:async';
import 'dart:math' as math;

import 'package:flame/components.dart';
import 'package:flame/events.dart';
import 'package:flame/game.dart';
import 'package:flutter/material.dart';
import 'package:flutter/services.dart';

import 'components/components.dart';
import 'config.dart';

enum PlayState { welcome, playing, gameOver, won }

class BrickBreaker extends FlameGame
    with HasCollisionDetection, KeyboardEvents, TapDetector {
  BrickBreaker()
    : super(
        camera: CameraComponent.withFixedResolution(
          width: gameWidth,
          height: gameHeight,
        ),
      );

  final ValueNotifier<int> score = ValueNotifier(0);            // Add this line
  final rand = math.Random();
  double get width => size.x;
  double get height => size.y;

  late PlayState _playState;
  PlayState get playState => _playState;
  set playState(PlayState playState) {
    _playState = playState;
    switch (playState) {
      case PlayState.welcome:
      case PlayState.gameOver:
      case PlayState.won:
        overlays.add(playState.name);
      case PlayState.playing:
        overlays.remove(PlayState.welcome.name);
        overlays.remove(PlayState.gameOver.name);
        overlays.remove(PlayState.won.name);
    }
  }

  @override
  FutureOr<void> onLoad() async {
    super.onLoad();

    camera.viewfinder.anchor = Anchor.topLeft;

    world.add(PlayArea());

    playState = PlayState.welcome;
  }

  void startGame() {
    if (playState == PlayState.playing) return;

    world.removeAll(world.children.query<Ball>());
    world.removeAll(world.children.query<Bat>());
    world.removeAll(world.children.query<Brick>());

    playState = PlayState.playing;
    score.value = 0;                                            // Add this line

    world.add(
      Ball(
        difficultyModifier: difficultyModifier,
        radius: ballRadius,
        position: size / 2,
        velocity: Vector2(
          (rand.nextDouble() - 0.5) * width,
          height * 0.2,
        ).normalized()..scale(height / 4),
      ),
    );

    world.add(
      Bat(
        size: Vector2(batWidth, batHeight),
        cornerRadius: const Radius.circular(ballRadius / 2),
        position: Vector2(width / 2, height * 0.95),
      ),
    );

    world.addAll([
      for (var i = 0; i < brickColors.length; i++)
        for (var j = 1; j <= 5; j++)
          Brick(
            position: Vector2(
              (i + 0.5) * brickWidth + (i + 1) * brickGutter,
              (j + 2.0) * brickHeight + j * brickGutter,
            ),
            color: brickColors[i],
          ),
    ]);
  }

  @override
  void onTap() {
    super.onTap();
    startGame();
  }

  @override
  KeyEventResult onKeyEvent(
    KeyEvent event,
    Set<LogicalKeyboardKey> keysPressed,
  ) {
    super.onKeyEvent(event, keysPressed);
    switch (event.logicalKey) {
      case LogicalKeyboardKey.arrowLeft:
        world.children.query<Bat>().first.moveBy(-batStep);
      case LogicalKeyboardKey.arrowRight:
        world.children.query<Bat>().first.moveBy(batStep);
      case LogicalKeyboardKey.space:
      case LogicalKeyboardKey.enter:
        startGame();
    }
    return KeyEventResult.handled;
  }

  @override
  Color backgroundColor() => const Color(0xfff2e8cf);
}
गेम में score जोड़ने पर, गेम की स्थिति को Flutter के स्टेटस मैनेजमेंट से जोड़ दिया जाता है.
- जब खिलाड़ी ईंटों को तोड़ता है, तो स्कोर में एक पॉइंट जोड़ने के लिए,
Brickक्लास में बदलाव करें.
lib/src/components/brick.dart
import 'package:flame/collisions.dart';
import 'package:flame/components.dart';
import 'package:flutter/material.dart';

import '../brick_breaker.dart';
import '../config.dart';
import 'ball.dart';
import 'bat.dart';

class Brick extends RectangleComponent
    with CollisionCallbacks, HasGameReference<BrickBreaker> {
  Brick({required super.position, required Color color})
    : super(
        size: Vector2(brickWidth, brickHeight),
        anchor: Anchor.center,
        paint: Paint()
          ..color = color
          ..style = PaintingStyle.fill,
        children: [RectangleHitbox()],
      );

  @override
  void onCollisionStart(
    Set<Vector2> intersectionPoints,
    PositionComponent other,
  ) {
    super.onCollisionStart(intersectionPoints, other);
    removeFromParent();
    game.score.value++;                                         // Add this line

    if (game.world.children.query<Brick>().length == 1) {
      game.playState = PlayState.won;
      game.world.removeAll(game.world.children.query<Ball>());
      game.world.removeAll(game.world.children.query<Bat>());
    }
  }
}
शानदार गेम बनाना
अब Flutter में स्कोर रखा जा सकता है. अब इसे बेहतर बनाने के लिए, विजेट जोड़ने का समय आ गया है.
lib/src/widgetsमेंscore_card.dartबनाएं और नीचे दिया गया कोड जोड़ें.
lib/src/widgets/score_card.dart
import 'package:flutter/material.dart';

class ScoreCard extends StatelessWidget {
  const ScoreCard({super.key, required this.score});

  final ValueNotifier<int> score;

  @override
  Widget build(BuildContext context) {
    return ValueListenableBuilder<int>(
      valueListenable: score,
      builder: (context, score, child) {
        return Padding(
          padding: const EdgeInsets.fromLTRB(12, 6, 12, 18),
          child: Text(
            'Score: $score'.toUpperCase(),
            style: Theme.of(context).textTheme.titleLarge!,
          ),
        );
      },
    );
  }
}
lib/src/widgetsमेंoverlay_screen.dartबनाएं और यह कोड जोड़ें.
इससे ओवरले स्क्रीन में कुछ मूवमेंट और स्टाइल जोड़ने के लिए, flutter_animate पैकेज की मदद से ओवरले को ज़्यादा बेहतर बनाया जा सकता है.
lib/src/widgets/overlay_screen.dart
import 'package:flutter/material.dart';
import 'package:flutter_animate/flutter_animate.dart';

class OverlayScreen extends StatelessWidget {
  const OverlayScreen({super.key, required this.title, required this.subtitle});

  final String title;
  final String subtitle;

  @override
  Widget build(BuildContext context) {
    return Container(
      alignment: const Alignment(0, -0.15),
      child: Column(
        mainAxisSize: MainAxisSize.min,
        children: [
          Text(
            title,
            style: Theme.of(context).textTheme.headlineLarge,
          ).animate().slideY(duration: 750.ms, begin: -3, end: 0),
          const SizedBox(height: 16),
          Text(subtitle, style: Theme.of(context).textTheme.headlineSmall)
              .animate(onPlay: (controller) => controller.repeat())
              .fadeIn(duration: 1.seconds)
              .then()
              .fadeOut(duration: 1.seconds),
        ],
      ),
    );
  }
}
flutter_animate की सुविधाओं के बारे में ज़्यादा जानने के लिए, Flutter में अगली पीढ़ी के यूज़र इंटरफ़ेस बनाना कोडलैब देखें.
इस कोड ने GameApp कॉम्पोनेंट में काफ़ी बदलाव किया है. सबसे पहले, ScoreCard को score को ऐक्सेस करने की अनुमति देने के लिए , उसे StatelessWidget से StatefulWidget में बदलें. स्कोरकार्ड जोड़ने के लिए, Column जोड़ना ज़रूरी है, ताकि गेम के ऊपर स्कोर दिखे.
दूसरा, आपने वेलकम, गेम खत्म होने, और जीतने के अनुभव को बेहतर बनाने के लिए, नया OverlayScreen विजेट जोड़ा है.
lib/src/widgets/game_app.dart
import 'package:flame/game.dart';
import 'package:flutter/material.dart';
import 'package:google_fonts/google_fonts.dart';

import '../brick_breaker.dart';
import '../config.dart';
import 'overlay_screen.dart';                                   // Add this import
import 'score_card.dart';                                       // And this one too

class GameApp extends StatefulWidget {                          // Modify this line
  const GameApp({super.key});

  @override                                                     // Add from here...
  State<GameApp> createState() => _GameAppState();
}

class _GameAppState extends State<GameApp> {
  late final BrickBreaker game;

  @override
  void initState() {
    super.initState();
    game = BrickBreaker();
  }                                                             // To here.

  @override
  Widget build(BuildContext context) {
    return MaterialApp(
      debugShowCheckedModeBanner: false,
      theme: ThemeData(
        textTheme: GoogleFonts.pressStart2pTextTheme().apply(
          bodyColor: const Color(0xff184e77),
          displayColor: const Color(0xff184e77),
        ),
      ),
      home: Scaffold(
        body: Container(
          decoration: const BoxDecoration(
            gradient: LinearGradient(
              begin: Alignment.topCenter,
              end: Alignment.bottomCenter,
              colors: [Color(0xffa9d6e5), Color(0xfff2e8cf)],
            ),
          ),
          child: SafeArea(
            child: Padding(
              padding: const EdgeInsets.all(16),
              child: Center(
                child: Column(                                  // Modify from here...
                  children: [
                    ScoreCard(score: game.score),
                    Expanded(
                      child: FittedBox(
                        child: SizedBox(
                          width: gameWidth,
                          height: gameHeight,
                          child: GameWidget(
                            game: game,
                            overlayBuilderMap: {
                              PlayState.welcome.name: (context, game) =>
                                  const OverlayScreen(
                                    title: 'TAP TO PLAY',
                                    subtitle: 'Use arrow keys or swipe',
                                  ),
                              PlayState.gameOver.name: (context, game) =>
                                  const OverlayScreen(
                                    title: 'G A M E   O V E R',
                                    subtitle: 'Tap to Play Again',
                                  ),
                              PlayState.won.name: (context, game) =>
                                  const OverlayScreen(
                                    title: 'Y O U   W O N ! ! !',
                                    subtitle: 'Tap to Play Again',
                                  ),
                            },
                          ),
                        ),
                      ),
                    ),
                  ],
                ),                                              // To here.
              ),
            ),
          ),
        ),
      ),
    );
  }
}
सभी चीज़ें सेट अप करने के बाद, अब आपको यह गेम Flutter के टारगेट किए गए छह प्लैटफ़ॉर्म में से किसी भी पर चलाने में मदद मिलेगी. गेम इस तरह का होना चाहिए.
|
|


11. बधाई हो
बधाई हो, आपने Flutter और Flame का इस्तेमाल करके गेम बना लिया है!
आपने Flame 2D गेम इंजन का इस्तेमाल करके कोई गेम बनाया हो और उसे Flutter रैपर में जोड़ा हो. आपने कॉम्पोनेंट को ऐनिमेट करने और हटाने के लिए, Flame के इफ़ेक्ट का इस्तेमाल किया है. आपने पूरे गेम को बेहतर तरीके से डिज़ाइन करने के लिए, Google Fonts और Flutter Animate पैकेज का इस्तेमाल किया है.
आगे क्या करना है?
इनमें से कुछ कोडलैब देखें...
- Flutter में अगली पीढ़ी के यूज़र इंटरफ़ेस बनाना
- अपने Flutter ऐप्लिकेशन को बोरिंग से खूबसूरत बनाएं
- अपने Flutter ऐप्लिकेशन में इन-ऐप्लिकेशन खरीदारी की सुविधा जोड़ना