
Informationen zu diesem Codelab
1. Einführung
Material 3 ist die neueste Version des Open-Source-Designsystems von Google. Flutter unterstützt jetzt noch mehr Funktionen für die Entwicklung ansprechender Apps mit Material 3. In diesem Codelab beginnen Sie mit einer leeren Flutter-Anwendung und erstellen mit Material 3 in Flutter eine vollständig gestaltete und animierte Anwendung.
Aufgaben
In diesem Codelab erstellen Sie eine Mock-Messaging-Anwendung. Mit der Anwendung können Sie Folgendes tun:
- Verwenden Sie ein responsives Design, damit die Website auf Computern und Mobilgeräten funktioniert.
- Verwenden Sie Animationen, um fließend zwischen verschiedenen Layouts zu wechseln.
- Verwenden Sie Material 3 für einen ausdrucksstarken Stil.
- Sie können unter Android, iOS, im Web, unter Windows, Linux und macOS ausgeführt werden.

In diesem Codelab geht es um Material 3 mit Flutter. Auf irrelevante Konzepte wird nicht genauer eingegangen und entsprechende Codeblöcke können Sie einfach kopieren und einfügen.
2. Flutter-Umgebung einrichten
Voraussetzungen
- Flutter SDK
- Einen Editor, z. B. VS Code oder Android Studio.
Dieses Codelab wurde für die Bereitstellung unter Android, iOS, im Web, unter Windows, Linux und macOS getestet. Für einige dieser Bereitstellungsziele muss zusätzliche Software installiert sein, damit eine Bereitstellung möglich ist. Mit flutter doctor können Sie prüfen, ob Ihre Plattform richtig eingerichtet ist.
$ flutter doctor
Doctor summary (to see all details, run flutter doctor -v):
[✓] Flutter (Channel stable, 3.32.1, on macOS 15.5 24F74 darwin-arm64, locale en-AU)
[✓] Android toolchain - develop for Android devices (Android SDK version 36.0.0)
[✓] Xcode - develop for iOS and macOS (Xcode 16.3)
[✓] Chrome - develop for the web
[✓] Android Studio (version 2024.2)
[✓] IntelliJ IDEA Community Edition (version 2024.3.1.1)
[✓] VS Code (version 1.100.3)
[✓] Connected device (3 available)
[✓] Network resources

• No issues found!
Wenn in der Ausgabe Probleme aufgeführt sind, die sich auf das ausgewählte Bereitstellungsziel auswirken, führen Sie flutter doctor -v aus, um detailliertere Informationen zu erhalten. Wenn das Problem auch nach der Ausführung der von flutter doctor -v aufgeführten Schritte nicht behoben ist, wenden Sie sich an die Flutter-Community.
3. Erste Schritte
Leere Flutter-Anwendung erstellen
Die meisten Flutter-Entwickler erstellen mit flutter create eine einfache App, die die Anzahl der Tastendrücke zählt, und entfernen dann in wenigen Minuten alles, was nicht benötigt wird. Sie können ein leeres Flutter-Projekt mit der --empty-Paramter erstellen, das nur das Nötigste enthält, um eine App einzurichten.
$ flutter create animated_responsive_layout --empty
Creating project animated_responsive_layout...
Resolving dependencies in `animated_responsive_layout`...
Downloading packages...
Got dependencies in `animated_responsive_layout`.
Wrote 129 files.

All done!
You can find general documentation for Flutter at: https://docs.flutter.dev/
Detailed API documentation is available at: https://api.flutter.dev/
If you prefer video documentation, consider: https://www.youtube.com/c/flutterdev

In order to run your empty application, type:

  $ cd animated_responsive_layout
  $ flutter run

Your empty application code is in animated_responsive_layout/lib/main.dart.
Sie können diesen Code entweder über Ihren Code-Editor oder direkt über die Befehlszeile ausführen. Je nachdem, welche toolchains Sie installiert haben und ob Simulatoren oder Emulatoren ausgeführt werden, werden Sie möglicherweise aufgefordert, das Bereitstellungsziel für die Anwendung auszuwählen. Hier sehen Sie beispielsweise, wie Sie die leere Anwendung in einem Webbrowser ausführen, indem Sie die Option „Chrome“ auswählen.
$ cd animated_responsive_layout
$ flutter run
Connected devices:
macOS (desktop) • macos  • darwin-arm64   • macOS 15.5 24F74 darwin-arm64
Chrome (web)    • chrome • web-javascript • Google Chrome 137.0.7151.56

[1]: macOS (macos)
[2]: Chrome (chrome)
Please choose one (or "q" to quit): 2
Launching lib/main.dart on Chrome in debug mode...
Waiting for connection from debug service on Chrome...              6.4s
This app is linked to the debug service: ws://127.0.0.1:60848/AM68Aq_ZiB8=/ws
Debug service listening on ws://127.0.0.1:60848/AM68Aq_ZiB8=/ws

Flutter run key commands.
R Hot restart.
h List all available interactive commands.
d Detach (terminate "flutter run" but leave application running).
c Clear the screen
q Quit (terminate the application on the device).

A Dart VM Service on Chrome is available at: http://127.0.0.1:60848/AM68Aq_ZiB8=
The Flutter DevTools debugger and profiler on Chrome is available at: http://127.0.0.1:9100?uri=http://127.0.0.1:60848/AM68Aq_ZiB8=
Application finished.
In diesem Szenario wird die leere App in einem Chrome-Webbrowser ausgeführt. Sie können sie auch unter Android, iOS oder auf Ihrem Computer ausführen.
4. Messenger-App erstellen
Avatare erstellen
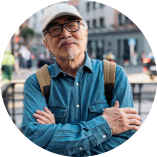
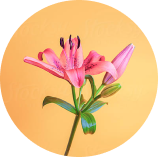
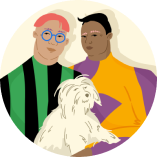
Jede Messaging-Anwendung benötigt Bilder ihrer Nutzer. Diese Bilder repräsentieren die Nutzer und werden als Avatare bezeichnet. Erstellen Sie als Nächstes oben im Projektbaum ein Assets-Verzeichnis und füllen Sie es mit einer Reihe von Bildern aus dem Git-Repository für dieses Codelab. Eine Möglichkeit hierfür bietet das wget-Befehlszeilentool.
$ mkdir assets
$ cd assets
$ for name in avatar_1 avatar_2 avatar_3 avatar_4 \
              avatar_5 avatar_6 avatar_7 thumbnail_1; \
  do wget https://raw.githubusercontent.com/flutter/codelabs/main/animated-responsive-layout/step_04/assets/$name.png ; \
  done
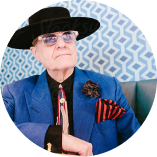
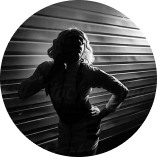
Dadurch werden die folgenden Bilder in das assets-Verzeichnis Ihrer App heruntergeladen:
|
|
|
|
|
|
|
|
|
|
|
|
|
|
|
|


Nachdem Sie die Avatar-Bild-Assets haben, müssen Sie sie der pubspec.yaml-Datei so hinzufügen:
pubspec.yaml
name: animated_responsive_layout
description: "A new Flutter project."
publish_to: 'none'
version: 0.1.0

environment:
  sdk: ^3.8.0

dependencies:
  flutter:
    sdk: flutter

dev_dependencies:
  flutter_test:
    sdk: flutter
  flutter_lints: ^5.0.0

flutter:
  uses-material-design: true

                                        # Add from here...
  assets:
    - assets/avatar_1.png
    - assets/avatar_2.png
    - assets/avatar_3.png
    - assets/avatar_4.png
    - assets/avatar_5.png
    - assets/avatar_6.png
    - assets/avatar_7.png
    - assets/thumbnail_1.png
                                        # ... to here.
Die Anwendung benötigt eine Datenquelle für die angezeigten Nachrichten. Erstellen Sie im Verzeichnis lib Ihres Projekts das Unterverzeichnis models. Sie können dies in der Befehlszeile mit mkdir oder in einem beliebigen Texteditor tun. Erstellen Sie im Verzeichnis lib/models eine Datei models.dart mit folgendem Inhalt:
lib/models/models.dart
class Attachment {
  const Attachment({required this.url});

  final String url;
}

class Email {
  const Email({
    required this.sender,
    required this.recipients,
    required this.subject,
    required this.content,
    this.replies = 0,
    this.attachments = const [],
  });

  final User sender;
  final List<User> recipients;
  final String subject;
  final String content;
  final List<Attachment> attachments;
  final double replies;
}

class Name {
  const Name({required this.first, required this.last});

  final String first;
  final String last;
  String get fullName => '$first $last';
}

class User {
  const User({
    required this.name,
    required this.avatarUrl,
    required this.lastActive,
  });

  final Name name;
  final String avatarUrl;
  final DateTime lastActive;
}
Nachdem Sie die Definition für die Form der Daten festgelegt haben, erstellen Sie im Verzeichnis lib/models eine data.dart-Datei mit folgendem Inhalt:
lib/models/data.dart
import 'models.dart';

final User user_0 = User(
  name: const Name(first: 'Me', last: ''),
  avatarUrl: 'assets/avatar_1.png',
  lastActive: DateTime.now(),
);
final User user_1 = User(
  name: const Name(first: '老', last: '强'),
  avatarUrl: 'assets/avatar_2.png',
  lastActive: DateTime.now().subtract(const Duration(minutes: 10)),
);
final User user_2 = User(
  name: const Name(first: 'So', last: 'Duri'),
  avatarUrl: 'assets/avatar_3.png',
  lastActive: DateTime.now().subtract(const Duration(minutes: 20)),
);
final User user_3 = User(
  name: const Name(first: 'Lily', last: 'MacDonald'),
  avatarUrl: 'assets/avatar_4.png',
  lastActive: DateTime.now().subtract(const Duration(hours: 2)),
);
final User user_4 = User(
  name: const Name(first: 'Ziad', last: 'Aouad'),
  avatarUrl: 'assets/avatar_5.png',
  lastActive: DateTime.now().subtract(const Duration(hours: 6)),
);

final List<Email> emails = [
  Email(
    sender: user_1,
    recipients: [],
    subject: '豆花鱼',
    content: '最近忙吗?昨晚我去了你最爱的那家饭馆,点了他们的特色豆花鱼,吃着吃着就想你了。',
  ),
  Email(
    sender: user_2,
    recipients: [],
    subject: 'Dinner Club',
    content:
        'I think it's time for us to finally try that new noodle shop downtown that doesn't use menus. Anyone else have other suggestions for dinner club this week? I'm so intrigued by this idea of a noodle restaurant where no one gets to order for themselves - could be fun, or terrible, or both :)\n\nSo',
  ),
  Email(
    sender: user_3,
    recipients: [],
    subject: 'This food show is made for you',
    content:
        'Ping– you'd love this new food show I started watching. It's produced by a Thai drummer who started getting recognized for the amazing vegan food she always brought to shows.',
    attachments: [const Attachment(url: 'assets/thumbnail_1.png')],
  ),
  Email(
    sender: user_4,
    recipients: [],
    subject: 'Volunteer EMT with me?',
    content:
        'What do you think about training to be volunteer EMTs? We could do it together for moral support. Think about it??',
  ),
];

final List<Email> replies = [
  Email(
    sender: user_2,
    recipients: [user_3, user_2],
    subject: 'Dinner Club',
    content:
        'I think it's time for us to finally try that new noodle shop downtown that doesn't use menus. Anyone else have other suggestions for dinner club this week? I'm so intrigued by this idea of a noodle restaurant where no one gets to order for themselves - could be fun, or terrible, or both :)\n\nSo',
  ),
  Email(
    sender: user_0,
    recipients: [user_3, user_2],
    subject: 'Dinner Club',
    content:
        'Yes! I forgot about that place! I'm definitely up for taking a risk this week and handing control over to this mysterious noodle chef. I wonder what happens if you have allergies though? Lucky none of us have any otherwise I'd be a bit concerned.\n\nThis is going to be great. See you all at the usual time?',
  ),
];
Jetzt ist es an der Zeit, einige Widgets zu definieren, um diese Daten anzuzeigen. Erstellen Sie unter lib ein Unterverzeichnis mit dem Namen widgets. Sie erstellen vier Dateien in widgets. Bis Sie alle vier erstellt haben, erhalten Sie wahrscheinlich einige Warnungen von Ihrem Editor. Denken Sie daran, dass das Ziel dieses Codelabs darin besteht, die App mit Material 3 zu gestalten. Fügen Sie daher die folgenden vier Dateien mit dem aufgeführten Inhalt hinzu:
lib/widgets/email_list_view.dart
import 'package:flutter/material.dart';

import '../models/data.dart' as data;
import '../models/models.dart';
import 'email_widget.dart';
import 'search_bar.dart' as search_bar;

class EmailListView extends StatelessWidget {
  const EmailListView({
    super.key,
    this.selectedIndex,
    this.onSelected,
    required this.currentUser,
  });

  final int? selectedIndex;
  final ValueChanged<int>? onSelected;
  final User currentUser;

  @override
  Widget build(BuildContext context) {
    return Padding(
      padding: const EdgeInsets.symmetric(horizontal: 8.0),
      child: ListView(
        children: [
          const SizedBox(height: 8),
          search_bar.SearchBar(currentUser: currentUser),
          const SizedBox(height: 8),
          ...List.generate(data.emails.length, (index) {
            return Padding(
              padding: const EdgeInsets.only(bottom: 8.0),
              child: EmailWidget(
                email: data.emails[index],
                onSelected: onSelected != null
                    ? () {
                        onSelected!(index);
                      }
                    : null,
                isSelected: selectedIndex == index,
              ),
            );
          }),
        ],
      ),
    );
  }
}
Eine Nachrichten-App sollte in der Lage sein, eine Liste von E-Mails anzuzeigen. Der Editor meldet einige Probleme, die Sie jedoch durch Hinzufügen der nächsten Datei email_widget.dart beheben können.
lib/widgets/email_widget.dart
import 'package:flutter/material.dart';
import '../models/models.dart';
import 'star_button.dart';

enum EmailType { preview, threaded, primaryThreaded }

class EmailWidget extends StatefulWidget {
  const EmailWidget({
    super.key,
    required this.email,
    this.isSelected = false,
    this.isPreview = true,
    this.isThreaded = false,
    this.showHeadline = false,
    this.onSelected,
  });

  final bool isSelected;
  final bool isPreview;
  final bool showHeadline;
  final bool isThreaded;
  final void Function()? onSelected;
  final Email email;

  @override
  State<EmailWidget> createState() => _EmailWidgetState();
}

class _EmailWidgetState extends State<EmailWidget> {
  late final ColorScheme _colorScheme = Theme.of(context).colorScheme;
  late Color unselectedColor = Color.alphaBlend(
    _colorScheme.primary.withAlpha(20),
    _colorScheme.surface,
  );

  Color get _surfaceColor => switch (widget) {
    EmailWidget(isPreview: false) => _colorScheme.surface,
    EmailWidget(isSelected: true) => _colorScheme.primaryContainer,
    _ => unselectedColor,
  };

  @override
  Widget build(BuildContext context) {
    return GestureDetector(
      onTap: widget.onSelected,
      child: Card(
        elevation: 0,
        color: _surfaceColor,
        clipBehavior: Clip.hardEdge,
        child: Column(
          crossAxisAlignment: CrossAxisAlignment.start,
          mainAxisSize: MainAxisSize.min,
          children: [
            if (widget.showHeadline) ...[
              EmailHeadline(email: widget.email, isSelected: widget.isSelected),
            ],
            EmailContent(
              email: widget.email,
              isPreview: widget.isPreview,
              isThreaded: widget.isThreaded,
              isSelected: widget.isSelected,
            ),
          ],
        ),
      ),
    );
  }
}

class EmailContent extends StatefulWidget {
  const EmailContent({
    super.key,
    required this.email,
    required this.isPreview,
    required this.isThreaded,
    required this.isSelected,
  });

  final Email email;
  final bool isPreview;
  final bool isThreaded;
  final bool isSelected;

  @override
  State<EmailContent> createState() => _EmailContentState();
}

class _EmailContentState extends State<EmailContent> {
  late final ColorScheme _colorScheme = Theme.of(context).colorScheme;
  late final TextTheme _textTheme = Theme.of(context).textTheme;

  Widget get contentSpacer => SizedBox(height: widget.isThreaded ? 20 : 2);

  String get lastActiveLabel {
    final DateTime now = DateTime.now();
    if (widget.email.sender.lastActive.isAfter(now)) throw ArgumentError();
    final Duration elapsedTime = widget.email.sender.lastActive
        .difference(now)
        .abs();
    return switch (elapsedTime) {
      Duration(inSeconds: < 60) => '${elapsedTime.inSeconds}s',
      Duration(inMinutes: < 60) => '${elapsedTime.inMinutes}m',
      Duration(inHours: < 24) => '${elapsedTime.inHours}h',
      Duration(inDays: < 365) => '${elapsedTime.inDays}d',
      _ => throw UnimplementedError(),
    };
  }

  TextStyle? get contentTextStyle => switch (widget) {
    EmailContent(isThreaded: true) => _textTheme.bodyLarge,
    EmailContent(isSelected: true) => _textTheme.bodyMedium?.copyWith(
      color: _colorScheme.onPrimaryContainer,
    ),
    _ => _textTheme.bodyMedium?.copyWith(color: _colorScheme.onSurfaceVariant),
  };

  @override
  Widget build(BuildContext context) {
    return Padding(
      padding: const EdgeInsets.all(20),
      child: Column(
        crossAxisAlignment: CrossAxisAlignment.start,
        children: [
          LayoutBuilder(
            builder: (context, constraints) {
              return Row(
                crossAxisAlignment: CrossAxisAlignment.center,
                children: [
                  if (constraints.maxWidth - 200 > 0) ...[
                    CircleAvatar(
                      backgroundImage: AssetImage(
                        widget.email.sender.avatarUrl,
                      ),
                    ),
                    const Padding(
                      padding: EdgeInsets.symmetric(horizontal: 6.0),
                    ),
                  ],
                  Expanded(
                    child: Column(
                      crossAxisAlignment: CrossAxisAlignment.start,
                      children: [
                        Text(
                          widget.email.sender.name.fullName,
                          overflow: TextOverflow.fade,
                          maxLines: 1,
                          style: widget.isSelected
                              ? _textTheme.labelMedium?.copyWith(
                                  color: _colorScheme.onSecondaryContainer,
                                )
                              : _textTheme.labelMedium?.copyWith(
                                  color: _colorScheme.onSurface,
                                ),
                        ),
                        Text(
                          lastActiveLabel,
                          overflow: TextOverflow.fade,
                          maxLines: 1,
                          style: widget.isSelected
                              ? _textTheme.labelMedium?.copyWith(
                                  color: _colorScheme.onSecondaryContainer,
                                )
                              : _textTheme.labelMedium?.copyWith(
                                  color: _colorScheme.onSurfaceVariant,
                                ),
                        ),
                      ],
                    ),
                  ),
                  if (constraints.maxWidth - 200 > 0) ...[const StarButton()],
                ],
              );
            },
          ),
          const SizedBox(width: 8),
          Column(
            crossAxisAlignment: CrossAxisAlignment.start,
            children: [
              if (widget.isPreview) ...[
                Text(
                  widget.email.subject,
                  style: const TextStyle(
                    fontSize: 18,
                  ).copyWith(color: _colorScheme.onSurface),
                ),
              ],
              if (widget.isThreaded) ...[
                contentSpacer,
                Text(
                  "To ${widget.email.recipients.map((recipient) => recipient.name.first).join(", ")}",
                  style: _textTheme.bodyMedium,
                ),
              ],
              contentSpacer,
              Text(
                widget.email.content,
                maxLines: widget.isPreview ? 2 : 100,
                overflow: TextOverflow.ellipsis,
                style: contentTextStyle,
              ),
            ],
          ),
          const SizedBox(width: 12),
          widget.email.attachments.isNotEmpty
              ? Container(
                  height: 96,
                  decoration: BoxDecoration(
                    borderRadius: BorderRadius.circular(8.0),
                    image: DecorationImage(
                      fit: BoxFit.cover,
                      image: AssetImage(widget.email.attachments.first.url),
                    ),
                  ),
                )
              : const SizedBox.shrink(),
          if (!widget.isPreview) ...[const EmailReplyOptions()],
        ],
      ),
    );
  }
}

class EmailHeadline extends StatefulWidget {
  const EmailHeadline({
    super.key,
    required this.email,
    required this.isSelected,
  });

  final Email email;
  final bool isSelected;

  @override
  State<EmailHeadline> createState() => _EmailHeadlineState();
}

class _EmailHeadlineState extends State<EmailHeadline> {
  late final TextTheme _textTheme = Theme.of(context).textTheme;
  late final ColorScheme _colorScheme = Theme.of(context).colorScheme;

  @override
  Widget build(BuildContext context) {
    return LayoutBuilder(
      builder: (context, constraints) {
        return Container(
          height: 84,
          color: Color.alphaBlend(
            _colorScheme.primary.withAlpha(12),
            _colorScheme.surface,
          ),
          child: Padding(
            padding: const EdgeInsets.fromLTRB(24, 12, 12, 12),
            child: Row(
              mainAxisSize: MainAxisSize.max,
              crossAxisAlignment: CrossAxisAlignment.center,
              children: [
                Expanded(
                  child: Column(
                    mainAxisSize: MainAxisSize.min,
                    crossAxisAlignment: CrossAxisAlignment.start,
                    children: [
                      Text(
                        widget.email.subject,
                        maxLines: 1,
                        overflow: TextOverflow.fade,
                        style: const TextStyle(
                          fontSize: 18,
                          fontWeight: FontWeight.w400,
                        ),
                      ),
                      Text(
                        '${widget.email.replies.toString()} Messages',
                        maxLines: 1,
                        overflow: TextOverflow.fade,
                        style: _textTheme.labelMedium?.copyWith(
                          fontWeight: FontWeight.w500,
                        ),
                      ),
                    ],
                  ),
                ),
                // Display a "condensed" version if the widget in the row are
                // expected to overflow.
                if (constraints.maxWidth - 200 > 0) ...[
                  SizedBox(
                    height: 40,
                    width: 40,
                    child: FloatingActionButton(
                      onPressed: () {},
                      elevation: 0,
                      backgroundColor: _colorScheme.surface,
                      child: const Icon(Icons.delete_outline),
                    ),
                  ),
                  const Padding(padding: EdgeInsets.only(right: 8.0)),
                  SizedBox(
                    height: 40,
                    width: 40,
                    child: FloatingActionButton(
                      onPressed: () {},
                      elevation: 0,
                      backgroundColor: _colorScheme.surface,
                      child: const Icon(Icons.more_vert),
                    ),
                  ),
                ],
              ],
            ),
          ),
        );
      },
    );
  }
}

class EmailReplyOptions extends StatefulWidget {
  const EmailReplyOptions({super.key});

  @override
  State<EmailReplyOptions> createState() => _EmailReplyOptionsState();
}

class _EmailReplyOptionsState extends State<EmailReplyOptions> {
  late final ColorScheme _colorScheme = Theme.of(context).colorScheme;

  @override
  Widget build(BuildContext context) {
    return LayoutBuilder(
      builder: (context, constraints) {
        if (constraints.maxWidth < 100) {
          return const SizedBox.shrink();
        }
        return Row(
          children: [
            Expanded(
              child: TextButton(
                style: ButtonStyle(
                  backgroundColor: WidgetStateProperty.all(
                    _colorScheme.onInverseSurface,
                  ),
                ),
                onPressed: () {},
                child: Text(
                  'Reply',
                  style: TextStyle(color: _colorScheme.onSurfaceVariant),
                ),
              ),
            ),
            const SizedBox(width: 8),
            Expanded(
              child: TextButton(
                style: ButtonStyle(
                  backgroundColor: WidgetStateProperty.all(
                    _colorScheme.onInverseSurface,
                  ),
                ),
                onPressed: () {},
                child: Text(
                  'Reply All',
                  style: TextStyle(color: _colorScheme.onSurfaceVariant),
                ),
              ),
            ),
          ],
        );
      },
    );
  }
}
Ja, in diesem Widget ist viel los. Es lohnt sich, es genauer zu betrachten, vor allem, um zu sehen, wie die Farbe im gesamten Widget angewendet wird. Das wird ein wiederkehrendes Thema. Als Nächstes search_bar.dart.
lib/widgets/search_bar.dart
import 'package:flutter/material.dart';

import '../models/models.dart';

class SearchBar extends StatelessWidget {
  const SearchBar({super.key, required this.currentUser});

  final User currentUser;

  @override
  Widget build(BuildContext context) {
    return SizedBox(
      height: 56,
      child: Container(
        decoration: BoxDecoration(
          borderRadius: BorderRadius.circular(100),
          color: Colors.white,
        ),
        padding: const EdgeInsets.fromLTRB(31, 12, 12, 12),
        child: Row(
          crossAxisAlignment: CrossAxisAlignment.center,
          children: [
            const Icon(Icons.search),
            const SizedBox(width: 23.5),
            Expanded(
              child: TextField(
                maxLines: 1,
                decoration: InputDecoration(
                  isDense: true,
                  border: InputBorder.none,
                  hintText: 'Search replies',
                  hintStyle: Theme.of(context).textTheme.bodyMedium,
                ),
              ),
            ),
            CircleAvatar(backgroundImage: AssetImage(currentUser.avatarUrl)),
          ],
        ),
      ),
    );
  }
}
Ein viel einfacheres und zustandsloses Widget. Fügen Sie als Nächstes ein weiteres Widget hinzu, star_button.dart:
lib/widgets/star_button.dart
impoimport 'package:flutter/material.dart';

class StarButton extends StatefulWidget {
  const StarButton({super.key});

  @override
  State<StarButton> createState() => _StarButtonState();
}

class _StarButtonState extends State<StarButton> {
  bool state = false;
  late final ColorScheme _colorScheme = Theme.of(context).colorScheme;

  Icon get icon {
    final IconData iconData = state ? Icons.star : Icons.star_outline;

    return Icon(iconData, color: Colors.grey, size: 20);
  }

  void _toggle() {
    setState(() {
      state = !state;
    });
  }

  double get turns => state ? 1 : 0;

  @override
  Widget build(BuildContext context) {
    return AnimatedRotation(
      turns: turns,
      curve: Curves.decelerate,
      duration: const Duration(milliseconds: 300),
      child: FloatingActionButton(
        elevation: 0,
        shape: const CircleBorder(),
        backgroundColor: _colorScheme.surface,
        onPressed: () => _toggle(),
        child: Padding(padding: const EdgeInsets.all(10.0), child: icon),
      ),
    );
  }
}
Aktualisieren Sie als Nächstes den Hauptdarsteller lib/main.dart. Ersetzen Sie den aktuellen Inhalt dieser Datei durch Folgendes:
lib/main.dart
import 'package:flutter/material.dart';

import 'models/data.dart' as data;
import 'models/models.dart';
import 'widgets/email_list_view.dart';

void main() {
  runApp(const MainApp());
}

class MainApp extends StatelessWidget {
  const MainApp({super.key});

  @override
  Widget build(BuildContext context) {
    return MaterialApp(
      theme: ThemeData.light(),
      home: Feed(currentUser: data.user_0),
    );
  }
}

class Feed extends StatefulWidget {
  const Feed({super.key, required this.currentUser});

  final User currentUser;

  @override
  State<Feed> createState() => _FeedState();
}

class _FeedState extends State<Feed> {
  late final _colorScheme = Theme.of(context).colorScheme;
  late final _backgroundColor = Color.alphaBlend(
    _colorScheme.primary.withAlpha(36),
    _colorScheme.surface,
  );

  @override
  Widget build(BuildContext context) {
    return Scaffold(
      body: Container(
        color: _backgroundColor,
        child: EmailListView(currentUser: widget.currentUser),
      ),
      floatingActionButton: FloatingActionButton(
        backgroundColor: _colorScheme.tertiaryContainer,
        foregroundColor: _colorScheme.onTertiaryContainer,
        onPressed: () {},
        child: const Icon(Icons.add),
      ),
    );
  }
}
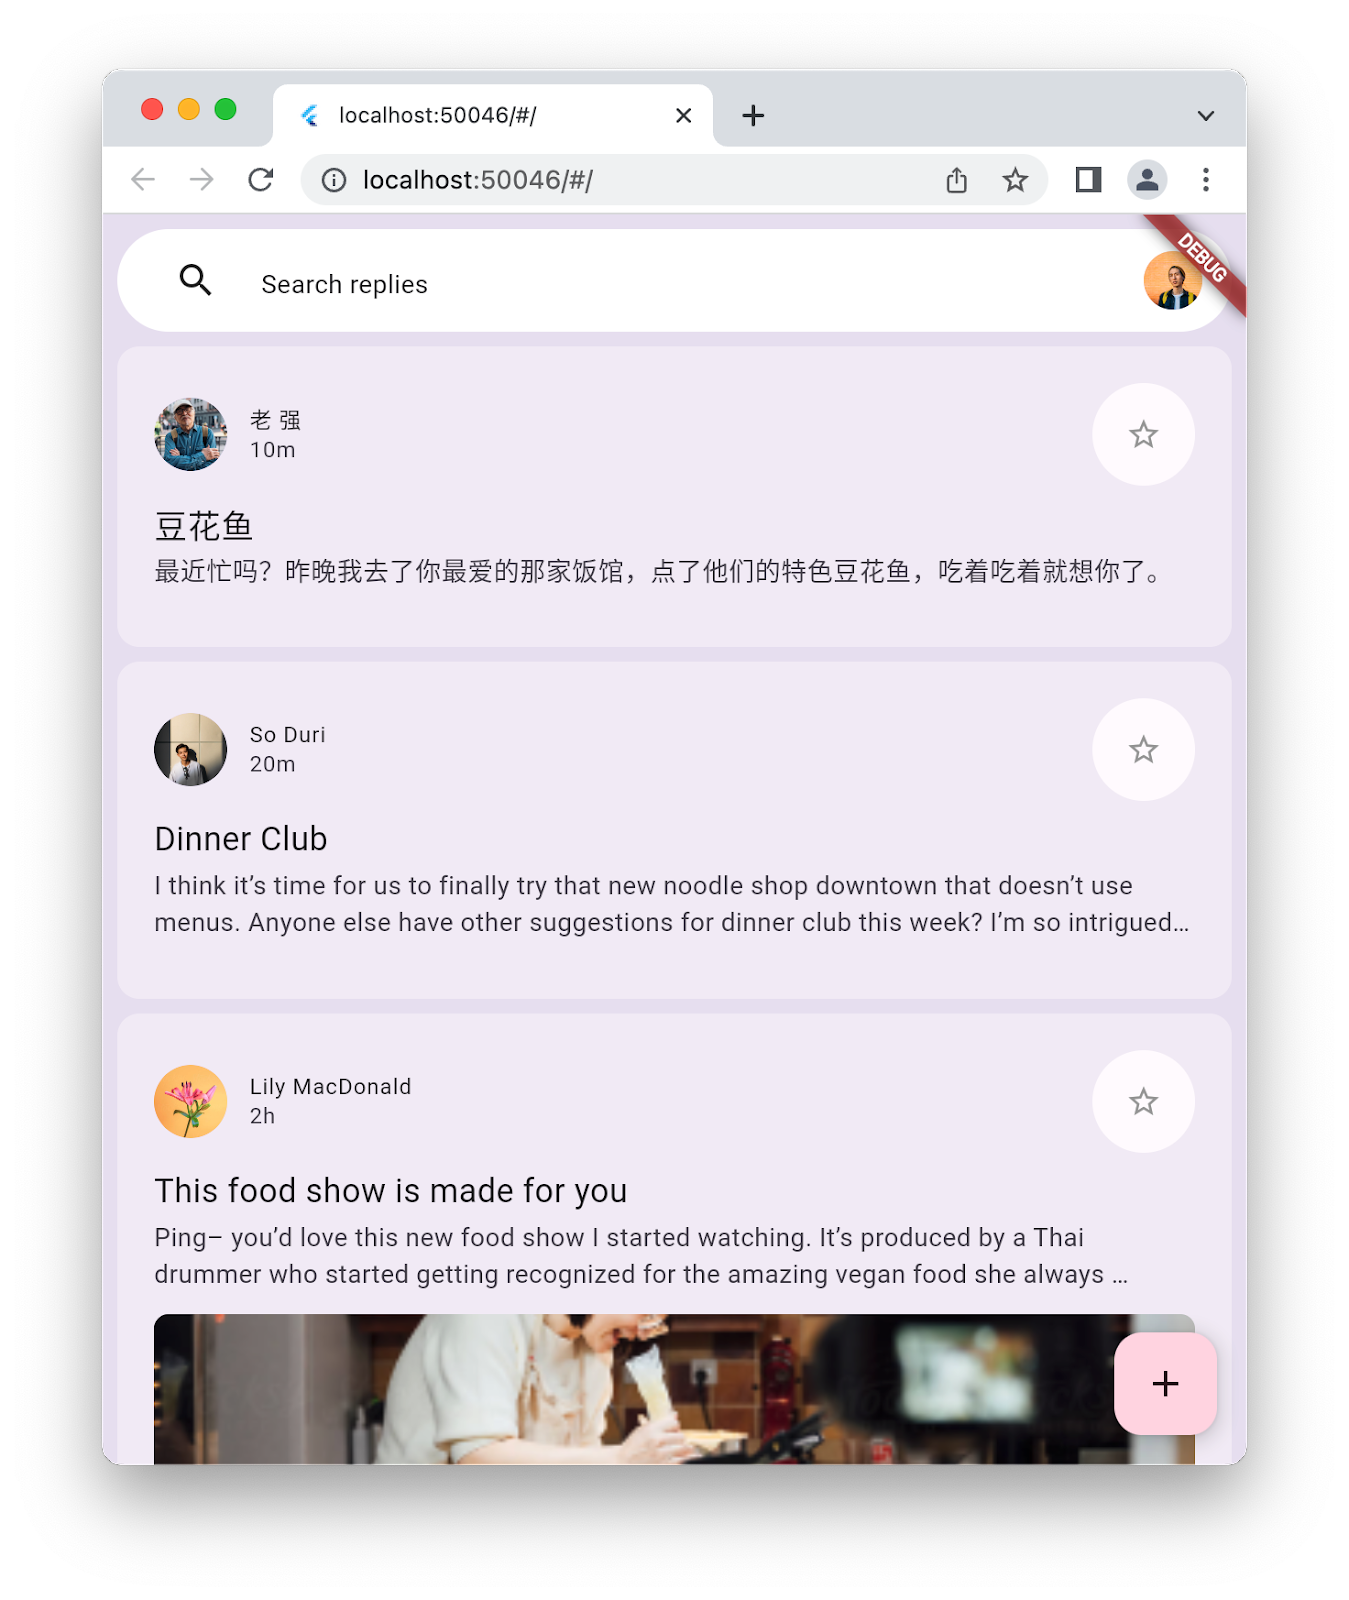
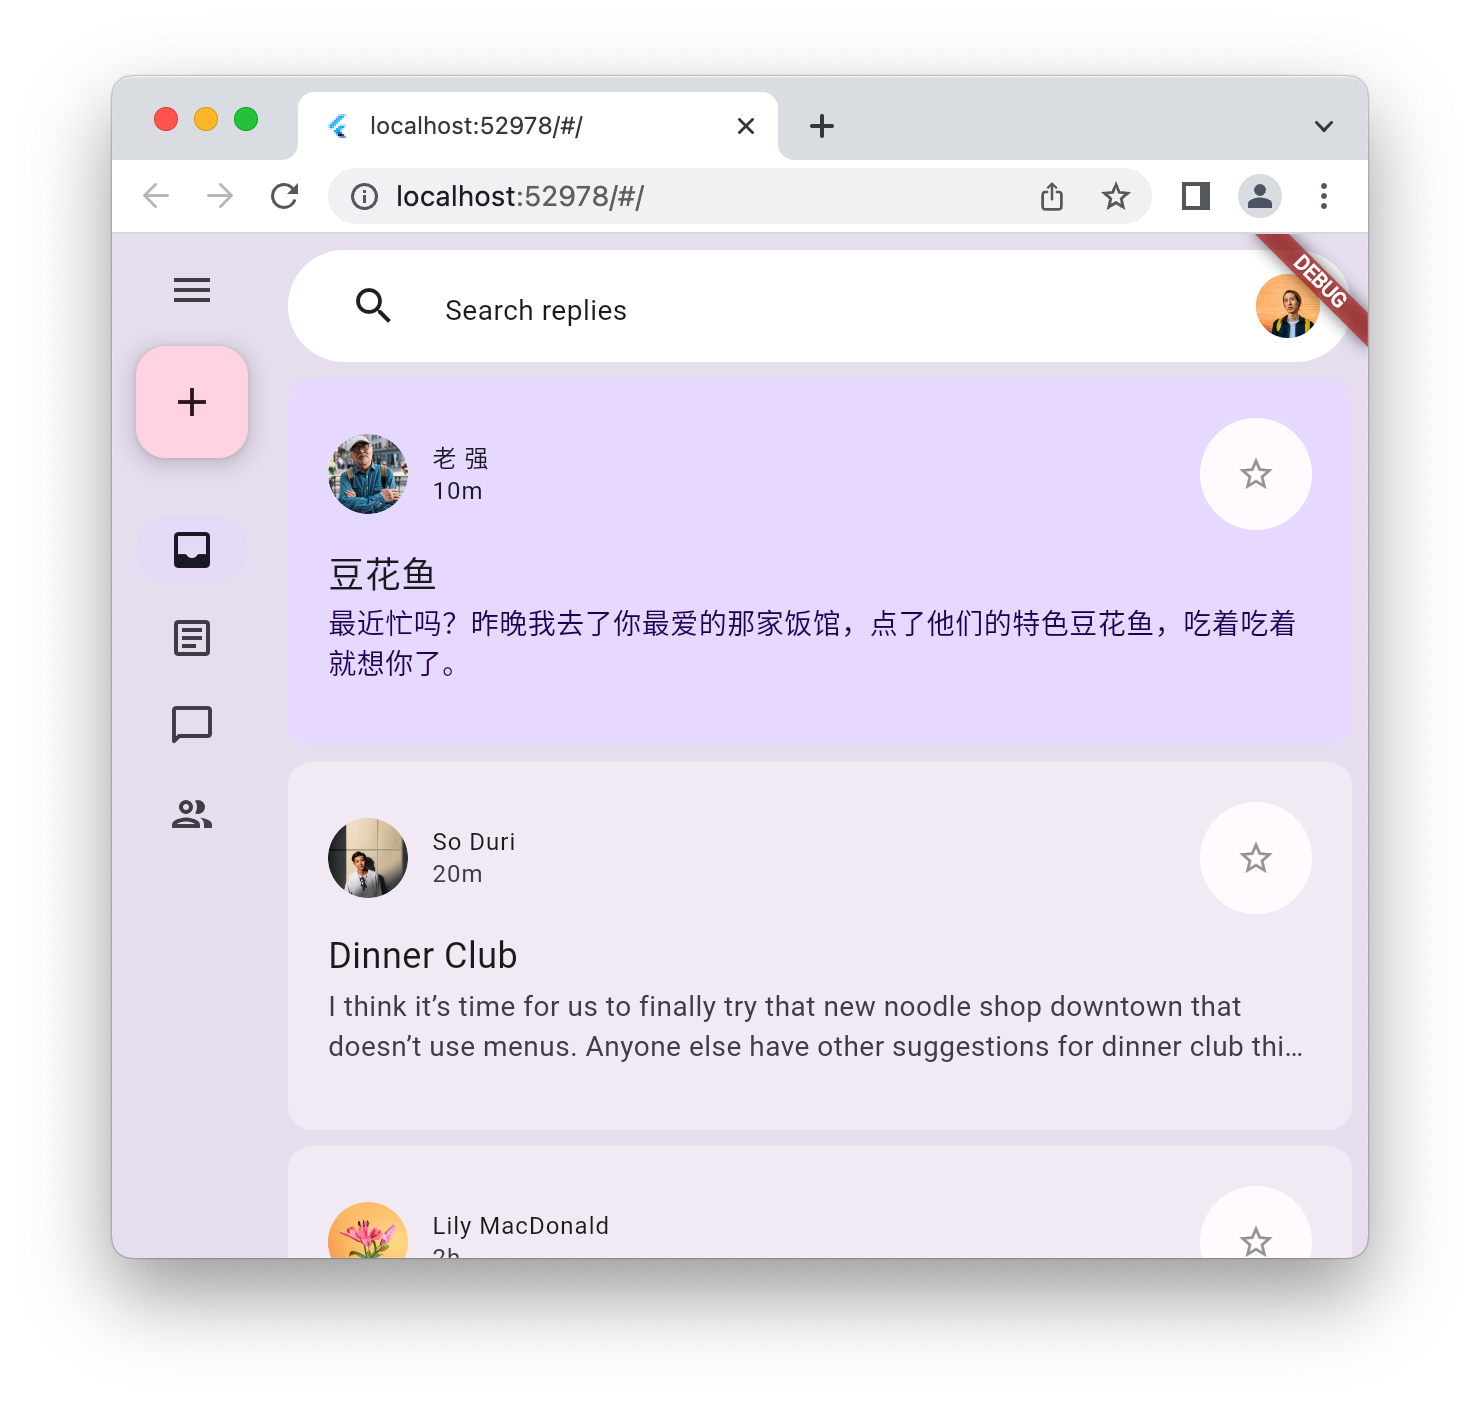
Starten Sie die App, um zu sehen, was Sie als Ausgangspunkt haben.
5. Navigationsleiste hinzufügen
Am Ende des vorherigen Schritts enthielt die Starter App eine Liste mit Nachrichten, aber sonst nicht viel. In diesem Schritt fügen Sie ein NavigationBar hinzu, um das Design visuell ansprechender zu gestalten. Während die App von einem UI-Sketch zu einer echten Anwendung wird, bietet die Navigationsleiste dem Nutzer verschiedene Bereiche der Anwendung.
Ein NavigationBar bedeutet, dass es Ziele gibt, zu denen man navigieren kann. Erstellen Sie im Verzeichnis lib eine neue Datei mit dem Namen destinations.dart und fügen Sie den folgenden Code ein.
lib/destinations.dart
import 'package:flutter/material.dart';

class Destination {
  const Destination(this.icon, this.label);
  final IconData icon;
  final String label;
}

const List<Destination> destinations = <Destination>[
  Destination(Icons.inbox_rounded, 'Inbox'),
  Destination(Icons.article_outlined, 'Articles'),
  Destination(Icons.messenger_outline_rounded, 'Messages'),
  Destination(Icons.group_outlined, 'Groups'),
];
So hat die Anwendung vier Ziele, an denen der NavigationBar angezeigt werden kann. Fügen Sie diese Liste der Ziele dann so in die Datei lib/main.dart ein:
lib/main.dart
import 'package:flutter/material.dart';

import 'destinations.dart';                    // Add this import
import 'models/data.dart' as data;
import 'models/models.dart';
import 'widgets/email_list_view.dart';

void main() {
  runApp(const MainApp());
}

class MainApp extends StatelessWidget {
  const MainApp({super.key});

  @override
  Widget build(BuildContext context) {
    return MaterialApp(
      theme: ThemeData.light(),
      home: Feed(currentUser: data.user_0),
    );
  }
}

class Feed extends StatefulWidget {
  const Feed({super.key, required this.currentUser});

  final User currentUser;

  @override
  State<Feed> createState() => _FeedState();
}

class _FeedState extends State<Feed> {
  late final _colorScheme = Theme.of(context).colorScheme;
  late final _backgroundColor = Color.alphaBlend(
    _colorScheme.primary.withAlpha(36),
    _colorScheme.surface,
  );

  int selectedIndex = 0;                       // Add this variable

  @override
  Widget build(BuildContext context) {
    return Scaffold(
      body: Container(
        color: _backgroundColor,
        child: EmailListView(
                                              // Add from here...
          selectedIndex: selectedIndex,
          onSelected: (index) {
            setState(() {
              selectedIndex = index;
            });
          },
                                              // ... to here.
          currentUser: widget.currentUser,
        ),
      ),
      floatingActionButton: FloatingActionButton(
        backgroundColor: _colorScheme.tertiaryContainer,
        foregroundColor: _colorScheme.onTertiaryContainer,
        onPressed: () {},
        child: const Icon(Icons.add),
      ),
                                                  // Add from here...
      bottomNavigationBar: NavigationBar(
        elevation: 0,
        backgroundColor: Colors.white,
        destinations: destinations.map<NavigationDestination>((d) {
          return NavigationDestination(icon: Icon(d.icon), label: d.label);
        }).toList(),
        selectedIndex: selectedIndex,
        onDestinationSelected: (index) {
          setState(() {
            selectedIndex = index;
          });
        },
      ),
                                                // ...to here.
    );
  }
}
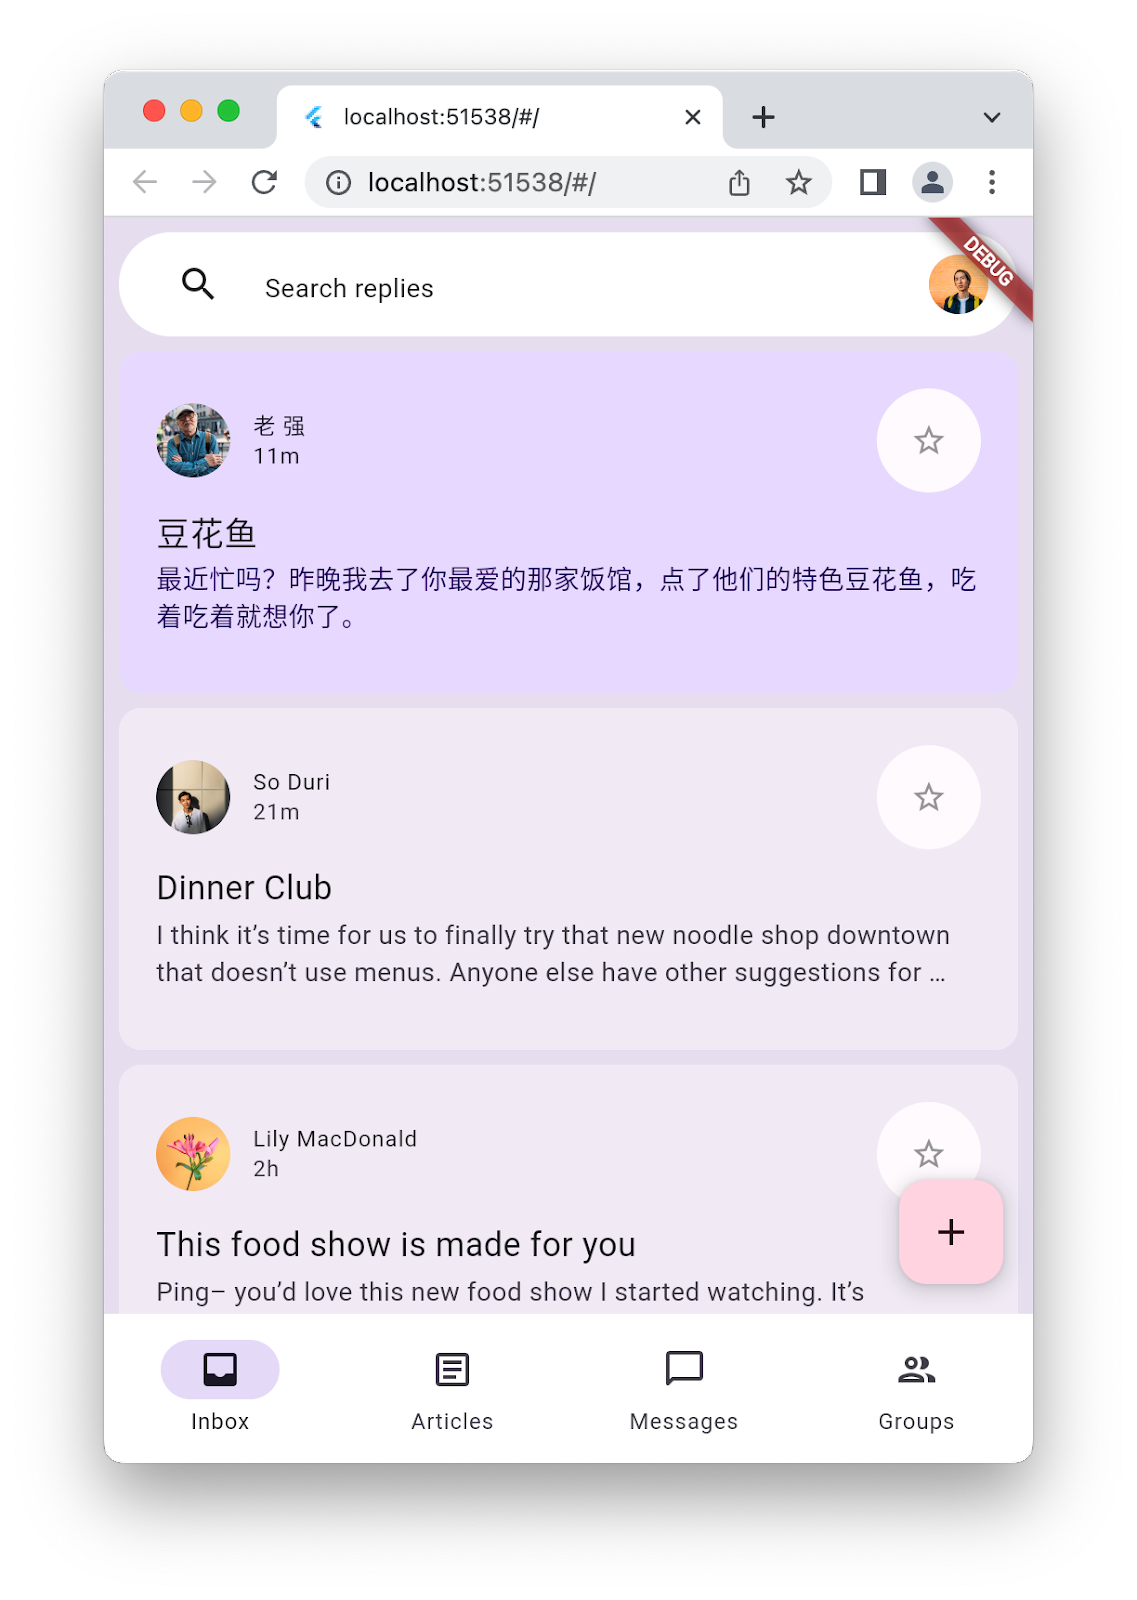
Anstatt für jedes Ziel unterschiedliche Inhalte zu definieren, ändern Sie den Status der einzelnen Nachrichten so, dass er dem ausgewählten Ziel in NavigationBar entspricht. Aus Gründen der Einheitlichkeit funktioniert das auch umgekehrt: Wenn Sie eine Nachricht auswählen, wird das entsprechende Ziel in NavigationBar angezeigt. Führen Sie die Anwendung aus, um diese Änderungen zu überprüfen:
In einer schmalen Konfiguration sieht das vernünftig aus. Wenn Sie das Fenster jedoch breiter machen oder den Smartphone-Simulator horizontal drehen, sieht es etwas seltsam aus. Um das Problem zu beheben, fügen Sie links auf dem Bildschirm ein NavigationRail ein, wenn die Anwendung breit genug ist. Das geschieht im nächsten Schritt.
6. Navigationsleiste hinzufügen
Mit diesem Schritt wird Ihrer Anwendung ein NavigationRail hinzugefügt. Je nach Bildschirmgröße soll nur eines der beiden Navigations-Widgets angezeigt werden. Das bedeutet, dass Sie die NavigationBar bei Bedarf ausblenden oder einblenden müssen. Erstellen Sie im Verzeichnis lib/widgets eine Datei disappearing_bottom_navigation_bar.dart und fügen Sie den folgenden Code hinzu:
lib/widgets/disappearing_bottom_navigation_bar.dart
import 'package:flutter/material.dart';

import '../destinations.dart';

class DisappearingBottomNavigationBar extends StatelessWidget {
  const DisappearingBottomNavigationBar({
    super.key,
    required this.selectedIndex,
    this.onDestinationSelected,
  });

  final int selectedIndex;
  final ValueChanged<int>? onDestinationSelected;

  @override
  Widget build(BuildContext context) {
    return NavigationBar(
      elevation: 0,
      backgroundColor: Colors.white,
      destinations: destinations.map<NavigationDestination>((d) {
        return NavigationDestination(icon: Icon(d.icon), label: d.label);
      }).toList(),
      selectedIndex: selectedIndex,
      onDestinationSelected: onDestinationSelected,
    );
  }
}
Fügen Sie im selben Verzeichnis eine weitere Datei namens disappearing_navigation_rail.dart mit dem folgenden Code hinzu:
lib/widgets/disappearing_navigation_rail.dart
import 'package:flutter/material.dart';

import '../destinations.dart';

class DisappearingNavigationRail extends StatelessWidget {
  const DisappearingNavigationRail({
    super.key,
    required this.backgroundColor,
    required this.selectedIndex,
    this.onDestinationSelected,
  });

  final Color backgroundColor;
  final int selectedIndex;
  final ValueChanged<int>? onDestinationSelected;

  @override
  Widget build(BuildContext context) {
    final colorScheme = Theme.of(context).colorScheme;
    return NavigationRail(
      selectedIndex: selectedIndex,
      backgroundColor: backgroundColor,
      onDestinationSelected: onDestinationSelected,
      leading: Column(
        children: [
          IconButton(onPressed: () {}, icon: const Icon(Icons.menu)),
          const SizedBox(height: 8),
          FloatingActionButton(
            shape: const RoundedRectangleBorder(
              borderRadius: BorderRadius.all(Radius.circular(15)),
            ),
            backgroundColor: colorScheme.tertiaryContainer,
            foregroundColor: colorScheme.onTertiaryContainer,
            onPressed: () {},
            child: const Icon(Icons.add),
          ),
        ],
      ),
      groupAlignment: -0.85,
      destinations: destinations.map((d) {
        return NavigationRailDestination(
          icon: Icon(d.icon),
          label: Text(d.label),
        );
      }).toList(),
    );
  }
}
Da die Navigationselemente in eigene Widgets umgearbeitet wurden, müssen einige Änderungen an der lib/main.dart-Datei vorgenommen werden:
lib/main.dart
import 'package:flutter/material.dart';

// Remove the destination.dart import, it's not required
import 'models/data.dart' as data;
import 'models/models.dart';
import 'widgets/disappearing_bottom_navigation_bar.dart';  // Add import
import 'widgets/disappearing_navigation_rail.dart';        // Add import
import 'widgets/email_list_view.dart';

void main() {
  runApp(const MainApp());
}

class MainApp extends StatelessWidget {
  const MainApp({super.key});

  @override
  Widget build(BuildContext context) {
    return MaterialApp(
      theme: ThemeData.light(),
      home: Feed(currentUser: data.user_0),
    );
  }
}

class Feed extends StatefulWidget {
  const Feed({super.key, required this.currentUser});

  final User currentUser;

  @override
  State<Feed> createState() => _FeedState();
}

class _FeedState extends State<Feed> {
  late final _colorScheme = Theme.of(context).colorScheme;
  late final _backgroundColor = Color.alphaBlend(
    _colorScheme.primary.withAlpha(36),
    _colorScheme.surface,
  );

  int selectedIndex = 0;
                                                  // Add from here...
  bool wideScreen = false;

  @override
  void didChangeDependencies() {
    super.didChangeDependencies();

    final double width = MediaQuery.of(context).size.width;
    wideScreen = width > 600;
  }
                                                 // ... to here.

  @override
  Widget build(BuildContext context) {
                                                 // Modify from here...
    return Scaffold(
      body: Row(
        children: [
          if (wideScreen)
            DisappearingNavigationRail(
              selectedIndex: selectedIndex,
              backgroundColor: _backgroundColor,
              onDestinationSelected: (index) {
                setState(() {
                  selectedIndex = index;
                });
              },
            ),
          Expanded(
            child: Container(
              color: _backgroundColor,
              child: EmailListView(
                selectedIndex: selectedIndex,
                onSelected: (index) {
                  setState(() {
                    selectedIndex = index;
                  });
                },
                currentUser: widget.currentUser,
              ),
            ),
          ),
        ],
      ),
      floatingActionButton: wideScreen
          ? null
          : FloatingActionButton(
              backgroundColor: _colorScheme.tertiaryContainer,
              foregroundColor: _colorScheme.onTertiaryContainer,
              onPressed: () {},
              child: const Icon(Icons.add),
            ),
      bottomNavigationBar: wideScreen
          ? null
          : DisappearingBottomNavigationBar(
              selectedIndex: selectedIndex,
              onDestinationSelected: (index) {
                setState(() {
                  selectedIndex = index;
                });
              },
            ),
    );
                                                    // ... to here.
  }
}
Die erste wichtige Änderung an der main.dart-Datei ist die Hinzufügung eines wideScreen-Status, der aktualisiert wird, wenn der Nutzer die Größe des Displays ändert, z. B. durch Ändern der Größe eines Browserfensters oder Drehen eines Smartphones. Bei der nächsten Änderung werden NavigationBar und FloatingActionButton so geändert, dass sie davon abhängen, ob sich die App im Modus wideScreen befindet. Schließlich wird das NavigationRail bedingt links angezeigt, wenn der Bildschirm breit genug ist. Führen Sie die Anwendung im Web oder auf dem Computer aus und ändern Sie die Größe des Bildschirms, um die beiden verschiedenen Layouts zu sehen.
|
|

Die beiden verschiedenen Layouts sind gut, aber die Übergänge zwischen ihnen sind nicht optimal. Wenn die Leiste dynamischer durch die Schiene ersetzt würde (und umgekehrt), würde dies die Anwendung erheblich verbessern. Diese Animation fügen Sie im nächsten Schritt hinzu.
7. Übergänge animieren
Das Erstellen einer animierten Benutzeroberfläche umfasst die Erstellung einer Reihe von Animationen, bei denen jede Komponente entsprechend choreografiert wird. Für diese Animation erstellen Sie zuerst im Verzeichnis lib eine neue Datei namens animations.dart mit den erforderlichen Animationskurven.
lib/animations.dart
import 'package:flutter/animation.dart';

class BarAnimation extends ReverseAnimation {
  BarAnimation({required AnimationController parent})
    : super(
        CurvedAnimation(
          parent: parent,
          curve: const Interval(0, 1 / 5),
          reverseCurve: const Interval(1 / 5, 4 / 5),
        ),
      );
}

class OffsetAnimation extends CurvedAnimation {
  OffsetAnimation({required super.parent})
    : super(
        curve: const Interval(
          2 / 5,
          3 / 5,
          curve: Curves.easeInOutCubicEmphasized,
        ),
        reverseCurve: Interval(
          4 / 5,
          1,
          curve: Curves.easeInOutCubicEmphasized.flipped,
        ),
      );
}

class RailAnimation extends CurvedAnimation {
  RailAnimation({required super.parent})
    : super(
        curve: const Interval(0 / 5, 4 / 5),
        reverseCurve: const Interval(3 / 5, 1),
      );
}

class RailFabAnimation extends CurvedAnimation {
  RailFabAnimation({required super.parent})
    : super(curve: const Interval(3 / 5, 1));
}

class ScaleAnimation extends CurvedAnimation {
  ScaleAnimation({required super.parent})
    : super(
        curve: const Interval(
          3 / 5,
          4 / 5,
          curve: Curves.easeInOutCubicEmphasized,
        ),
        reverseCurve: Interval(
          3 / 5,
          1,
          curve: Curves.easeInOutCubicEmphasized.flipped,
        ),
      );
}

class ShapeAnimation extends CurvedAnimation {
  ShapeAnimation({required super.parent})
    : super(
        curve: const Interval(
          2 / 5,
          3 / 5,
          curve: Curves.easeInOutCubicEmphasized,
        ),
      );
}

class SizeAnimation extends CurvedAnimation {
  SizeAnimation({required super.parent})
    : super(
        curve: const Interval(
          0 / 5,
          3 / 5,
          curve: Curves.easeInOutCubicEmphasized,
        ),
        reverseCurve: Interval(
          2 / 5,
          1,
          curve: Curves.easeInOutCubicEmphasized.flipped,
        ),
      );
}
Die Entwicklung dieser Kurven erfordert Iterationen, was durch den Hot Reload von Flutter viel einfacher wird. Für diese Animationen benötigen Sie einige Übergänge. Erstellen Sie im Verzeichnis lib ein Unterverzeichnis mit dem Namen transitions und fügen Sie eine Datei namens bottom_bar_transition.dart mit dem folgenden Code hinzu:
lib/transitions/bottom_bar_transition.dart
import 'package:flutter/material.dart';
import '../animations.dart';

class BottomBarTransition extends StatefulWidget {
  const BottomBarTransition({
    super.key,
    required this.animation,
    required this.backgroundColor,
    required this.child,
  });

  final Animation<double> animation;
  final Color backgroundColor;
  final Widget child;

  @override
  State<BottomBarTransition> createState() => _BottomBarTransition();
}

class _BottomBarTransition extends State<BottomBarTransition> {
  late final Animation<Offset> offsetAnimation = Tween<Offset>(
    begin: const Offset(0, 1),
    end: Offset.zero,
  ).animate(OffsetAnimation(parent: widget.animation));

  late final Animation<double> heightAnimation = Tween<double>(
    begin: 0,
    end: 1,
  ).animate(SizeAnimation(parent: widget.animation));

  @override
  Widget build(BuildContext context) {
    return ClipRect(
      child: DecoratedBox(
        decoration: BoxDecoration(color: widget.backgroundColor),
        child: Align(
          alignment: Alignment.topLeft,
          heightFactor: heightAnimation.value,
          child: FractionalTranslation(
            translation: offsetAnimation.value,
            child: widget.child,
          ),
        ),
      ),
    );
  }
}
Fügen Sie dem Verzeichnis lib/transitions eine weitere Datei mit dem Namen nav_rail_transition.dart hinzu und fügen Sie den folgenden Code ein:
lib/transitions/nav_rail_transition.dart
import 'package:flutter/material.dart';
import '../animations.dart';

class NavRailTransition extends StatefulWidget {
  const NavRailTransition({
    super.key,
    required this.animation,
    required this.backgroundColor,
    required this.child,
  });

  final Animation<double> animation;
  final Widget child;
  final Color backgroundColor;

  @override
  State<NavRailTransition> createState() => _NavRailTransitionState();
}

class _NavRailTransitionState extends State<NavRailTransition> {
  // The animations are only rebuilt by this method when the text
  // direction changes because this widget only depends on Directionality.
  late final bool ltr = Directionality.of(context) == TextDirection.ltr;
  late final Animation<Offset> offsetAnimation = Tween<Offset>(
    begin: ltr ? const Offset(-1, 0) : const Offset(1, 0),
    end: Offset.zero,
  ).animate(OffsetAnimation(parent: widget.animation));
  late final Animation<double> widthAnimation = Tween<double>(
    begin: 0,
    end: 1,
  ).animate(SizeAnimation(parent: widget.animation));

  @override
  Widget build(BuildContext context) {
    return ClipRect(
      child: DecoratedBox(
        decoration: BoxDecoration(color: widget.backgroundColor),
        child: AnimatedBuilder(
          animation: widthAnimation,
          builder: (context, child) {
            return Align(
              alignment: Alignment.topLeft,
              widthFactor: widthAnimation.value,
              child: FractionalTranslation(
                translation: offsetAnimation.value,
                child: widget.child,
              ),
            );
          },
        ),
      ),
    );
  }
}
Diese beiden Übergangs-Widgets umschließen die Navigationsleiste und die Balken-Widgets, um deren Ein- und Ausblenden zu animieren. Wenn Sie diese beiden Übergangs-Widgets verwenden möchten, aktualisieren Sie zwei Widgets, die mit disappearing_bottom_navigation_bar.dart beginnen:
lib/widgets/disappearing_bottom_navigation_bar.dart
import 'package:flutter/material.dart';

import '../animations.dart';                          // Add this import
import '../destinations.dart';
import '../transitions/bottom_bar_transition.dart';   // Add this import

class DisappearingBottomNavigationBar extends StatelessWidget {
  const DisappearingBottomNavigationBar({
    super.key,
    required this.barAnimation,                       // Add this parameter
    required this.selectedIndex,
    this.onDestinationSelected,
  });

  final BarAnimation barAnimation;                   // Add this variable
  final int selectedIndex;
  final ValueChanged<int>? onDestinationSelected;

  @override
  Widget build(BuildContext context) {
                                                     // Modify from here...
    return BottomBarTransition(
      animation: barAnimation,
      backgroundColor: Colors.white,
      child: NavigationBar(
        elevation: 0,
        backgroundColor: Colors.white,
        destinations: destinations.map<NavigationDestination>((d) {
          return NavigationDestination(icon: Icon(d.icon), label: d.label);
        }).toList(),
        selectedIndex: selectedIndex,
        onDestinationSelected: onDestinationSelected,
      ),
    );
                                                     // ... to here.
  }
}
Bei der vorherigen Änderung wird eine der Animationen hinzugefügt und ein Übergang integriert. So können Sie festlegen, wie die Navigationsleiste angezeigt und ausgeblendet wird.
Ändern Sie als Nächstes disappearing_navigation_rail.dart so:
lib/widgets/disappearing_navigation_rail.dart
import 'package:flutter/material.dart';

import '../animations.dart';                          // Add this import
import '../destinations.dart';
import '../transitions/nav_rail_transition.dart';     // Add this import
import 'animated_floating_action_button.dart';        // Add this import

class DisappearingNavigationRail extends StatelessWidget {
  const DisappearingNavigationRail({
    super.key,
    required this.railAnimation,                      // Add this parameter
    required this.railFabAnimation,                   // Add this parameter
    required this.backgroundColor,
    required this.selectedIndex,
    this.onDestinationSelected,
  });

  final RailAnimation railAnimation;                  // Add this variable
  final RailFabAnimation railFabAnimation;            // Add this variable
  final Color backgroundColor;
  final int selectedIndex;
  final ValueChanged<int>? onDestinationSelected;

  @override
  Widget build(BuildContext context) {
    // Delete colorScheme
                                                      // Modify from here ...
    return NavRailTransition(
      animation: railAnimation,
      backgroundColor: backgroundColor,
      child: NavigationRail(
        selectedIndex: selectedIndex,
        backgroundColor: backgroundColor,
        onDestinationSelected: onDestinationSelected,
        leading: Column(
          children: [
            IconButton(onPressed: () {}, icon: const Icon(Icons.menu)),
            const SizedBox(height: 8),
            AnimatedFloatingActionButton(
              animation: railFabAnimation,
              elevation: 0,
              onPressed: () {},
              child: const Icon(Icons.add),
            ),
          ],
        ),
        groupAlignment: -0.85,
        destinations: destinations.map((d) {
          return NavigationRailDestination(
            icon: Icon(d.icon),
            label: Text(d.label),
          );
        }).toList(),
      ),
    );
                                                      // ... to here.
  }
}
Beim Eingeben des vorherigen Codes haben Sie wahrscheinlich mehrere Fehlerwarnungen zu einem nicht definierten Widget erhalten – dem FloatingActionButton. Fügen Sie lib/widgets dazu die Datei animated_floating_action_button.dart mit dem folgenden Code hinzu:
lib/widgets/animated_floating_action_button.dart
import 'dart:ui';

import 'package:flutter/material.dart';
import '../animations.dart';

class AnimatedFloatingActionButton extends StatefulWidget {
  const AnimatedFloatingActionButton({
    super.key,
    required this.animation,
    this.elevation,
    this.onPressed,
    this.child,
  });

  final Animation<double> animation;
  final VoidCallback? onPressed;
  final Widget? child;
  final double? elevation;

  @override
  State<AnimatedFloatingActionButton> createState() =>
      _AnimatedFloatingActionButton();
}

class _AnimatedFloatingActionButton
    extends State<AnimatedFloatingActionButton> {
  late final ColorScheme _colorScheme = Theme.of(context).colorScheme;
  late final Animation<double> _scaleAnimation = ScaleAnimation(
    parent: widget.animation,
  );
  late final Animation<double> _shapeAnimation = ShapeAnimation(
    parent: widget.animation,
  );

  @override
  Widget build(BuildContext context) {
    return ScaleTransition(
      scale: _scaleAnimation,
      child: FloatingActionButton(
        elevation: widget.elevation,
        shape: RoundedRectangleBorder(
          borderRadius: BorderRadius.all(
            Radius.circular(lerpDouble(30, 15, _shapeAnimation.value)!),
          ),
        ),
        backgroundColor: _colorScheme.tertiaryContainer,
        foregroundColor: _colorScheme.onTertiaryContainer,
        onPressed: widget.onPressed,
        child: widget.child,
      ),
    );
  }
}
Um diese Änderungen in die Anwendung zu übernehmen, aktualisieren Sie die Datei main.dart so:
lib/main.dart
import 'package:flutter/material.dart';

import 'animations.dart';                               // Add this import
import 'models/data.dart' as data;
import 'models/models.dart';
import 'widgets/animated_floating_action_button.dart';  // Add this import
import 'widgets/disappearing_bottom_navigation_bar.dart';
import 'widgets/disappearing_navigation_rail.dart';
import 'widgets/email_list_view.dart';

void main() {
  runApp(const MainApp());
}

class MainApp extends StatelessWidget {
  const MainApp({super.key});

  @override
  Widget build(BuildContext context) {
    return MaterialApp(
      theme: ThemeData.light(),
      home: Feed(currentUser: data.user_0),
    );
  }
}

class Feed extends StatefulWidget {
  const Feed({super.key, required this.currentUser});

  final User currentUser;

  @override
  State<Feed> createState() => _FeedState();
}

class _FeedState extends State<Feed> with SingleTickerProviderStateMixin {
  late final _colorScheme = Theme.of(context).colorScheme;
  late final _backgroundColor = Color.alphaBlend(
    _colorScheme.primary.withAlpha(36),
    _colorScheme.surface,
  );
                                                        // Add from here...
  late final _controller = AnimationController(
    duration: const Duration(milliseconds: 1000),
    reverseDuration: const Duration(milliseconds: 1250),
    value: 0,
    vsync: this,
  );
  late final _railAnimation = RailAnimation(parent: _controller);
  late final _railFabAnimation = RailFabAnimation(parent: _controller);
  late final _barAnimation = BarAnimation(parent: _controller);
                                                        // ... to here.

  int selectedIndex = 0;
  // Remove wideScreen
  bool controllerInitialized = false;                   // Add this variable

  @override
  void didChangeDependencies() {
    super.didChangeDependencies();

    final double width = MediaQuery.of(context).size.width;
    // Remove wideScreen reference
                                                        // Add from here ...
    final AnimationStatus status = _controller.status;
    if (width > 600) {
      if (status != AnimationStatus.forward &&
          status != AnimationStatus.completed) {
        _controller.forward();
      }
    } else {
      if (status != AnimationStatus.reverse &&
          status != AnimationStatus.dismissed) {
        _controller.reverse();
      }
    }
    if (!controllerInitialized) {
      controllerInitialized = true;
      _controller.value = width > 600 ? 1 : 0;
    }
                                                        // ... to here.
  }

                                                        // Add from here ...
  @override
  void dispose() {
    _controller.dispose();
    super.dispose();
  }
                                                        // ... to here.

  @override
  Widget build(BuildContext context) {
                                                        // Modify from here ...
    return AnimatedBuilder(
      animation: _controller,
      builder: (context, _) {
        return Scaffold(
          body: Row(
            children: [
              DisappearingNavigationRail(
                railAnimation: _railAnimation,
                railFabAnimation: _railFabAnimation,
                selectedIndex: selectedIndex,
                backgroundColor: _backgroundColor,
                onDestinationSelected: (index) {
                  setState(() {
                    selectedIndex = index;
                  });
                },
              ),
              Expanded(
                child: Container(
                  color: _backgroundColor,
                  child: EmailListView(
                    selectedIndex: selectedIndex,
                    onSelected: (index) {
                      setState(() {
                        selectedIndex = index;
                      });
                    },
                    currentUser: widget.currentUser,
                  ),
                ),
              ),
            ],
          ),
          floatingActionButton: AnimatedFloatingActionButton(
            animation: _barAnimation,
            onPressed: () {},
            child: const Icon(Icons.add),
          ),
          bottomNavigationBar: DisappearingBottomNavigationBar(
            barAnimation: _barAnimation,
            selectedIndex: selectedIndex,
            onDestinationSelected: (index) {
              setState(() {
                selectedIndex = index;
              });
            },
          ),
        );
      },
    );
                                                        // ... to here.
  }
}
Starten Sie die App. Sie sollte anfangs genauso aussehen wie zuvor. Ändern Sie die Größe des Bildschirms, um zu sehen, wie die Benutzeroberfläche je nach Größe und Abmessungen zwischen Navigationsleiste und Navigationsleiste wechselt. Die Bewegung dieser Übergänge sollte jetzt flüssig und spielerisch wirken. Verwenden Sie den Hot-Reload, um die verwendeten Animationskurven zu ändern und zu sehen, wie sich das auf die Nutzerfreundlichkeit der App auswirkt.
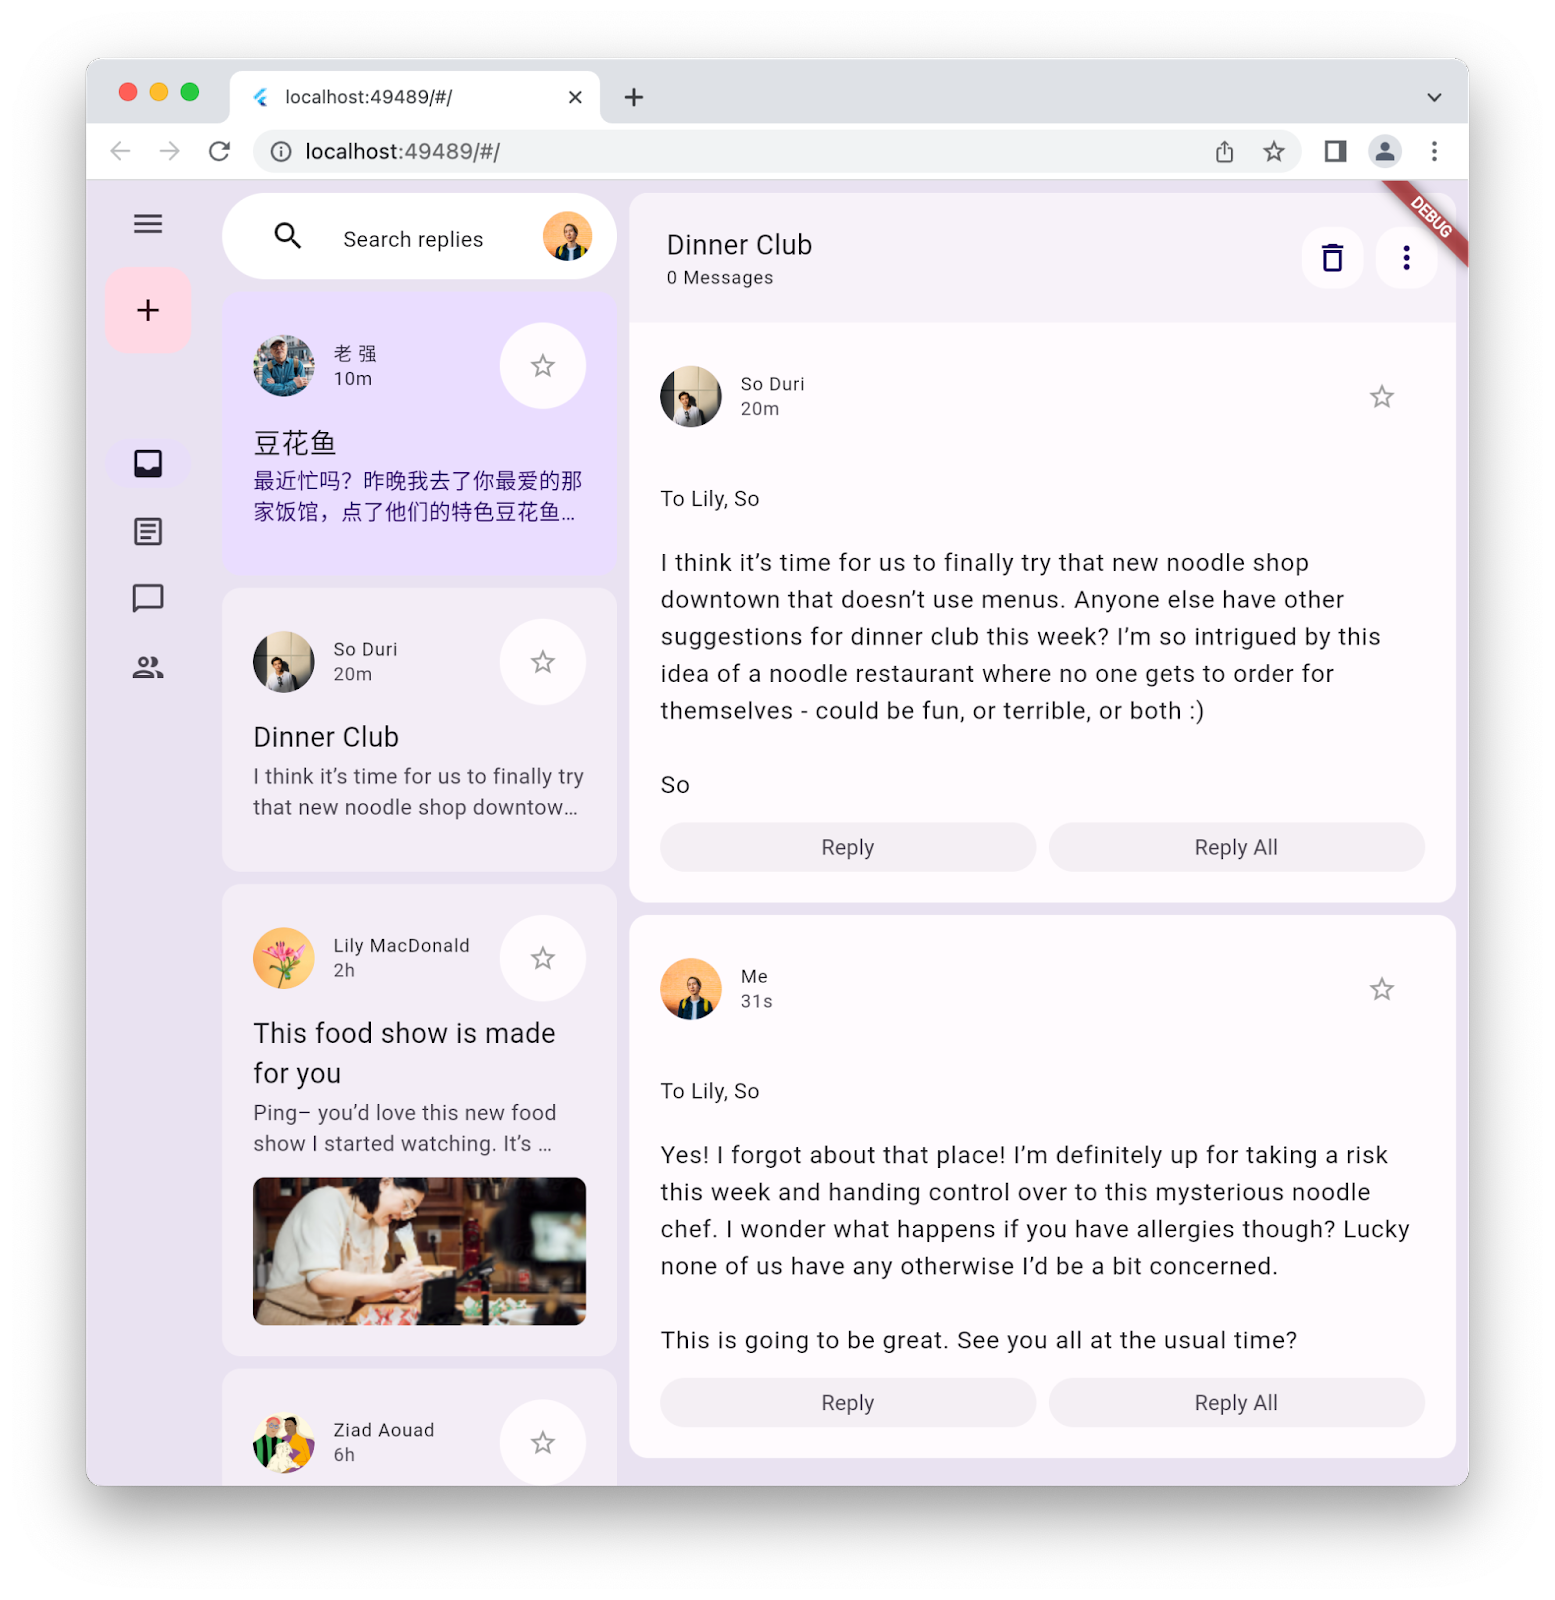
8. Liste mit Detailansicht hinzufügen
Als Bonus eignet sich eine Messaging-App hervorragend, um eine Liste mit Detaillayout zu präsentieren, aber nur, wenn das Display breit genug ist. Erstellen Sie zuerst eine Datei mit dem Namen reply_list_view.dart in lib/widgets und fügen Sie den folgenden Code ein:
lib/widgets/reply_list_view.dart
import 'package:flutter/material.dart';

import '../models/data.dart' as data;
import 'email_widget.dart';

class ReplyListView extends StatelessWidget {
  const ReplyListView({super.key});

  @override
  Widget build(BuildContext context) {
    return Padding(
      padding: const EdgeInsets.only(right: 8.0),
      child: ListView(
        children: [
          const SizedBox(height: 8),
          ...List.generate(data.replies.length, (index) {
            return Padding(
              padding: const EdgeInsets.only(bottom: 8.0),
              child: EmailWidget(
                email: data.replies[index],
                isPreview: false,
                isThreaded: true,
                showHeadline: index == 0,
              ),
            );
          }),
        ],
      ),
    );
  }
}
Fügen Sie als Nächstes in lib/transitions eine list_detail_transition.dart hinzu und füllen Sie sie mit dem folgenden Code aus:
lib/transitions/list_detail_transition.dart
import 'dart:ui';

import 'package:flutter/material.dart';
import '../animations.dart';

class ListDetailTransition extends StatefulWidget {
  const ListDetailTransition({
    super.key,
    required this.animation,
    required this.one,
    required this.two,
  });

  final Animation<double> animation;
  final Widget one;
  final Widget two;

  @override
  State<ListDetailTransition> createState() => _ListDetailTransitionState();
}

class _ListDetailTransitionState extends State<ListDetailTransition> {
  Animation<double> widthAnimation = const AlwaysStoppedAnimation(0);
  late final Animation<double> sizeAnimation = SizeAnimation(
    parent: widget.animation,
  );
  late final Animation<Offset> offsetAnimation = Tween<Offset>(
    begin: const Offset(1, 0),
    end: Offset.zero,
  ).animate(OffsetAnimation(parent: sizeAnimation));
  double currentFlexFactor = 0;

  @override
  void didChangeDependencies() {
    super.didChangeDependencies();

    final double width = MediaQuery.of(context).size.width;
    double nextFlexFactor = switch (width) {
      >= 800 && < 1200 => lerpDouble(1000, 2000, (width - 800) / 400)!,
      >= 1200 && < 1600 => lerpDouble(2000, 3000, (width - 1200) / 400)!,
      >= 1600 => 3000,
      _ => 1000,
    };

    if (nextFlexFactor == currentFlexFactor) {
      return;
    }

    if (currentFlexFactor == 0) {
      widthAnimation = Tween<double>(
        begin: 0,
        end: nextFlexFactor,
      ).animate(sizeAnimation);
    } else {
      final TweenSequence<double> sequence = TweenSequence([
        if (sizeAnimation.value > 0) ...[
          TweenSequenceItem(
            tween: Tween(begin: 0, end: widthAnimation.value),
            weight: sizeAnimation.value,
          ),
        ],
        if (sizeAnimation.value < 1) ...[
          TweenSequenceItem(
            tween: Tween(begin: widthAnimation.value, end: nextFlexFactor),
            weight: 1 - sizeAnimation.value,
          ),
        ],
      ]);

      widthAnimation = sequence.animate(sizeAnimation);
    }

    currentFlexFactor = nextFlexFactor;
  }

  @override
  Widget build(BuildContext context) {
    return widthAnimation.value.toInt() == 0
        ? widget.one
        : Row(
            children: [
              Flexible(flex: 1000, child: widget.one),
              Flexible(
                flex: widthAnimation.value.toInt(),
                child: FractionalTranslation(
                  translation: offsetAnimation.value,
                  child: widget.two,
                ),
              ),
            ],
          );
  }
}
Binden Sie diese Inhalte in die App ein, indem Sie lib/main.dart so aktualisieren:
lib/main.dart
import 'package:flutter/material.dart';

import 'animations.dart';
import 'models/data.dart' as data;
import 'models/models.dart';
import 'transitions/list_detail_transition.dart';          // Add import
import 'widgets/animated_floating_action_button.dart';
import 'widgets/disappearing_bottom_navigation_bar.dart';
import 'widgets/disappearing_navigation_rail.dart';
import 'widgets/email_list_view.dart';
import 'widgets/reply_list_view.dart';                     // Add import

void main() {
  runApp(const MainApp());
}

class MainApp extends StatelessWidget {
  const MainApp({super.key});

  @override
  Widget build(BuildContext context) {
    return MaterialApp(
      theme: ThemeData.light(),
      home: Feed(currentUser: data.user_0),
    );
  }
}

class Feed extends StatefulWidget {
  const Feed({super.key, required this.currentUser});

  final User currentUser;

  @override
  State<Feed> createState() => _FeedState();
}

class _FeedState extends State<Feed> with SingleTickerProviderStateMixin {
  late final _colorScheme = Theme.of(context).colorScheme;
  late final _backgroundColor = Color.alphaBlend(
    _colorScheme.primary.withAlpha(36),
    _colorScheme.surface,
  );
  late final _controller = AnimationController(
    duration: const Duration(milliseconds: 1000),
    reverseDuration: const Duration(milliseconds: 1250),
    value: 0,
    vsync: this,
  );
  late final _railAnimation = RailAnimation(parent: _controller);
  late final _railFabAnimation = RailFabAnimation(parent: _controller);
  late final _barAnimation = BarAnimation(parent: _controller);

  int selectedIndex = 0;
  bool controllerInitialized = false;

  @override
  void didChangeDependencies() {
    super.didChangeDependencies();

    final double width = MediaQuery.of(context).size.width;
    final AnimationStatus status = _controller.status;
    if (width > 600) {
      if (status != AnimationStatus.forward &&
          status != AnimationStatus.completed) {
        _controller.forward();
      }
    } else {
      if (status != AnimationStatus.reverse &&
          status != AnimationStatus.dismissed) {
        _controller.reverse();
      }
    }
    if (!controllerInitialized) {
      controllerInitialized = true;
      _controller.value = width > 600 ? 1 : 0;
    }
  }

  @override
  void dispose() {
    _controller.dispose();
    super.dispose();
  }

  @override
  Widget build(BuildContext context) {
    return AnimatedBuilder(
      animation: _controller,
      builder: (context, _) {
        return Scaffold(
          body: Row(
            children: [
              DisappearingNavigationRail(
                railAnimation: _railAnimation,
                railFabAnimation: _railFabAnimation,
                selectedIndex: selectedIndex,
                backgroundColor: _backgroundColor,
                onDestinationSelected: (index) {
                  setState(() {
                    selectedIndex = index;
                  });
                },
              ),
              Expanded(
                child: Container(
                  color: _backgroundColor,
                                                // Update from here ...
                  child: ListDetailTransition(
                    animation: _railAnimation,
                    one: EmailListView(
                      selectedIndex: selectedIndex,
                      onSelected: (index) {
                        setState(() {
                          selectedIndex = index;
                        });
                      },
                      currentUser: widget.currentUser,
                    ),
                    two: const ReplyListView(),
                  ),
                                                // ... to here.
                ),
              ),
            ],
          ),
          floatingActionButton: AnimatedFloatingActionButton(
            animation: _barAnimation,
            onPressed: () {},
            child: const Icon(Icons.add),
          ),
          bottomNavigationBar: DisappearingBottomNavigationBar(
            barAnimation: _barAnimation,
            selectedIndex: selectedIndex,
            onDestinationSelected: (index) {
              setState(() {
                selectedIndex = index;
              });
            },
          ),
        );
      },
    );
  }
}
Führen Sie die App aus, um das Gesamtbild zu sehen. Sie haben das Material 3-Design und die Animation zwischen verschiedenen Layouts in einer App, die eine reale Anwendung darstellt. Sie sollte so aussehen:
9. Glückwunsch
Herzlichen Glückwunsch! Sie haben Ihre erste Material 3-Flutter-App erstellt.
Den Code für alle Schritte dieses Codelabs finden Sie im GitHub-Repository für Flutter-Codelabs.
Nächste Schritte
Sehen Sie sich einige dieser Codelabs an:
- Spiele mit Flutter und Flame erstellen
- Ihre Flutter-App von langweilig zu schön machen
- FFI in einem Flutter-Plug-in verwenden