
About this codelab
1. 概览
在此 Codelab 中,您将学习一些 Firebase 基础知识,以便创建交互式 Web 应用。您将使用多种 Firebase 产品来构建一个活动回复应用及一个留言板应用。

学习内容
- 使用 Firebase Authentication 和 FirebaseUI 对用户进行身份验证。
- 使用 Cloud Firestore 同步数据。
- 编写 Firebase 安全规则以保护数据库的安全。
所需条件
- 您所选的浏览器(例如 Chrome)。
- 访问 stackblitz.com(无需账号或登录)。
- Google 账号,例如 Gmail 账号。我们建议使用您已用于 GitHub 账号的电子邮件账号。这样一来,您就可以使用 StackBlitz 中的高级功能了。
- Codelab 的示例代码。如需了解如何获取代码,请参阅下一步。
2. 获取起始代码
在此 Codelab 中,您将使用 StackBlitz(一款集成了多个 Firebase 工作流程的在线编辑器)构建应用。Stackblitz 无需安装软件,也不需要特殊的 StackBlitz 账号。
借助 StackBlitz,您可以与他人共享项目。拥有您的 StackBlitz 项目网址的其他用户可以查看您的代码并派生您的项目,但他们无法修改您的 StackBlitz 项目。
- 如需获取起始代码,请前往以下网址:https://stackblitz.com/edit/firebase-gtk-web-start
- 在 StackBlitz 页面顶部,点击创建分支:
现在,您已将初始代码复制为自己的 StackBlitz 项目,该项目具有唯一的名称和唯一的网址。您的所有文件和更改都保存在此 StackBlitz 项目中。
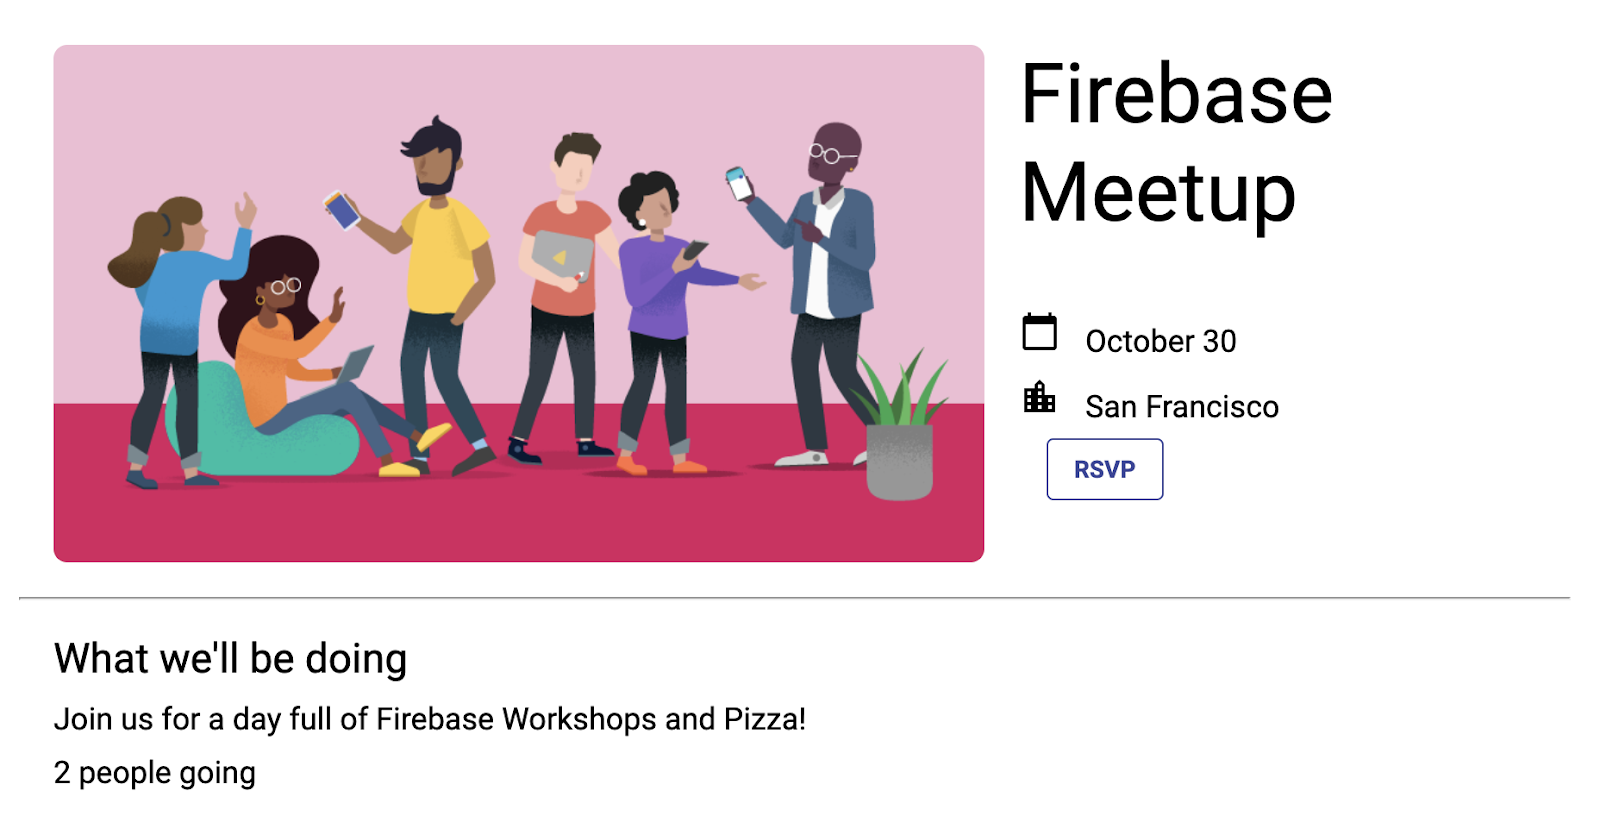
3. 修改活动信息
此 Codelab 的起始材料为 Web 应用提供了一些结构,包括一些样式表和几个用于应用的 HTML 容器。在此 Codelab 的后续部分,您会将这些容器连接到 Firebase。
首先,我们来详细了解一下 StackBlitz 界面。
- 在 StackBlitz 中,打开
index.html文件。 - 找到
event-details-container和description-container,然后尝试修改一些活动详情。
在您修改文本时,StackBlitz 中的自动页面重新加载会显示新的活动详情。很酷,对吧?
<!-- ... -->
<div id="app">
<img src="..." />
<section id="event-details-container">
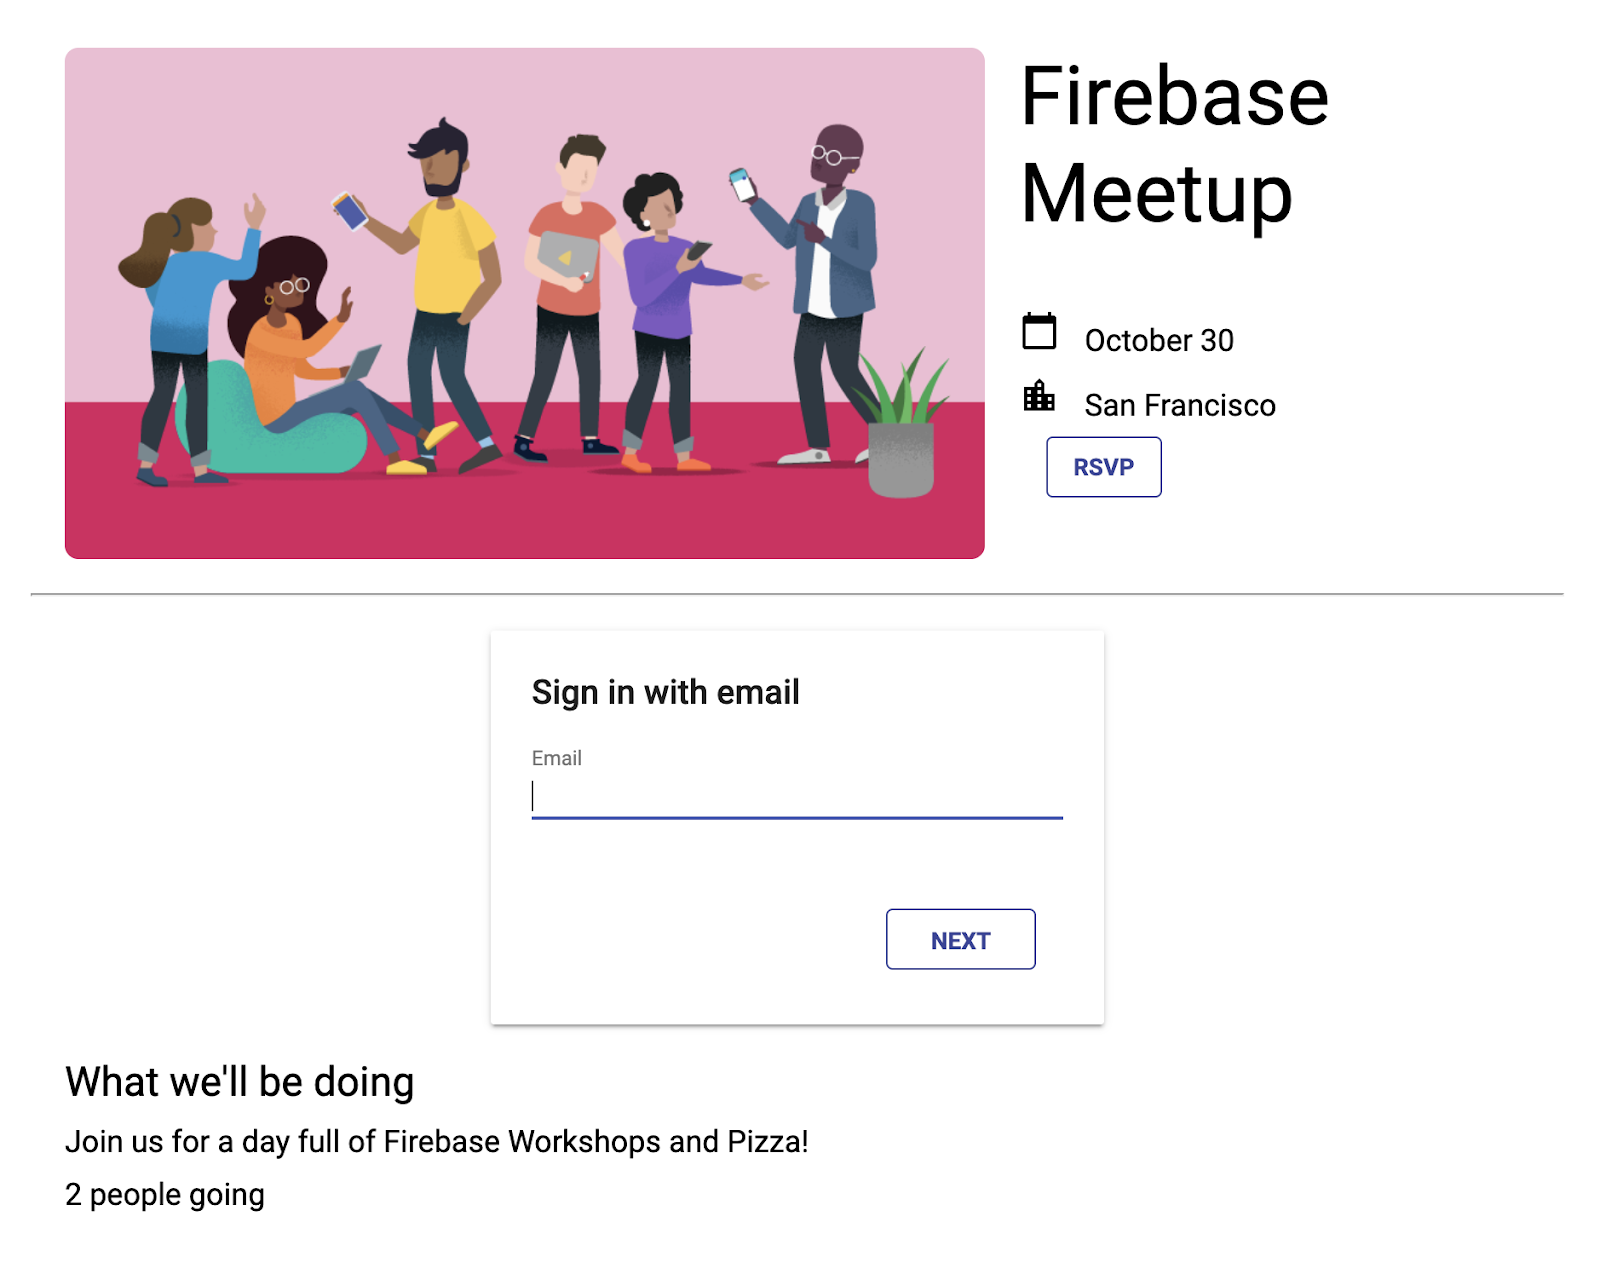
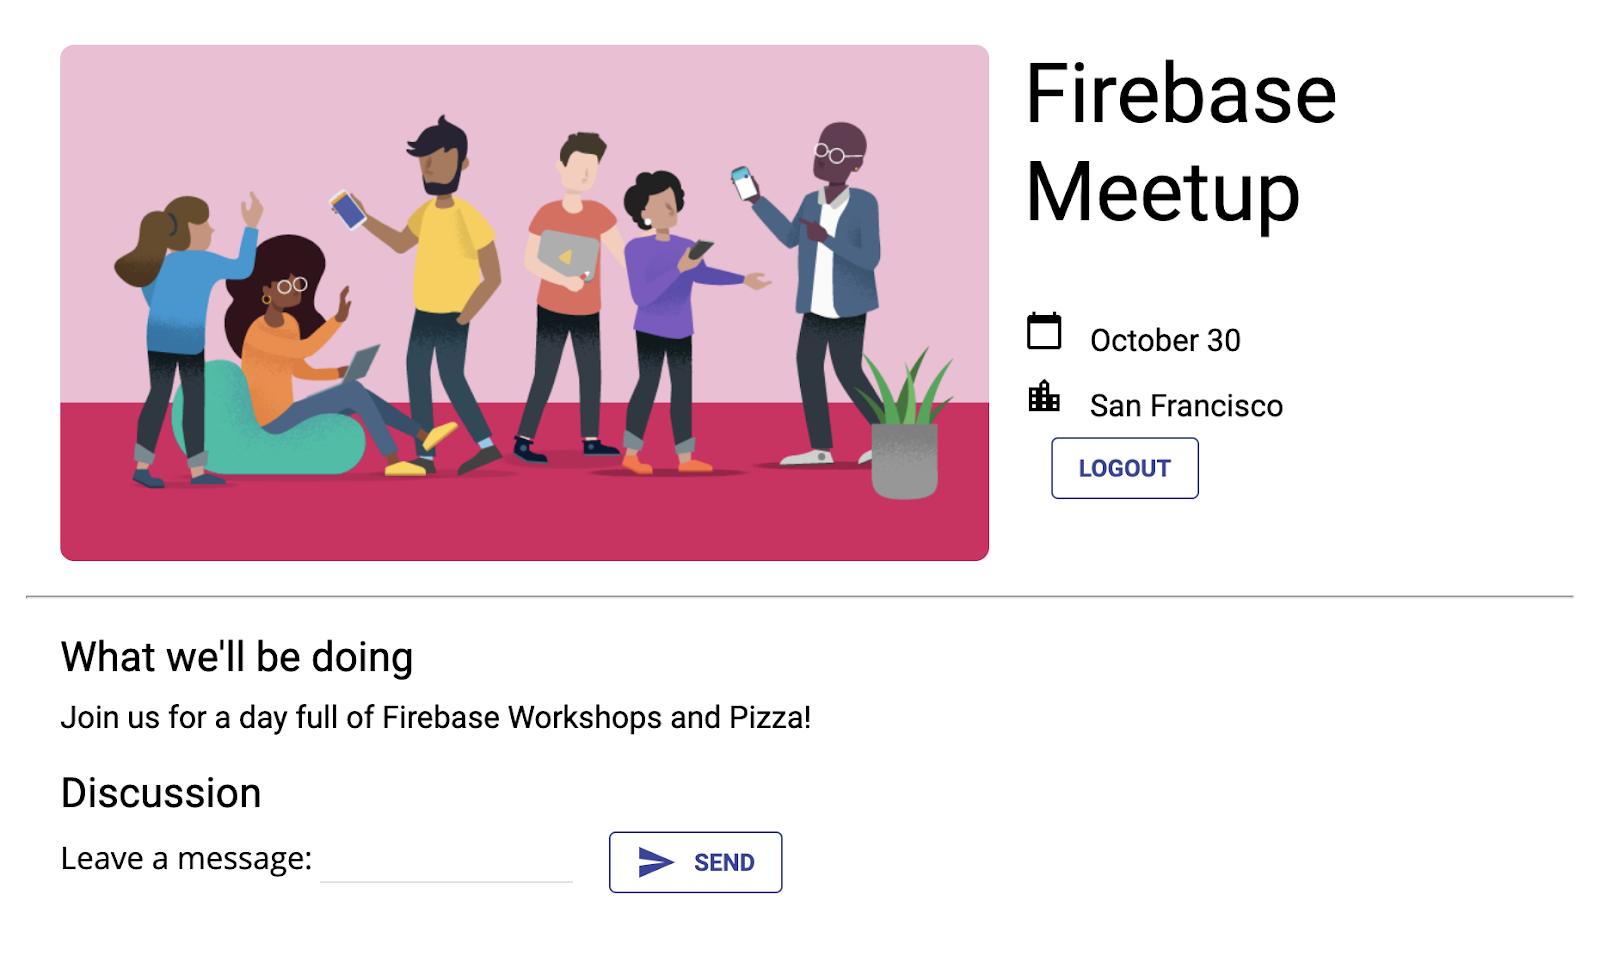
<h1>Firebase Meetup</h1>
<p><i class="material-icons">calendar_today</i> October 30</p>
<p><i class="material-icons">location_city</i> San Francisco</p>
</section>
<hr>
<section id="firebaseui-auth-container"></section>
<section id="description-container">
<h2>What we'll be doing</h2>
<p>Join us for a day full of Firebase Workshops and Pizza!</p>
</section>
</div>
<!-- ... -->
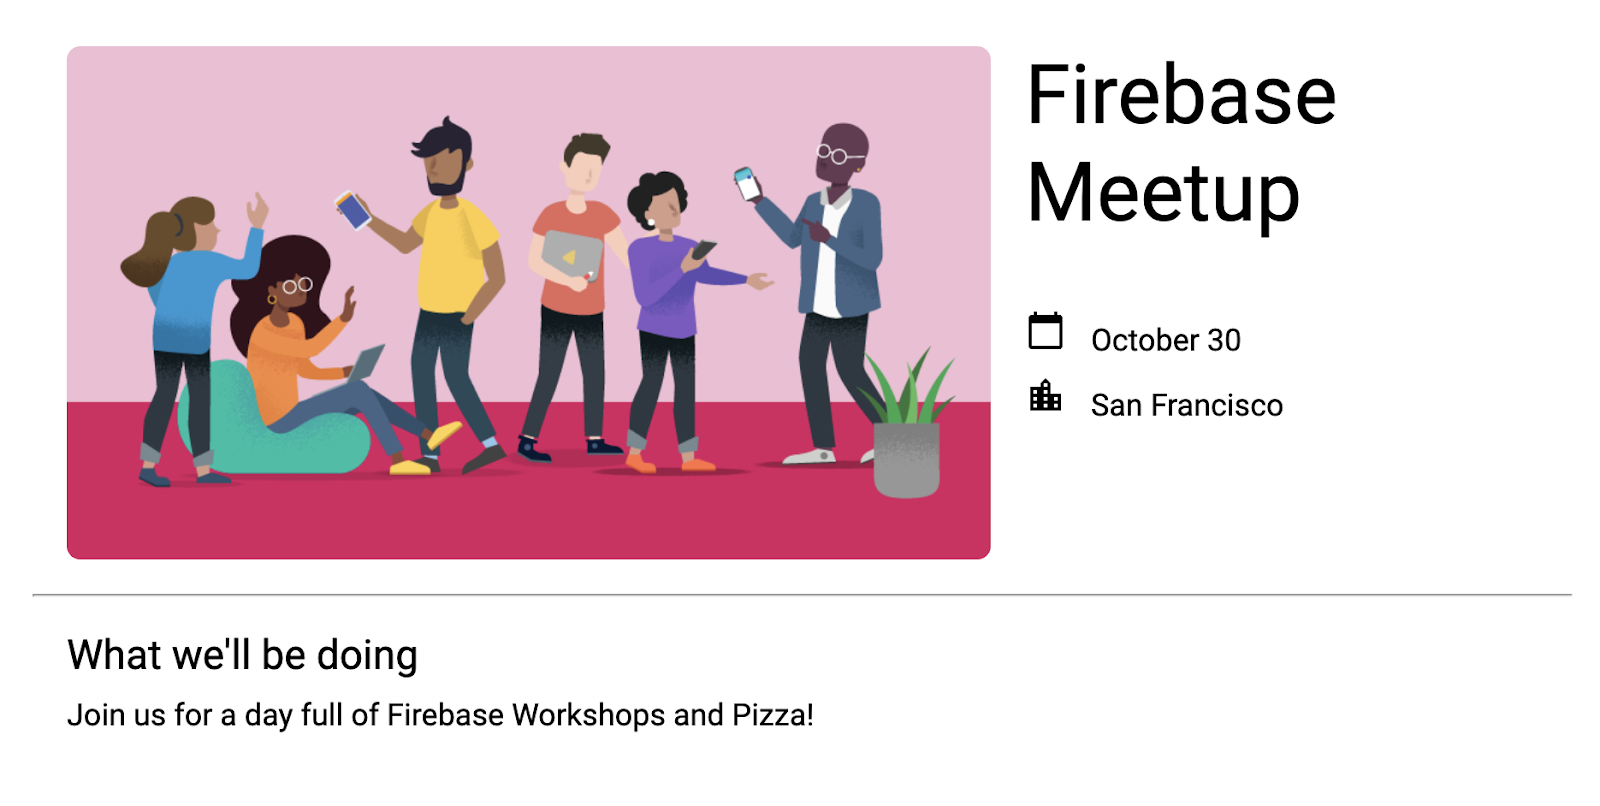
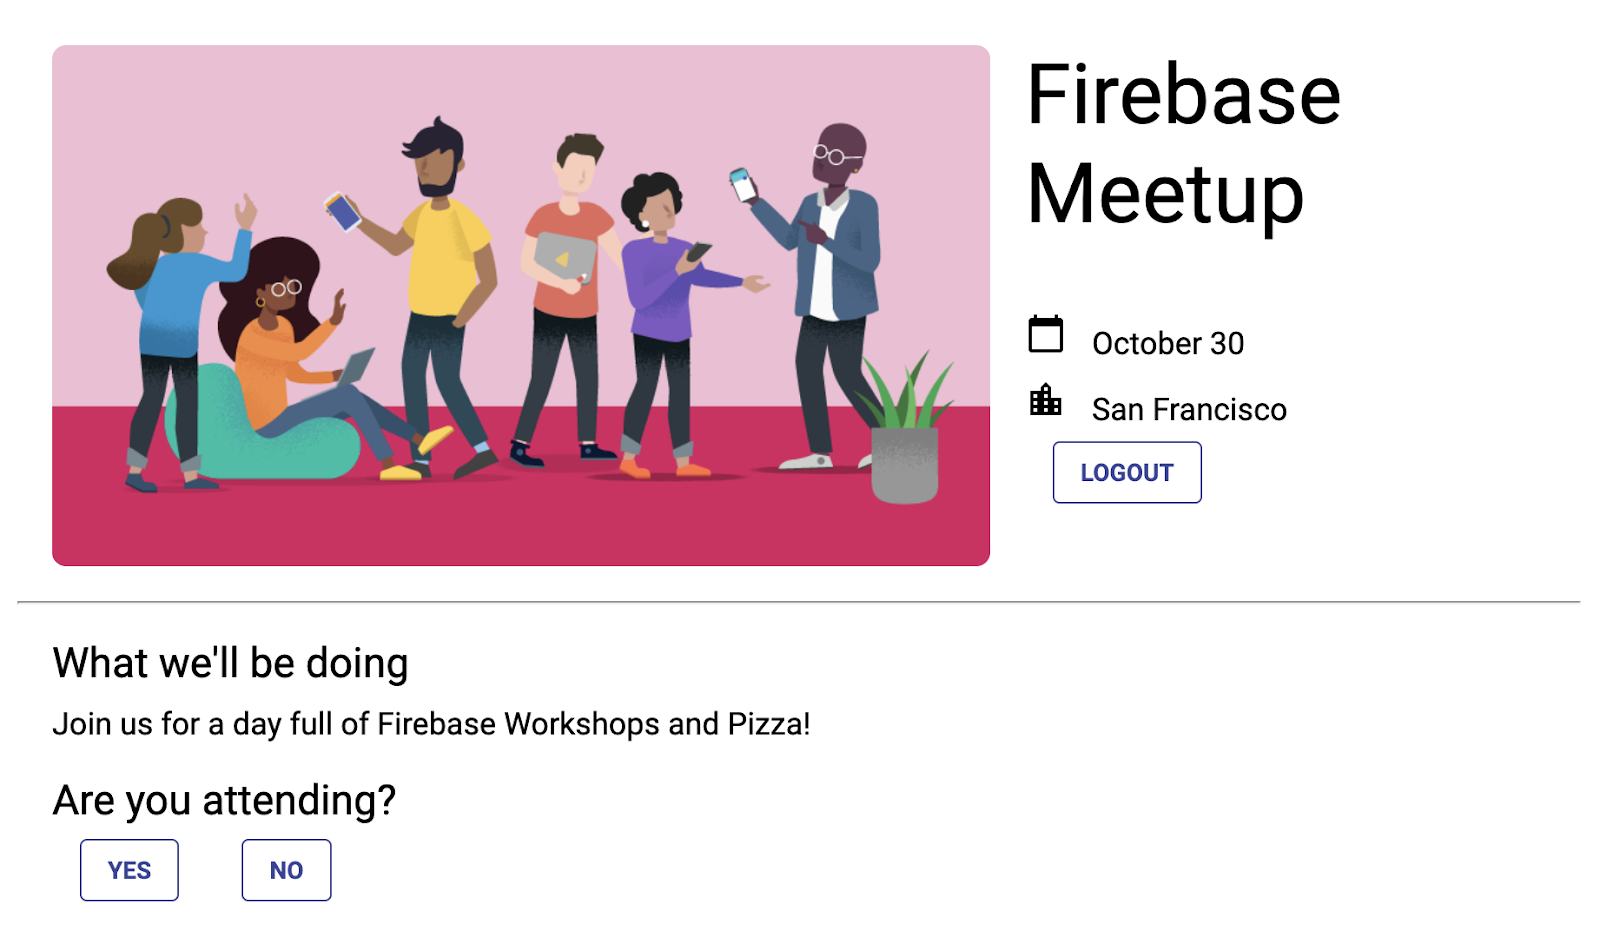
应用的预览效果应如下所示:
应用预览
4. 创建和设置 Firebase 项目
显示活动信息对您的宾客来说非常有用,但仅显示活动对任何人来说都不是很有用。我们来为这款应用添加一些动态功能。为此,您需要将 Firebase 连接到您的应用。如需开始使用 Firebase,您需要创建并设置 Firebase 项目。
创建 Firebase 项目
- 使用您的 Google 账号登录 Firebase 控制台。
- 点击相应按钮以创建新项目,然后输入项目名称(例如
Firebase-Web-Codelab)。 - 点击继续。
- 如果看到相关提示,请查看并接受 Firebase 条款,然后点击继续。
- (可选)在 Firebase 控制台中启用 AI 辅助功能(称为“Gemini in Firebase”)。
- 在此 Codelab 中,您不需要使用 Google Analytics,因此请关闭 Google Analytics 选项。
- 点击创建项目,等待项目完成预配,然后点击继续。
如需详细了解 Firebase 项目,请参阅了解 Firebase 项目。
在控制台中启用和设置 Firebase 产品
您所构建的应用会使用多个适用于 Web 应用的 Firebase 产品:
- Firebase Authentication 和 Firebase UI,可让用户轻松登录您的应用。
- Cloud Firestore:用于在云端保存结构化数据,并在数据发生变化时即时收到通知。
- Firebase 安全规则,用于保护您的数据库的安全。
其中一些产品需要进行特殊配置,或需要使用 Firebase 控制台启用。
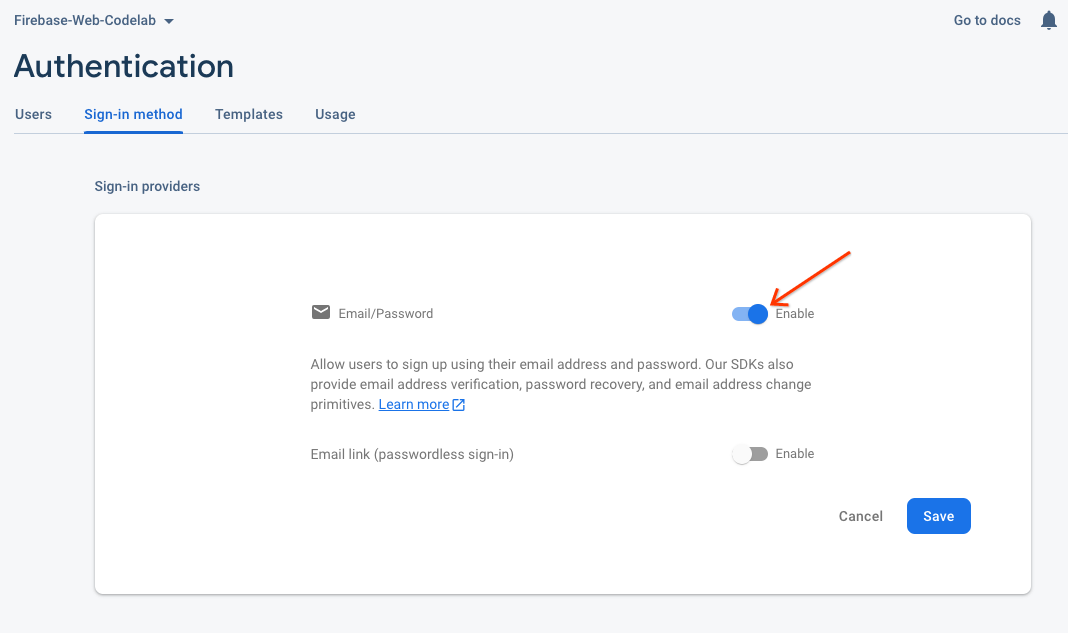
为 Firebase Authentication 启用电子邮件登录
在此 Codelab 中,如需允许用户登录 Web 应用,您将使用电子邮件地址/密码登录方法:
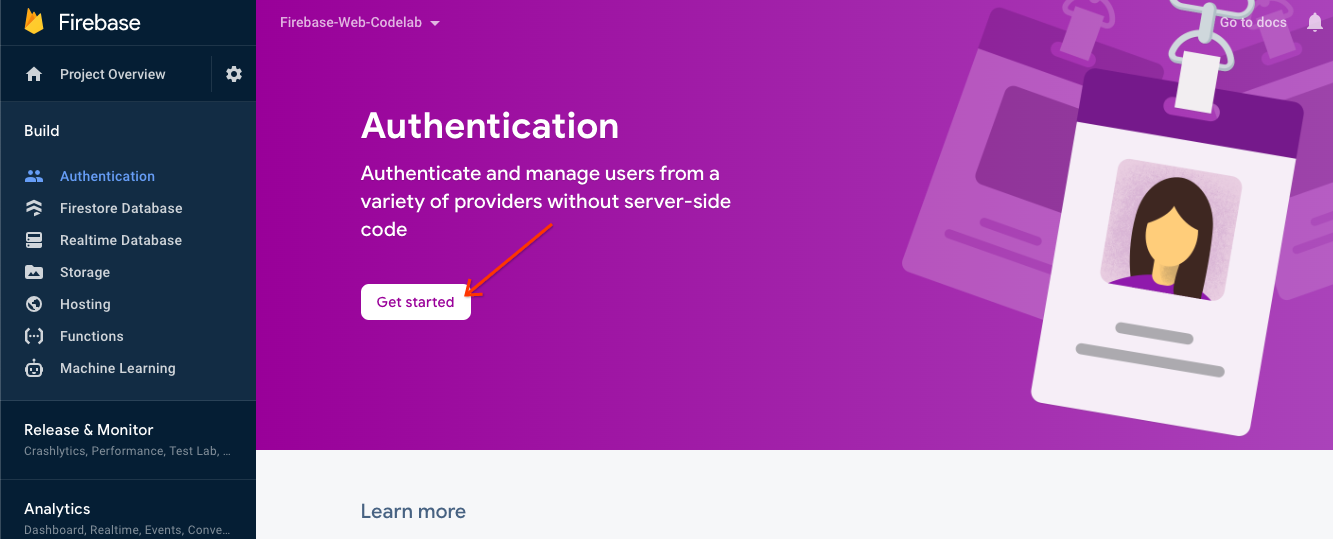
- 在 Firebase 控制台的左侧面板中,依次点击构建 > 身份验证。然后点击开始使用。您现在位于“身份验证”信息中心,可以在其中查看注册用户、配置登录提供方和管理设置。
- 选择登录方法标签页(或点击此处直接前往该标签页)。
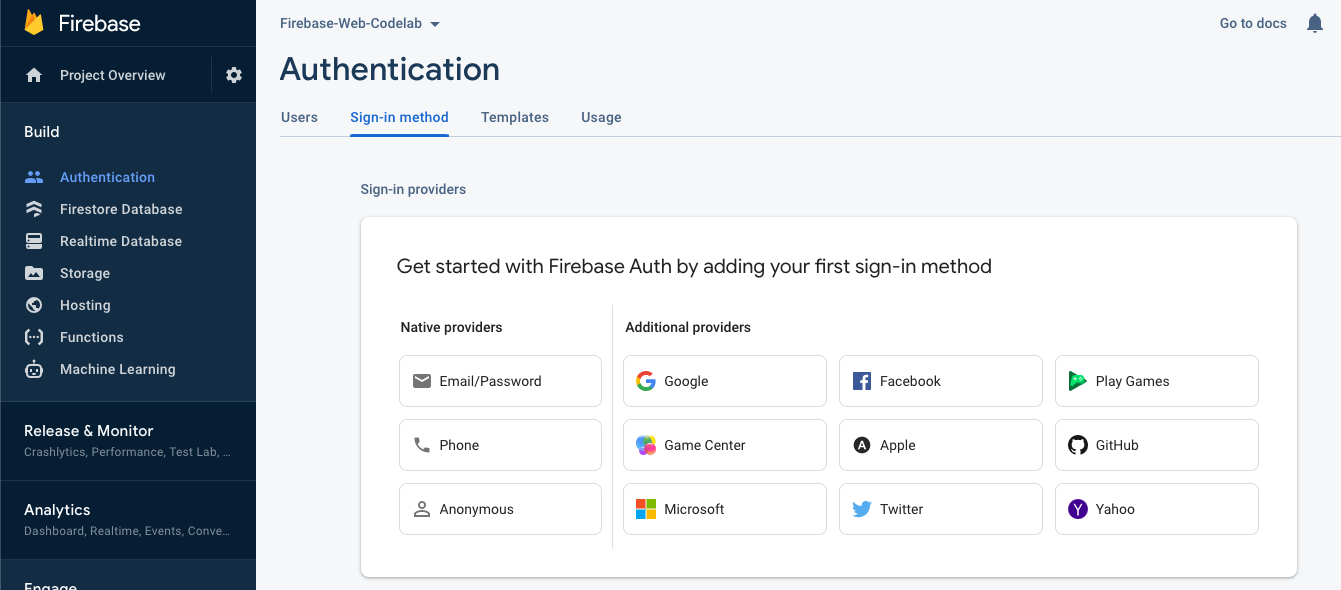
- 在提供商选项中点击电子邮件地址/密码,将开关切换为启用,然后点击保存。
设置 Cloud Firestore
Web 应用使用 Cloud Firestore 保存聊天消息并接收新的聊天消息。
以下是在 Firebase 项目中设置 Cloud Firestore 的方法:
- 在 Firebase 控制台的左侧面板中,展开构建,然后选择 Firestore 数据库。
- 点击创建数据库。
- 将数据库 ID 保留为
(default)。 - 为数据库选择一个位置,然后点击下一步。
对于真实应用,您需要选择靠近用户的位置。 - 点击以测试模式开始。阅读有关安全规则的免责声明。
在本 Codelab 的后面部分,您将添加安全规则来保护您的数据。在没有为数据库添加安全规则的情况下,请不要公开分发或公开应用。 - 点击创建。
5. 添加和配置 Firebase
现在,您已创建 Firebase 项目并启用了一些服务,接下来需要告知代码您要使用 Firebase 以及要使用哪个 Firebase 项目。
添加 Firebase 库
如需让应用使用 Firebase,您需要将 Firebase 库添加到应用中。如 Firebase 文档中所述,您可以通过多种方式执行此操作。例如,您可以从 Google 的 CDN 添加这些库,也可以使用 npm 在本地安装这些库,然后在使用 Browserify 时将它们打包到应用中。
StackBlitz 提供自动打包功能,因此您可以使用 import 语句添加 Firebase 库。您将使用模块化 (v9) 版本的库,这些库可通过一种称为“tree shaking”的过程来帮助减小网页的总体大小。如需详细了解模块化 SDK,请参阅相关文档。
如需构建此应用,您需要使用 Firebase Authentication、FirebaseUI 和 Cloud Firestore 库。在此 Codelab 中,index.js 文件的顶部已包含以下 import 语句,我们将在后续步骤中从每个 Firebase 库导入更多方法:
// Import stylesheets
import './style.css';

// Firebase App (the core Firebase SDK) is always required
import { initializeApp } from 'firebase/app';

// Add the Firebase products and methods that you want to use
import {} from 'firebase/auth';
import {} from 'firebase/firestore';

import * as firebaseui from 'firebaseui';
将 Firebase Web 应用添加到 Firebase 项目
- 返回 Firebase 控制台,点击左上角的项目概览,前往项目的概览页面。
- 在项目概览页面的中心位置,点击 Web 图标
 以创建新的 Firebase Web 应用。
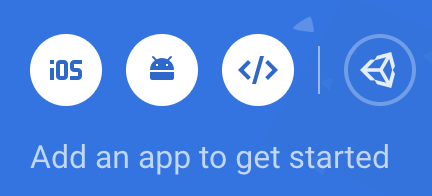
- 注册应用,并为其指定昵称 Web App。
- 在此 Codelab 中,请勿选中还为此应用设置 Firebase Hosting 旁边的复选框。您暂时将使用 StackBlitz 的预览窗格。
- 点击注册应用。

- 将 Firebase 配置对象复制到剪贴板。
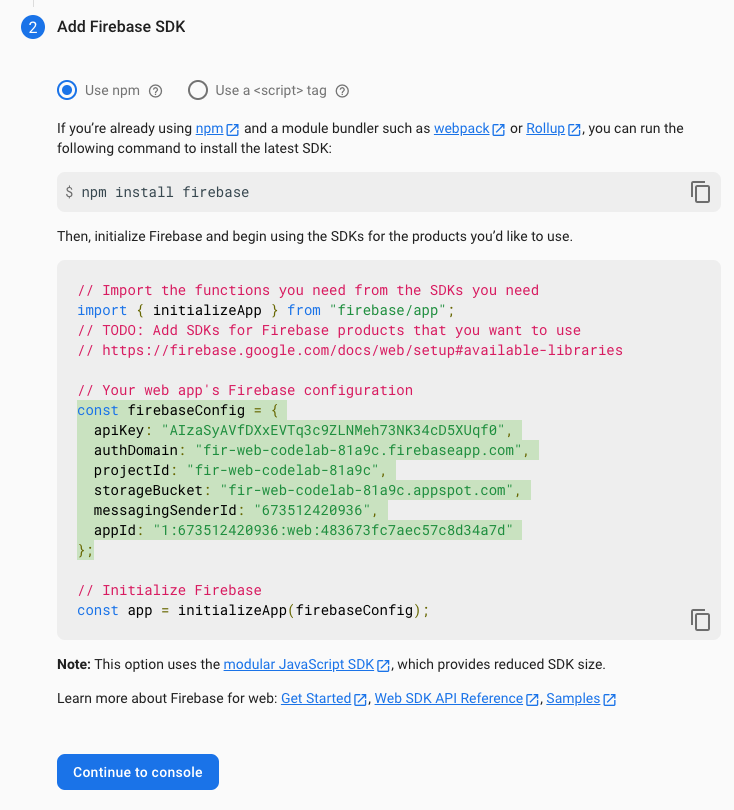
- 点击继续并前往控制台。将 Firebase 配置对象添加到您的应用:
- 返回 StackBlitz,前往
index.js文件。 - 找到
Add Firebase project configuration object here注释行,然后将配置代码段粘贴到该注释下方。 - 添加
initializeApp函数调用,以使用您独特的 Firebase 项目配置来设置 Firebase。// ...
// Add Firebase project configuration object here
const firebaseConfig = {
apiKey: "random-unique-string",
authDomain: "your-projectId.firebaseapp.com",
databaseURL: "https://your-projectId.firebaseio.com",
projectId: "your-projectId",
storageBucket: "your-projectId.firebasestorage.app",
messagingSenderId: "random-unique-string",
appId: "random-unique-string",
};
// Initialize Firebase
initializeApp(firebaseConfig);
6. 添加用户登录 (RSVP)
现在,您已将 Firebase 添加到应用,接下来可以设置一个 RSVP 按钮,用于使用 Firebase Authentication 注册用户。
使用电子邮件登录和 FirebaseUI 对用户进行身份验证
您需要一个 RSVP 按钮,提示用户使用其电子邮件地址登录。为此,您可以将 FirebaseUI 连接到 RSVP 按钮。FirebaseUI 是一个库,可为您提供基于 Firebase Auth 的预构建界面。
FirebaseUI 需要一项配置(请参阅文档中的选项),该配置可执行以下两项操作:
- 告知 FirebaseUI 您要使用电子邮件地址/密码登录方法。
- 处理成功登录的回调,并返回 false 以避免重定向。您不希望页面刷新,因为您要构建的是单页 Web 应用。
添加用于初始化 FirebaseUI Auth 的代码
- 在 StackBlitz 中,前往
index.js文件。 - 在顶部,找到
firebase/authimport 语句,然后添加getAuth和EmailAuthProvider,如下所示:// ...
// Add the Firebase products and methods that you want to use
import { getAuth, EmailAuthProvider } from 'firebase/auth';
import {} from 'firebase/firestore'; - 在
initializeApp之后立即保存对身份验证对象的引用,如下所示:initializeApp(firebaseConfig);
auth = getAuth(); - 请注意,起始代码中已提供 FirebaseUI 配置。它已设置为使用电子邮件身份验证提供程序。
- 在
index.js中main()函数的底部,添加 FirebaseUI 初始化语句,如下所示:async function main() {
// ...
// Initialize the FirebaseUI widget using Firebase
const ui = new firebaseui.auth.AuthUI(auth);
}
main();
向 HTML 添加 RSVP 按钮
- 在 StackBlitz 中,前往
index.html文件。 - 在
event-details-container内添加 RSVP 按钮的 HTML,如下例所示。
请务必使用与下文所示相同的id值,因为在此 Codelab 中,index.js文件中已包含这些特定 ID 的钩子。
请注意,在index.html文件中,有一个 ID 为firebaseui-auth-container的容器。这是您将传递给 FirebaseUI 以保留登录信息的 ID。<!-- ... -->
<section id="event-details-container">
<!-- ... -->
<!-- ADD THE RSVP BUTTON HERE -->
<button id="startRsvp">RSVP</button>
</section>
<hr>
<section id="firebaseui-auth-container"></section>
<!-- ... -->
- 在 RSVP 按钮上设置监听器,并调用 FirebaseUI 启动函数。这会告知 FirebaseUI 您想要看到登录窗口。
将以下代码添加到index.js中main()函数的底部:async function main() {
// ...
// Listen to RSVP button clicks
startRsvpButton.addEventListener("click",
() => {
ui.start("#firebaseui-auth-container", uiConfig);
});
}
main();
测试应用登录
- 在 StackBlitz 的预览窗口中,点击“RSVP”按钮以登录应用。
- 在本 Codelab 中,您可以使用任何电子邮件地址,甚至是虚假的电子邮件地址,因为您不会为本 Codelab 设置电子邮件验证步骤。
- 如果您看到一条错误消息,指出
auth/operation-not-allowed或The given sign-in provider is disabled for this Firebase project,请检查以确保您已在 Firebase 控制台中启用电子邮件/密码作为登录提供方。
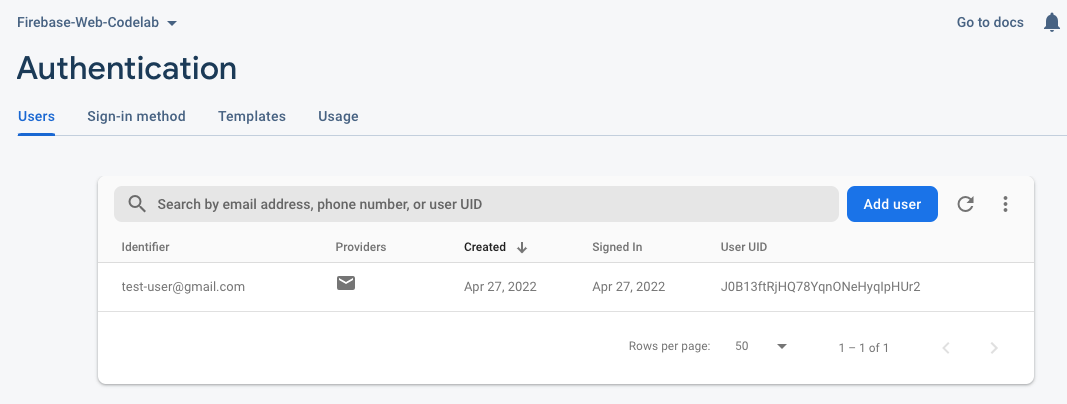
- 前往 Firebase 控制台中的身份验证信息中心。在用户标签页中,您应该会看到您在登录应用时输入的账号信息。
向界面添加身份验证状态
接下来,确保界面显示您已登录。
您将使用 Firebase 身份验证状态监听器回调,每当用户的登录状态发生变化时,系统都会通知该回调。如果当前有已登录的用户,您的应用会将“RSVP”按钮切换为“退出”按钮。
- 在 StackBlitz 中,前往
index.js文件。 - 在顶部,找到
firebase/authimport 语句,然后添加signOut和onAuthStateChanged,如下所示:// ...
// Add the Firebase products and methods that you want to use
import {
getAuth,
EmailAuthProvider,
signOut,
onAuthStateChanged
} from 'firebase/auth';
import {} from 'firebase/firestore'; - 在
main()函数的底部添加以下代码:async function main() {
// ...
// Listen to the current Auth state
onAuthStateChanged(auth, user => {
if (user) {
startRsvpButton.textContent = 'LOGOUT';
} else {
startRsvpButton.textContent = 'RSVP';
}
});
}
main(); - 在按钮监听器中,检查是否存在当前用户并将其退出。为此,请将当前的
startRsvpButton.addEventListener替换为以下内容:// ...
// Called when the user clicks the RSVP button
startRsvpButton.addEventListener('click', () => {
if (auth.currentUser) {
// User is signed in; allows user to sign out
signOut(auth);
} else {
// No user is signed in; allows user to sign in
ui.start('#firebaseui-auth-container', uiConfig);
}
});
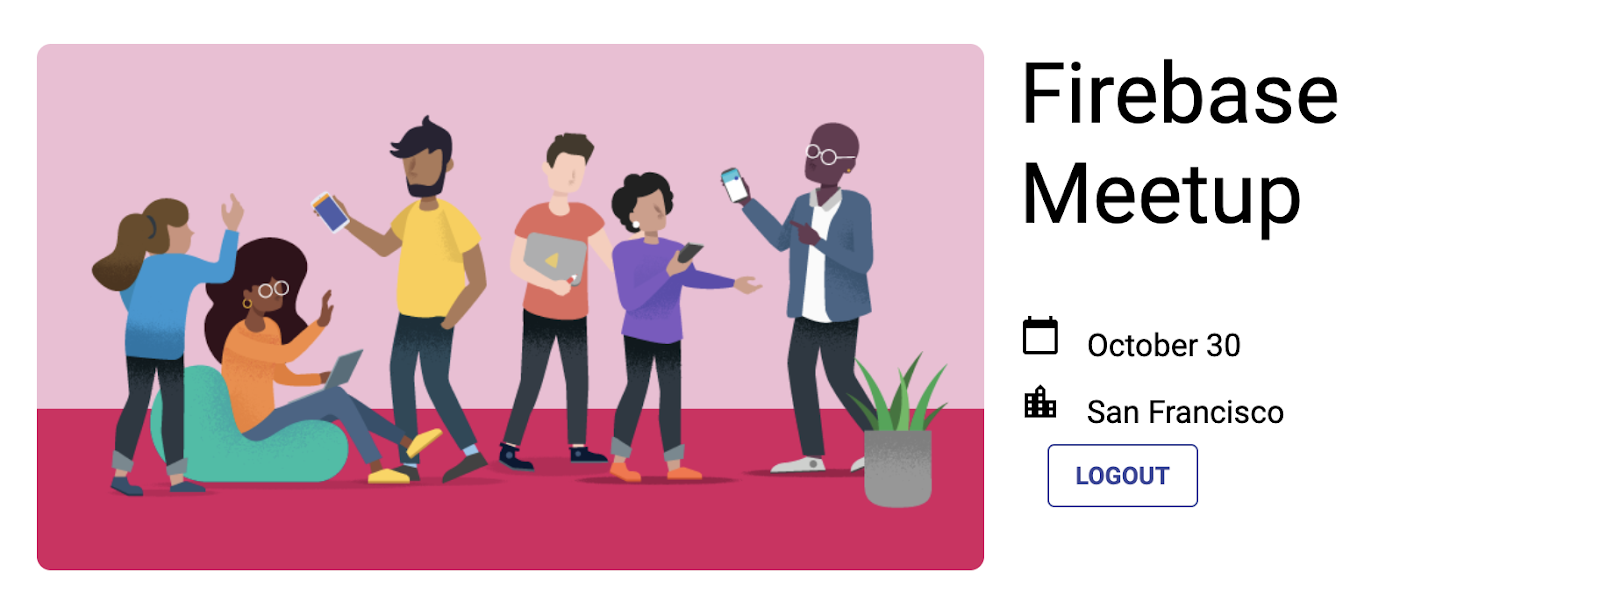
现在,应用中的按钮应显示 LOGOUT,并且在点击后应切换回 RSVP。
应用预览
7. 将消息写入 Cloud Firestore
知道用户会来固然很好,但我们不妨让嘉宾在应用中做些其他事情。如果他们可以在留言簿中留言呢?他们可以分享自己为何期待参加活动,或者希望与哪些人见面。
为了存储用户在应用中撰写的聊天消息,您将使用 Cloud Firestore。
数据模型
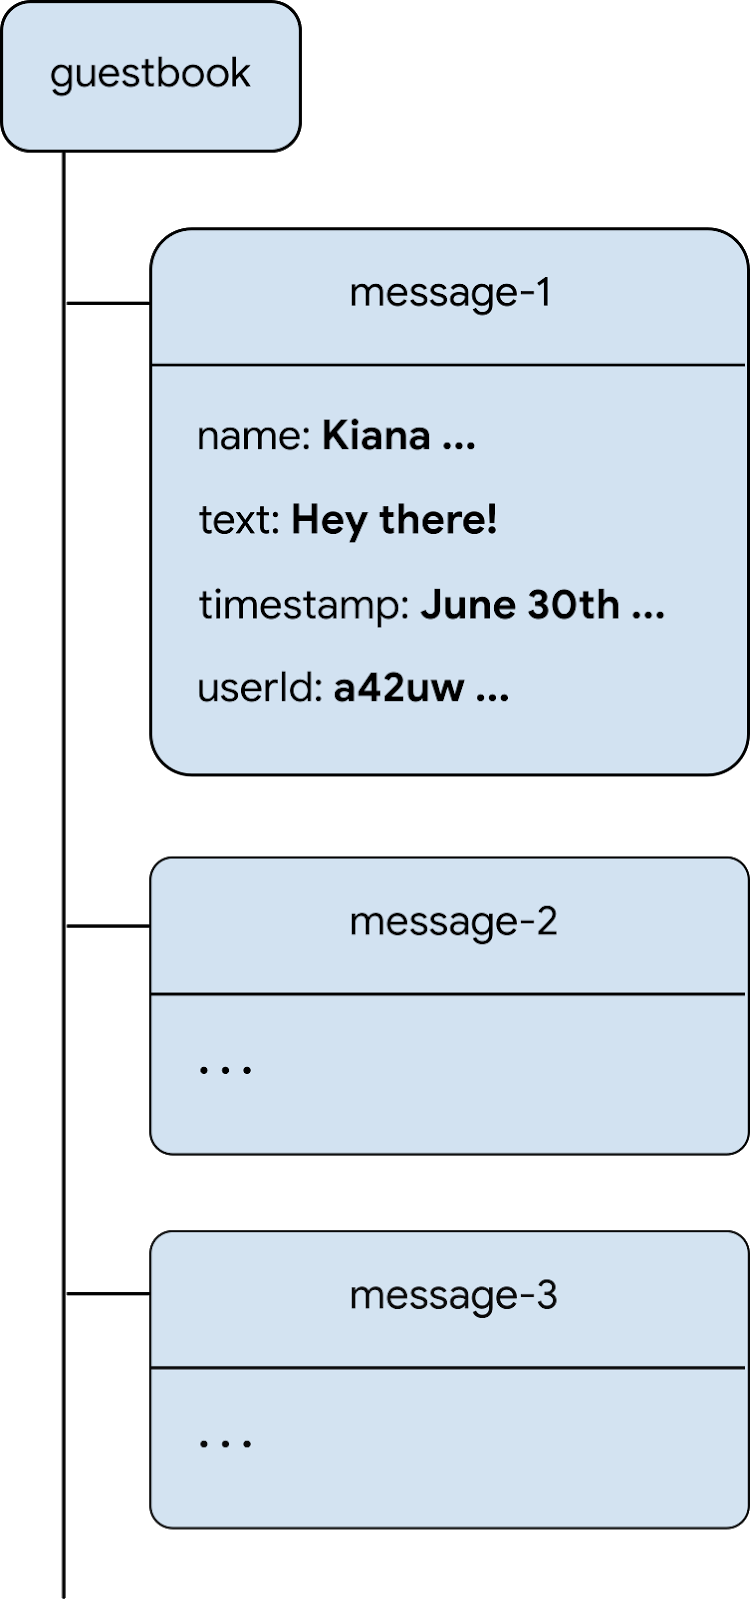
Cloud Firestore 是一种 NoSQL 数据库,存储在其中的数据分为集合、文档、字段和子集合。您将把聊天中的每条消息都以文档形式存储在名为 guestbook 的顶级集合中。
向 Firestore 添加消息
在本部分中,您将添加一项功能,让用户能够向数据库写入新消息。首先,您需要为界面元素(消息字段和发送按钮)添加 HTML。然后,您添加将这些元素连接到数据库的代码。
如需添加消息字段和发送按钮的界面元素,请执行以下操作:
- 在 StackBlitz 中,前往
index.html文件。 - 找到
guestbook-container,然后添加以下 HTML 代码,以创建一个包含消息输入字段和发送按钮的表单。<!-- ... -->
<section id="guestbook-container">
<h2>Discussion</h2>
<form id="leave-message">
<label>Leave a message: </label>
<input type="text" id="message">
<button type="submit">
<i class="material-icons">send</i>
<span>SEND</span>
</button>
</form>
</section>
<!-- ... -->
应用预览
用户点击 SEND 按钮会触发以下代码段。它会将消息输入字段的内容添加到数据库的 guestbook 集合中。具体而言,addDoc 方法会将消息内容添加到 guestbook 集合中的新文档(具有自动生成的 ID)中。
- 在 StackBlitz 中,前往
index.js文件。 - 在顶部,找到
firebase/firestoreimport 语句,然后添加getFirestore、addDoc和collection,如下所示:// ...
// Add the Firebase products and methods that you want to use
import {
getAuth,
EmailAuthProvider,
signOut,
onAuthStateChanged
} from 'firebase/auth';
import {
getFirestore,
addDoc,
collection
} from 'firebase/firestore'; - 现在,我们将在
initializeApp之后立即保存对 Firestoredb对象的引用:initializeApp(firebaseConfig);
auth = getAuth();
db = getFirestore(); - 在
main()函数底部,添加以下代码。
请注意,auth.currentUser.uid是对 Firebase Authentication 为所有已登录用户自动生成的唯一 ID 的引用。async function main() {
// ...
// Listen to the form submission
form.addEventListener('submit', async e => {
// Prevent the default form redirect
e.preventDefault();
// Write a new message to the database collection "guestbook"
addDoc(collection(db, 'guestbook'), {
text: input.value,
timestamp: Date.now(),
name: auth.currentUser.displayName,
userId: auth.currentUser.uid
});
// clear message input field
input.value = '';
// Return false to avoid redirect
return false;
});
}
main();
仅向已登录的用户显示留言簿
您不希望任何人看到嘉宾的聊天内容。为了确保聊天安全,您可以只允许已登录的用户查看留言簿。不过,对于您自己的应用,您还需要使用 Firebase 安全规则来保护数据库的安全。(本 Codelab 后面会详细介绍安全规则。)
- 在 StackBlitz 中,前往
index.js文件。 - 修改
onAuthStateChanged监听器以隐藏和显示留言簿。// ...
// Listen to the current Auth state
onAuthStateChanged(auth, user => {
if (user) {
startRsvpButton.textContent = 'LOGOUT';
// Show guestbook to logged-in users
guestbookContainer.style.display = 'block';
} else {
startRsvpButton.textContent = 'RSVP';
// Hide guestbook for non-logged-in users
guestbookContainer.style.display = 'none';
}
});
测试发送消息
- 确保您已登录该应用。
- 输入消息(例如“Hey there!”),然后点击发送。
此操作会将消息写入您的 Cloud Firestore 数据库。不过,您还不会在实际 Web 应用中看到该消息,因为您仍需实现数据检索。您接下来将执行此操作。
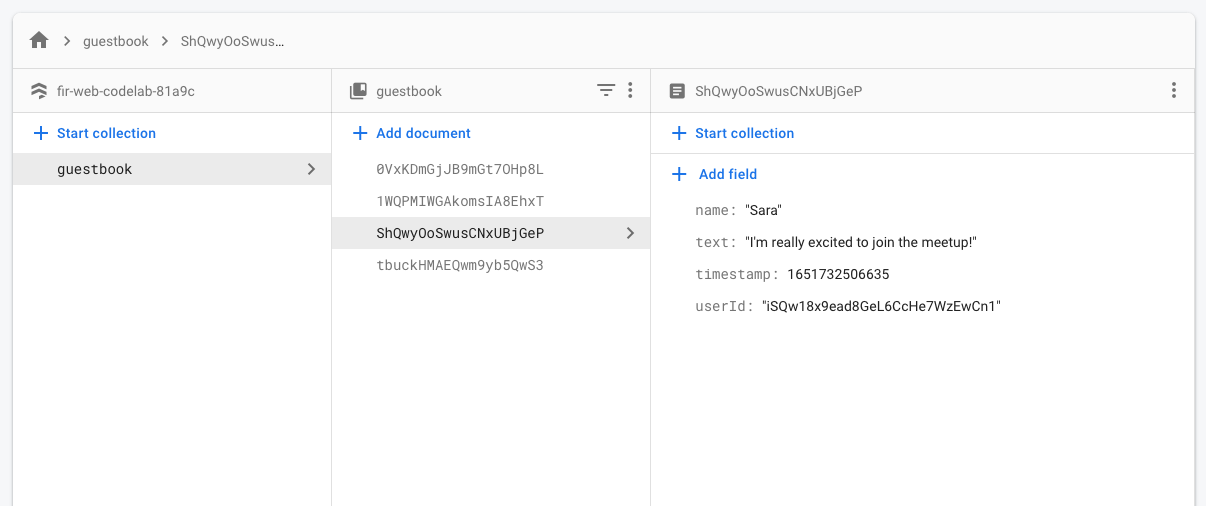
不过,您可以在 Firebase 控制台中看到新添加的消息。
在 Firebase 控制台的 Firestore 数据库信息中心中,您应该会看到包含新添加的消息的 guestbook 集合。如果您继续发送消息,留言簿集合将包含许多文档,如下所示:
Firebase 控制台
8. 阅读消息
同步消息
很高兴看到,访客可以向数据库写入消息,但他们还无法在应用中看到这些消息。
如需显示消息,您需要添加在数据发生变化时触发的监听器,然后创建一个用于显示新消息的界面元素。
您将添加用于监听应用中新添加的消息的代码。首先,在 HTML 中添加一个用于显示消息的部分:
- 在 StackBlitz 中,前往
index.html文件。 - 在
guestbook-container中,添加一个 ID 为guestbook的新部分。<!-- ... -->
<section id="guestbook-container">
<h2>Discussion</h2>
<form><!-- ... --></form>
<section id="guestbook"></section>
</section>
<!-- ... -->
接下来,注册用于监听数据更改的监听器:
- 在 StackBlitz 中,前往
index.js文件。 - 在顶部,找到
firebase/firestoreimport 语句,然后添加query、orderBy和onSnapshot,如下所示:// ...
import {
getFirestore,
addDoc,
collection,
query,
orderBy,
onSnapshot
} from 'firebase/firestore'; - 在
main()函数底部,添加以下代码以遍历数据库中的所有文档(留言簿消息)。如需详细了解此代码中的内容,请阅读代码段下方的相关信息。async function main() {
// ...
// Create query for messages
const q = query(collection(db, 'guestbook'), orderBy('timestamp', 'desc'));
onSnapshot(q, snaps => {
// Reset page
guestbook.innerHTML = '';
// Loop through documents in database
snaps.forEach(doc => {
// Create an HTML entry for each document and add it to the chat
const entry = document.createElement('p');
entry.textContent = doc.data().name + ': ' + doc.data().text;
guestbook.appendChild(entry);
});
});
}
main();
为了监听数据库中的消息,您使用 collection 函数对特定集合创建了查询。上述代码会监听 guestbook 集合中的更改,聊天消息就存储在该集合中。消息还会按日期排序,使用 orderBy('timestamp', 'desc') 将最新消息显示在顶部。
onSnapshot 函数接受两个参数:要使用的查询和回调函数。当与查询匹配的文档发生任何更改时,系统都会触发回调函数。例如,当消息被删除、修改或添加时,就会发生这种情况。如需了解详情,请参阅 Cloud Firestore 文档。
测试消息同步
Cloud Firestore 会自动且即时地将数据与订阅数据库的客户端同步。
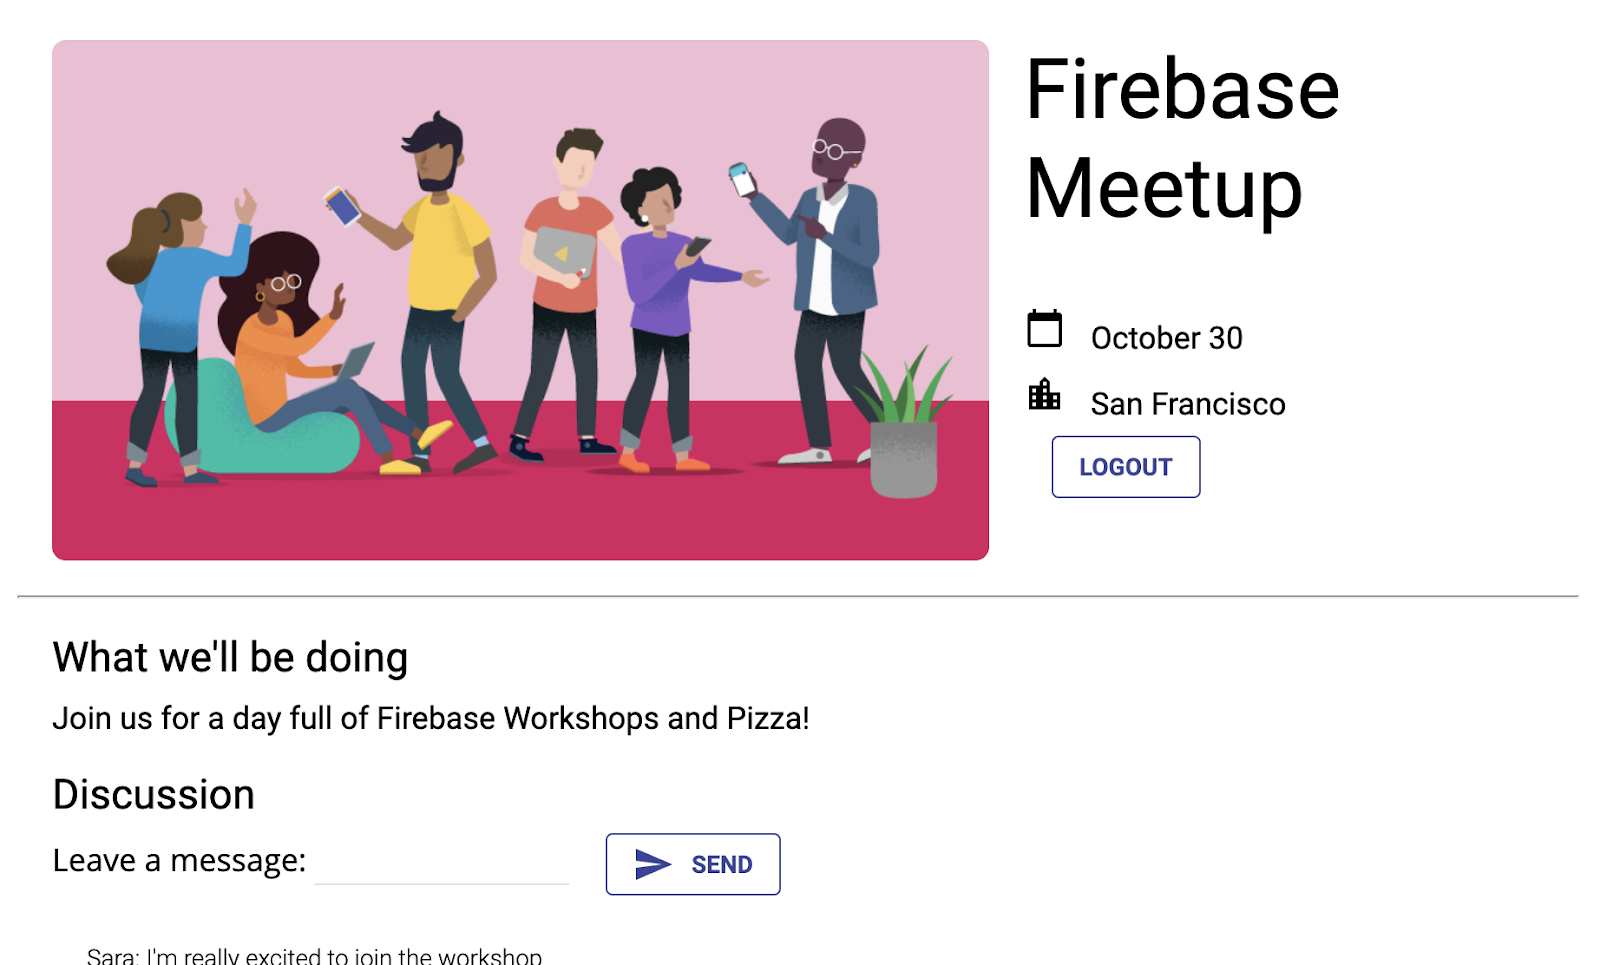
- 您之前在数据库中创建的消息应会显示在应用中。您可以随意撰写新消息,这些消息应会立即显示。
- 如果您在多个窗口或标签页中打开工作区,邮件会在标签页之间实时同步。
- (可选)您可以尝试直接在 Firebase 控制台的数据库部分中手动删除、修改或添加新消息;任何更改都应显示在界面中。
恭喜!您正在应用中读取 Cloud Firestore 文档!
应用预览
9. 设置基本安全规则
您最初将 Cloud Firestore 设置为使用测试模式,这意味着您的数据库可供读取和写入。不过,您只应在开发的极早期阶段使用测试模式。作为最佳实践,您应该在开发应用时为数据库设置安全规则。安全应该是应用结构和行为不可或缺的一部分。
借助安全规则,您可以控制对数据库中的文档和集合的访问权限。您可以使用灵活的规则语法创建与任意情况(包括对整个数据库执行的所有写入操作和对特定文档的操作)匹配的规则。
您可以在 Firebase 控制台中为 Cloud Firestore 编写安全规则:
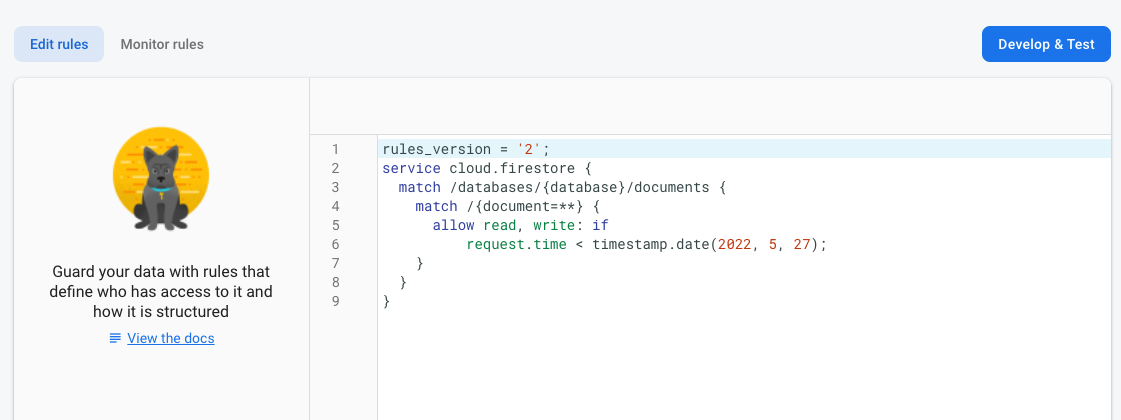
- 在 Firebase 控制台的构建部分中,点击 Firestore 数据库,然后选择规则标签页(或点击此处直接前往规则标签页)。
- 您应该会看到以下默认安全规则,其中包含从今天起几周的公开访问时间限制。
确定集合
首先,确定应用向哪些集合写入数据。
- 删除现有的
match /{document=**}子句,使规则如下所示:rules_version = '2';
service cloud.firestore {
match /databases/{database}/documents {
}
} - 在
match /databases/{database}/documents中,确定要保护的集合:rules_version = '2';
service cloud.firestore {
match /databases/{database}/documents {
match /guestbook/{entry} {
// You'll add rules here in the next step.
}
}
添加安全规则
由于您在每份留言簿文档中都使用了 Authentication UID 作为字段,因此您可以获取 Authentication UID 并验证尝试写入文档的任何人是否具有匹配的 Authentication UID。
- 将读取和写入规则添加到您的规则集中,如下所示:
rules_version = '2';
service cloud.firestore {
  match /databases/{database}/documents {
    match /guestbook/{entry} {
      allow read: if request.auth.uid != null;
      allow create:
        if request.auth.uid == request.resource.data.userId;
    }
  }
} - 点击发布以部署新规则。现在,对于留言簿,只有登录用户可以读取消息(任何消息!),但您只能使用自己的用户 ID 创建消息。我们也不允许修改或删除消息。
添加验证规则
- 添加数据验证,确保文档中包含所有预期字段:
rules_version = '2';
service cloud.firestore {
  match /databases/{database}/documents {
    match /guestbook/{entry} {
      allow read: if request.auth.uid != null;
      allow create:
      if request.auth.uid == request.resource.data.userId
          && "name" in request.resource.data
          && "text" in request.resource.data
          && "timestamp" in request.resource.data;
    }
  }
} - 点击发布以部署新规则。
重置监听器
由于您的应用现在只允许通过身份验证的用户登录,因此您应将留言簿 firestore 查询移到身份验证监听器内。否则,当用户退出账号时,系统会发生权限错误,并且应用会断开连接。
- 在 StackBlitz 中,前往
index.js文件。 - 将留言簿集合
onSnapshot监听器提取到名为subscribeGuestbook的新函数中。此外,将onSnapshot函数的结果分配给guestbookListener变量。
FirestoreonSnapshot监听器返回一个取消订阅函数,您可以使用该函数稍后取消快照监听器。// ...
// Listen to guestbook updates
function subscribeGuestbook() {
const q = query(collection(db, 'guestbook'), orderBy('timestamp', 'desc'));
guestbookListener = onSnapshot(q, snaps => {
// Reset page
guestbook.innerHTML = '';
// Loop through documents in database
snaps.forEach(doc => {
// Create an HTML entry for each document and add it to the chat
const entry = document.createElement('p');
entry.textContent = doc.data().name + ': ' + doc.data().text;
guestbook.appendChild(entry);
});
});
} - 在下方添加一个名为
unsubscribeGuestbook的新函数。检查guestbookListener变量是否不为 null,然后调用该函数以取消监听器。// ...
// Unsubscribe from guestbook updates
function unsubscribeGuestbook() {
if (guestbookListener != null) {
guestbookListener();
guestbookListener = null;
}
}
最后,将新函数添加到 onAuthStateChanged 回调中。
- 在
if (user)的底部添加subscribeGuestbook()。 - 在
else语句的底部添加unsubscribeGuestbook()。// ...
// Listen to the current Auth state
onAuthStateChanged(auth, user => {
if (user) {
startRsvpButton.textContent = 'LOGOUT';
// Show guestbook to logged-in users
guestbookContainer.style.display = 'block';
// Subscribe to the guestbook collection
subscribeGuestbook();
} else {
startRsvpButton.textContent = 'RSVP';
// Hide guestbook for non-logged-in users
guestbookContainer.style.display = 'none';
// Unsubscribe from the guestbook collection
unsubscribeGuestbook();
}
});
10. 奖励步骤:练习所学知识
记录参会者的回复状态
目前,您的应用仅允许对活动感兴趣的用户开始聊天。此外,您只能通过聊天中的消息来了解是否有人会来。让我们整理一下,让大家知道有多少人会来。
您将添加一个开关,用于登记想要参加活动的人员,然后收集参加活动的人数。
- 在 StackBlitz 中,前往
index.html文件。 - 在
guestbook-container中,添加一组 YES 和 NO 按钮,如下所示:<!-- ... -->
<section id="guestbook-container">
<h2>Are you attending?</h2>
<button id="rsvp-yes">YES</button>
<button id="rsvp-no">NO</button>
<h2>Discussion</h2>
<!-- ... -->
</section>
<!-- ... -->
应用预览
接下来,注册按钮点击监听器。如果用户点击是,则使用其身份验证 UID 将回答保存到数据库。
- 在 StackBlitz 中,前往
index.js文件。 - 在顶部,找到
firebase/firestoreimport 语句,然后添加doc、setDoc和where,如下所示:// ...
// Add the Firebase products and methods that you want to use
import {
getFirestore,
addDoc,
collection,
query,
orderBy,
onSnapshot,
doc,
setDoc,
where
} from 'firebase/firestore'; - 在
main()函数的底部,添加以下代码以监听 RSVP 状态:async function main() {
// ...
// Listen to RSVP responses
rsvpYes.onclick = async () => {
};
rsvpNo.onclick = async () => {
};
}
main(); - 接下来,创建一个名为
attendees的新集合,然后在点击任一 RSVP 按钮时注册文档引用。根据点击的按钮,将该引用设置为true或false。
首先,对于rsvpYes:// ...
// Listen to RSVP responses
rsvpYes.onclick = async () => {
// Get a reference to the user's document in the attendees collection
const userRef = doc(db, 'attendees', auth.currentUser.uid);
// If they RSVP'd yes, save a document with attendi()ng: true
try {
await setDoc(userRef, {
attending: true
});
} catch (e) {
console.error(e);
}
};rsvpNo执行相同的操作,但使用值false:rsvpNo.onclick = async () => {
// Get a reference to the user's document in the attendees collection
const userRef = doc(db, 'attendees', auth.currentUser.uid);
// If they RSVP'd yes, save a document with attending: true
try {
await setDoc(userRef, {
attending: false
});
} catch (e) {
console.error(e);
}
};
更新安全规则
由于您已设置了一些规则,因此您使用按钮添加的新数据将被拒绝。
允许向 attendees 集合添加内容
您需要更新规则,以允许向 attendees 集合添加内容。
- 对于
attendees集合,由于您使用了身份验证 UID 作为文档名称,因此您可以获取该名称并验证提交者的uid是否与他们正在写入的文档相同。您将允许所有人读取参会者名单(因为其中不包含任何私密数据),但只有创建者可以更新该名单。rules_version = '2';
service cloud.firestore {
match /databases/{database}/documents {
// ... //
match /attendees/{userId} {
allow read: if true;
allow write: if request.auth.uid == userId;
}
}
} - 点击发布以部署新规则。
添加验证规则
- 添加一些数据验证规则,以确保文档中包含所有预期字段:
rules_version = '2';
service cloud.firestore {
  match /databases/{database}/documents {
    // ... //
    match /attendees/{userId} {
      allow read: if true;
      allow write: if request.auth.uid == userId
          && "attending" in request.resource.data;

    }
  }
} - 别忘了点击发布来部署您的规则!
(可选)您现在可以查看点击按钮后的结果。前往 Firebase 控制台中的 Cloud Firestore 信息中心。
读取回复状态
现在,您已记录回答,接下来我们来看看谁会来,并在界面中反映出来。
- 在 StackBlitz 中,前往
index.html文件。 - 在
description-container中,添加一个 ID 为number-attending的新元素。<!-- ... -->
<section id="description-container">
<!-- ... -->
<p id="number-attending"></p>
</section>
<!-- ... -->
接下来,为 attendees 集合注册监听器,并统计 YES 回答的数量:
- 在 StackBlitz 中,前往
index.js文件。 - 在
main()函数底部,添加以下代码以监听 RSVP 状态并统计 YES 点击次数。async function main() {
// ...
// Listen for attendee list
const attendingQuery = query(
collection(db, 'attendees'),
where('attending', '==', true)
);
const unsubscribe = onSnapshot(attendingQuery, snap => {
const newAttendeeCount = snap.docs.length;
numberAttending.innerHTML = newAttendeeCount + ' people going';
});
}
main();
最后,我们来突出显示与当前状态对应的按钮。
- 创建一个函数,用于检查当前身份验证 UID 是否在
attendees集合中具有条目,然后将按钮类设置为clicked。// ...
// Listen for attendee list
function subscribeCurrentRSVP(user) {
const ref = doc(db, 'attendees', user.uid);
rsvpListener = onSnapshot(ref, doc => {
if (doc && doc.data()) {
const attendingResponse = doc.data().attending;
// Update css classes for buttons
if (attendingResponse) {
rsvpYes.className = 'clicked';
rsvpNo.className = '';
} else {
rsvpYes.className = '';
rsvpNo.className = 'clicked';
}
}
});
} - 此外,我们再创建一个用于取消订阅的函数。当用户退出登录时,系统会使用此值。
// ...
function unsubscribeCurrentRSVP() {
  if (rsvpListener != null) {
    rsvpListener();
    rsvpListener = null;
  }
  rsvpYes.className = '';
  rsvpNo.className = '';
} - 从身份验证监听器调用函数。
// ...
// Listen to the current Auth state
  // Listen to the current Auth state
  onAuthStateChanged(auth, user => {
    if (user) {
      startRsvpButton.textContent = 'LOGOUT';
      // Show guestbook to logged-in users
      guestbookContainer.style.display = 'block';

      // Subscribe to the guestbook collection
      subscribeGuestbook();
      // Subscribe to the user's RSVP
      subscribeCurrentRSVP(user);
    } else {
      startRsvpButton.textContent = 'RSVP';
      // Hide guestbook for non-logged-in users
      guestbookContainer.style.display = 'none'
      ;
      // Unsubscribe from the guestbook collection
      unsubscribeGuestbook();
      // Unsubscribe from the guestbook collection
      unsubscribeCurrentRSVP();
    }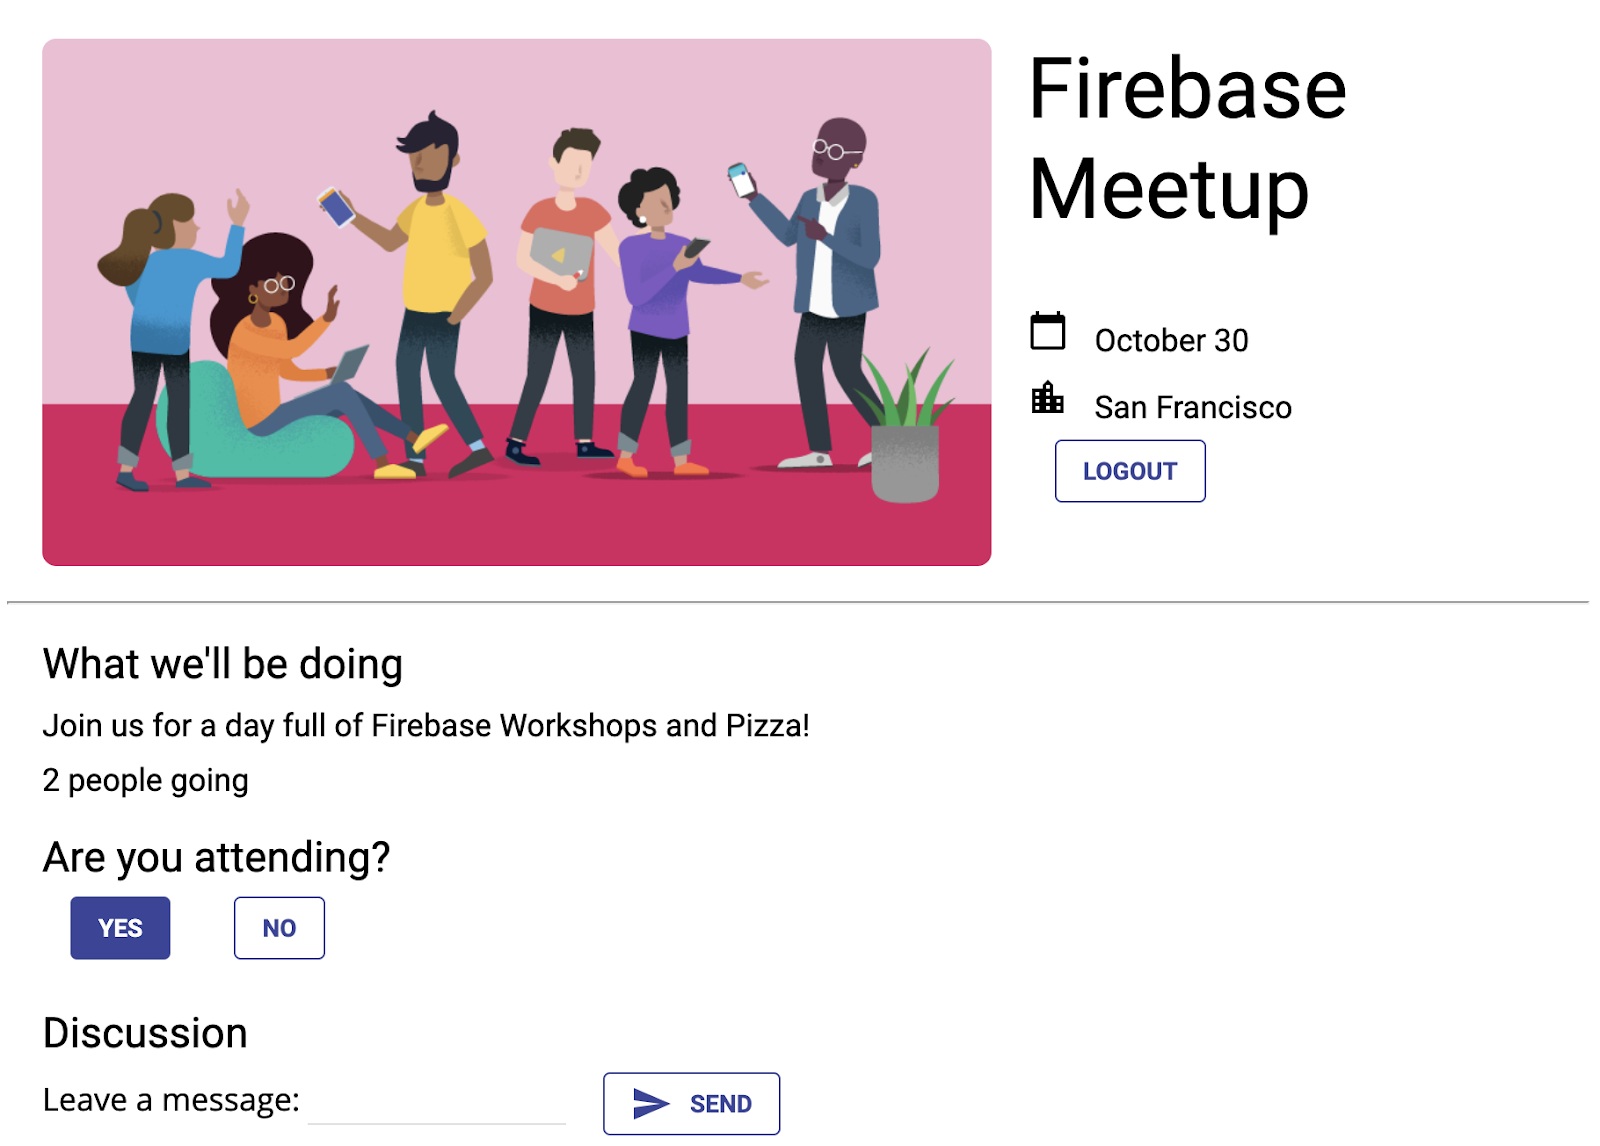
}); - 尝试以多个用户的身份登录,并查看每次点击额外的是按钮时,计数是否会增加。
应用预览
11. 恭喜!
您已使用 Firebase 构建了一个交互式实时 Web 应用!
所学内容
- Firebase Authentication
- FirebaseUI
- Cloud Firestore
- Firebase 安全规则
后续步骤
- 想详细了解 Firebase 开发者工作流?不妨查看 Firebase 模拟器 Codelab,了解如何完全在本地测试和运行应用。
- 想详细了解其他 Firebase 产品?也许您想存储用户上传的图片文件?还是向用户发送通知?如需了解更多有关 Firebase Web 产品的 Codelab,请查看 Firebase Web Codelab。
- 想详细了解 Cloud Firestore?也许您想了解子集合和事务?如需深入了解 Cloud Firestore,请前往 Cloud Firestore Web Codelab。您也可以观看此 YouTube 系列视频,了解 Cloud Firestore!
了解详情
- Firebase 网站:firebase.google.com
- Firebase YouTube 频道
效果如何?
欢迎提供反馈!请点击此处填写一份(非常)简短的表单。