
1. 개요
Cloud Run은 Google의 확장 가능한 인프라에서 직접 코드를 실행할 수 있게 해주는 완전 관리형 플랫폼입니다. 이 Codelab에서는 Node.js Admin SDK를 사용하여 Cloud Run의 Angular 애플리케이션을 Firestore 데이터베이스에 연결하는 방법을 보여줍니다.
이 실습에서는 다음 작업을 수행하는 방법을 배웁니다.
- Firestore 데이터베이스 만들기
- Firestore 데이터베이스에 연결되는 애플리케이션을 Cloud Run에 배포
2. 기본 요건
- 아직 Google 계정이 없다면 Google 계정을 만들어야 합니다.
- 직장 또는 학교 계정이 아닌 개인 계정을 사용합니다. 직장 및 학교 계정에는 이 실습에 필요한 API를 사용 설정할 수 없도록 하는 제한사항이 있을 수 있습니다.
3. 프로젝트 설정
- Google Cloud 콘솔에 로그인합니다.
- Cloud 콘솔에서 결제를 사용 설정합니다.
- 이 실습을 완료하는 데 드는 Cloud 리소스 비용은 미화 1달러 미만입니다.
- 이 실습의 끝에 있는 단계에 따라 리소스를 삭제하여 추가 비용이 청구되지 않도록 할 수 있습니다.
- 신규 사용자는 미화$300 상당의 무료 체험판을 이용할 수 있습니다.
- 새 프로젝트를 만들거나 기존 프로젝트를 재사용합니다.
4. Cloud Shell 편집기 열기
- Cloud Shell 편집기로 이동합니다.
- 터미널이 화면 하단에 표시되지 않으면 다음과 같이 엽니다.
- 햄버거 메뉴
 를 클릭합니다.
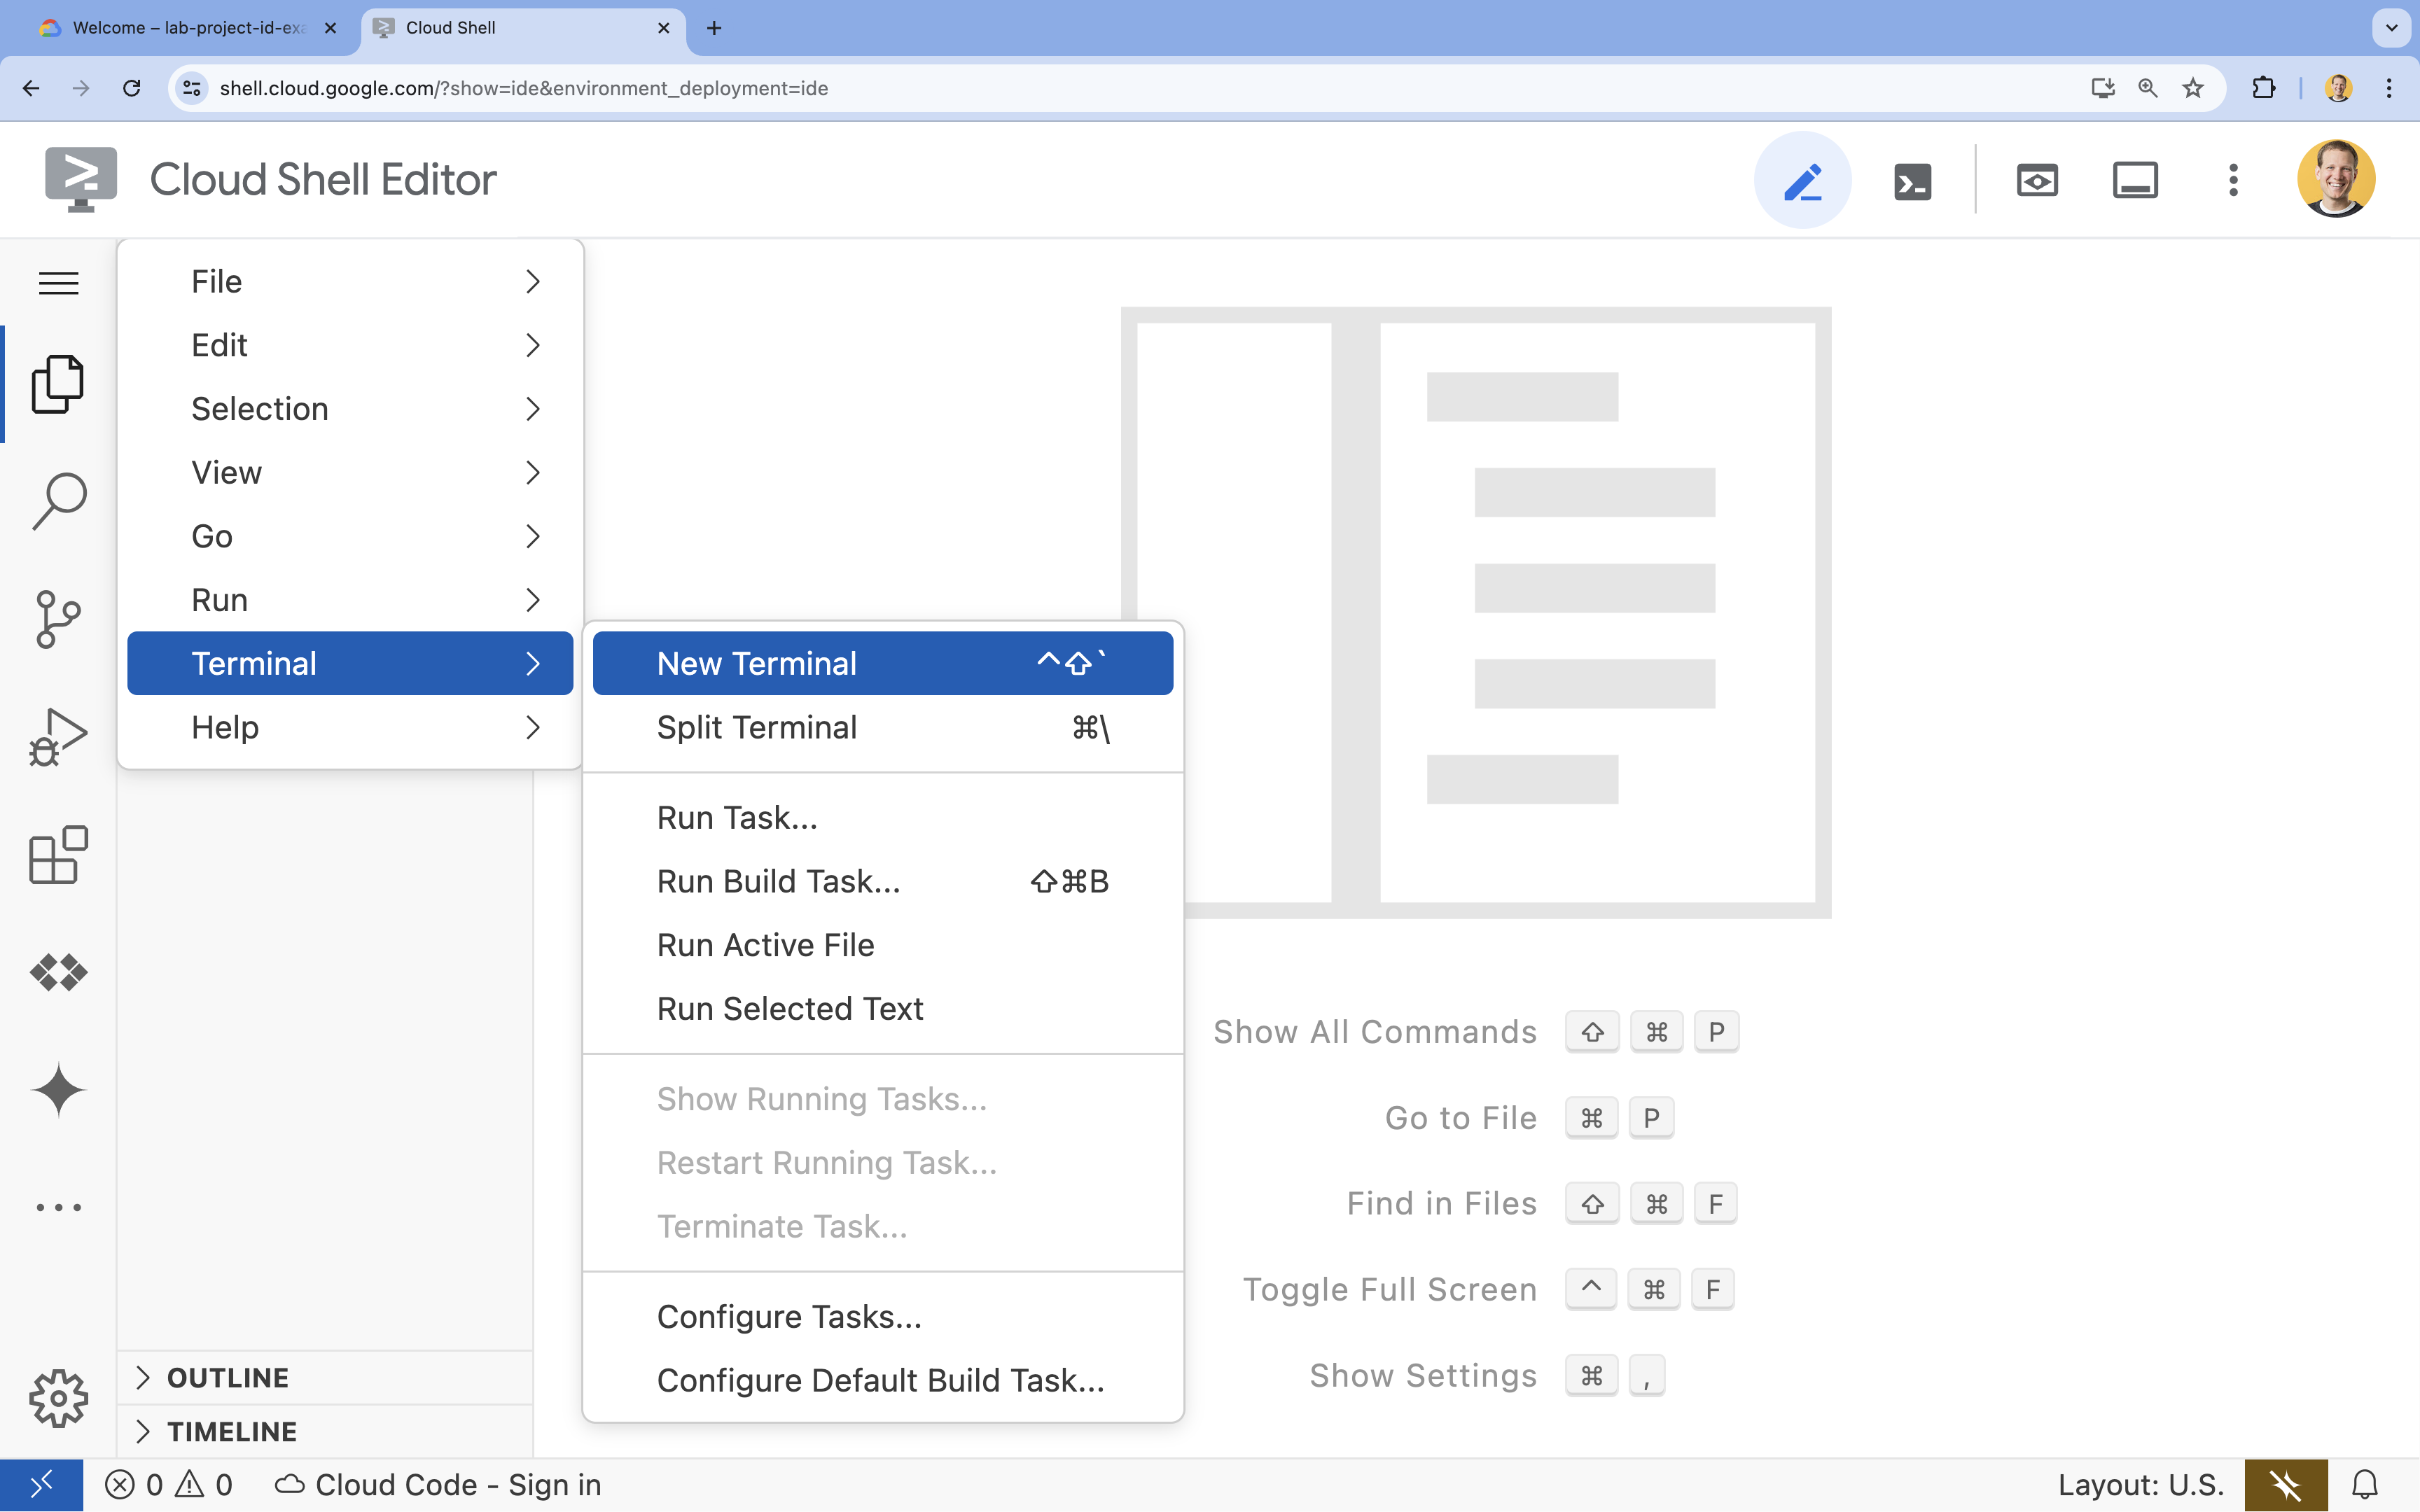
 - 터미널을 클릭합니다.
- 새 터미널을 클릭합니다.
- 햄버거 메뉴
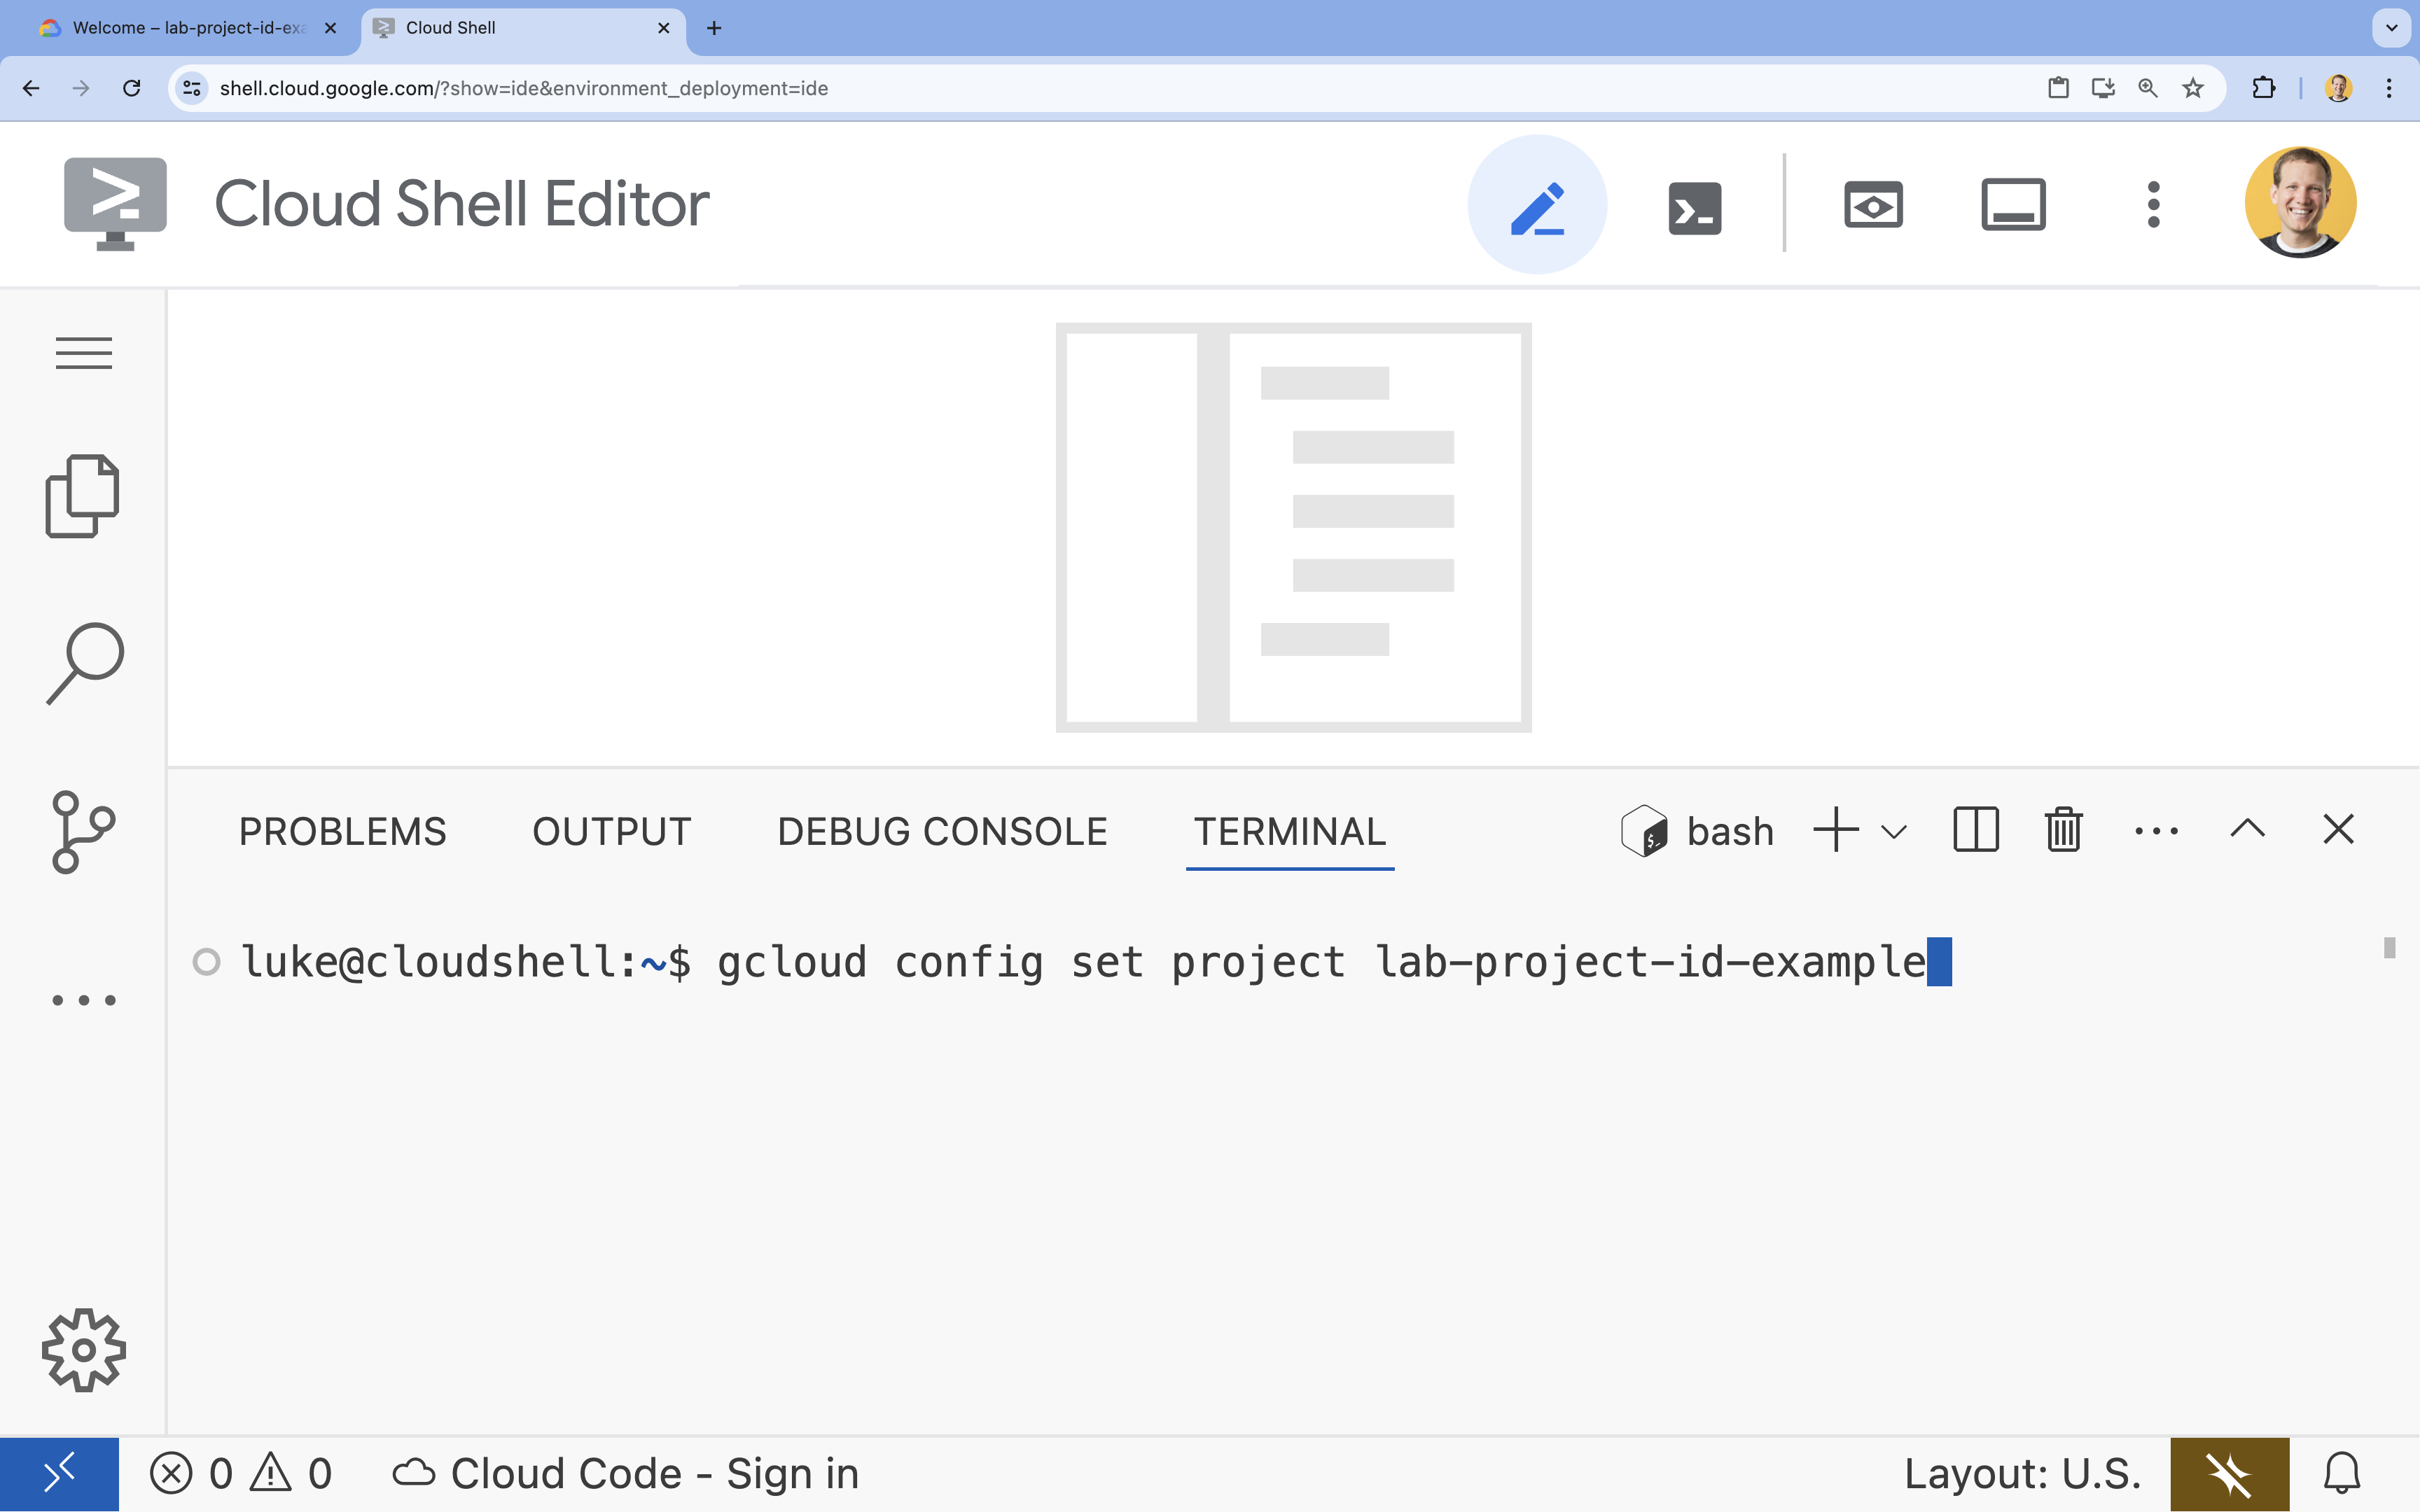
- 터미널에서 다음 명령어를 사용하여 프로젝트를 설정합니다.
- 형식:
gcloud config set project [PROJECT_ID] - 예:
gcloud config set project lab-project-id-example - 프로젝트 ID를 기억할 수 없는 경우 다음 안내를 따르세요.
- 다음을 사용하여 모든 프로젝트 ID를 나열할 수 있습니다.
gcloud projects list | awk '/PROJECT_ID/{print $2}'
- 다음을 사용하여 모든 프로젝트 ID를 나열할 수 있습니다.
- 형식:
- 승인하라는 메시지가 표시되면 승인을 클릭하여 계속 진행합니다.

- 다음 메시지가 표시되어야 합니다.
Updated property [core/project].
WARNING이 표시되고Do you want to continue (Y/N)?메시지가 표시되면 프로젝트 ID를 잘못 입력했을 가능성이 큽니다.N를 누른 다음Enter를 누르고gcloud config set project명령어를 다시 실행해 봅니다.
5. API 사용 설정
터미널에서 API를 사용 설정합니다.
gcloud services enable \
  firestore.googleapis.com \
  run.googleapis.com \
  artifactregistry.googleapis.com \
  cloudbuild.googleapis.com
승인하라는 메시지가 표시되면 승인을 클릭하여 계속 진행합니다.
이 명령어를 완료하는 데 몇 분 정도 걸릴 수 있지만, 결국 다음과 유사한 성공 메시지가 표시됩니다.
Operation "operations/acf.p2-73d90d00-47ee-447a-b600" finished successfully.
6. Firestore 데이터베이스 만들기
gcloud firestore databases create명령어를 실행하여 Firestore 데이터베이스 만들기gcloud firestore databases create --location=nam5
7. 신청 준비
HTTP 요청에 응답하는 Next.js 애플리케이션을 준비합니다.
task-app라는 새 Next.js 프로젝트를 만들려면 다음 명령어를 사용합니다.npx --yes @angular/cli@19.2.5 new task-app \ --minimal \ --inline-template \ --inline-style \ --ssr \ --server-routing \ --defaults- 디렉터리를
task-app으로 변경합니다.cd task-app
firebase-admin를 설치하여 Firestore 데이터베이스와 상호작용합니다.npm install firebase-admin
- Cloud Shell 편집기에서
server.ts파일을 엽니다.cloudshell edit src/server.tsserver.ts파일을 수정할 수 있습니다.
server.ts파일의 기존 콘텐츠를 삭제합니다.- 다음 코드를 복사하여 열려 있는
server.ts파일에 붙여넣습니다.import { AngularNodeAppEngine, createNodeRequestHandler, isMainModule, writeResponseToNodeResponse, } from '@angular/ssr/node'; import express from 'express'; import { dirname, resolve } from 'node:path'; import { fileURLToPath } from 'node:url'; import { initializeApp, applicationDefault, getApps } from 'firebase-admin/app'; import { getFirestore } from 'firebase-admin/firestore'; type Task = { id: string; title: string; status: 'IN_PROGRESS' | 'COMPLETE'; createdAt: number; }; const credential = applicationDefault(); // Only initialize app if it does not already exist if (getApps().length === 0) { initializeApp({ credential }); } const db = getFirestore(); const tasksRef = db.collection('tasks'); const serverDistFolder = dirname(fileURLToPath(import.meta.url)); const browserDistFolder = resolve(serverDistFolder, '../browser'); const app = express(); const angularApp = new AngularNodeAppEngine(); app.use(express.json()); app.get('/api/tasks', async (req, res) => { const snapshot = await tasksRef.orderBy('createdAt', 'desc').limit(100).get(); const tasks: Task[] = snapshot.docs.map(doc => ({ id: doc.id, title: doc.data()['title'], status: doc.data()['status'], createdAt: doc.data()['createdAt'], })); res.send(tasks); }); app.post('/api/tasks', async (req, res) => { const newTaskTitle = req.body.title; if(!newTaskTitle){ res.status(400).send("Title is required"); return; } await tasksRef.doc().create({ title: newTaskTitle, status: 'IN_PROGRESS', createdAt: Date.now(), }); res.sendStatus(200); }); app.put('/api/tasks', async (req, res) => { const task: Task = req.body; if (!task || !task.id || !task.title || !task.status) { res.status(400).send("Invalid task data"); return; } await tasksRef.doc(task.id).set(task); res.sendStatus(200); }); app.delete('/api/tasks', async (req, res) => { const task: Task = req.body; if(!task || !task.id){ res.status(400).send("Task ID is required"); return; } await tasksRef.doc(task.id).delete(); res.sendStatus(200); }); /** * Serve static files from /browser */ app.use( express.static(browserDistFolder, { maxAge: '1y', index: false, redirect: false, }), ); /** * Handle all other requests by rendering the Angular application. */ app.use('/**', (req, res, next) => { angularApp .handle(req) .then((response) => response ? writeResponseToNodeResponse(response, res) : next(), ) .catch(next); }); /** * Start the server if this module is the main entry point. * The server listens on the port defined by the `PORT` environment variable, or defaults to 4000. */ if (isMainModule(import.meta.url)) { const port = process.env['PORT'] || 4000; app.listen(port, () => { console.log(`Node Express server listening on http://localhost:${port}`); }); } /** * Request handler used by the Angular CLI (for dev-server and during build) or Firebase Cloud Functions. */ export const reqHandler = createNodeRequestHandler(app); - Cloud Shell 편집기에서
angular.json파일을 엽니다.cloudshell edit angular.jsonangular.json파일에"externalDependencies": ["firebase-admin"]줄을 추가합니다. angular.json파일의 기존 콘텐츠를 삭제합니다.- 다음 코드를 복사하여 열려 있는
angular.json파일에 붙여넣습니다.{ "$schema": "./node_modules/@angular/cli/lib/config/schema.json", "version": 1, "newProjectRoot": "projects", "projects": { "task-app": { "projectType": "application", "schematics": { "@schematics/angular:component": { "inlineTemplate": true, "inlineStyle": true, "skipTests": true }, "@schematics/angular:class": { "skipTests": true }, "@schematics/angular:directive": { "skipTests": true }, "@schematics/angular:guard": { "skipTests": true }, "@schematics/angular:interceptor": { "skipTests": true }, "@schematics/angular:pipe": { "skipTests": true }, "@schematics/angular:resolver": { "skipTests": true }, "@schematics/angular:service": { "skipTests": true } }, "root": "", "sourceRoot": "src", "prefix": "app", "architect": { "build": { "builder": "@angular-devkit/build-angular:application", "options": { "outputPath": "dist/task-app", "index": "src/index.html", "browser": "src/main.ts", "polyfills": [ "zone.js" ], "tsConfig": "tsconfig.app.json", "assets": [ { "glob": "**/*", "input": "public" } ], "styles": [ "src/styles.css" ], "scripts": [], "server": "src/main.server.ts", "outputMode": "server", "ssr": { "entry": "src/server.ts" }, "externalDependencies": ["firebase-admin"] }, "configurations": { "production": { "budgets": [ { "type": "initial", "maximumWarning": "500kB", "maximumError": "1MB" }, { "type": "anyComponentStyle", "maximumWarning": "4kB", "maximumError": "8kB" } ], "outputHashing": "all" }, "development": { "optimization": false, "extractLicenses": false, "sourceMap": true } }, "defaultConfiguration": "production" }, "serve": { "builder": "@angular-devkit/build-angular:dev-server", "configurations": { "production": { "buildTarget": "task-app:build:production" }, "development": { "buildTarget": "task-app:build:development" } }, "defaultConfiguration": "development" }, "extract-i18n": { "builder": "@angular-devkit/build-angular:extract-i18n" } } } } }
"externalDependencies": ["firebase-admin"]
- Cloud Shell 편집기에서
app.component.ts파일을 엽니다.cloudshell edit src/app/app.component.tsapp.component.ts파일을 수정할 수 있습니다. app.component.ts파일의 기존 콘텐츠를 삭제합니다.- 다음 코드를 복사하여 열려 있는
app.component.ts파일에 붙여넣습니다.import { afterNextRender, Component, signal } from '@angular/core'; import { FormsModule } from '@angular/forms'; type Task = { id: string; title: string; status: 'IN_PROGRESS' | 'COMPLETE'; createdAt: number; }; @Component({ selector: 'app-root', standalone: true, imports: [FormsModule], template: ` <section> <input type="text" placeholder="New Task Title" [(ngModel)]="newTaskTitle" class="text-black border-2 p-2 m-2 rounded" /> <button (click)="addTask()">Add new task</button> <table> <tbody> @for (task of tasks(); track task) { @let isComplete = task.status === 'COMPLETE'; <tr> <td> <input (click)="updateTask(task, { status: isComplete ? 'IN_PROGRESS' : 'COMPLETE' })" type="checkbox" [checked]="isComplete" /> </td> <td>{{ task.title }}</td> <td>{{ task.status }}</td> <td> <button (click)="deleteTask(task)">Delete</button> </td> </tr> } </tbody> </table> </section> `, styles: '', }) export class AppComponent { newTaskTitle = ''; tasks = signal<Task[]>([]); constructor() { afterNextRender({ earlyRead: () => this.getTasks() }); } async getTasks() { const response = await fetch(`/api/tasks`); const tasks = await response.json(); this.tasks.set(tasks); } async addTask() { await fetch(`/api/tasks`, { method: 'POST', headers: { 'Content-Type': 'application/json' }, body: JSON.stringify({ title: this.newTaskTitle, status: 'IN_PROGRESS', createdAt: Date.now(), }), }); this.newTaskTitle = ''; await this.getTasks(); } async updateTask(task: Task, newTaskValues: Partial<Task>) { await fetch(`/api/tasks`, { method: 'PUT', headers: { 'Content-Type': 'application/json' }, body: JSON.stringify({ ...task, ...newTaskValues }), }); await this.getTasks(); } async deleteTask(task: any) { await fetch('/api/tasks', { method: 'DELETE', headers: { 'Content-Type': 'application/json' }, body: JSON.stringify(task), }); await this.getTasks(); } }
이제 애플리케이션을 배포할 준비가 되었습니다.
8. Cloud Run에 애플리케이션 배포
- 아래 명령어를 실행하여 Cloud Run에 애플리케이션을 배포합니다.
gcloud run deploy helloworld \ --region=us-central1 \ --source=. - 메시지가 표시되면
Y및Enter를 눌러 계속 진행하겠다고 확인합니다.Do you want to continue (Y/n)? Y
몇 분 후 애플리케이션에서 방문할 URL을 제공합니다.
URL로 이동하여 애플리케이션이 작동하는 모습을 확인합니다. URL을 방문하거나 페이지를 새로고침할 때마다 할 일 앱이 표시됩니다.
9. 축하합니다
이 실습에서는 다음을 수행하는 방법을 알아봤습니다.
- PostgreSQL용 Cloud SQL 인스턴스 만들기
- Cloud SQL 데이터베이스에 연결되는 애플리케이션을 Cloud Run에 배포
삭제
Cloud SQL에는 무료 등급이 없으며 계속 사용하면 요금이 청구됩니다. Cloud 프로젝트를 삭제하여 추가 비용이 청구되지 않도록 할 수 있습니다.
Cloud Run에서는 서비스를 사용하지 않을 때 비용이 청구되지 않지만 Artifact Registry에 컨테이너 이미지를 저장하는 데 요금이 부과될 수 있습니다. Cloud 프로젝트를 삭제하면 해당 프로젝트 내에서 사용되는 모든 리소스에 대한 청구가 중단됩니다.
원하는 경우 프로젝트를 삭제합니다.
gcloud projects delete $GOOGLE_CLOUD_PROJECT
CloudShell 디스크에서 불필요한 리소스를 삭제할 수도 있습니다. 다음과 같은 작업을 할 수 있습니다.
- Codelab 프로젝트 디렉터리를 삭제합니다.
rm -rf ~/task-app - 경고 다음 작업은 실행취소할 수 없습니다. Cloud Shell에서 모든 항목을 삭제하여 공간을 확보하려면 전체 홈 디렉터리를 삭제하면 됩니다. 보관하려는 모든 항목이 다른 곳에 저장되어 있는지 확인하세요.
sudo rm -rf $HOME
계속 학습
- Cloud SQL Node.js 커넥터를 사용하여 PostgreSQL용 Cloud SQL과 함께 Cloud Run에 풀 스택 Next.js 애플리케이션 배포
- Cloud SQL Node.js 커넥터를 사용하여 PostgreSQL용 Cloud SQL과 함께 Cloud Run에 풀 스택 Angular 애플리케이션 배포
- Node.js Admin SDK를 사용하여 Firestore와 함께 Cloud Run에 풀 스택 Angular 애플리케이션 배포
- Node.js Admin SDK를 사용하여 Firestore와 함께 Cloud Run에 풀 스택 Next.js 애플리케이션 배포