1. खास जानकारी
Cloud Run एक ऐसा प्लैटफ़ॉर्म है जिसे पूरी तरह से मैनेज किया जाता है. इसकी मदद से, अपने कोड को सीधे Google के स्केलेबल इन्फ़्रास्ट्रक्चर पर चलाया जा सकता है. इस कोडलैब में, Node.js Admin SDK का इस्तेमाल करके, Cloud Run पर मौजूद Angular ऐप्लिकेशन को Firestore डेटाबेस से कनेक्ट करने का तरीका बताया गया है.
इस लैब में, आपको इनके बारे में जानकारी मिलेगी:
- Firestore डेटाबेस बनाना
- Cloud Run पर ऐसा ऐप्लिकेशन डिप्लॉय करना जो आपके Firestore डेटाबेस से कनेक्ट हो
2. ज़रूरी शर्तें
- अगर आपके पास पहले से कोई Google खाता नहीं है, तो आपको Google खाता बनाना होगा.
- ऑफ़िस या स्कूल वाले खाते के बजाय, निजी खाते का इस्तेमाल करें. ऑफ़िस और स्कूल वाले खातों पर ऐसी पाबंदियां हो सकती हैं जिनकी वजह से, इस लैब के लिए ज़रूरी एपीआई चालू नहीं किए जा सकते.
3. प्रोजेक्ट सेटअप करना
- Google Cloud Console में साइन इन करें.
- Cloud Console में बिलिंग चालू करें.
- इस लैब को पूरा करने के लिए, Cloud के संसाधनों पर 1 डॉलर से कम खर्च करना पड़ेगा.
- आगे कोई शुल्क न देना पड़े, इसके लिए संसाधनों को मिटाएं. इसके लिए, इस लैब के आखिर में दिया गया तरीका अपनाएं.
- नए उपयोगकर्ताओं को 300 डॉलर का मुफ़्त क्रेडिट मिलता है.
- नया प्रोजेक्ट बनाएं या किसी मौजूदा प्रोजेक्ट का फिर से इस्तेमाल करें.
4. Cloud Shell एडिटर खोलना
- Cloud Shell एडिटर पर जाएं
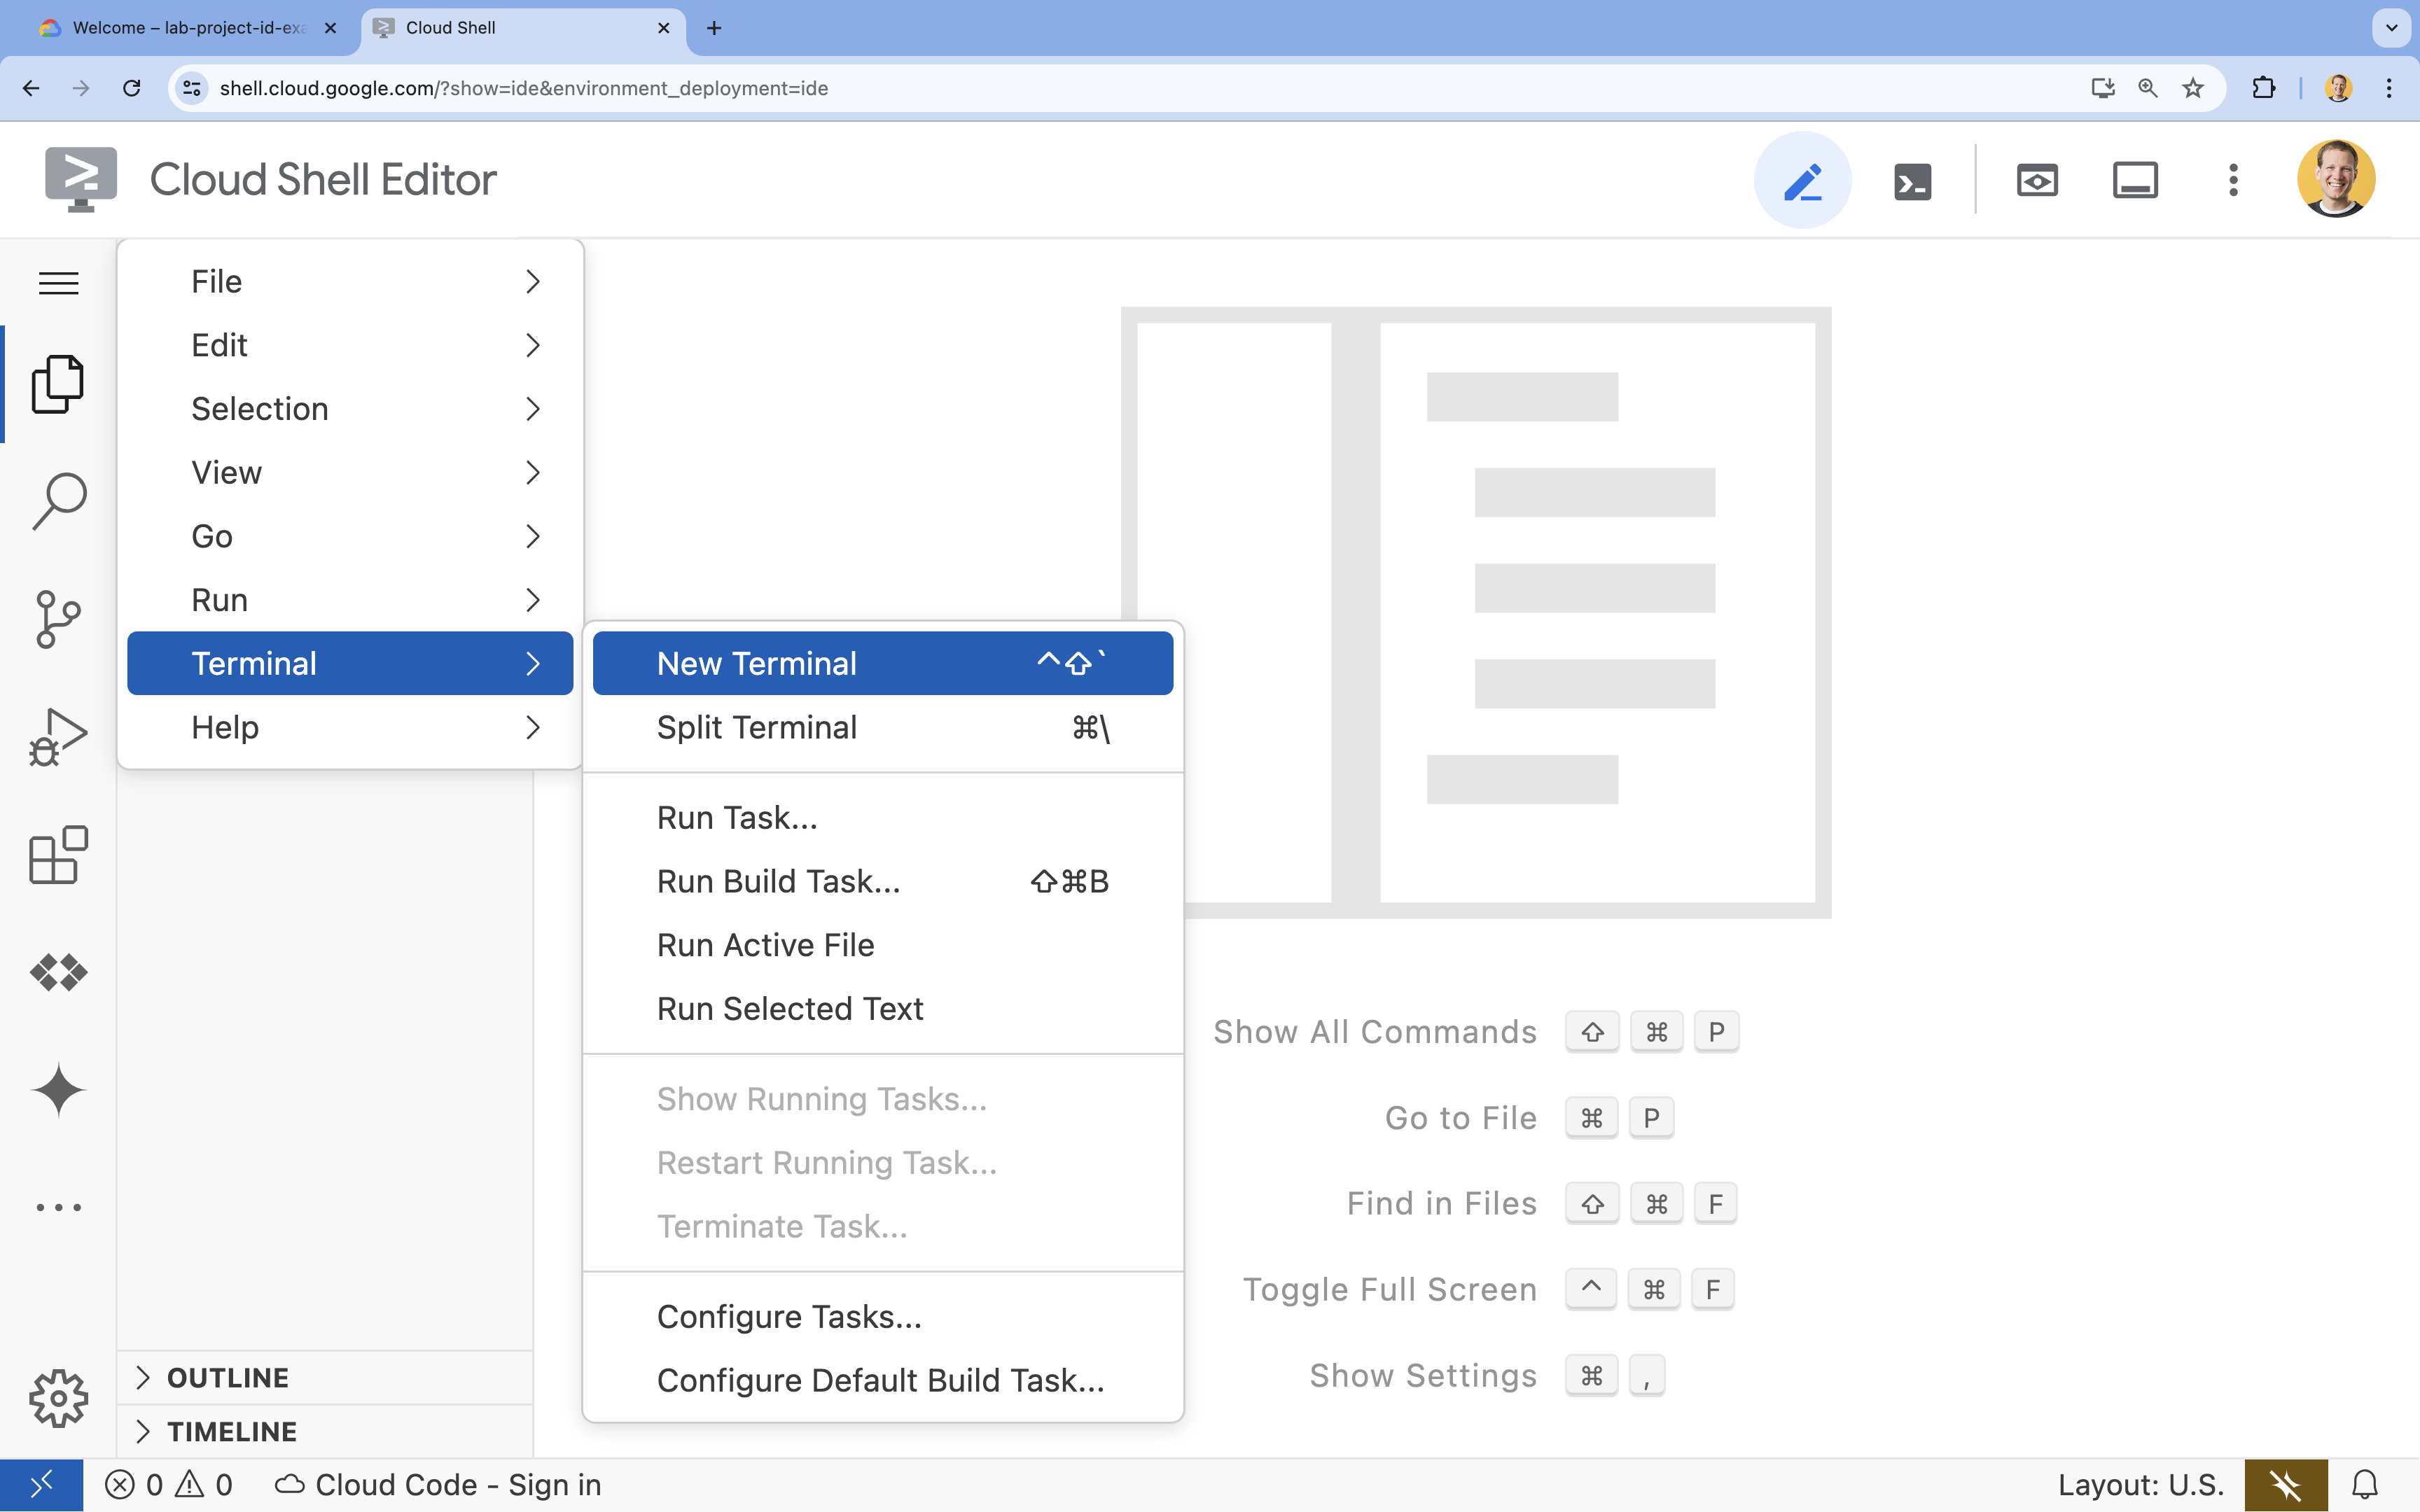
- अगर टर्मिनल स्क्रीन पर सबसे नीचे नहीं दिखता है, तो उसे खोलें:
- हैमबर्गर मेन्यू
 पर क्लिक करें
 - Terminal पर क्लिक करें
- नया टर्मिनल पर क्लिक करें

- हैमबर्गर मेन्यू
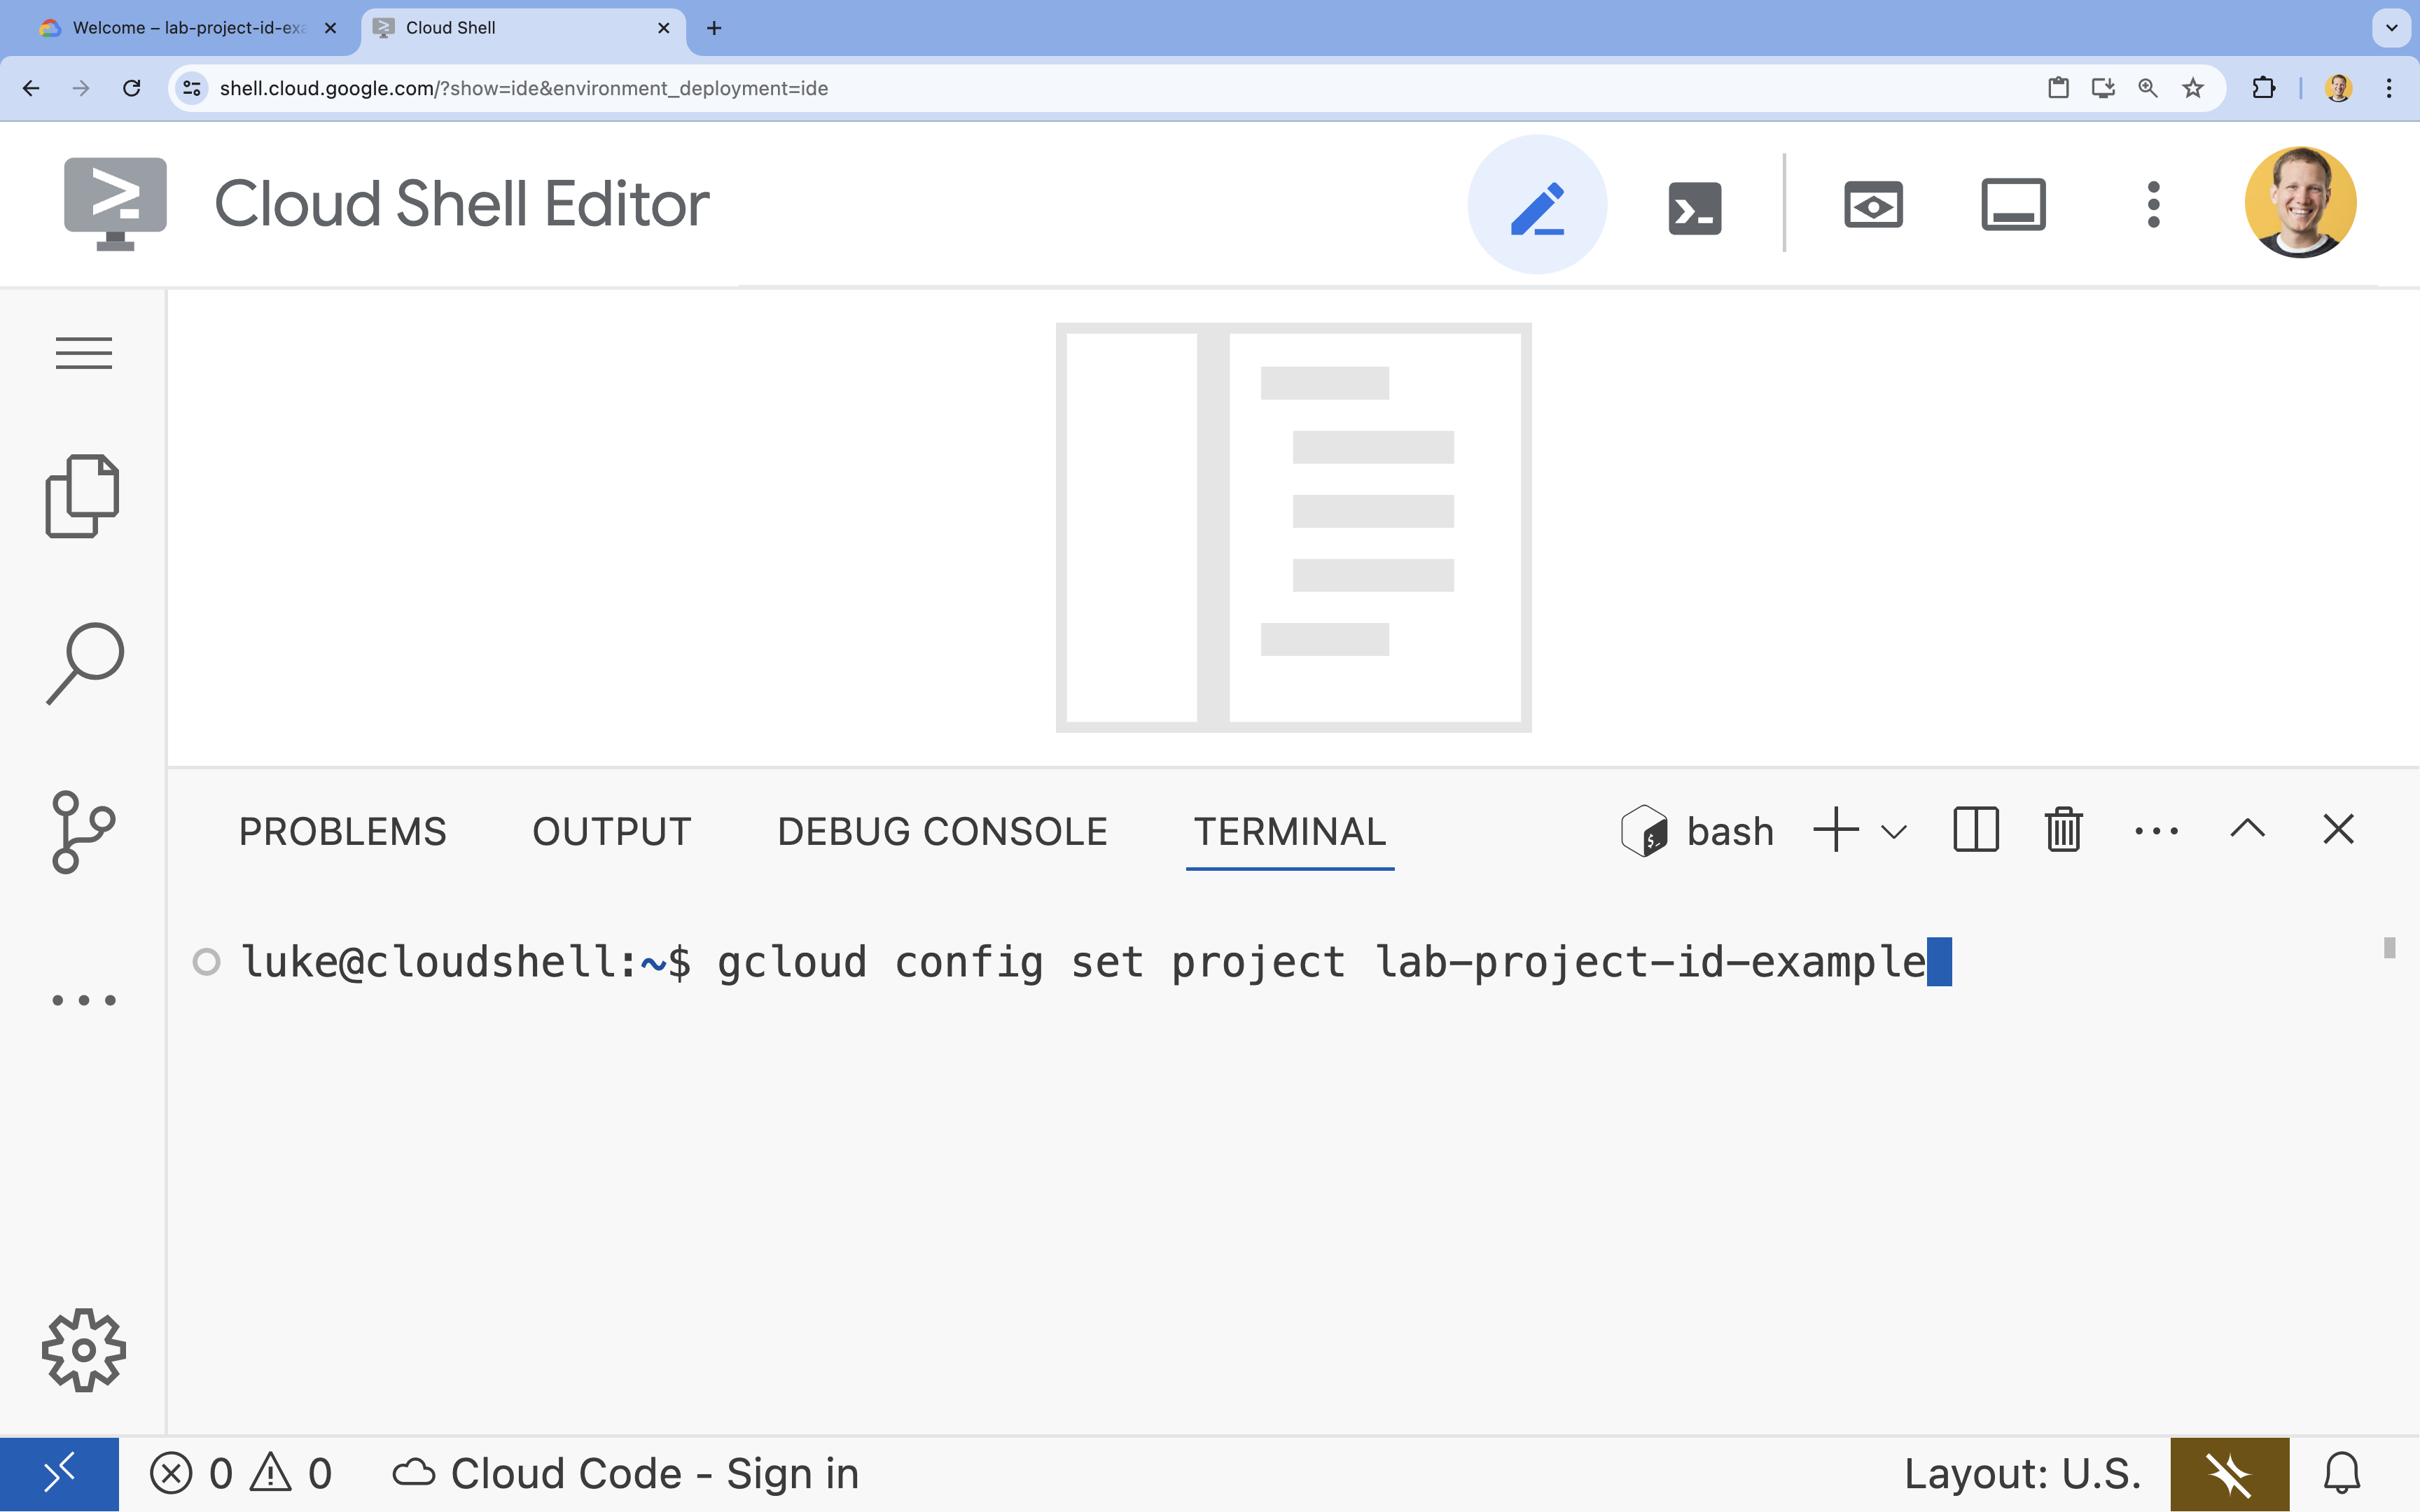
- टर्मिनल में, इस कमांड की मदद से अपना प्रोजेक्ट सेट करें:
- फ़ॉर्मैट:
gcloud config set project [PROJECT_ID] - उदाहरण:
gcloud config set project lab-project-id-example - अगर आपको अपना प्रोजेक्ट आईडी याद नहीं है, तो:
- अपने सभी प्रोजेक्ट आईडी की सूची देखने के लिए:
gcloud projects list | awk '/PROJECT_ID/{print $2}'

- अपने सभी प्रोजेक्ट आईडी की सूची देखने के लिए:
- फ़ॉर्मैट:
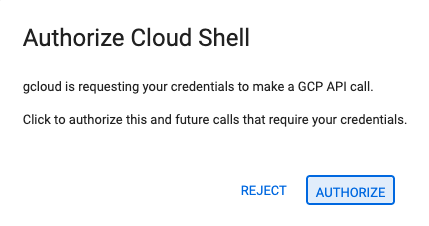
- अगर आपसे अनुमति देने के लिए कहा जाए, तो जारी रखने के लिए अनुमति दें पर क्लिक करें.

- आपको यह मैसेज दिखेगा:
Updated property [core/project].
WARNINGदिखता है और आपसेDo you want to continue (Y/N)?पूछा जाता है, तो हो सकता है कि आपने प्रोजेक्ट आईडी गलत डाला हो.Nदबाएं,Enterदबाएं, औरgcloud config set projectकमांड को फिर से चलाने की कोशिश करें.
5. एपीआई चालू करें
टर्मिनल में, एपीआई चालू करें:
gcloud services enable \
  firestore.googleapis.com \
  run.googleapis.com \
  artifactregistry.googleapis.com \
  cloudbuild.googleapis.com
अगर आपसे अनुमति देने के लिए कहा जाए, तो जारी रखने के लिए अनुमति दें पर क्लिक करें. 
इस निर्देश को पूरा होने में कुछ मिनट लग सकते हैं. हालांकि, आखिर में आपको इस तरह का मैसेज दिखेगा:
Operation "operations/acf.p2-73d90d00-47ee-447a-b600" finished successfully.
6. Firestore डेटाबेस बनाना
- Firestore डेटाबेस बनाने के लिए,
gcloud firestore databases createकमांड चलाएंgcloud firestore databases create --location=nam5
7. आवेदन तैयार करना
एचटीटीपी अनुरोधों का जवाब देने वाला Next.js ऐप्लिकेशन तैयार करें.
task-appनाम का नया Next.js प्रोजेक्ट बनाने के लिए, इस निर्देश का इस्तेमाल करें:npx --yes @angular/cli@19.2.5 new task-app \ --minimal \ --inline-template \ --inline-style \ --ssr \ --server-routing \ --defaults- डायरेक्ट्री को
task-appमें बदलने के लिए:cd task-app
- Firestore डेटाबेस के साथ इंटरैक्ट करने के लिए,
firebase-adminइंस्टॉल करें.npm install firebase-admin
- Cloud Shell Editor में
server.tsफ़ाइल खोलें:cloudshell edit src/server.tsserver.tsफ़ाइल में बदलाव किया जा सकता है.
server.tsफ़ाइल के मौजूदा कॉन्टेंट मिटाएं.- नीचे दिया गया कोड कॉपी करके, खोली गई
server.tsफ़ाइल में चिपकाएं:import { AngularNodeAppEngine, createNodeRequestHandler, isMainModule, writeResponseToNodeResponse, } from '@angular/ssr/node'; import express from 'express'; import { dirname, resolve } from 'node:path'; import { fileURLToPath } from 'node:url'; import { initializeApp, applicationDefault, getApps } from 'firebase-admin/app'; import { getFirestore } from 'firebase-admin/firestore'; type Task = { id: string; title: string; status: 'IN_PROGRESS' | 'COMPLETE'; createdAt: number; }; const credential = applicationDefault(); // Only initialize app if it does not already exist if (getApps().length === 0) { initializeApp({ credential }); } const db = getFirestore(); const tasksRef = db.collection('tasks'); const serverDistFolder = dirname(fileURLToPath(import.meta.url)); const browserDistFolder = resolve(serverDistFolder, '../browser'); const app = express(); const angularApp = new AngularNodeAppEngine(); app.use(express.json()); app.get('/api/tasks', async (req, res) => { const snapshot = await tasksRef.orderBy('createdAt', 'desc').limit(100).get(); const tasks: Task[] = snapshot.docs.map(doc => ({ id: doc.id, title: doc.data()['title'], status: doc.data()['status'], createdAt: doc.data()['createdAt'], })); res.send(tasks); }); app.post('/api/tasks', async (req, res) => { const newTaskTitle = req.body.title; if(!newTaskTitle){ res.status(400).send("Title is required"); return; } await tasksRef.doc().create({ title: newTaskTitle, status: 'IN_PROGRESS', createdAt: Date.now(), }); res.sendStatus(200); }); app.put('/api/tasks', async (req, res) => { const task: Task = req.body; if (!task || !task.id || !task.title || !task.status) { res.status(400).send("Invalid task data"); return; } await tasksRef.doc(task.id).set(task); res.sendStatus(200); }); app.delete('/api/tasks', async (req, res) => { const task: Task = req.body; if(!task || !task.id){ res.status(400).send("Task ID is required"); return; } await tasksRef.doc(task.id).delete(); res.sendStatus(200); }); /** * Serve static files from /browser */ app.use( express.static(browserDistFolder, { maxAge: '1y', index: false, redirect: false, }), ); /** * Handle all other requests by rendering the Angular application. */ app.use('/**', (req, res, next) => { angularApp .handle(req) .then((response) => response ? writeResponseToNodeResponse(response, res) : next(), ) .catch(next); }); /** * Start the server if this module is the main entry point. * The server listens on the port defined by the `PORT` environment variable, or defaults to 4000. */ if (isMainModule(import.meta.url)) { const port = process.env['PORT'] || 4000; app.listen(port, () => { console.log(`Node Express server listening on http://localhost:${port}`); }); } /** * Request handler used by the Angular CLI (for dev-server and during build) or Firebase Cloud Functions. */ export const reqHandler = createNodeRequestHandler(app); - Cloud Shell Editor में
angular.jsonफ़ाइल खोलें:cloudshell edit angular.jsonangular.jsonफ़ाइल में"externalDependencies": ["firebase-admin"]लाइन जोड़ेंगे. angular.jsonफ़ाइल का मौजूदा कॉन्टेंट मिटाएं.- नीचे दिया गया कोड कॉपी करके, खोली गई
angular.jsonफ़ाइल में चिपकाएं:{ "$schema": "./node_modules/@angular/cli/lib/config/schema.json", "version": 1, "newProjectRoot": "projects", "projects": { "task-app": { "projectType": "application", "schematics": { "@schematics/angular:component": { "inlineTemplate": true, "inlineStyle": true, "skipTests": true }, "@schematics/angular:class": { "skipTests": true }, "@schematics/angular:directive": { "skipTests": true }, "@schematics/angular:guard": { "skipTests": true }, "@schematics/angular:interceptor": { "skipTests": true }, "@schematics/angular:pipe": { "skipTests": true }, "@schematics/angular:resolver": { "skipTests": true }, "@schematics/angular:service": { "skipTests": true } }, "root": "", "sourceRoot": "src", "prefix": "app", "architect": { "build": { "builder": "@angular-devkit/build-angular:application", "options": { "outputPath": "dist/task-app", "index": "src/index.html", "browser": "src/main.ts", "polyfills": [ "zone.js" ], "tsConfig": "tsconfig.app.json", "assets": [ { "glob": "**/*", "input": "public" } ], "styles": [ "src/styles.css" ], "scripts": [], "server": "src/main.server.ts", "outputMode": "server", "ssr": { "entry": "src/server.ts" }, "externalDependencies": ["firebase-admin"] }, "configurations": { "production": { "budgets": [ { "type": "initial", "maximumWarning": "500kB", "maximumError": "1MB" }, { "type": "anyComponentStyle", "maximumWarning": "4kB", "maximumError": "8kB" } ], "outputHashing": "all" }, "development": { "optimization": false, "extractLicenses": false, "sourceMap": true } }, "defaultConfiguration": "production" }, "serve": { "builder": "@angular-devkit/build-angular:dev-server", "configurations": { "production": { "buildTarget": "task-app:build:production" }, "development": { "buildTarget": "task-app:build:development" } }, "defaultConfiguration": "development" }, "extract-i18n": { "builder": "@angular-devkit/build-angular:extract-i18n" } } } } }
"externalDependencies": ["firebase-admin"]
- Cloud Shell Editor में
app.component.tsफ़ाइल खोलें:cloudshell edit src/app/app.component.tsapp.component.tsफ़ाइल में बदलाव किया जा सकता है.
app.component.tsफ़ाइल का मौजूदा कॉन्टेंट मिटाएं.- नीचे दिया गया कोड कॉपी करके, खोली गई
app.component.tsफ़ाइल में चिपकाएं:import { afterNextRender, Component, signal } from '@angular/core'; import { FormsModule } from '@angular/forms'; type Task = { id: string; title: string; status: 'IN_PROGRESS' | 'COMPLETE'; createdAt: number; }; @Component({ selector: 'app-root', standalone: true, imports: [FormsModule], template: ` <section> <input type="text" placeholder="New Task Title" [(ngModel)]="newTaskTitle" class="text-black border-2 p-2 m-2 rounded" /> <button (click)="addTask()">Add new task</button> <table> <tbody> @for (task of tasks(); track task) { @let isComplete = task.status === 'COMPLETE'; <tr> <td> <input (click)="updateTask(task, { status: isComplete ? 'IN_PROGRESS' : 'COMPLETE' })" type="checkbox" [checked]="isComplete" /> </td> <td>{{ task.title }}</td> <td>{{ task.status }}</td> <td> <button (click)="deleteTask(task)">Delete</button> </td> </tr> } </tbody> </table> </section> `, styles: '', }) export class AppComponent { newTaskTitle = ''; tasks = signal<Task[]>([]); constructor() { afterNextRender({ earlyRead: () => this.getTasks() }); } async getTasks() { const response = await fetch(`/api/tasks`); const tasks = await response.json(); this.tasks.set(tasks); } async addTask() { await fetch(`/api/tasks`, { method: 'POST', headers: { 'Content-Type': 'application/json' }, body: JSON.stringify({ title: this.newTaskTitle, status: 'IN_PROGRESS', createdAt: Date.now(), }), }); this.newTaskTitle = ''; await this.getTasks(); } async updateTask(task: Task, newTaskValues: Partial<Task>) { await fetch(`/api/tasks`, { method: 'PUT', headers: { 'Content-Type': 'application/json' }, body: JSON.stringify({ ...task, ...newTaskValues }), }); await this.getTasks(); } async deleteTask(task: any) { await fetch('/api/tasks', { method: 'DELETE', headers: { 'Content-Type': 'application/json' }, body: JSON.stringify(task), }); await this.getTasks(); } }
ऐप्लिकेशन अब डिप्लॉय करने के लिए तैयार है.
8. ऐप्लिकेशन को Cloud Run पर डिप्लॉय करना
- अपने ऐप्लिकेशन को Cloud Run पर डिप्लॉय करने के लिए, यह कमांड चलाएं:
gcloud run deploy helloworld \ --region=us-central1 \ --source=. - अगर कहा जाए, तो जारी रखने के लिए
YऔरEnterदबाएं:Do you want to continue (Y/n)? Y
कुछ मिनटों के बाद, आपको ऐप्लिकेशन से एक यूआरएल मिलेगा.
अपने ऐप्लिकेशन को काम करते हुए देखने के लिए, यूआरएल पर जाएं. जब भी यूआरएल पर जाया जाएगा या पेज को रीफ़्रेश किया जाएगा, तब आपको टास्क ऐप्लिकेशन दिखेगा.
9. बधाई हो
इस लैब में, आपको ये काम करने का तरीका पता चला है:
- PostgreSQL के लिए Cloud SQL इंस्टेंस बनाना
- Cloud Run पर ऐसा ऐप्लिकेशन डिप्लॉय करना जो आपके Cloud SQL डेटाबेस से कनेक्ट हो
व्यवस्थित करें
Cloud SQL में कोई मुफ़्त टीयर नहीं है. इसका इस्तेमाल जारी रखने पर, आपसे शुल्क लिया जाएगा. अतिरिक्त शुल्कों से बचने के लिए, अपना Cloud प्रोजेक्ट मिटाया जा सकता है.
Cloud Run का इस्तेमाल न होने पर, आपसे कोई शुल्क नहीं लिया जाता. हालांकि, आर्टफ़ैक्ट रजिस्ट्री में कंटेनर इमेज को सेव करने के लिए, आपसे शुल्क लिया जा सकता है. Cloud प्रोजेक्ट मिटाने पर, उसमें इस्तेमाल किए गए सभी संसाधनों के लिए बिलिंग बंद हो जाती है.
अगर आपको प्रोजेक्ट मिटाना है, तो:
gcloud projects delete $GOOGLE_CLOUD_PROJECT
आपके पास अपनी CloudShell डिस्क से ग़ैर-ज़रूरी संसाधनों को मिटाने का विकल्प भी है. आप:
- कोडलैब प्रोजेक्ट डायरेक्ट्री मिटाएं:
rm -rf ~/task-app - चेतावनी! इस कार्रवाई को पहले जैसा नहीं किया जा सकता! अगर आपको जगह खाली करने के लिए, अपने Cloud Shell पर मौजूद सभी चीज़ें मिटानी हैं, तो अपनी पूरी होम डायरेक्ट्री मिटाएं. ध्यान रखें कि आपको जो भी चीज़ें सेव रखनी हैं उन्हें किसी दूसरी जगह सेव कर लें.
sudo rm -rf $HOME
सीखते रहें
- Cloud SQL Node.js कनेक्टर का इस्तेमाल करके, Cloud SQL for PostgreSQL के साथ Cloud Run में फ़ुल स्टैक Next.js ऐप्लिकेशन को डिप्लॉय करना
- Cloud SQL Node.js कनेक्टर का इस्तेमाल करके, Cloud SQL for PostgreSQL के साथ Cloud Run में फ़ुल स्टैक Angular ऐप्लिकेशन को डिप्लॉय करना
- Node.js Admin SDK टूल का इस्तेमाल करके, Firestore के साथ Cloud Run पर फ़ुल स्टैक Angular ऐप्लिकेशन को डिप्लॉय करना
- Node.js Admin SDK का इस्तेमाल करके, Firestore के साथ Cloud Run पर फ़ुल स्टैक Next.js ऐप्लिकेशन को डिप्लॉय करना

