
1. บทนำ
การบันทึกประสบการณ์ AR เป็นไฟล์ MP4 และเล่นจากไฟล์ MP4 มีประโยชน์กับทั้งนักพัฒนาแอปและผู้ใช้ปลายทาง
แก้ไขข้อบกพร่องและทดสอบฟีเจอร์ใหม่ได้จากโต๊ะทำงาน
การใช้งานระเบียน ARCore ที่ง่ายที่สุด API การเล่นมีไว้สำหรับนักพัฒนา ไม่ต้องเสียเวลาไปกับการสร้างและเรียกใช้แอปบนอุปกรณ์ทดสอบ ถอดสาย USB และเดินไปรอบๆ เพียงเพื่อทดสอบการเปลี่ยนแปลงโค้ดเล็กๆ น้อยๆ ตอนนี้คุณเพียงแค่บันทึก MP4 ในสภาพแวดล้อมการทดสอบที่มีการเคลื่อนไหวของโทรศัพท์ที่คาดไว้ และทดสอบจากโต๊ะทำงานได้โดยตรง
บันทึกและเล่นจากอุปกรณ์เครื่องอื่น
เมื่อใช้ API การบันทึกและการเล่น ผู้ใช้คนหนึ่งจะสามารถบันทึกเซสชันโดยใช้อุปกรณ์หนึ่ง ส่วนอีกเครื่องหนึ่งสามารถเล่นเซสชันเดียวกันนั้นในอีกอุปกรณ์หนึ่งได้ คุณอาจแชร์ประสบการณ์ AR กับผู้ใช้รายอื่นได้ มีหลากหลายความเป็นไปได้!
นี่เป็นการสร้างแอป ARCore เป็นครั้งแรกใช่ไหม
คุณจะใช้ Codelab นี้อย่างไร
สิ่งที่คุณจะสร้าง
ใน Codelab นี้ คุณจะใช้การบันทึกและ API การเล่น เพื่อสร้างแอปที่บันทึกประสบการณ์ AR ลงในไฟล์ MP4 และเล่นไฟล์เดียวกันนั้น คุณจะได้เรียนรู้:
- วิธีใช้ API การบันทึกเพื่อบันทึกเซสชัน AR เป็นไฟล์ MP4
- วิธีใช้ API การเล่นเพื่อเล่นเซสชัน AR ซ้ำจากไฟล์ MP4
- วิธีบันทึกเซสชัน AR ในอุปกรณ์หนึ่งและเล่นซ้ำในอุปกรณ์อีกเครื่องหนึ่ง
สิ่งที่ต้องมี
ใน Codelab นี้ คุณจะได้แก้ไขแอป Hello AR Java ที่สร้างด้วย ARCore Android SDK และคุณจะต้องใช้ฮาร์ดแวร์และซอฟต์แวร์ที่เฉพาะเจาะจงตามมาด้วย
ข้อกำหนดเกี่ยวกับฮาร์ดแวร์
- อุปกรณ์ที่รองรับ ARCore ที่เปิดตัวเลือกสำหรับนักพัฒนาซอฟต์แวร์ไว้ และเปิดใช้การแก้ไขข้อบกพร่อง USB อยู่ โดยเชื่อมต่อผ่านสาย USB กับเครื่องพัฒนา
- เครื่องสำหรับการพัฒนาที่คุณใช้ Android Studio
- การเข้าถึงอินเทอร์เน็ต สำหรับดาวน์โหลดไลบรารีระหว่างการพัฒนา
ข้อกำหนดของซอฟต์แวร์
- บริการ Google Play สำหรับ AR (ARCore) 1.24 ขึ้นไปในอุปกรณ์ ARCore ที่กำลังพัฒนา โดยปกติแล้วบริการนี้จะได้รับการติดตั้งโดยอัตโนมัติบนอุปกรณ์ผ่านทาง Play Store หรือคุณจะติดตั้งด้วยตนเองในอุปกรณ์ที่รองรับ ARCore ก็ได้เช่นกัน
- Android Studio (v3.1 หรือใหม่กว่า) บนเครื่องพัฒนา
นอกจากนี้ คุณควรมีความเข้าใจเบื้องต้นเกี่ยวกับ ARCore ด้วยเพื่อให้ได้ผลลัพธ์ที่ดีที่สุด
2. ตั้งค่าสภาพแวดล้อมในการพัฒนาซอฟต์แวร์
เริ่มต้นด้วยการตั้งค่าสภาพแวดล้อมในการพัฒนาซอฟต์แวร์
ดาวน์โหลด ARCore Android SDK
แตกไฟล์ ARCore Android SDK
เมื่อดาวน์โหลด Android SDK ลงในเครื่องแล้ว ให้แตกไฟล์และไปที่ไดเรกทอรี arcore-android-sdk-1.24/samples/hello_ar_java นี่คือไดเรกทอรีรากของแอปที่คุณจะใช้งาน

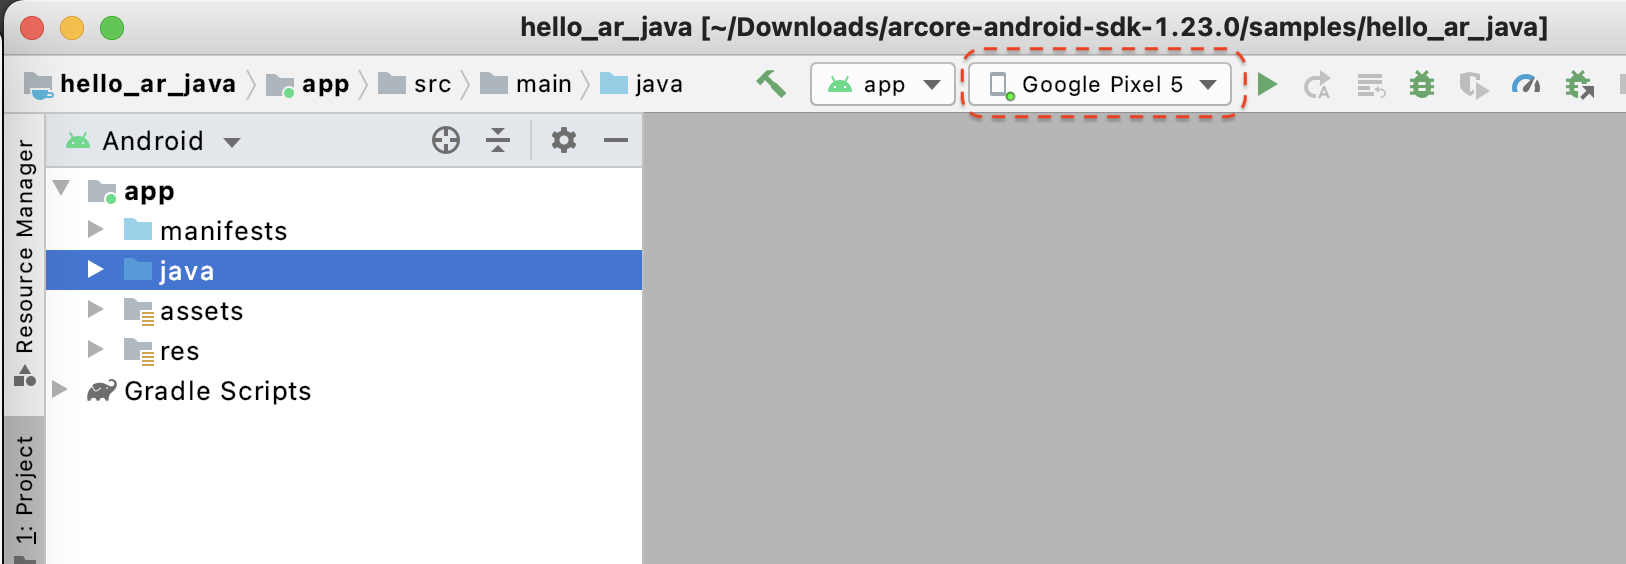
โหลด Hello AR Java ลงใน Android Studio
เปิด Android Studio แล้วคลิกเปิดโปรเจ็กต์ Android Studio ที่มีอยู่
ในหน้าต่างที่ปรากฏขึ้น ให้เลือก arcore-android-sdk-1.24/samples/hello_ar_java แล้วคลิกเปิด
รอให้ Android Studio ซิงค์โปรเจ็กต์ให้เสร็จ หากมีคอมโพเนนต์ขาดหายไป การนำเข้าโปรเจ็กต์อาจล้มเหลวโดยมีข้อความแสดงข้อผิดพลาด โปรดแก้ไขปัญหาเหล่านี้ก่อนดำเนินการต่อ
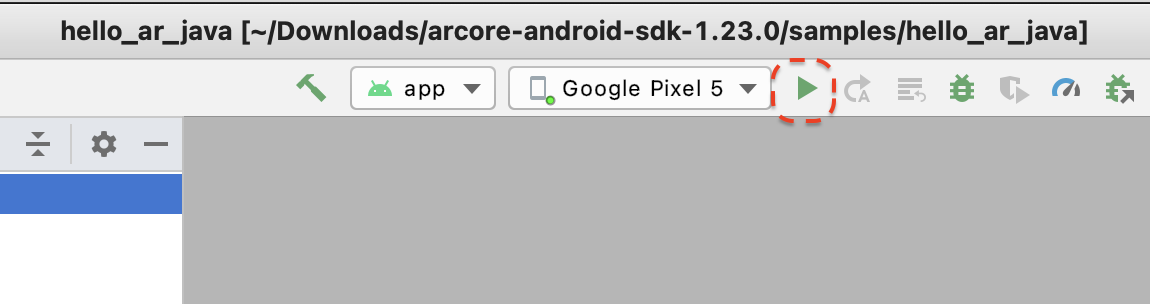
เรียกใช้แอปตัวอย่าง
- เชื่อมต่ออุปกรณ์ที่รองรับ ARCore กับเครื่องพัฒนา
- หากระบบรู้จักอุปกรณ์อย่างถูกต้อง คุณควรเห็นชื่ออุปกรณ์ปรากฏใน Android Studio
- คลิกปุ่ม Run หรือเลือก Run > (เรียกใช้) เรียกใช้ "แอป" เพื่อให้ Android Studio ติดตั้งและเปิดแอปในอุปกรณ์
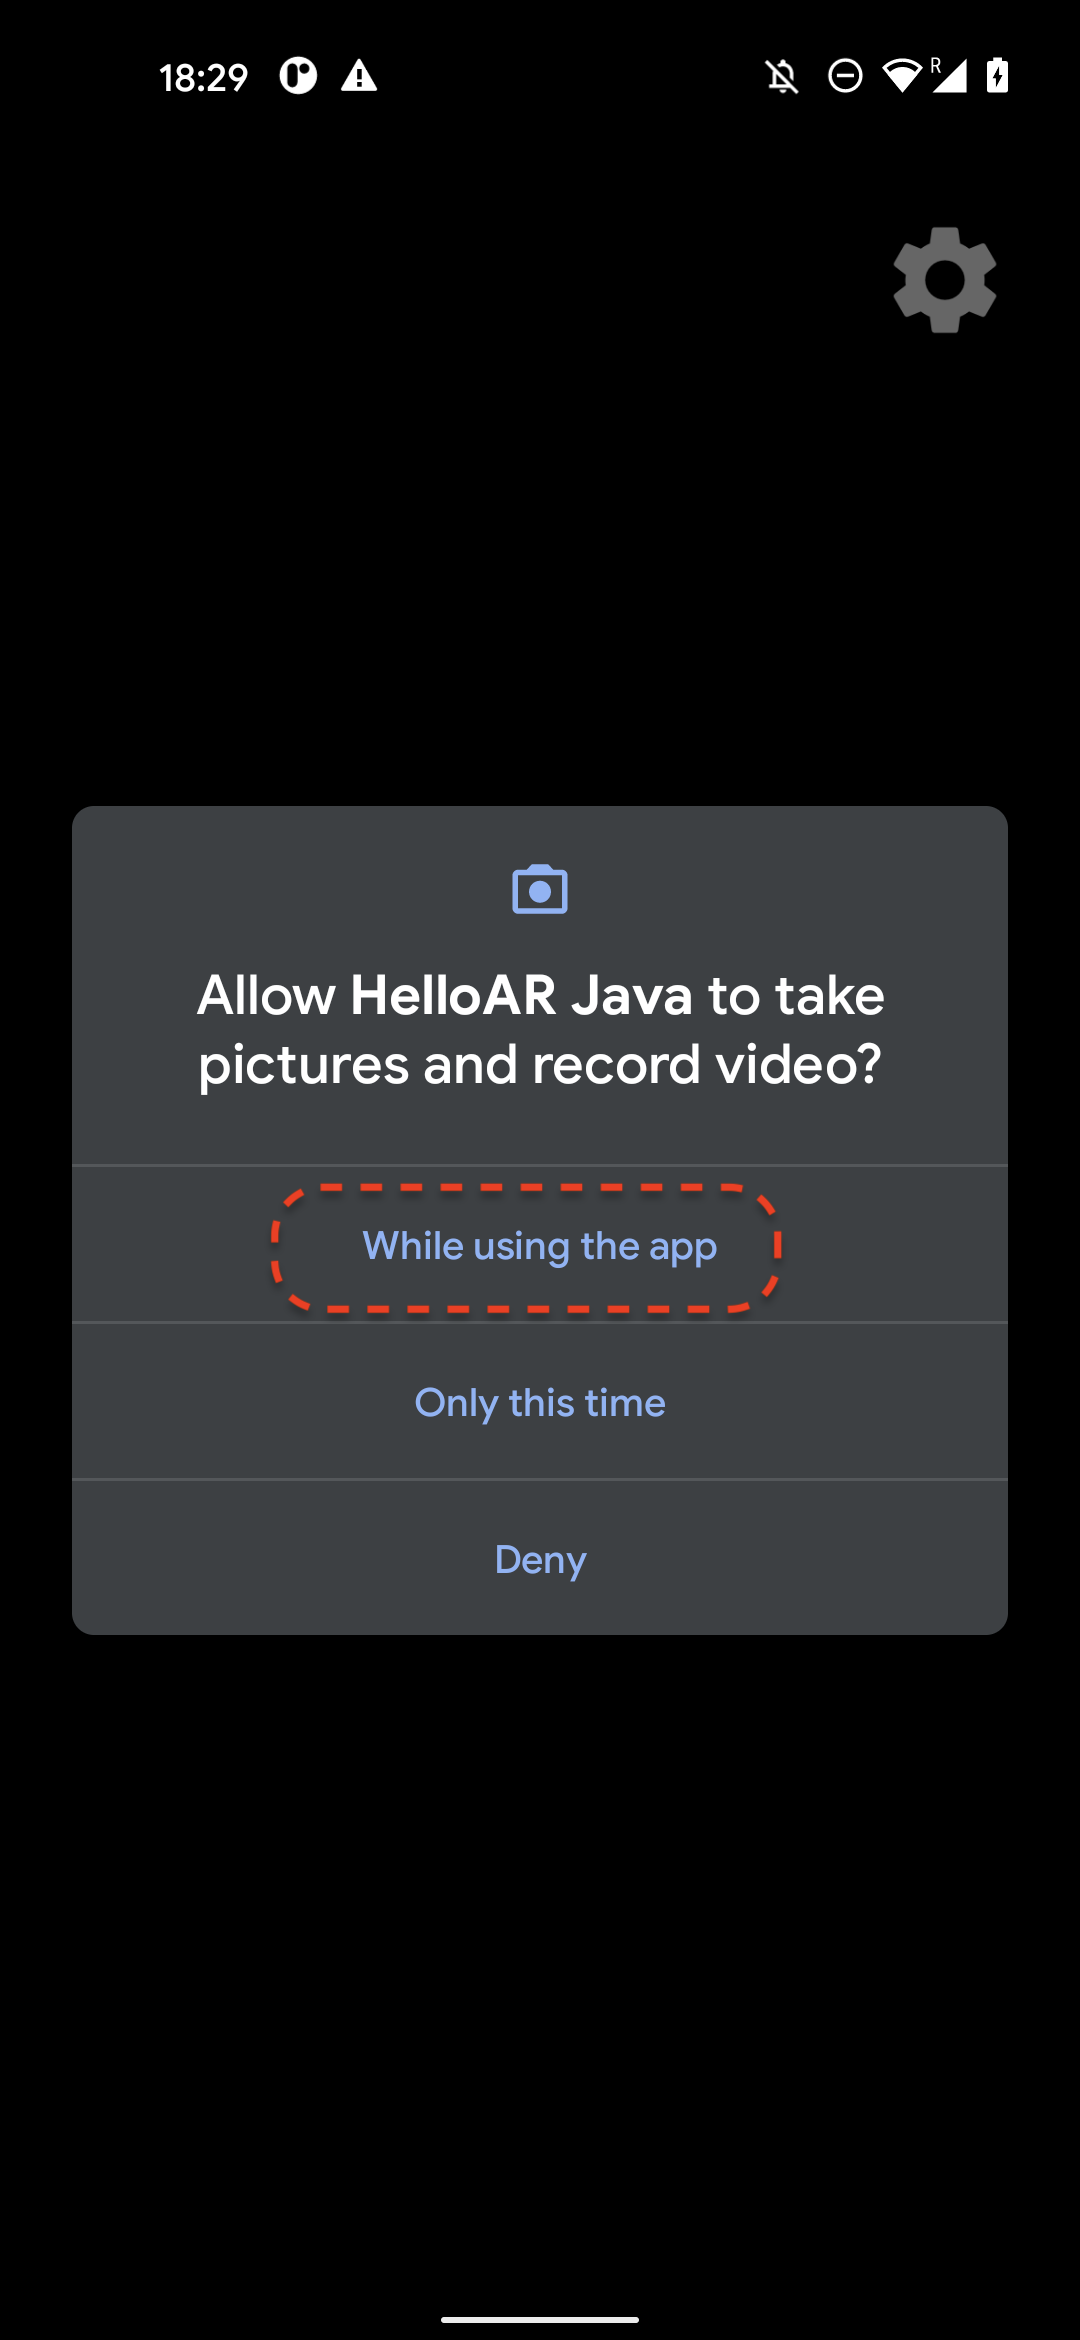
- คุณจะเห็นข้อความที่ขออนุญาตถ่ายภาพและบันทึกวิดีโอ เลือกขณะใช้แอปนี้เพื่อให้สิทธิ์กล้องถ่ายรูปแก่แอป จากนั้นคุณจะเห็นสภาพแวดล้อมในโลกจริงบนหน้าจออุปกรณ์
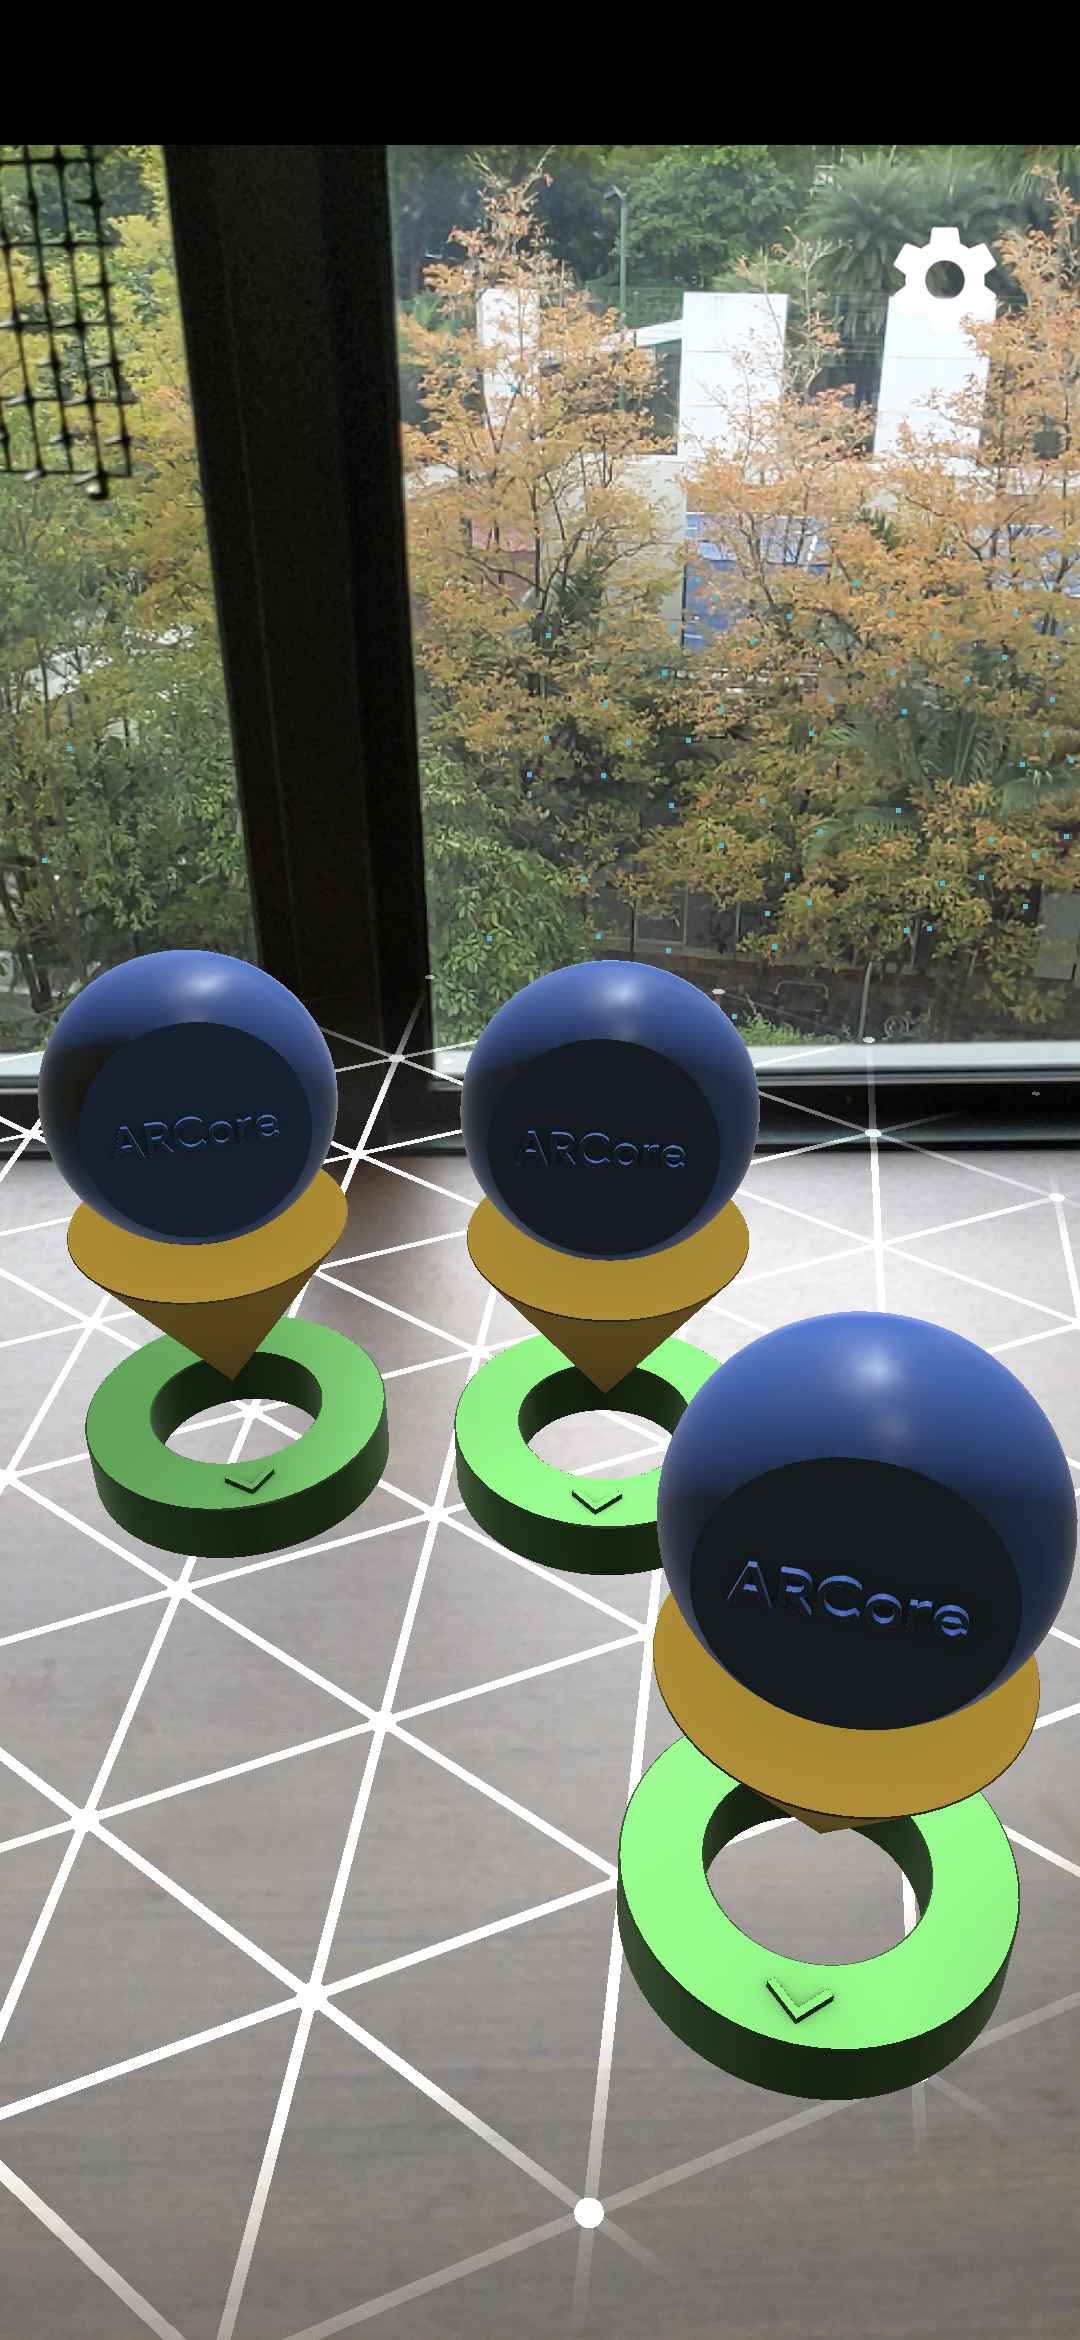
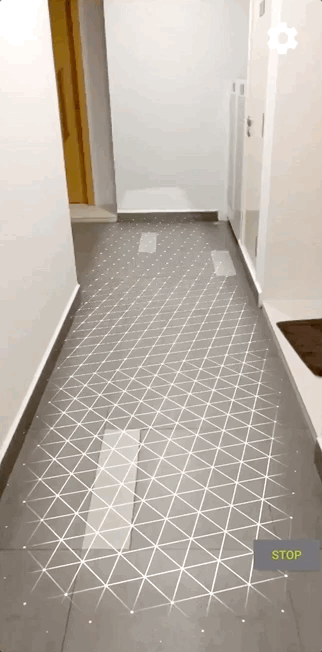
- เลื่อนอุปกรณ์ในแนวนอนเพื่อสแกนหาเครื่องบิน
- ตารางกริดสีขาวจะปรากฏขึ้นเมื่อแอปตรวจพบเครื่องบิน แตะเพื่อวางเครื่องหมายบนระนาบนั้น
สิ่งที่คุณดำเนินการในขั้นตอนนี้
- ตั้งค่าโปรเจ็กต์ Hello AR Java
- สร้างและเรียกใช้แอปตัวอย่างในอุปกรณ์ที่รองรับ ARCore
ขั้นตอนต่อไปคือการบันทึกเซสชัน AR เป็นไฟล์ MP4
3. บันทึกเซสชัน ARCore เป็นไฟล์ MP4
เราจะเพิ่มฟีเจอร์การบันทึกในขั้นตอนนี้ ซึ่งประกอบด้วย
- ปุ่มสำหรับเริ่มหรือหยุดการบันทึก
- ฟังก์ชันพื้นที่เก็บข้อมูลเพื่อบันทึกไฟล์ MP4 ในอุปกรณ์
- เรียกใช้หรือหยุดการบันทึกเซสชัน ARCore
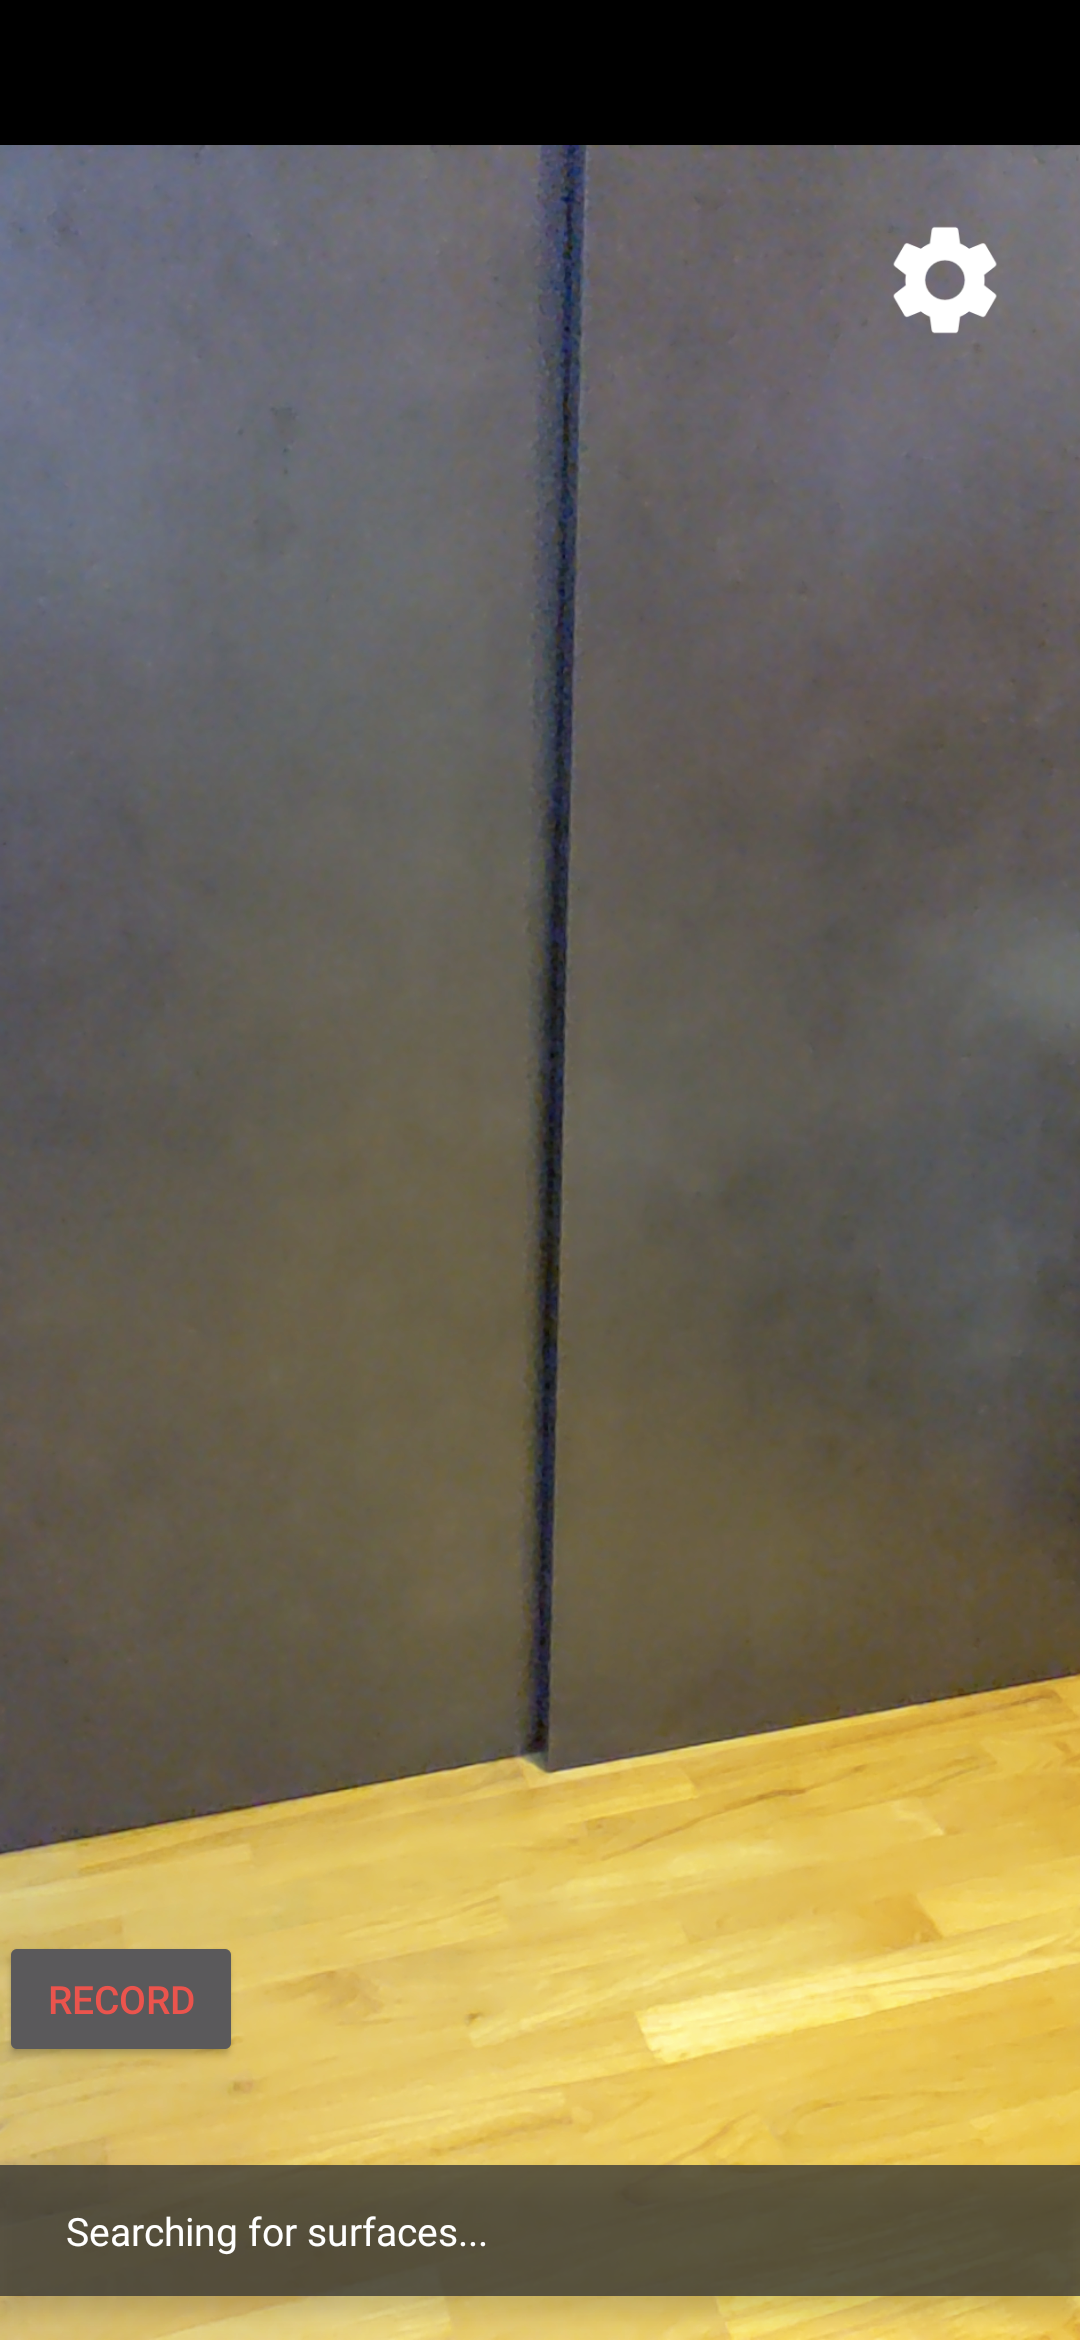
เพิ่ม UI สำหรับปุ่มบันทึก
ก่อนใช้การบันทึก ให้เพิ่มปุ่มใน UI เพื่อให้ผู้ใช้แจ้ง ARCore ว่าจะเริ่มหรือหยุดบันทึกได้เมื่อใด
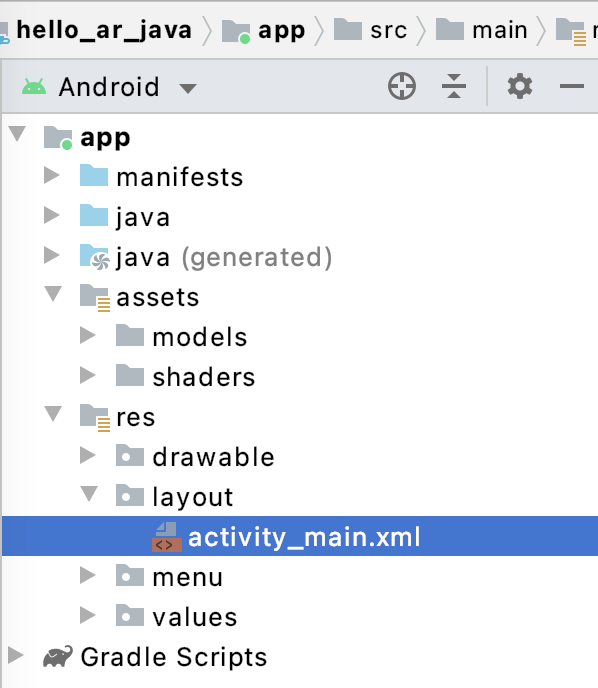
เปิดไฟล์ app/res/layout/activity_main.xml ในแผงโปรเจ็กต์
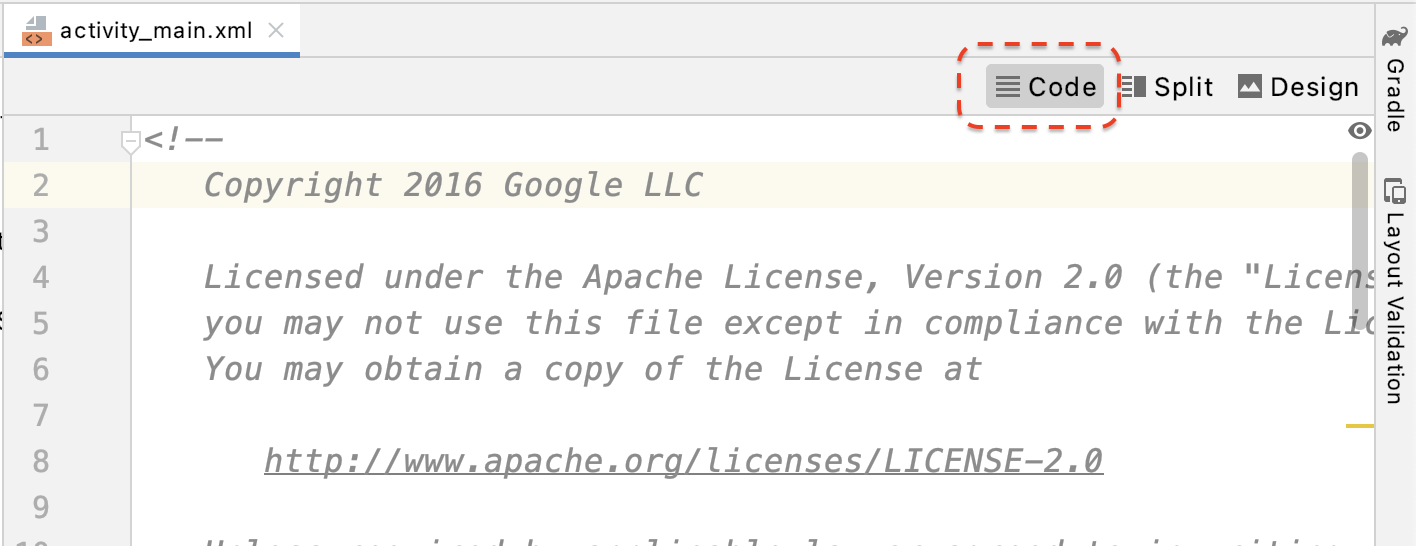
โดยค่าเริ่มต้น Android Studio จะใช้มุมมองการออกแบบหลังจากที่คุณเปิดไฟล์ app/res/layout/activity_main.xml คลิกปุ่มโค้ดที่มุมขวาบนของแท็บเพื่อเปลี่ยนเป็นมุมมองโค้ด
ใน activity_main.xml ให้เพิ่มโค้ดต่อไปนี้ก่อนแท็กปิดเพื่อสร้างปุ่มบันทึกใหม่ และตั้งค่าเครื่องจัดการเหตุการณ์เป็นเมธอดที่ชื่อ onClickRecord()
  <!--
    Add a new "Record" button with those attributes:
        text is "Record",
        onClick event handler is "onClickRecord",
        text color is "red".
  -->
  <Button
      android:id="@+id/record_button"
      android:layout_width="wrap_content"
      android:layout_height="wrap_content"
      android:layout_alignLeft="@id/surfaceview"
      android:layout_alignBottom="@id/surfaceview"
      android:layout_marginBottom="100dp"
      android:onClick="onClickRecord"
      android:text="Record"
      android:textColor="@android:color/holo_red_light" />
หลังจากเพิ่มโค้ดข้างต้นแล้ว ระบบอาจแสดงข้อผิดพลาดขึ้นชั่วคราว: Corresponding method handler 'public void onClickRecord(android.view.View)' not found" กรณีนี้เป็นสิ่งที่คาดว่าจะเกิดอยู่แล้ว คุณจะแก้ไขข้อผิดพลาดโดยการสร้างฟังก์ชัน onClickRecord() ในไม่กี่ขั้นตอน
เปลี่ยนข้อความตามปุ่มตามสถานะ
ปุ่มบันทึกจะจัดการทั้งการบันทึกและการหยุด เมื่อแอปไม่ได้บันทึกข้อมูลไว้ แอปควรแสดงคำว่า "บันทึก" เมื่อแอปกำลังบันทึกข้อมูล ปุ่มควรเปลี่ยนเป็นคำว่า "หยุด"
หากต้องการให้ปุ่มมีฟังก์ชันการทำงานนี้ แอปต้องทราบสถานะปัจจุบันของปุ่ม โค้ดต่อไปนี้จะสร้าง Enum ใหม่ที่เรียกว่า AppState เพื่อแสดงสถานะการทำงานของแอปและติดตามการเปลี่ยนแปลงสถานะที่เจาะจงผ่านตัวแปรสมาชิกส่วนตัวที่ชื่อ appState เพิ่มใน HelloArActivity.java เมื่อเริ่มชั้นเรียน HelloArActivity
  // Represents the app's working state.
  public enum AppState {
    Idle,
    Recording
  }

  // Tracks app's specific state changes.
  private AppState appState = AppState.Idle;
ตอนนี้คุณติดตามสถานะภายในของแอปได้แล้ว ให้สร้างฟังก์ชันที่ชื่อว่า updateRecordButton() ซึ่งจะเปลี่ยนแปลงข้อความของปุ่มตามสถานะปัจจุบันของแอป เพิ่มโค้ดต่อไปนี้ในชั้นเรียน HelloArActivity ใน HelloArActivity.java
// Add imports to the beginning of the file.
import android.widget.Button;

  // Update the "Record" button based on app's internal state.
  private void updateRecordButton() {
    View buttonView = findViewById(R.id.record_button);
    Button button = (Button) buttonView;

    switch (appState) {
      case Idle:
        button.setText("Record");
        break;
      case Recording:
        button.setText("Stop");
        break;
    }
  }
จากนั้น สร้างเมธอด onClickRecord() ที่จะตรวจสอบสถานะของแอป เปลี่ยนเป็นเมธอดถัดไป และเรียกใช้ updateRecordButton() เพื่อเปลี่ยน UI ของปุ่ม เพิ่มโค้ดต่อไปนี้ในชั้นเรียน HelloArActivity ใน HelloArActivity.java
  // Handle the "Record" button click event.
  public void onClickRecord(View view) {
    Log.d(TAG, "onClickRecord");

    // Check the app's internal state and switch to the new state if needed.
    switch (appState) {
        // If the app is not recording, begin recording.
      case Idle: {
        boolean hasStarted = startRecording();
        Log.d(TAG, String.format("onClickRecord start: hasStarted %b", hasStarted));

        if (hasStarted)
          appState = AppState.Recording;

        break;
      }

      // If the app is recording, stop recording.
      case Recording: {
        boolean hasStopped = stopRecording();
        Log.d(TAG, String.format("onClickRecord stop: hasStopped %b", hasStopped));

        if (hasStopped)
          appState = AppState.Idle;

        break;
      }

      default:
        // Do nothing.
        break;
    }

    updateRecordButton();
  }
เปิดใช้แอปเพื่อเริ่มบันทึก
เพียงทำ 2 อย่างเพื่อเริ่มบันทึกใน ARCore
- ระบุ URI ของไฟล์บันทึกในออบเจ็กต์
RecordingConfig - เรียก
session.startRecordingด้วยออบเจ็กต์RecordingConfig
ส่วนที่เหลือเป็นเพียงโค้ดสำเร็จรูป ซึ่งได้แก่ การกำหนดค่า การบันทึก และการตรวจสอบความถูกต้อง
สร้างฟังก์ชันใหม่ชื่อ startRecording() ซึ่งจะบันทึกข้อมูลและบันทึกไว้ใน URI ของ MP4 เพิ่มโค้ดต่อไปนี้ในชั้นเรียน HelloArActivity ใน HelloArActivity.java
// Add imports to the beginning of the file.
import android.net.Uri;
import com.google.ar.core.RecordingConfig;
import com.google.ar.core.RecordingStatus;
import com.google.ar.core.exceptions.RecordingFailedException;

  private boolean startRecording() {
    Uri mp4FileUri = createMp4File();
    if (mp4FileUri == null)
      return false;

    Log.d(TAG, "startRecording at: " + mp4FileUri);

    pauseARCoreSession();

    // Configure the ARCore session to start recording.
    RecordingConfig recordingConfig = new RecordingConfig(session)
        .setMp4DatasetUri(mp4FileUri)
        .setAutoStopOnPause(true);

    try {
      // Prepare the session for recording, but do not start recording yet.
      session.startRecording(recordingConfig);
    } catch (RecordingFailedException e) {
      Log.e(TAG, "startRecording - Failed to prepare to start recording", e);
      return false;
    }

    boolean canResume = resumeARCoreSession();
    if (!canResume)
      return false;

    // Correctness checking: check the ARCore session's RecordingState.
    RecordingStatus recordingStatus = session.getRecordingStatus();
    Log.d(TAG, String.format("startRecording - recordingStatus %s", recordingStatus));
    return recordingStatus == RecordingStatus.OK;
  }
หากต้องการหยุดชั่วคราวและกลับมาดำเนินเซสชัน ARCore ต่ออย่างปลอดภัย ให้สร้าง pauseARCoreSession() และ resumeARCoreSession() ใน HelloArActivity.java
  private void pauseARCoreSession() {
    // Pause the GLSurfaceView so that it doesn't update the ARCore session.
    // Pause the ARCore session so that we can update its configuration.
    // If the GLSurfaceView is not paused,
    //   onDrawFrame() will try to update the ARCore session
    //   while it's paused, resulting in a crash.
    surfaceView.onPause();
    session.pause();
  }

  private boolean resumeARCoreSession() {
    // We must resume the ARCore session before the GLSurfaceView.
    // Otherwise, the GLSurfaceView will try to update the ARCore session.
    try {
      session.resume();
    } catch (CameraNotAvailableException e) {
      Log.e(TAG, "CameraNotAvailableException in resumeARCoreSession", e);
      return false;
    }

    surfaceView.onResume();
    return true;
  }
เปิดใช้แอปเพื่อหยุดบันทึก
สร้างฟังก์ชันชื่อ stopRecording() ใน HelloArActivity.java เพื่อหยุดไม่ให้แอปบันทึกข้อมูลใหม่ ฟังก์ชันนี้เรียกใช้ session.stopRecording() และส่งข้อผิดพลาดไปยังบันทึกของคอนโซลในกรณีที่แอปหยุดการบันทึกไม่ได้
  private boolean stopRecording() {
    try {
      session.stopRecording();
    } catch (RecordingFailedException e) {
      Log.e(TAG, "stopRecording - Failed to stop recording", e);
      return false;
    }

    // Correctness checking: check if the session stopped recording.
    return session.getRecordingStatus() == RecordingStatus.NONE;
  }
ออกแบบพื้นที่เก็บข้อมูลไฟล์โดยใช้พื้นที่เก็บข้อมูลที่กำหนดขอบเขตของ Android 11
ฟังก์ชันที่เกี่ยวข้องกับพื้นที่เก็บข้อมูลใน Codelab นี้ได้รับการออกแบบตามข้อกำหนดด้านพื้นที่เก็บข้อมูลที่กำหนดขอบเขตใหม่ของ Android 11
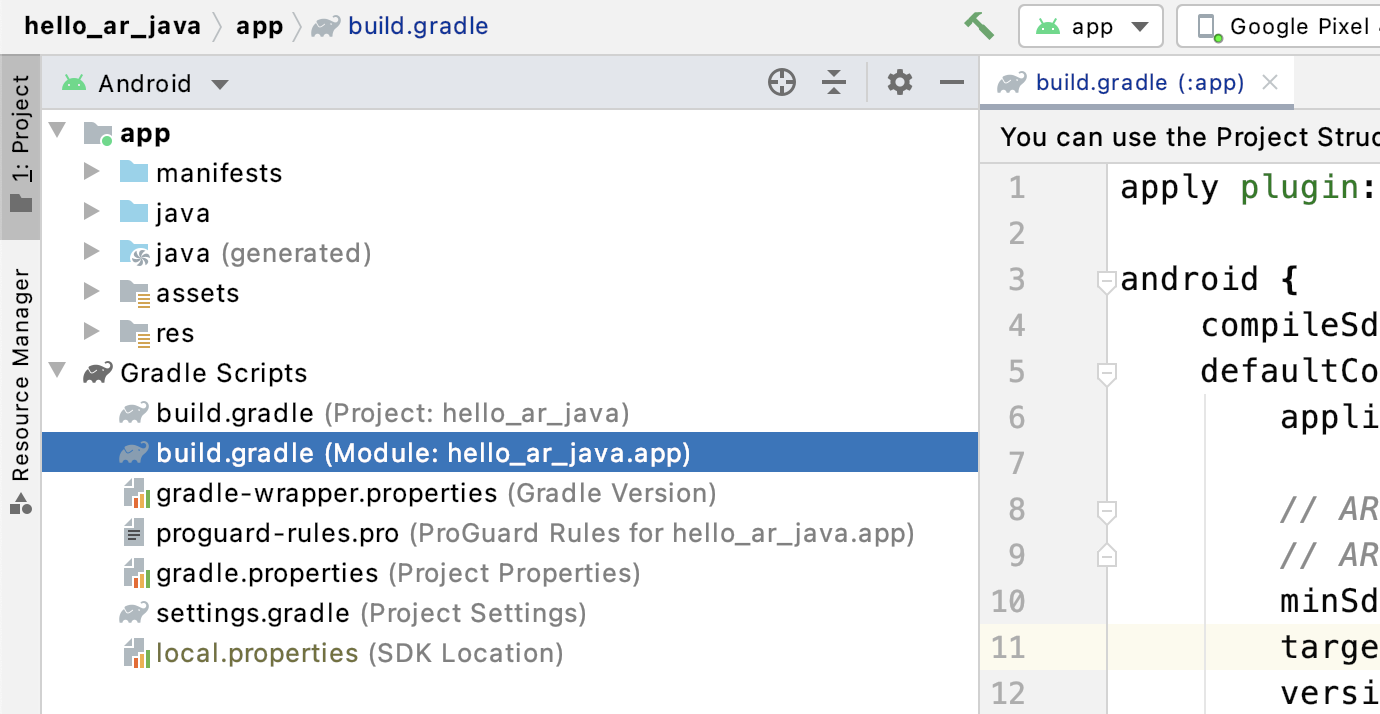
ทำการเปลี่ยนแปลงเล็กน้อยในไฟล์ app/build.gradle เพื่อกำหนดเป้าหมายเป็น Android 11 ในแผงโปรเจ็กต์ Android Studio ไฟล์นี้จะอยู่ภายใต้โหนด Gradle Scripts ที่เชื่อมโยงกับโมดูลแอป
เปลี่ยน compileSdkVersion และ targetSdkVersion เป็น 30
    compileSdkVersion 30
    defaultConfig {
      targetSdkVersion 30
    }
สำหรับการบันทึก ให้ใช้ Android MediaStore API เพื่อสร้างไฟล์ MP4 ในไดเรกทอรีภาพยนตร์ที่แชร์
สร้างฟังก์ชันชื่อ createMp4File() ใน HelloArActivity.java:
// Add imports to the beginning of the file.
import java.text.SimpleDateFormat;
import android.content.ContentResolver;
import android.net.Uri;
import android.os.Build;
import android.os.Environment;
import android.provider.MediaStore;
import android.content.ContentValues;
import java.io.File;
import android.content.CursorLoader;
import android.database.Cursor;
import java.util.Date;


  private final String MP4_VIDEO_MIME_TYPE = "video/mp4";

  private Uri createMp4File() {
    SimpleDateFormat dateFormat = new SimpleDateFormat("yyyyMMdd_HHmmss");
    String mp4FileName = "arcore-" + dateFormat.format(new Date()) + ".mp4";

    ContentResolver resolver = this.getContentResolver();

    Uri videoCollection = null;
    if (Build.VERSION.SDK_INT >= Build.VERSION_CODES.Q) {
      videoCollection = MediaStore.Video.Media.getContentUri(
          MediaStore.VOLUME_EXTERNAL_PRIMARY);
    } else {
      videoCollection = MediaStore.Video.Media.EXTERNAL_CONTENT_URI;
    }

    // Create a new Media file record.
    ContentValues newMp4FileDetails = new ContentValues();
    newMp4FileDetails.put(MediaStore.Video.Media.DISPLAY_NAME, mp4FileName);
    newMp4FileDetails.put(MediaStore.Video.Media.MIME_TYPE, MP4_VIDEO_MIME_TYPE);

    if (Build.VERSION.SDK_INT >= Build.VERSION_CODES.Q) {
      // The Relative_Path column is only available since API Level 29.
      newMp4FileDetails.put(MediaStore.Video.Media.RELATIVE_PATH, Environment.DIRECTORY_MOVIES);
    } else {
      // Use the Data column to set path for API Level <= 28.
      File mp4FileDir = Environment.getExternalStoragePublicDirectory(Environment.DIRECTORY_MOVIES);
      String absoluteMp4FilePath = new File(mp4FileDir, mp4FileName).getAbsolutePath();
      newMp4FileDetails.put(MediaStore.Video.Media.DATA, absoluteMp4FilePath);
    }

    Uri newMp4FileUri = resolver.insert(videoCollection, newMp4FileDetails);

    // Ensure that this file exists and can be written.
    if (newMp4FileUri == null) {
      Log.e(TAG, String.format("Failed to insert Video entity in MediaStore. API Level = %d", Build.VERSION.SDK_INT));
      return null;
    }

    // This call ensures the file exist before we pass it to the ARCore API.
    if (!testFileWriteAccess(newMp4FileUri)) {
      return null;
    }

    Log.d(TAG, String.format("createMp4File = %s, API Level = %d", newMp4FileUri, Build.VERSION.SDK_INT));

    return newMp4FileUri;
  }

  // Test if the file represented by the content Uri can be open with write access.
  private boolean testFileWriteAccess(Uri contentUri) {
    try (java.io.OutputStream mp4File = this.getContentResolver().openOutputStream(contentUri)) {
      Log.d(TAG, String.format("Success in testFileWriteAccess %s", contentUri.toString()));
      return true;
    } catch (java.io.FileNotFoundException e) {
      Log.e(TAG, String.format("FileNotFoundException in testFileWriteAccess %s", contentUri.toString()), e);
    } catch (java.io.IOException e) {
      Log.e(TAG, String.format("IOException in testFileWriteAccess %s", contentUri.toString()), e);
    }

    return false;
  }
จัดการสิทธิ์ของพื้นที่เก็บข้อมูล
หากใช้อุปกรณ์ Android 11 คุณจะเริ่มทดสอบโค้ดได้ หากต้องการรองรับอุปกรณ์ Android 10 หรือต่ำกว่า คุณจะต้องให้สิทธิ์พื้นที่เก็บข้อมูลของแอปเพื่อบันทึกข้อมูลลงในระบบไฟล์ของอุปกรณ์เป้าหมาย
ใน AndroidManifest.xml ให้ประกาศว่าแอปต้องการสิทธิ์อ่านและเขียนพื้นที่เก็บข้อมูลก่อน Android 11 (API ระดับ 30)
  <!-- Inside the <manifest> tag, below the existing Camera permission -->
  <uses-permission android:name="android.permission.WRITE_EXTERNAL_STORAGE"
      android:maxSdkVersion="29" />

  <uses-permission android:name="android.permission.READ_EXTERNAL_STORAGE"
      android:maxSdkVersion="29" />
เพิ่มฟังก์ชันตัวช่วยชื่อ checkAndRequestStoragePermission() ใน HelloArActivity.java เพื่อขอสิทธิ์ WRITE_EXTERNAL_STORAGE ระหว่างรันไทม์
// Add imports to the beginning of the file.
import android.Manifest;
import android.content.pm.PackageManager;
import androidx.core.app.ActivityCompat;
import androidx.core.content.ContextCompat;

  private final int REQUEST_WRITE_EXTERNAL_STORAGE = 1;
  public boolean checkAndRequestStoragePermission() {
    if (ContextCompat.checkSelfPermission(this, Manifest.permission.WRITE_EXTERNAL_STORAGE)
        != PackageManager.PERMISSION_GRANTED) {
      ActivityCompat.requestPermissions(this,
          new String[]{Manifest.permission.WRITE_EXTERNAL_STORAGE},
          REQUEST_WRITE_EXTERNAL_STORAGE);
      return false;
    }

    return true;
  }
หากคุณใช้ API ระดับ 29 หรือเวอร์ชันก่อนหน้า ให้เพิ่มการตรวจสอบสิทธิ์ของพื้นที่เก็บข้อมูลที่ด้านบนของ createMp4File() และออกจากฟังก์ชันตั้งแต่เนิ่นๆ หากแอปไม่มีสิทธิ์ที่ถูกต้อง API ระดับ 30 (Android 11) ไม่จำเป็นต้องใช้สิทธิ์เข้าถึงพื้นที่เก็บข้อมูลเพื่อเข้าถึงไฟล์ใน MediaStore
  private Uri createMp4File() {
    // Since we use legacy external storage for Android 10,
    // we still need to request for storage permission on Android 10.
    if (Build.VERSION.SDK_INT <= Build.VERSION_CODES.Q) {
      if (!checkAndRequestStoragePermission()) {
        Log.i(TAG, String.format(
            "Didn't createMp4File. No storage permission, API Level = %d",
            Build.VERSION.SDK_INT));
        return null;
      }
    }
    // ... omitted code ...
  }
บันทึกจากอุปกรณ์เป้าหมาย
ถึงเวลาดูว่าคุณสร้างอะไรมาบ้างแล้ว เชื่อมต่ออุปกรณ์เคลื่อนที่กับเครื่องพัฒนาซอฟต์แวร์ แล้วคลิกเรียกใช้ใน Android Studio
คุณจะเห็นปุ่มบันทึกสีแดงที่ด้านซ้ายล่างของหน้าจอ การแตะควรเปลี่ยนข้อความเป็นหยุด เคลื่อนอุปกรณ์ไปรอบๆ เพื่อบันทึกเซสชัน แล้วคลิกปุ่มหยุด เมื่อคุณต้องการสิ้นสุดการบันทึก ซึ่งจะบันทึกไฟล์ใหม่ชื่อ arcore-xxxxxx_xxxxxx.mp4 ลงในที่จัดเก็บข้อมูลภายนอกของอุปกรณ์
ตอนนี้คุณควรมีไฟล์ arcore-xxxxxx_xxxxxx.mp4 ใหม่ในพื้นที่เก็บข้อมูลภายนอกของอุปกรณ์ เส้นทางในอุปกรณ์ Pixel 5 คือ /storage/emulated/0/Movies/ คุณจะดูเส้นทางได้ในหน้าต่าง Logcat หลังจากเริ่มการบันทึก
com.google.ar.core.examples.java.helloar D/HelloArActivity: startRecording at:/storage/emulated/0/Movies/arcore-xxxxxxxx_xxxxxx.mp4
com.google.ar.core.examples.java.helloar D/HelloArActivity: startRecording - RecordingStatus OK
ดูวิดีโอที่บันทึกไว้
คุณใช้แอประบบไฟล์ เช่น Files by Google เพื่อดูหรือคัดลอกไฟล์ไปยังเครื่องพัฒนาของคุณได้ คำสั่ง adb 2 รายการสำหรับแสดงรายการและดึงไฟล์จากอุปกรณ์ Android มีดังนี้
adb shell ls '$EXTERNAL_STORAGE/Movies/*'เพื่อแสดงไฟล์ในไดเรกทอรีภาพยนตร์ในพื้นที่เก็บข้อมูลภายนอกของอุปกรณ์adb pull /absolute_path_from_previous_adb_shell_ls/arcore-xxxxxxxx_xxxxxx.mp4เพื่อคัดลอกไฟล์จากอุปกรณ์ไปยังเครื่องพัฒนา
ต่อไปนี้คือตัวอย่างเอาต์พุตหลังจากใช้คำสั่ง 2 คำสั่งนี้ (จาก macOS)
$ adb shell ls '$EXTERNAL_STORAGE/Movies/*'
/sdcard/Movies/arcore-xxxxxxxx_xxxxxx.mp4


$ adb pull /sdcard/Movies/arcore-xxxxxxxx_xxxxxx.mp4
/sdcard/Movies/arcore-xxxxxxxx_xxxxxx.mp4: ... pulled
สิ่งที่คุณดำเนินการในขั้นตอนนี้
- เพิ่มปุ่มเพื่อเริ่มและหยุดการบันทึก
- ใช้ฟังก์ชันต่างๆ เพื่อเริ่มและหยุดการบันทึก
- ทดสอบแอปในอุปกรณ์
- คัดลอก MP4 ที่บันทึกไปยังเครื่องและยืนยัน
ถัดไป คุณจะเล่นเซสชัน AR จากไฟล์ MP4
4. เล่นเซสชัน ARCore จากไฟล์ MP4
ตอนนี้คุณมีปุ่มบันทึกและไฟล์ MP4 บางไฟล์ที่มีเซสชันที่บันทึกไว้แล้ว ตอนนี้คุณจะเล่นวิดีโอเหล่านั้นโดยใช้ ARCore Playback API
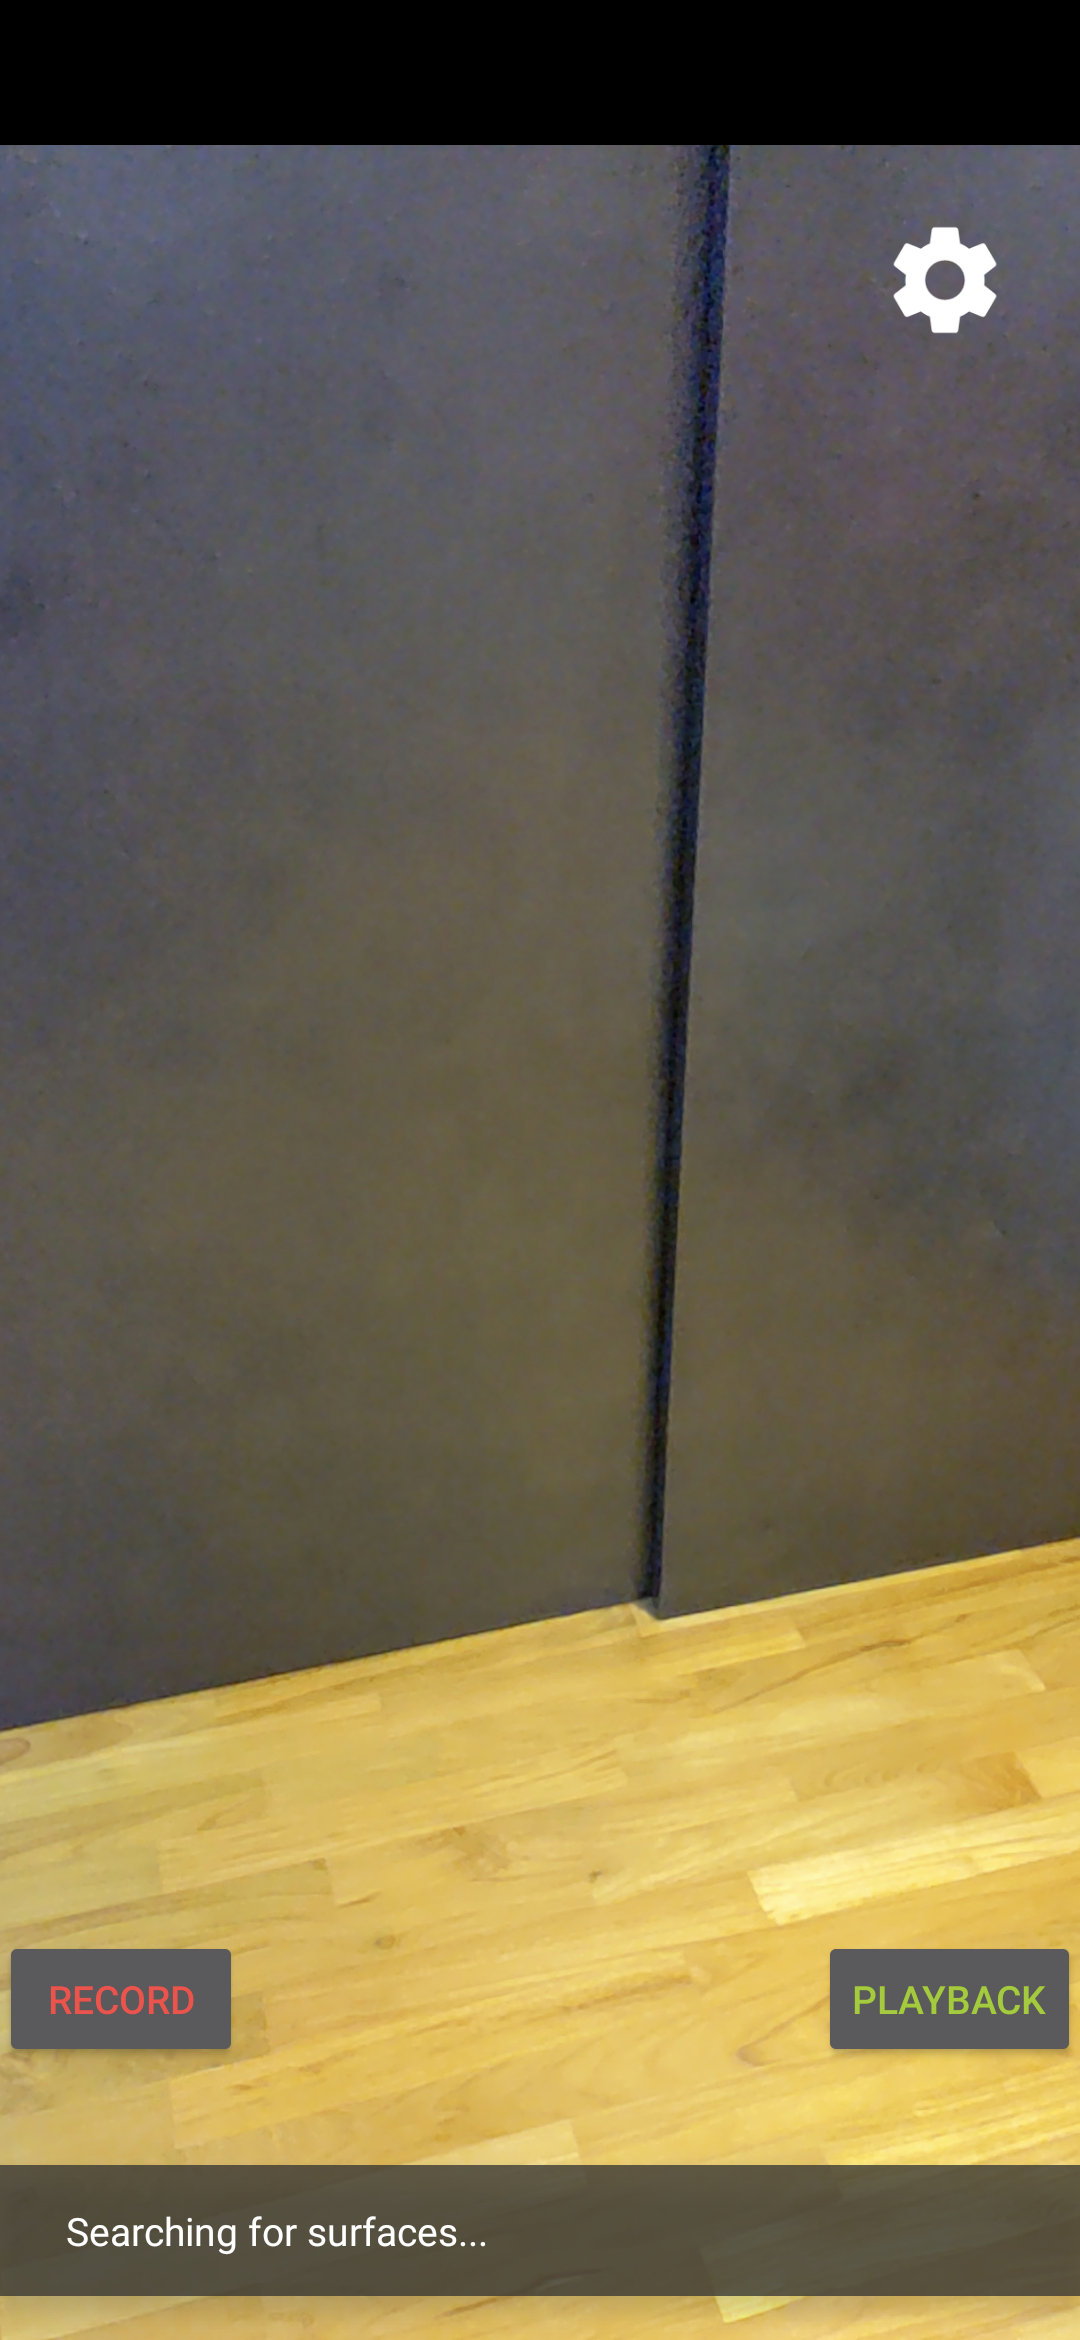
เพิ่ม UI สำหรับปุ่มการเล่น
ก่อนที่จะใช้การเล่น ให้เพิ่มปุ่มใน UI เพื่อให้ผู้ใช้แจ้ง ARCore ว่าเมื่อใดควรเริ่มเล่นและหยุดเล่นเซสชัน
เปิดไฟล์ app/res/layout/activity_main.xml ในแผงโครงการ
ใน activity_main.xml ให้เพิ่มโค้ดด้านล่างก่อนแท็กปิดเพื่อสร้างปุ่มเล่นใหม่ และตั้งค่าเครื่องจัดการเหตุการณ์เป็นเมธอดที่ชื่อ onClickPlayback() ปุ่มนี้จะคล้ายกับปุ่มบันทึก และจะแสดงที่ด้านขวาของหน้าจอ
  <!--
    Add a new "Playback" button with those attributes:
        text is "Playback",
        onClick event handler is "onClickPlayback",
        text color is "green".
  -->
  <Button
      android:id="@+id/playback_button"
      android:layout_width="wrap_content"
      android:layout_height="wrap_content"
      android:layout_alignEnd="@id/surfaceview"
      android:layout_alignBottom="@id/surfaceview"
      android:layout_marginBottom="100dp"
      android:onClick="onClickPlayback"
      android:text="Playback"
      android:textColor="@android:color/holo_green_light" />
อัปเดตปุ่มในระหว่างการเล่น
ตอนนี้แอปมีสถานะใหม่ที่ชื่อว่า Playingback อัปเดต enum ของ AppState และฟังก์ชันที่มีอยู่ทั้งหมดซึ่งใช้ appState เป็นอาร์กิวเมนต์ในการจัดการเรื่องนี้
เพิ่ม Playingback ใน enum ของ AppState ใน HelloArActivity.java
  public enum AppState {
    Idle,
    Recording,
    Playingback // New enum value.
  }
หากปุ่มบันทึกยังอยู่บนหน้าจอระหว่างการเล่น ผู้ใช้อาจคลิกปุ่มโดยไม่ตั้งใจ เพื่อหลีกเลี่ยงปัญหานี้ ให้ซ่อนปุ่มบันทึกระหว่างการเล่น วิธีนี้จะทำให้คุณไม่ต้องจัดการสถานะสำหรับPlayingbackในonClickRecord()
แก้ไขฟังก์ชัน updateRecordButton() ใน HelloArActivity.java เพื่อซ่อนปุ่มบันทึกเมื่อแอปอยู่ในสถานะ Playingback
  // Update the "Record" button based on app's internal state.
  private void updateRecordButton() {
    View buttonView = findViewById(R.id.record_button);
    Button button = (Button)buttonView;

    switch (appState) {

      // The app is neither recording nor playing back. The "Record" button is visible.
      case Idle:
        button.setText("Record");
        button.setVisibility(View.VISIBLE);
        break;

      // While recording, the "Record" button is visible and says "Stop".
      case Recording:
        button.setText("Stop");
        button.setVisibility(View.VISIBLE);
        break;

      // During playback, the "Record" button is not visible.
      case Playingback:
        button.setVisibility(View.INVISIBLE);
        break;
    }
  }
ในทำนองเดียวกัน ให้ซ่อนปุ่มเล่นเมื่อผู้ใช้บันทึกเซสชันแล้วเปลี่ยนเป็น "หยุด" เมื่อผู้ใช้กำลังเล่นเซสชันอยู่ วิธีนี้จะช่วยให้ผู้ใช้หยุดการเล่นได้โดยไม่ต้องรอให้เล่นจบด้วยตัวเอง
เพิ่มฟังก์ชัน updatePlaybackButton() ใน HelloArActivity.java:
  // Update the "Playback" button based on app's internal state.
  private void updatePlaybackButton() {
    View buttonView = findViewById(R.id.playback_button);
    Button button = (Button)buttonView;

    switch (appState) {

      // The app is neither recording nor playing back. The "Playback" button is visible.
      case Idle:
        button.setText("Playback");
        button.setVisibility(View.VISIBLE);
        break;

      // While playing back, the "Playback" button is visible and says "Stop".
      case Playingback:
        button.setText("Stop");
        button.setVisibility(View.VISIBLE);
        break;

      // During recording, the "Playback" button is not visible.
      case Recording:
        button.setVisibility(View.INVISIBLE);
        break;
    }
  }
สุดท้าย ให้อัปเดต onClickRecord() เพื่อโทรหา updatePlaybackButton() เพิ่มบรรทัดต่อไปนี้ใน HelloArActivity.java:
  public void onClickRecord(View view) {
    // ... omitted code ...
    updatePlaybackButton(); // Add this line to the end of the function.
  }
เลือกไฟล์ที่มีปุ่ม "เล่น"
เมื่อแตะ ปุ่มเล่นควรให้ผู้ใช้เลือกไฟล์ที่จะเล่นได้ ใน Android การเลือกไฟล์จะจัดการในเครื่องมือเลือกไฟล์ของระบบในกิจกรรมอื่น ซึ่งดำเนินการผ่านเฟรมเวิร์กการเข้าถึงพื้นที่เก็บข้อมูล (SAF) เมื่อผู้ใช้เลือกไฟล์ แอปจะได้รับการติดต่อกลับที่ชื่อว่า onActivityResult() คุณจะเริ่มเล่นจริงภายในฟังก์ชัน Callback นี้
ใน HelloArActivity.java ให้สร้างฟังก์ชัน onClickPlayback() เพื่อเลือกไฟล์และหยุดเล่นไฟล์
  // Handle the click event of the "Playback" button.
  public void onClickPlayback(View view) {
    Log.d(TAG, "onClickPlayback");

    switch (appState) {

      // If the app is not playing back, open the file picker.
      case Idle: {
        boolean hasStarted = selectFileToPlayback();
        Log.d(TAG, String.format("onClickPlayback start: selectFileToPlayback %b", hasStarted));
        break;
      }

      // If the app is playing back, stop playing back.
      case Playingback: {
        boolean hasStopped = stopPlayingback();
        Log.d(TAG, String.format("onClickPlayback stop: hasStopped %b", hasStopped));
        break;
      }

      default:
        // Recording - do nothing.
        break;
    }

    // Update the UI for the "Record" and "Playback" buttons.
    updateRecordButton();
    updatePlaybackButton();
  }
ใน HelloArActivity.java ให้สร้างฟังก์ชัน selectFileToPlayback() ที่จะเลือกไฟล์จากอุปกรณ์ หากต้องการเลือกไฟล์จากระบบไฟล์ Android ให้ใช้ ACTION_OPEN_DOCUMENT Intent
// Add imports to the beginning of the file.
import android.content.Intent;
import android.provider.DocumentsContract;

  private boolean selectFileToPlayback() {
    // Start file selection from Movies directory.
    // Android 10 and above requires VOLUME_EXTERNAL_PRIMARY to write to MediaStore.
    Uri videoCollection;
    if (Build.VERSION.SDK_INT >= Build.VERSION_CODES.Q) {
      videoCollection = MediaStore.Video.Media.getContentUri(
          MediaStore.VOLUME_EXTERNAL_PRIMARY);
    } else {
      videoCollection = MediaStore.Video.Media.EXTERNAL_CONTENT_URI;
    }

    // Create an Intent to select a file.
    Intent intent = new Intent(Intent.ACTION_OPEN_DOCUMENT);

    // Add file filters such as the MIME type, the default directory and the file category.
    intent.setType(MP4_VIDEO_MIME_TYPE); // Only select *.mp4 files
    intent.putExtra(DocumentsContract.EXTRA_INITIAL_URI, videoCollection); // Set default directory
    intent.addCategory(Intent.CATEGORY_OPENABLE); // Must be files that can be opened

    this.startActivityForResult(intent, REQUEST_MP4_SELECTOR);

    return true;
  }
REQUEST_MP4_SELECTOR เป็นค่าคงที่ที่จะระบุคำขอนี้ คุณจะกำหนดได้โดยใช้ค่าตัวยึดตำแหน่งภายใน HelloArActivity ใน HelloArActivity.java ดังนี้
private int REQUEST_MP4_SELECTOR = 1;
ลบล้างฟังก์ชัน onActivityResult() ใน HelloArActivity.java เพื่อจัดการ Callback จากเครื่องมือเลือกไฟล์
  // Begin playback once the user has selected the file.
  @Override
  protected void onActivityResult(int requestCode, int resultCode, Intent data) {
    // Check request status. Log an error if the selection fails.
    if (resultCode != android.app.Activity.RESULT_OK || requestCode != REQUEST_MP4_SELECTOR) {
      Log.e(TAG, "onActivityResult select file failed");
      return;
    }

    Uri mp4FileUri = data.getData();
    Log.d(TAG, String.format("onActivityResult result is %s", mp4FileUri));

    // Begin playback.
    startPlayingback(mp4FileUri);
  }
เปิดใช้แอปเพื่อเริ่มเล่น
เซสชัน ARCore จำเป็นต้องมีการเรียก API 3 ครั้งเพื่อเล่นไฟล์ MP4 ดังนี้
session.pause()session.setPlaybackDataset()session.resume()
ใน HelloArActivity.java ให้สร้างฟังก์ชัน startPlayingback()
// Add imports to the beginning of the file.
import com.google.ar.core.PlaybackStatus;
import com.google.ar.core.exceptions.PlaybackFailedException;

  private boolean startPlayingback(Uri mp4FileUri) {
    if (mp4FileUri == null)
      return false;

    Log.d(TAG, "startPlayingback at:" + mp4FileUri);

    pauseARCoreSession();

    try {
      session.setPlaybackDatasetUri(mp4FileUri);
    } catch (PlaybackFailedException e) {
      Log.e(TAG, "startPlayingback - setPlaybackDataset failed", e);
    }

    // The session's camera texture name becomes invalid when the
    // ARCore session is set to play back.
    // Workaround: Reset the Texture to start Playback
    // so it doesn't crashes with AR_ERROR_TEXTURE_NOT_SET.
    hasSetTextureNames = false;

    boolean canResume = resumeARCoreSession();
    if (!canResume)
      return false;

    PlaybackStatus playbackStatus = session.getPlaybackStatus();
    Log.d(TAG, String.format("startPlayingback - playbackStatus %s", playbackStatus));


    if (playbackStatus != PlaybackStatus.OK) { // Correctness check
      return false;
    }

    appState = AppState.Playingback;
    updateRecordButton();
    updatePlaybackButton();

    return true;
  }
เปิดใช้แอปเพื่อหยุดเล่น
สร้างฟังก์ชันชื่อ stopPlayingback() ใน HelloArActivity.java เพื่อจัดการการเปลี่ยนแปลงสถานะของแอปหลังจาก
- ผู้ใช้หยุดการเล่น MP4
- การเล่น MP4 เสร็จสมบูรณ์ด้วยตัวเอง
หากผู้ใช้หยุดการเล่น แอปควรกลับสู่สถานะเดียวกับในตอนที่ผู้ใช้เปิดแอปเป็นครั้งแรก
  // Stop the current playback, and restore app status to Idle.
  private boolean stopPlayingback() {
    // Correctness check, only stop playing back when the app is playing back.
    if (appState != AppState.Playingback)
      return false;

    pauseARCoreSession();

    // Close the current session and create a new session.
    session.close();
    try {
      session = new Session(this);
    } catch (UnavailableArcoreNotInstalledException
        |UnavailableApkTooOldException
        |UnavailableSdkTooOldException
        |UnavailableDeviceNotCompatibleException e) {
      Log.e(TAG, "Error in return to Idle state. Cannot create new ARCore session", e);
      return false;
    }
    configureSession();

    boolean canResume = resumeARCoreSession();
    if (!canResume)
      return false;

    // A new session will not have a camera texture name.
    // Manually set hasSetTextureNames to false to trigger a reset.
    hasSetTextureNames = false;

    // Reset appState to Idle, and update the "Record" and "Playback" buttons.
    appState = AppState.Idle;
    updateRecordButton();
    updatePlaybackButton();

    return true;
  }
การเล่นสามารถหยุดลงตามธรรมชาติหลังจากที่โปรแกรมเล่นวิดีโอเล่นไปถึงส่วนท้ายของไฟล์ MP4 แล้ว เมื่อเกิดกรณีนี้ขึ้น stopPlayingback() ควรเปลี่ยนสถานะของแอปกลับไปเป็น Idle ใน onDrawFrame() ให้ตรวจสอบ PlaybackStatus หากเป็น FINISHED ให้เรียกใช้ฟังก์ชัน stopPlayingback() ในชุดข้อความ UI
  public void onDrawFrame(SampleRender render) {
      // ... omitted code ...

      // Insert before this line:
      // frame = session.update();

      // Check the playback status and return early if playback reaches the end.
      if (appState == AppState.Playingback
          && session.getPlaybackStatus() == PlaybackStatus.FINISHED) {
        this.runOnUiThread(this::stopPlayingback);
        return;
      }

      // ... omitted code ...
  }
เล่นจากอุปกรณ์เป้าหมาย
ถึงเวลาดูว่าคุณสร้างอะไรมาบ้างแล้ว เชื่อมต่ออุปกรณ์เคลื่อนที่กับเครื่องพัฒนาซอฟต์แวร์ แล้วคลิกเรียกใช้ใน Android Studio
เมื่อแอปเปิดขึ้น คุณควรเห็นหน้าจอที่มีปุ่มบันทึกสีแดงที่ด้านซ้ายและปุ่มเล่นสีเขียวทางด้านขวา
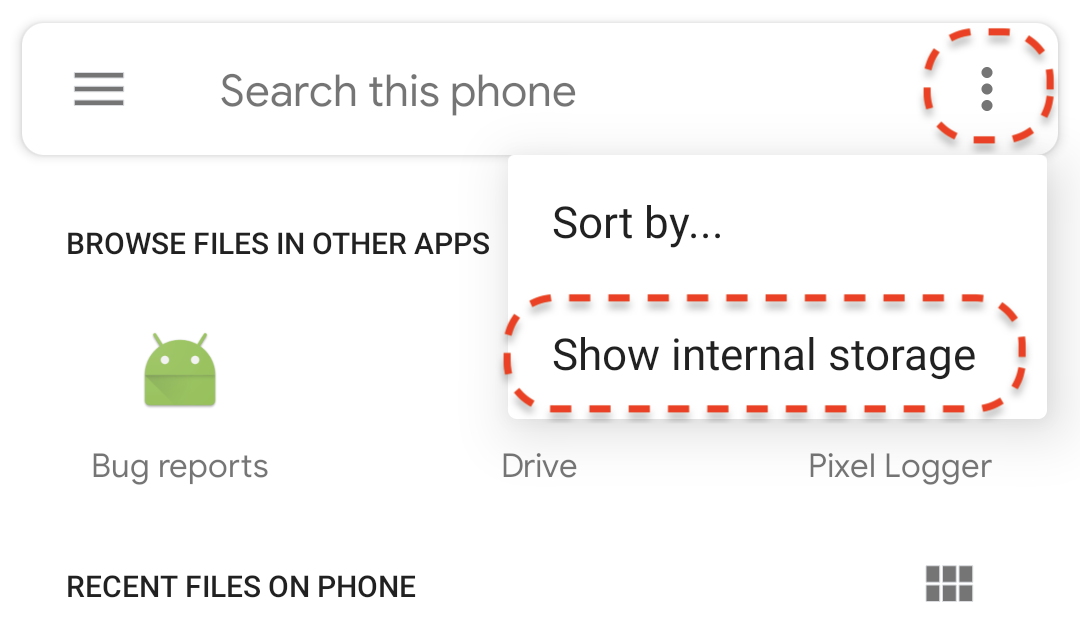
แตะปุ่มเล่น แล้วเลือกไฟล์ MP4 ที่คุณเพิ่งบันทึกไป หากคุณไม่เห็นชื่อไฟล์ใดๆ ที่ขึ้นต้นด้วย arcore- อาจเป็นเพราะอุปกรณ์ของคุณไม่แสดงโฟลเดอร์ภาพยนตร์ ในกรณีนี้ ให้ไปที่รุ่นของโทรศัพท์ > ภาพยนตร์ โฟลเดอร์โดยใช้เมนูที่มุมซ้ายบน คุณอาจต้องเปิดใช้ตัวเลือกแสดงที่จัดเก็บข้อมูลภายในเพื่อแสดงโฟลเดอร์รุ่นโทรศัพท์ด้วย
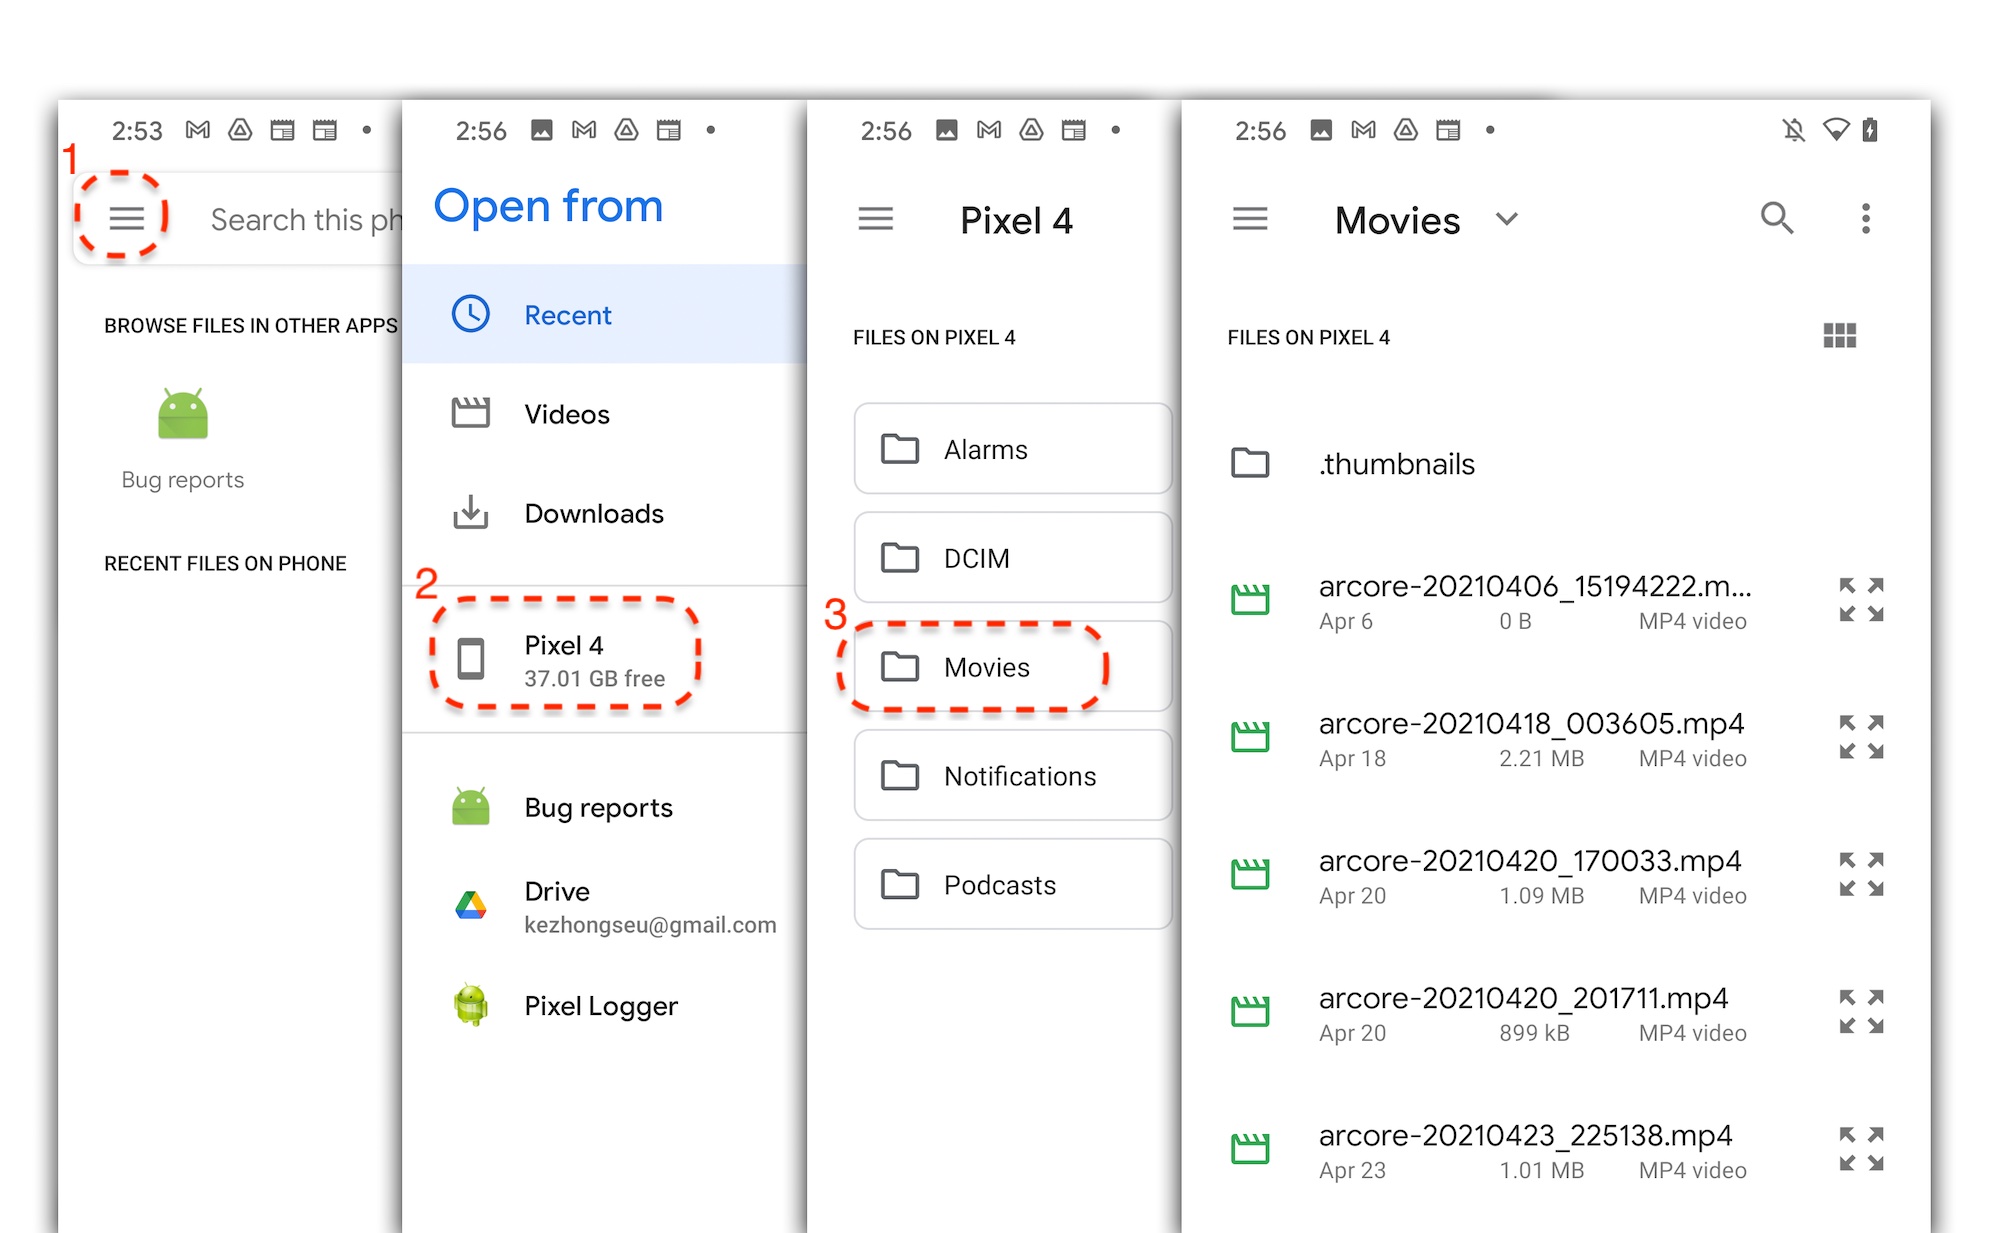
แตะชื่อไฟล์บนหน้าจอเพื่อเลือกไฟล์ MP4 แอปควรเล่นไฟล์ MP4
ความแตกต่างระหว่างการเล่นเซสชันกับการเล่นวิดีโอทั่วไปคือคุณสามารถโต้ตอบกับเซสชันที่บันทึกไว้ได้ แตะระนาบที่ตรวจพบเพื่อวางเครื่องหมายบนหน้าจอ
สิ่งที่คุณดำเนินการในขั้นตอนนี้
- เพิ่มปุ่มสำหรับเริ่มและหยุดเล่น
- ใช้ฟังก์ชันที่ทำให้แอปเริ่มและหยุดการบันทึก
- เล่นเซสชัน ARCore ที่บันทึกไว้ก่อนหน้านี้ในอุปกรณ์
5. บันทึกข้อมูลเพิ่มเติมใน MP4
เมื่อใช้ ARCore 1.24 คุณจะบันทึกข้อมูลเพิ่มเติมในไฟล์ MP4 ได้ คุณบันทึก Pose ของตำแหน่งวัตถุ AR ได้ จากนั้นระหว่างเล่น ให้สร้างวัตถุ AR ในตำแหน่งเดียวกัน
กำหนดค่าแทร็กใหม่ที่จะบันทึก
กำหนดแทร็กใหม่ด้วย UUID และแท็ก MIME ใน HelloArActivity.java
// Add imports to the beginning of the file.
import java.util.UUID;
import com.google.ar.core.Track;

  // Inside the HelloArActiity class.
  private static final UUID ANCHOR_TRACK_ID = UUID.fromString("53069eb5-21ef-4946-b71c-6ac4979216a6");;
  private static final String ANCHOR_TRACK_MIME_TYPE = "application/recording-playback-anchor";

  private boolean startRecording() {
    // ... omitted code ...

    // Insert after line:
    //   pauseARCoreSession();

    // Create a new Track, with an ID and MIME tag.
    Track anchorTrack = new Track(session)
        .setId(ANCHOR_TRACK_ID).
        .setMimeType(ANCHOR_TRACK_MIME_TYPE);
    // ... omitted code ...
  }
อัปเดตโค้ดทางออกเพื่อสร้างออบเจ็กต์ RecordingConfig ที่มีการเรียก addTrack()
  private boolean startRecording() {
    // ... omitted code ...

    // Update the lines below with a call to the addTrack() function:
    //   RecordingConfig recordingConfig = new RecordingConfig(session)
    //    .setMp4DatasetUri(mp4FileUri)
    //    .setAutoStopOnPause(true);

    RecordingConfig recordingConfig = new RecordingConfig(session)
        .setMp4DatasetUri(mp4FileUri)
        .setAutoStopOnPause(true)
        .addTrack(anchorTrack); // add the new track onto the recordingConfig

    // ... omitted code ...
  }
บันทึกท่าทาง Anchor ระหว่างบันทึก
ทุกครั้งที่ผู้ใช้แตะบนเครื่องบินที่ตรวจพบ เครื่องหมาย AR จะวางอยู่บน Anchor ซึ่ง ARCore จะอัปเดตท่าทาง
หากคุณยังบันทึกเซสชัน ARCore อยู่ ให้บันทึกท่าทางของ Anchor ในเฟรมที่สร้างขึ้น
แก้ไขฟังก์ชัน handleTap() ใน HelloArActivity.java
// Add imports to the beginning of the file.
import com.google.ar.core.Pose;
import java.nio.FloatBuffer;

  private void handleTap(Frame frame, Camera camera) {
          // ... omitted code ...

          // Insert after line:
          // anchors.add(hit.createAnchor());

          // If the app is recording a session,
          // save the new Anchor pose (relative to the camera)
          // into the ANCHOR_TRACK_ID track.
          if (appState == AppState.Recording) {
            // Get the pose relative to the camera pose.
            Pose cameraRelativePose = camera.getPose().inverse().compose(hit.getHitPose());
            float[] translation = cameraRelativePose.getTranslation();
            float[] quaternion = cameraRelativePose.getRotationQuaternion();
            ByteBuffer payload = ByteBuffer.allocate(4 * (translation.length + quaternion.length));
            FloatBuffer floatBuffer = payload.asFloatBuffer();
            floatBuffer.put(translation);
            floatBuffer.put(quaternion);

            try {
              frame.recordTrackData(ANCHOR_TRACK_ID, payload);
            } catch (IllegalStateException e) {
              Log.e(TAG, "Error in recording anchor into external data track.", e);
            }
          }
          // ... omitted code ...
  }
สาเหตุที่เราคงกล้องไว้ซึ่งสัมพันธ์กับ Pose แทนที่จะเป็นโลกแบบ Pose ก็เพราะว่าโลกกำเนิดของเซสชันการบันทึกและแหล่งที่มาในโลกของเซสชันการเล่นนั้นไม่เหมือนกัน จุดเริ่มต้นเซสชันการบันทึกครั้งแรกเมื่อเซสชันกลับมาทำงานอีกครั้ง เมื่อมีการเรียก Session.resume() เป็นครั้งแรก ต้นทางโลกของเซสชันการเล่นจะเริ่มขึ้นเมื่อมีการบันทึกเฟรมแรก โดยจะมีการเรียก Session.resume() หลังจาก Session.startRecording() เป็นครั้งแรก
การสร้าง Anchor สำหรับการเล่น
การสร้าง Anchor ใหม่นั้นไม่ซับซ้อน เพิ่มฟังก์ชันที่ชื่อว่า createRecordedAnchors() ใน HelloArActivity.java
// Add imports to the beginning of the file.
import com.google.ar.core.TrackData;

  // Extract poses from the ANCHOR_TRACK_ID track, and create new anchors.
  private void createRecordedAnchors(Frame frame, Camera camera) {
    // Get all `ANCHOR_TRACK_ID` TrackData from the frame.
    for (TrackData trackData : frame.getUpdatedTrackData(ANCHOR_TRACK_ID)) {
      ByteBuffer payload = trackData.getData();
      FloatBuffer floatBuffer = payload.asFloatBuffer();

      // Extract translation and quaternion from TrackData payload.
      float[] translation = new float[3];
      float[] quaternion = new float[4];

      floatBuffer.get(translation);
      floatBuffer.get(quaternion);

      // Transform the recorded anchor pose
      // from the camera coordinate
      // into world coordinates.
      Pose worldPose = camera.getPose().compose(new Pose(translation, quaternion));

      // Re-create an anchor at the recorded pose.
      Anchor recordedAnchor = session.createAnchor(worldPose);

      // Add the new anchor into the list of anchors so that
      // the AR marker can be displayed on top.
      anchors.add(recordedAnchor);
    }
  }
เรียก createRecordedAnchors() ในฟังก์ชัน onDrawFrame() ใน HelloArActivity.java
  public void onDrawFrame(SampleRender render) {
    // ... omitted code ...

    // Insert after this line:
    // handleTap(frame, camera);

    // If the app is currently playing back a session, create recorded anchors.
    if (appState == AppState.Playingback) {
      createRecordedAnchors(frame, camera);
    }
    // ... omitted code ...
  }
ทดสอบกับอุปกรณ์เป้าหมาย
เชื่อมต่ออุปกรณ์เคลื่อนที่กับเครื่องพัฒนาซอฟต์แวร์ แล้วคลิกเรียกใช้ใน Android Studio
ก่อนอื่น ให้แตะปุ่มบันทึกเพื่อบันทึกเซสชัน ระหว่างการบันทึก ให้แตะเครื่องบินที่ตรวจพบเพื่อวางเครื่องหมาย AR 2-3 เครื่องหมาย
หลังจากบันทึกแล้ว ให้แตะปุ่มเล่น แล้วเลือกไฟล์ที่คุณเพิ่งบันทึก วิดีโอควรเริ่มเล่น คุณจะสังเกตได้ว่าตำแหน่งเครื่องหมาย AR ก่อนหน้าจะปรากฏขึ้นเหมือนกับที่คุณแตะในแอป
นี่คือการเขียนโค้ดสำหรับ Codelab นี้ทั้งหมด
6. ขอแสดงความยินดี
ขอแสดงความยินดี คุณมาถึงส่วนสุดท้ายของ Codelab แล้ว มาย้อนดูสิ่งที่คุณได้ทำใน Codelab กัน
- สร้างและเรียกใช้ตัวอย่าง Hello AR Java ของ ARCore
- เพิ่มปุ่มบันทึกลงในแอปเพื่อบันทึกเซสชัน AR เป็นไฟล์ MP4
- เพิ่มปุ่ม "เล่น" ลงในแอปเพื่อเล่นเซสชัน AR จากไฟล์ MP4
- เพิ่มฟีเจอร์ใหม่เพื่อบันทึก Anchor ที่ผู้ใช้สร้างไว้ใน MP4 เพื่อเล่น