
1. Introduction
Imagine being able to get your data ready for analysis faster and more efficiently without needing to be a coding expert. With BigQuery Data Preparation, that's a reality. This powerful feature simplifies data ingestion, transformation, and cleansing, putting data preparation into the hands of all data practitioners in your organization.
Ready to unlock the secrets hidden in your product data?
Prerequisites
- A basic understanding of the Google Cloud, Console
- A basic understanding of SQL
What you'll learn
- How BigQuery data preparation can clean and transform your raw data into actionable business intelligence, using a realistic example from the Fashion and Beauty industry.
- How to run and schedule the data preparation for your cleaned data
What you'll need
- A Google Cloud Account and Google Cloud Project
- A web browser such as Chrome
2. Basic setup and Requirements
Self-paced environment setup
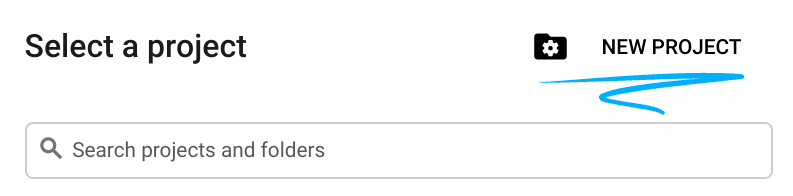
- Sign-in to the Google Cloud Console and create a new project or reuse an existing one. If you don't already have a Gmail or Google Workspace account, you must create one.

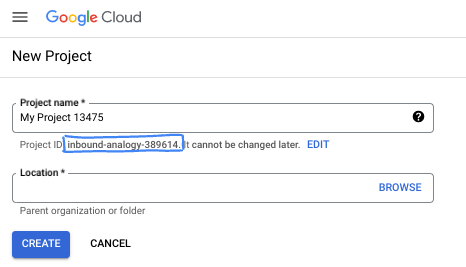
- The Project name is the display name for this project's participants. It is a character string not used by Google APIs. You can always update it.
- The Project ID is unique across all Google Cloud projects and is immutable (cannot be changed after it has been set). The Cloud Console auto-generates a unique string; usually you don't care what it is. In most codelabs, you'll need to reference your Project ID (typically identified as
PROJECT_ID). If you don't like the generated ID, you might generate another random one. Alternatively, you can try your own, and see if it's available. It can't be changed after this step and remains for the duration of the project. - For your information, there is a third value, a Project Number, which some APIs use. Learn more about all three of these values in the documentation.
- Next, you'll need to enable billing in the Cloud Console to use Cloud resources/APIs. Running through this codelab won't cost much, if anything at all. To shut down resources to avoid incurring billing beyond this tutorial, you can delete the resources you created or delete the project. New Google Cloud users are eligible for the $300 USD Free Trial program.
3. Before you begin
Enable API
To use Gemini in BigQuery, you must enable the Gemini for Google Cloud API. A service administrator or project owner with the serviceusage.services.enable IAM permission typically performs this step.
- To enable the Gemini for Google Cloud API, go to the Gemini for Google Cloud page in the Google Cloud Marketplace. Go to Gemini for Google Cloud
- In the project selector, select a project.
- Click Enable. The page updates and shows a status of Enabled. Gemini in BigQuery is now available in the selected Google Cloud project to all users who have the required IAM permissions.
Set up roles and permissions to develop data preparations
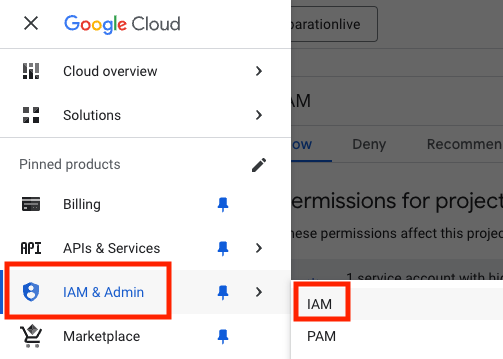
- In IAM and Admin, select IAM
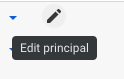
- Select your user and click on the pencil icon to ‘Edit principal'
To use BigQuery Data Preparation, you will need the following roles and permissions:
- BigQuery Data Editor (roles/bigquery.dataEditor)
- Service Usage Consumer (roles/serviceusage.serviceUsageConsumer)
4. Finding and Subscribing to the "bq data preparation demo" Listing in BigQuery Analytics Hub
We'll be using the bq data preparation demo dataset for this tutorial. It's a linked dataset in BigQuery Analytics Hub that we will be reading from.
Data preparation never writes back into the source and we'll ask you to define a destination table to write into. The table we'll be working with for this exercise only has 1,000 rows to keep costs minimal but data preparation runs on BigQuery and will scale alongside.
Follow these steps to find and subscribe to the linked dataset:
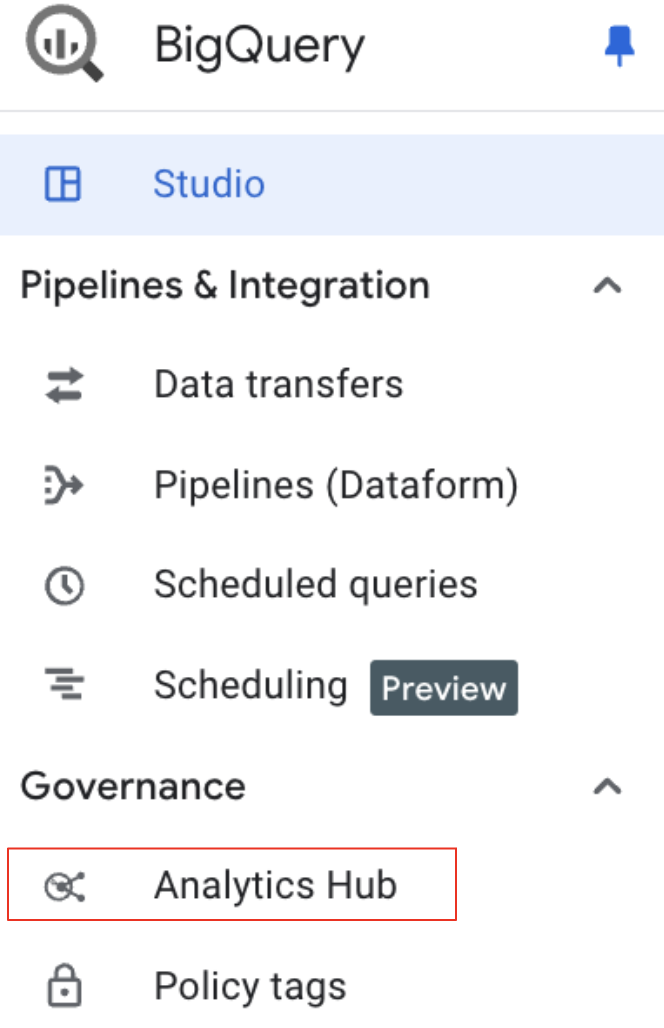
- Access Analytics Hub: In the Google Cloud Console, navigate to BigQuery.
- In the BigQuery navigation menu, under "Governance," select "Analytics Hub."
- Search for the Listing: In the Analytics Hub UI, click Search Listings."
- Type
bq data preparation demointo the search bar and press Enter.
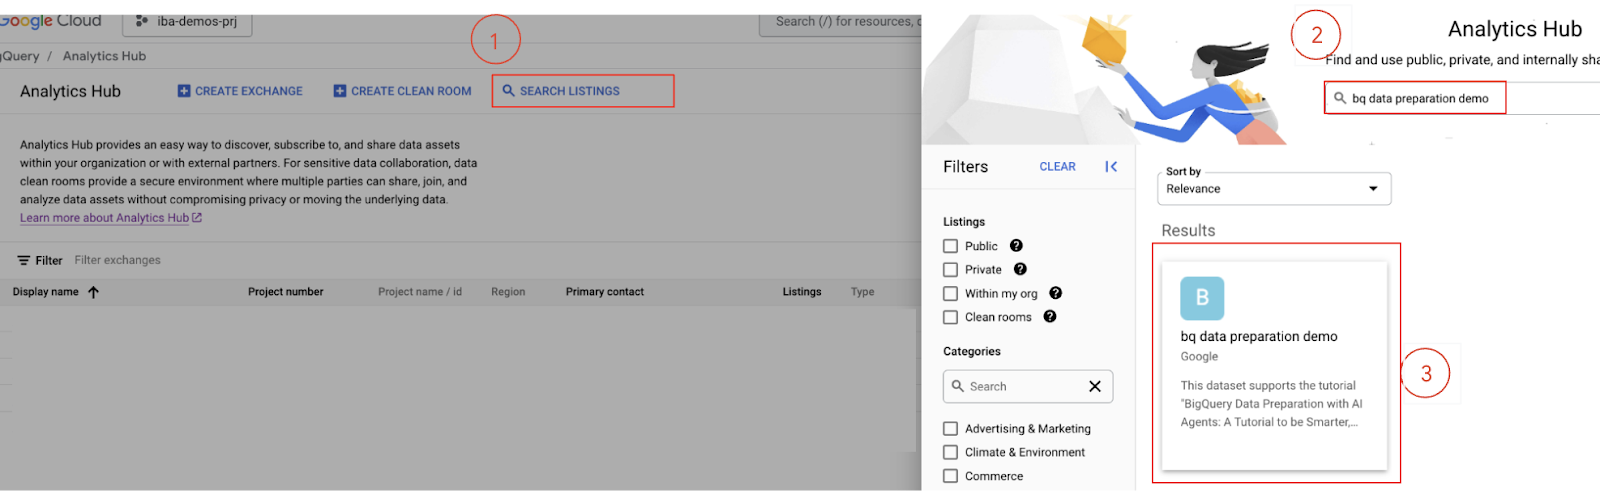
- Subscribe to the Listing: Select the
bq data preparation demolisting from the search results. - On the listing details page, click the Subscribe button.
- Review any confirmation dialogs and update the project/dataset if needed. The defaults should be correct.
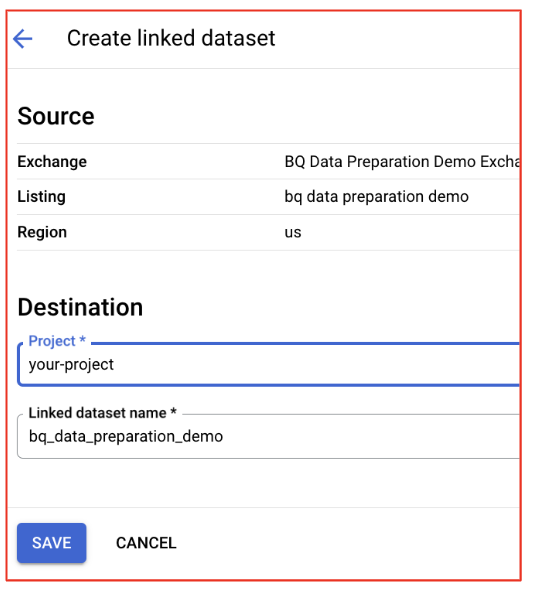
- Access the Dataset in BigQuery: Once you've successfully subscribed, the datasets within the listing will be linked to your BigQuery project.
Return to BigQuery Studio.
5. Explore the data and launch data preparation
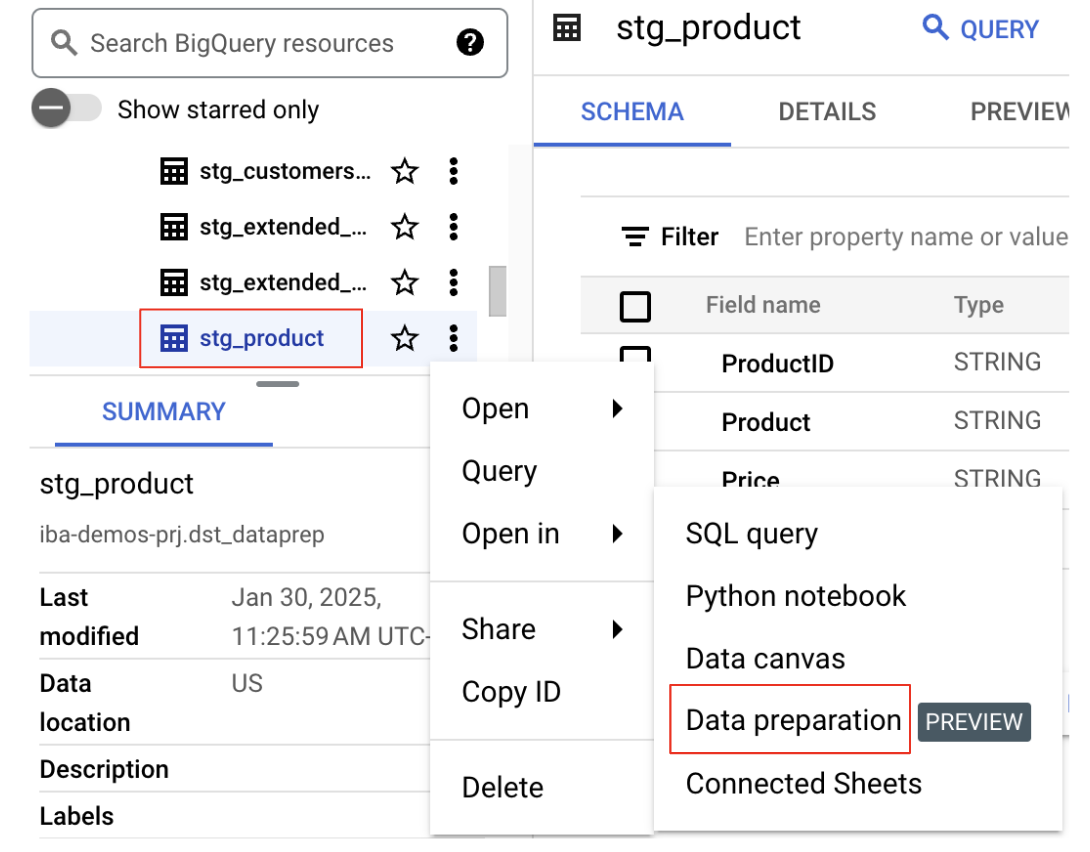
- Locate the Dataset and Table: In the Explorer panel, select your project and then find the dataset that was included in the
bq data preparation demolisting. Select thestg_producttable. - Open in Data Preparation: Click the three vertical dots next to the table name and select
Open in Data Preparation.
This will open the table in the Data Preparation interface, ready for you to begin transforming your data.
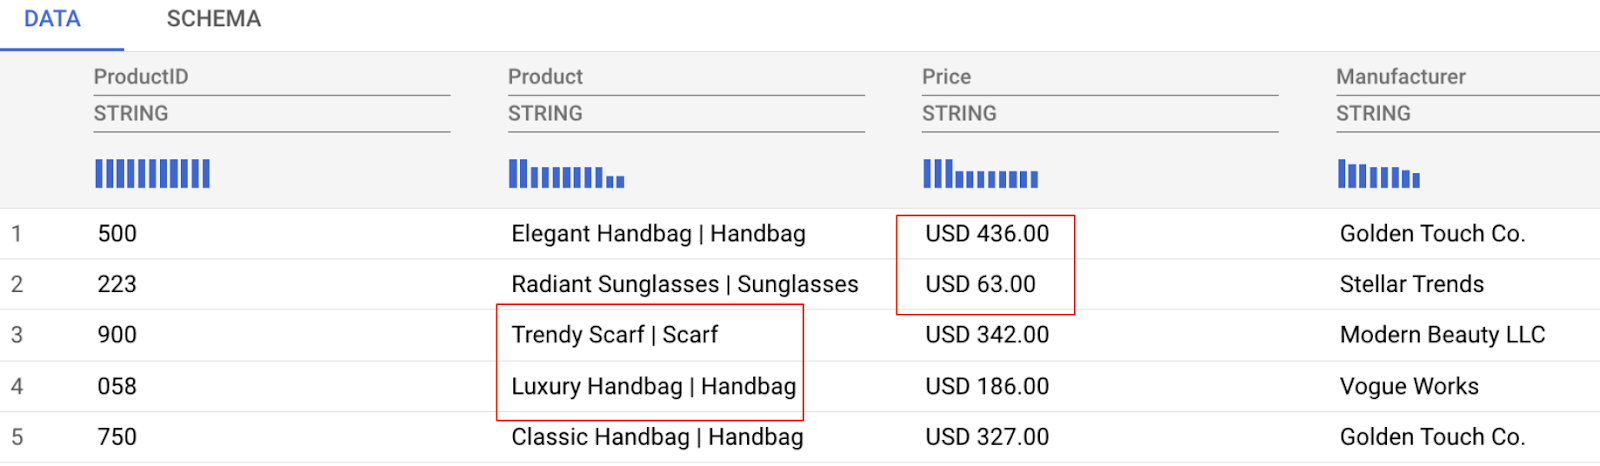
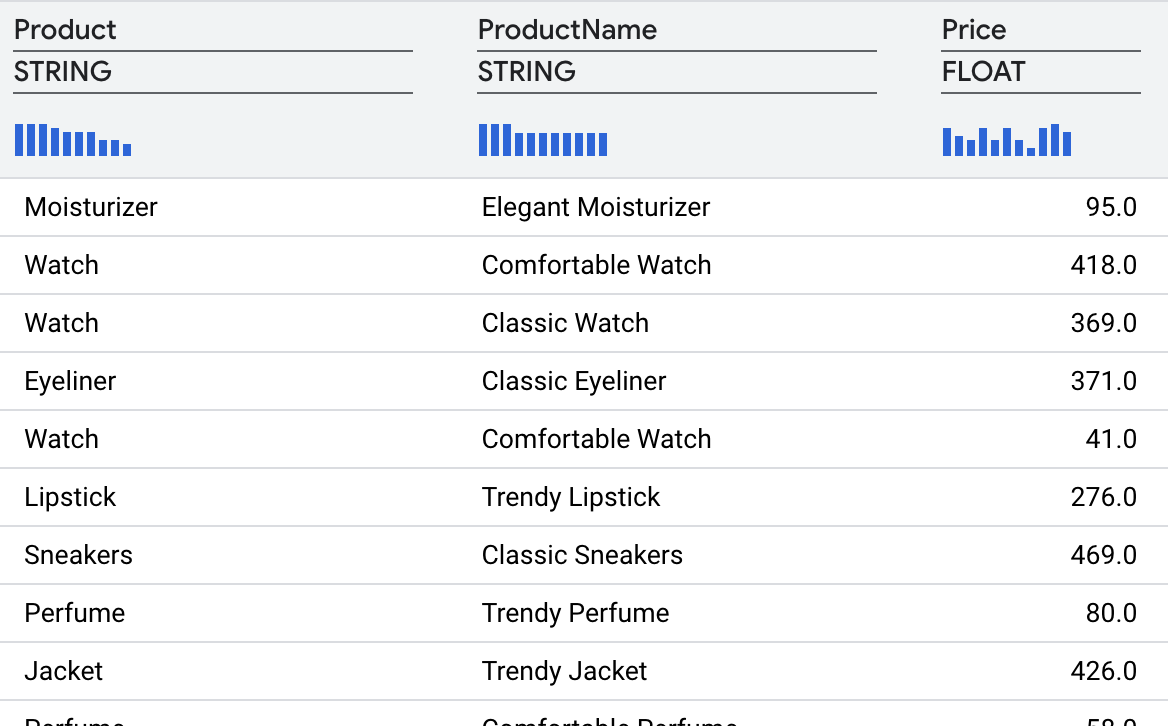
As you can see in the data preview below, we have some data challenges we'll tackle, these include:
- The price column contains both the amount and currency, making analysis difficult.
- The product column mixes the product name and category (separated by a pipe symbol |).
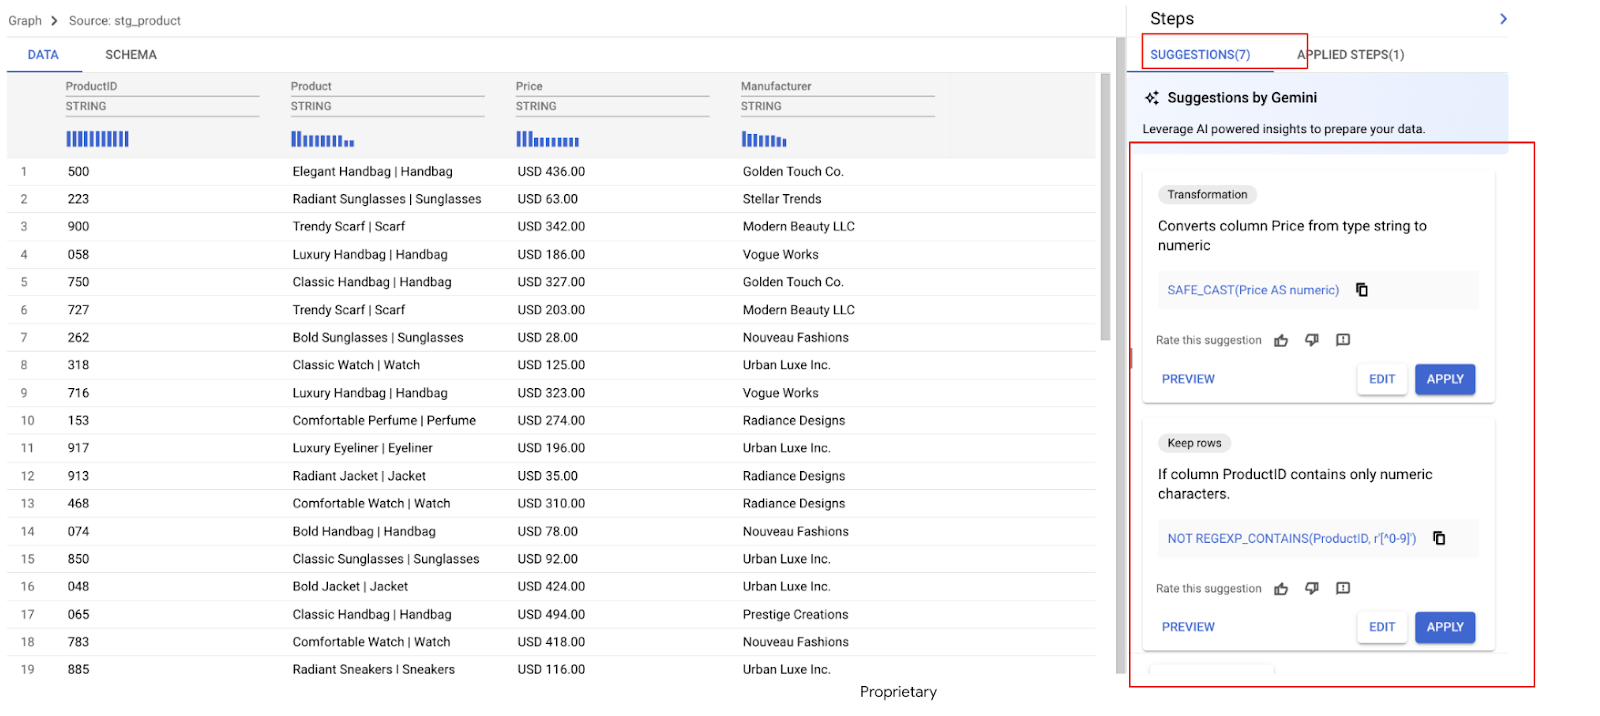
Right away, Gemini analyzes your data and suggests several transformations. In this example, we see a number of recommendations. In the next steps we will apply the ones we need.
6. Handling the Price Column
Let's tackle the Price column. As we've seen, it contains both the currency and the amount. Our goal is to separate these into two distinct columns:Currency and Amount.
Gemini has identified several recommendations for the Price column.
- Find a recommendation that says something similar to:
Description: "This expression removes the leading ‘USD ' from the specified field"
REGEXP_REPLACE(Price,` `r'^USD\s',` `r'')
- Select Preview
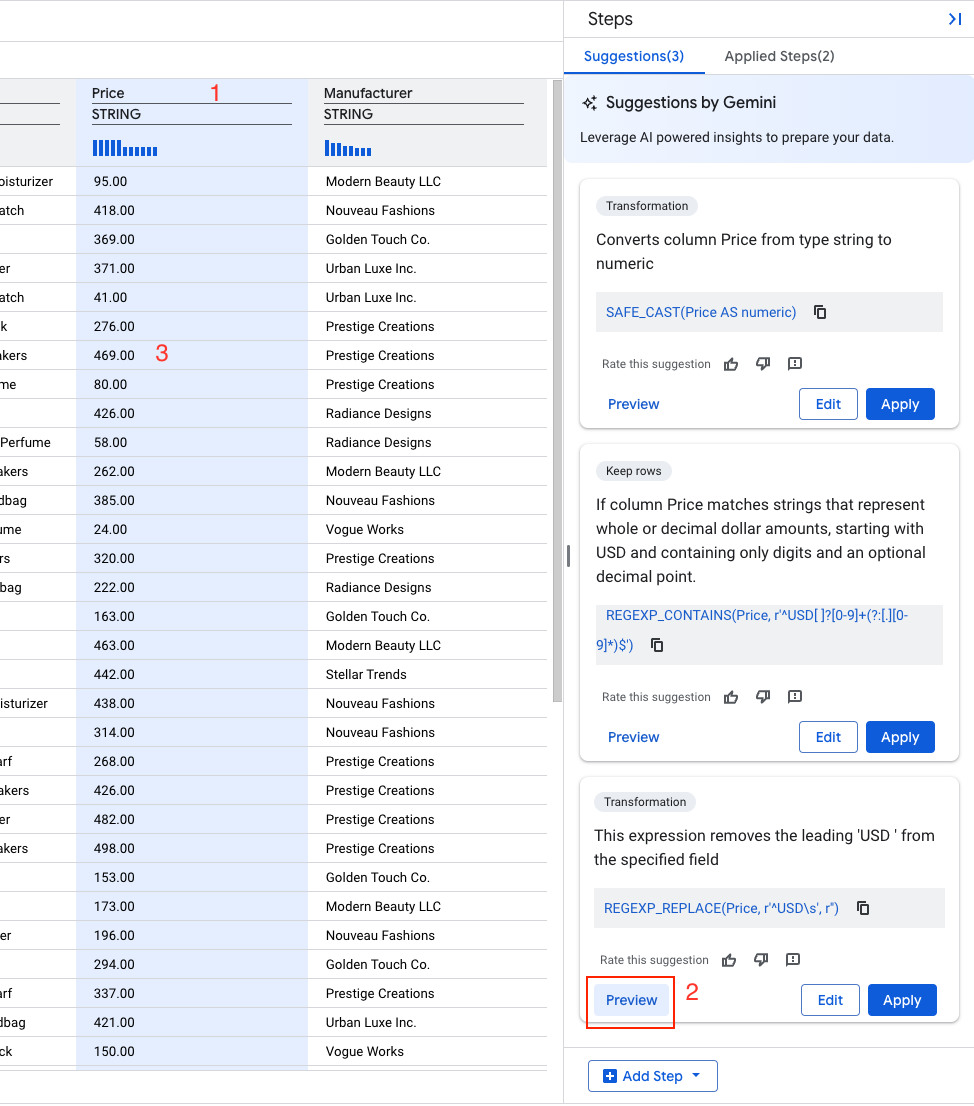
- Select Apply
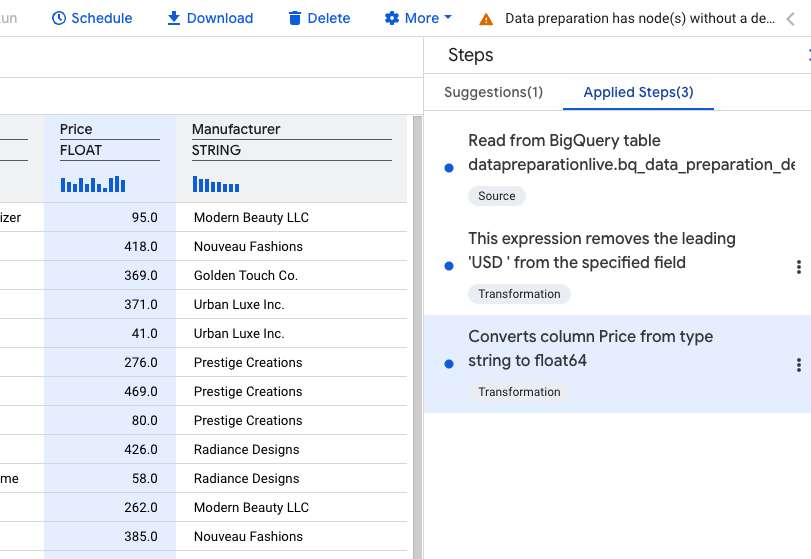
Next for the Price column, let's convert data type from STRING toNUMERIC.
- Find a recommendation that says something similar to:
Description: "Converts column Price from type string to float64"
SAFE_CAST(Price AS float64)
- Select Apply.
You should now see three applied steps in your step list.
7. Handling the Product Column
The product column contains both the product name and category, separated by a pipe (|).
While we could use natural language again, let's explore another of Gemini's powerful features.
Clean up the product name
- Select the category portion of a product entry including the
|character and delete it.
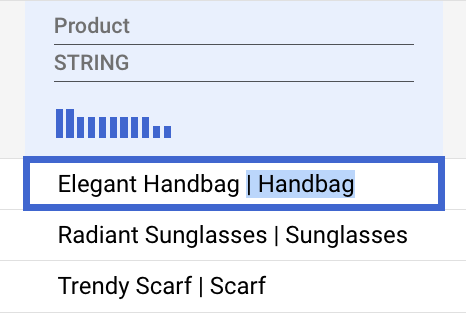
Gemini will intelligently recognize this pattern and suggest a transformation to apply to the entire column.
- Select "Edit".
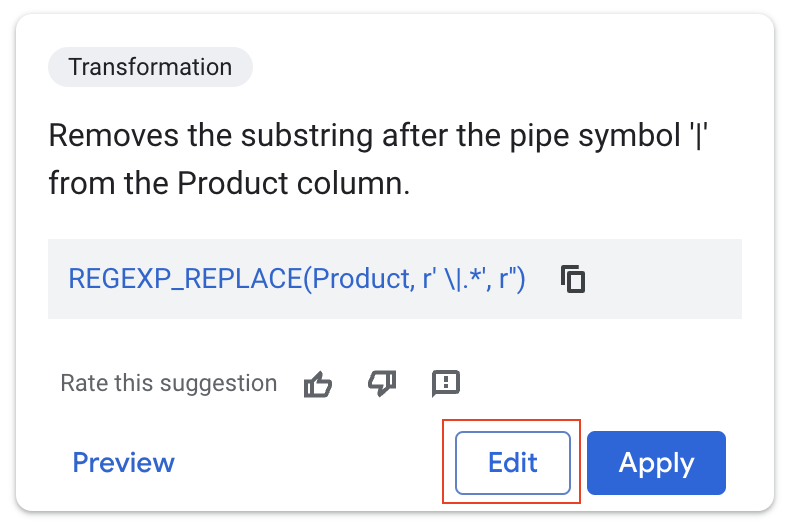
Gemini's recommendation is spot on: it removes everything after the ‘|'character, effectively isolating the product name.
But this time we don't want to overwrite our original data.
- In the target column dropdown, select "Create new column".
- Set the name to ProductName.

- Preview the changes to make sure everything looks good.
- Apply the Transformation.
Extract the product category
Using natural language, we'll instruct Gemini to extract the word after the pipe (|) in the Product column. This extracted value will be overwritten into the existing column called Product.
- Click on
Add Stepto add a new transformation step.
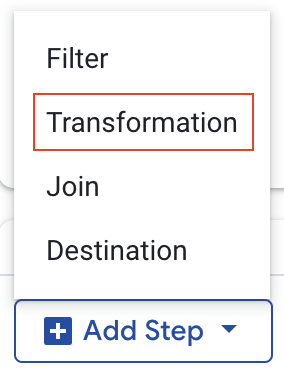
- Select
Transformationfrom the dropdown menu - In the natural language prompt field, enter "extract the word after the pipe (|) in the Product column." then hit return to generate the SQL.
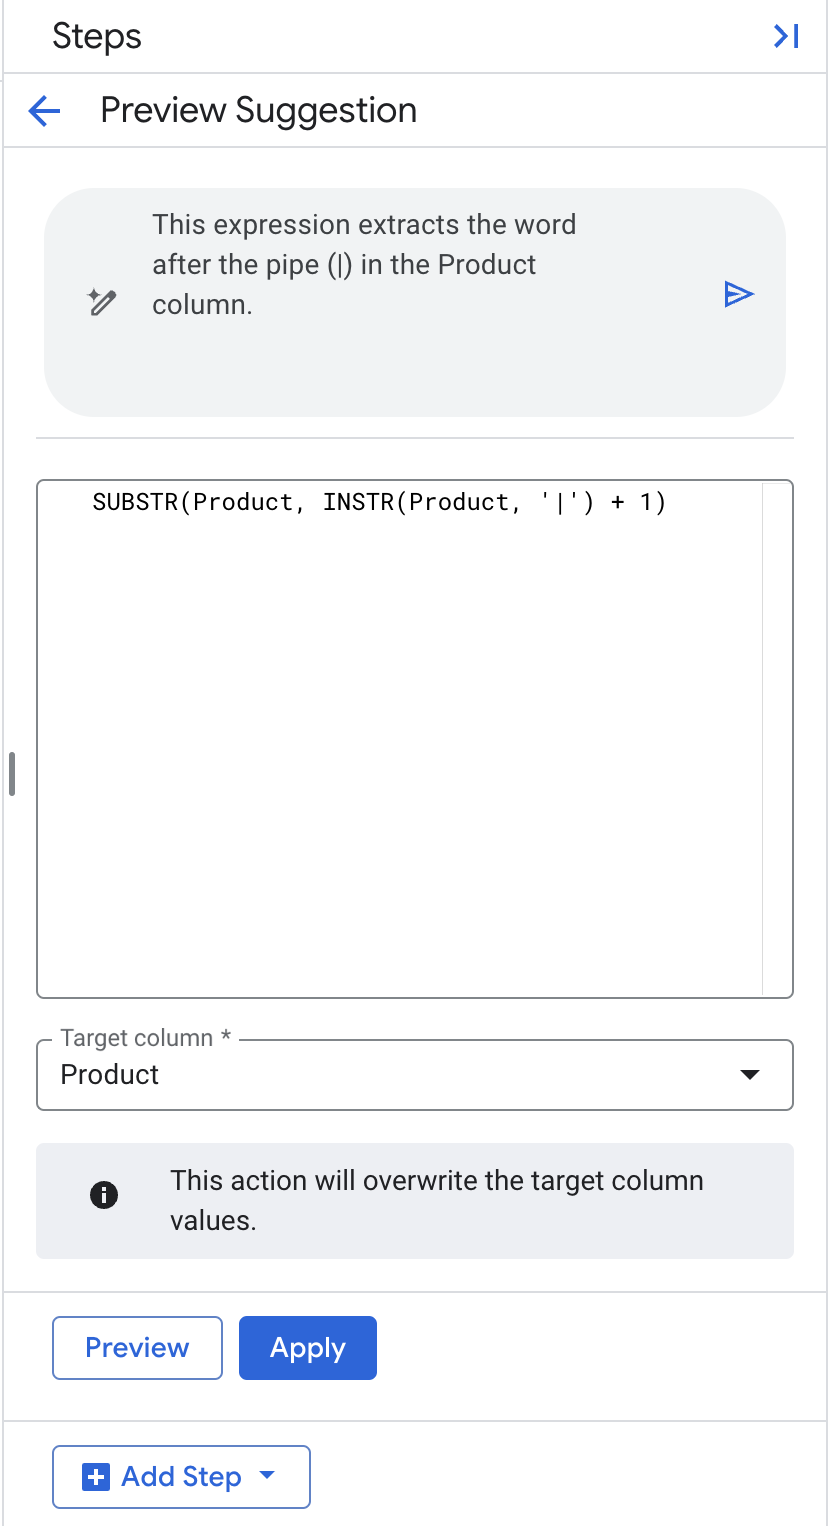
- Leave the Target Column as "Product".
- Click Apply.
The transformation should give you the following results.
8. Joining to enrich the data
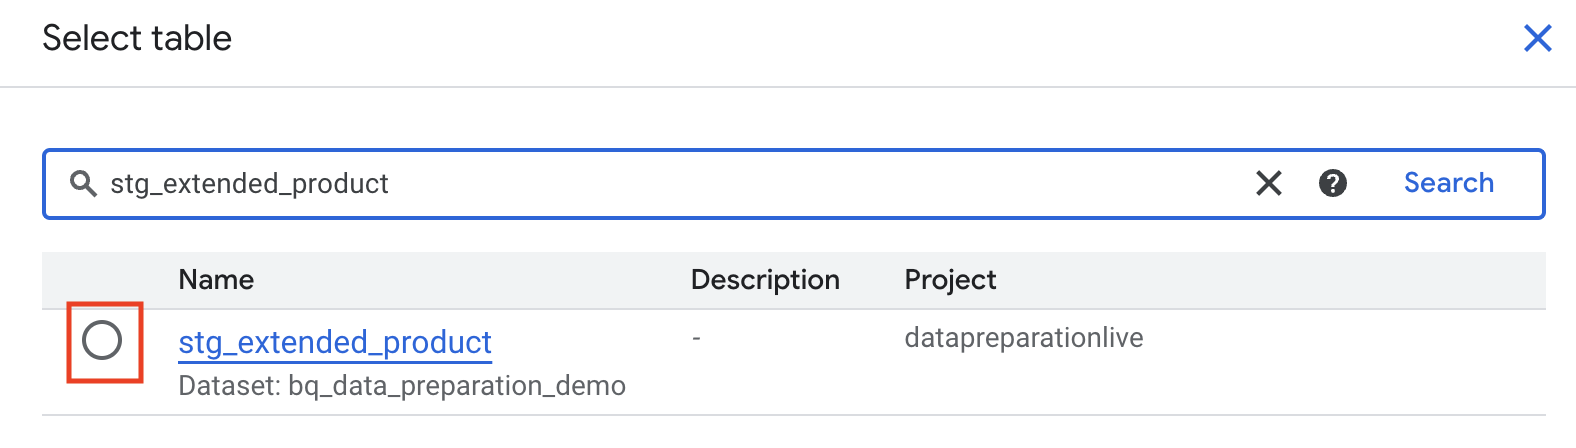
Often, you'll want to enrich your data with information from other sources. In our example, we'll join our product data with extended product attributes, stg_extended_product, from a third-party table. This table includes details like brand and launch date.
- Click on
Add Step - Select
Join - Browse to the
stg_extended_producttable.
Gemini in BigQuery automatically picked the productid join key for us and qualified the left and right hand sides since the key name is identical.
Note: Ensure that the description field reads ‘Join by productid'. If it includes additional join keys, overwrite the description field to ‘Join by productid' and select the generate button in the description field to re-generate the join expression with the following condition L.
productid
= R.
productid. 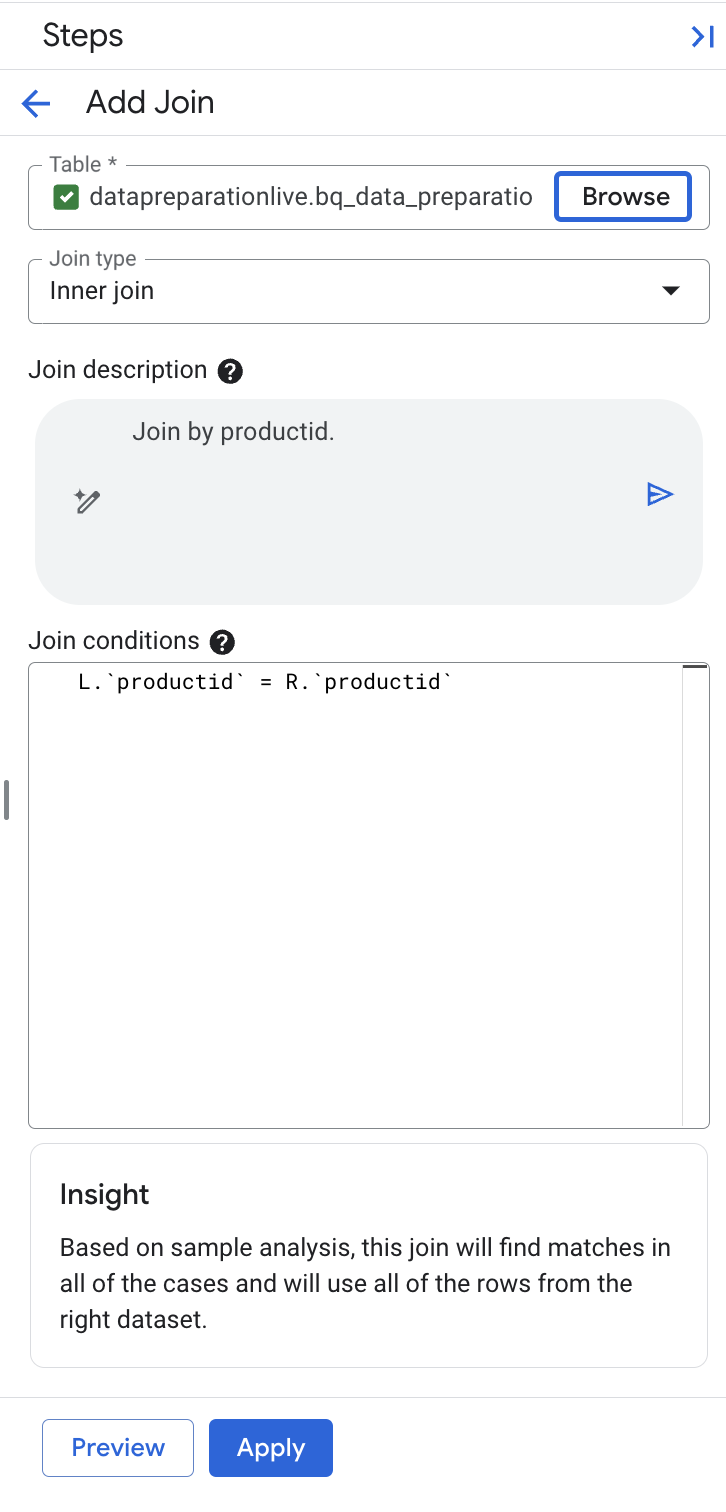
- Optionally, select Preview to preview the results.
- Click
Apply.
Cleaning up the extended attributes
While the join was successful, the extended attributes data requires some cleaning. The LaunchDate column has inconsistent date formats, and the Brand column contains some missing values.
We'll begin by addressing the LaunchDate column.

Before creating any transformations, check Gemini's recommendations.
- Click on the
LaunchDatecolumn name. You should see some recommendations generated similar to the ones in the image below.
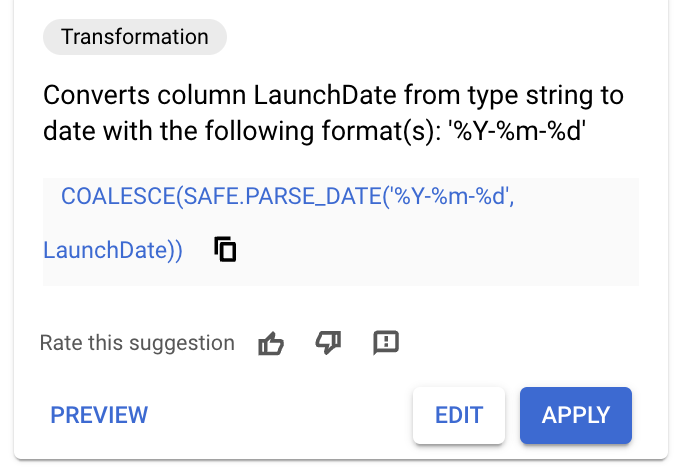
- If you see a recommendation with the following SQL then Apply the recommendation and skip the next steps.
COALESCE(SAFE.PARSE_DATE('%Y-%m-%d',
LaunchDate),SAFE.PARSE_DATE('%Y/%m/%d', LaunchDate))
- If you don't see a recommendation matching the SQL above, click
Add Step. - Select
Transformation. - In the SQL field, enter the following:
COALESCE(SAFE.PARSE_DATE('%Y-%m-%d',
LaunchDate),SAFE.PARSE_DATE('%Y/%m/%d', LaunchDate))
- Set the
Target ColumnstoLaunchDate. - Click
Apply.
The LaunchDate column now has a consistent date format.

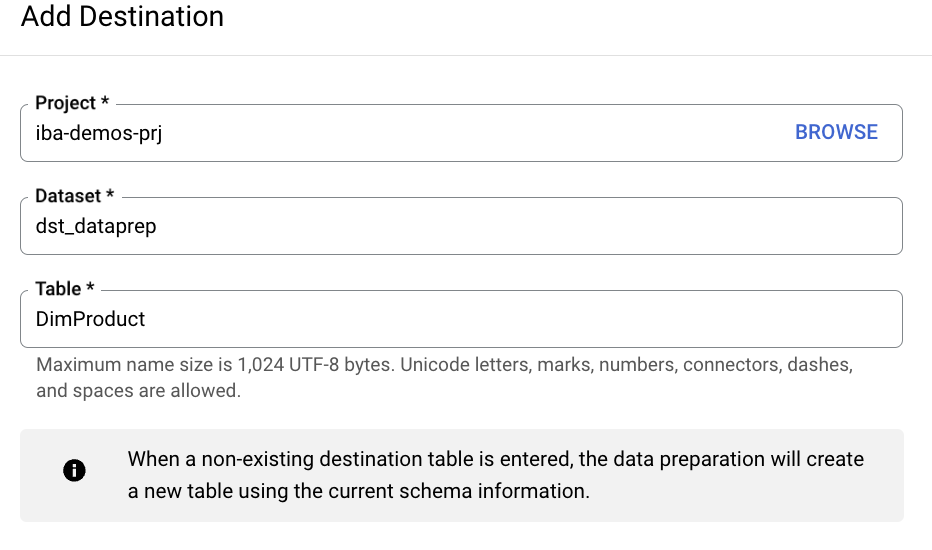
9. Adding a destination table
Our dataset is now clean and ready for loading into a dimension table in our data warehouse.
- Click
ADD STEP. - Select
Destination. - Fill in the required parameters: Dataset:
bq_data_preparation_demoTable:DimProduct - Click
Save.
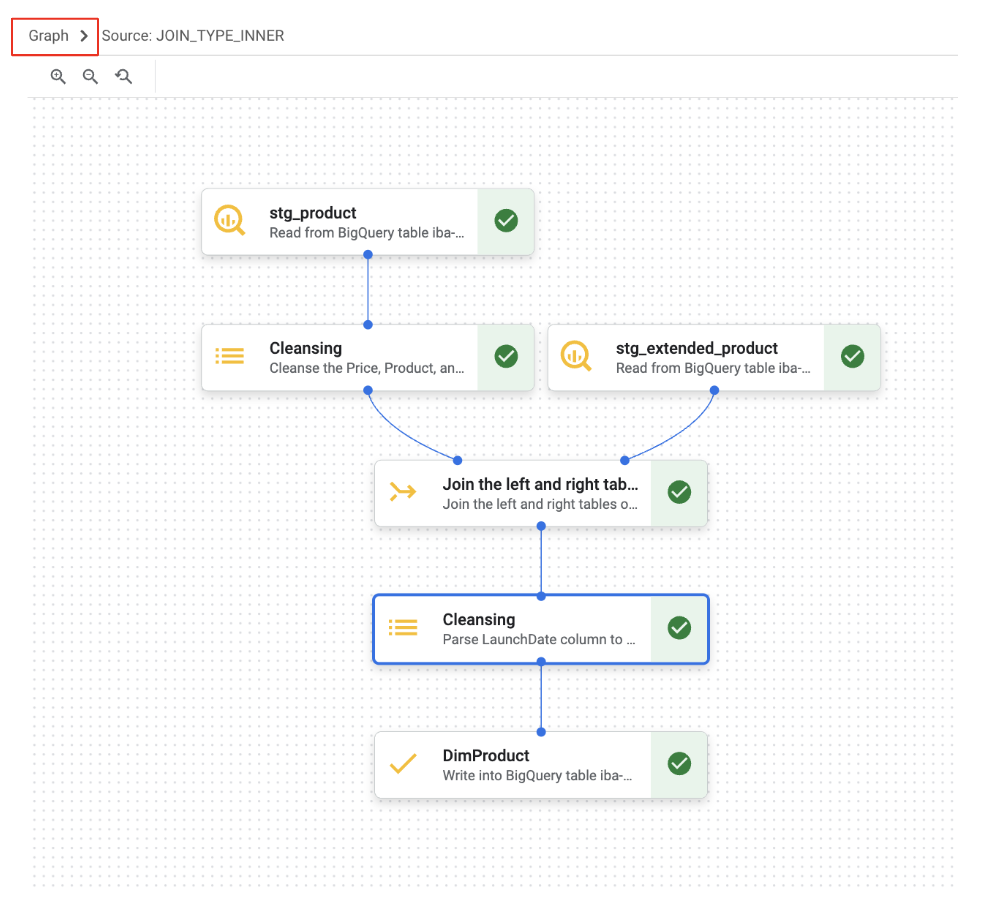
We've now worked with the "Data" and "Schema" tabs. In addition to these, BigQuery Data Preparation provides a "Graph" view that visually displays the sequence of transformation steps in your pipeline.
10. Bonus A: Handling Manufacturer column and creating Error Table
We've also identified empty values in the Manufacturer column. For these records, we want to implement a data quality check and move them to an error table for further review.
Create an error table
- Click the
Morebutton next to thestg_product data preparationtitle. - Under the
Settingsection, selectError Table. - Check the
Enable error tablebox, configure the settings as follows:
- Dataset: Select
bq_data_preparation_demo - Table: Enter
err_dataprep - Under
Define duration for keeping errors, select30 days (default)
- Click
Save.

Set up validation on the Manufacturer column
- Select the Manufacturer column.
- Gemini will have likely identified a relevant transformation. Find the recommendation that is keeping only rows where the Manufacturer field is not empty. It will have SQL similar to:
Manufacturer IS NOT NULL
2.Click the "Edit" button on this recommendation to review it.
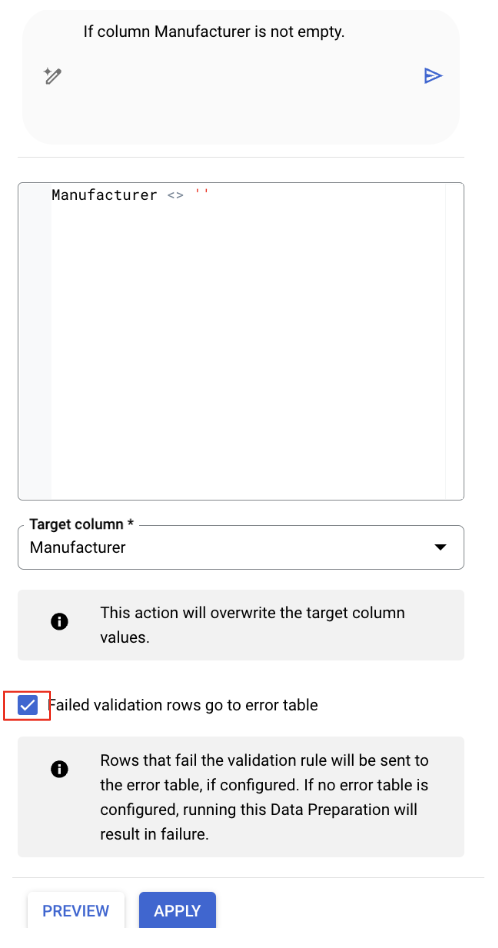
- Check the "Failed validation rows go to error table" option if it is not checked
- Click
Apply.
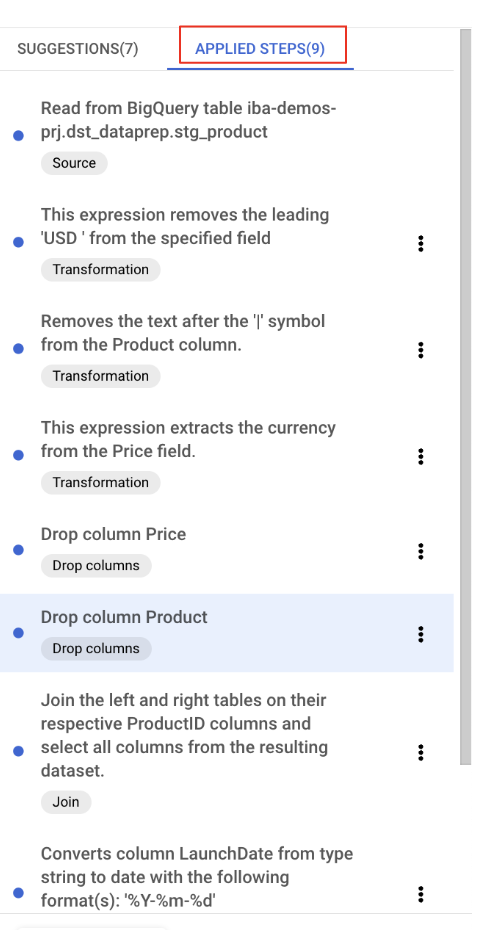
At any point, you can review, modify, or delete the transformations you've applied by clicking on the "Applied steps" button.
Clean up the redundant ProductID_1 column
The ProductID_1 column, which duplicates the ProductID from our joined table, can now be deleted.
- Go to the
Schematab - Click the 3 dots next to the
ProductID_1column. - Click on
Drop.
We're now ready to run the data preparation job and validate our entire pipeline. Once we're satisfied with the results, we can schedule the job to run automatically.
- Before navigating away from data preparation view, Save yourpreparations. Next to the
stg_product data preparationtitle, you should see aSavebutton. Click the button to save.
11. Clean up environment
- Delete the
stg_product data preparation - Delete the
bq data preparation demodataset
12. Congratulations
Congratulations for completing the codelab.
What we've covered
- Setting up data preparation
- Opening tables and navigating data preparation
- Splitting columns with numerical and unit descriptor data
- Standardizing date formats
- Running data preparations